Community New User Guide
Author: |
Sheila Albertelli |
Created at: |
Aug 2022 |
Updated at: |
Mar 2024 |
==== Welcome to the ForgeRock Community!
As a new user of our community, we hope you will find this site intuitive and clearly structured, but here is some guidance to get you started:
+
Basic Terms Used by ForgeRock Community (Nomenclature)
Here are some very basic terms that will be helpful to keep in mind as you use Discourse or read this guide:
-
Topic: The collection of messages grouped together in a meaningful conversation, with a title, listed in a category, beginning with an Original Post, and including all replies in chronological order.
Elsewhere this might be called a ‘thread’, but Discourse uses ‘topic’ since thread is used for linked elements that can go off in many different directions (and be confused with programming terms). -
Post: Each topic element is referred to as a post. Each Post has its own author and can be moved to a different topic if necessary or even become the start of a new topic.
-
Original Post (or OP): The first Post on any topic. This is key since it determines the focus of the Topic and is what the title and tags will link to.
-
Category: The primary means of organizing topics. Each Topic is placed in exactly one Category. Categories have permissions that can restrict which users can create, reply to, and see its topics. You can also configure notification preferences per Category or even mute them, as explained below. Categories are a similar concept to a ‘forum’ on other sites.
-
Tag: A marker placed on a topic to describe it. While a topic can only have one Category, it can have multiple tags. New tags can only be created by community admins.
-
User: Discourse sites may be private or public for anyone to read, but you will always be required to register in order to create posts and record any actions such as bookmarking, liking, tagging, and flagging. Most site activity, therefore, is based around registered Users.
For more details see the Interface Nomenclature Guide.
Browsing the Community
Topic lists
By default, the community homepage will show all Latest conversations in the community, but you can filter this list in several ways:

-
By Category: in the menu line, click the ‘all categories’ title and a list of all the categories appears.
-
By Tag: in the menu line, click the ‘all tags’ title and a list of all the tags are used will appear.
-
By level of activity: if you click on ‘Top’ the conversation topics will be listed in order of most activity (views and replies) for a specific time period. You can choose whether this is for all time or select a particular period such as quarter, month, week, or just today.
-
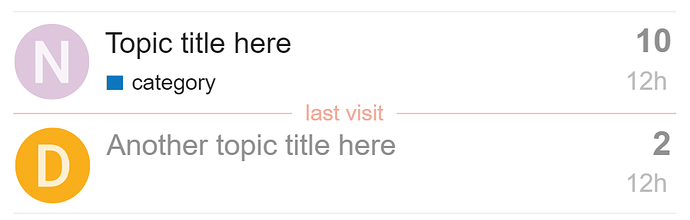
By what’s ‘New’ to you: by default, new topics are those created in the last 2 days that you have not opened yet to keep the list fresh and relevant. New topics show a small blue dot next to the topic title

-
By what topics are “Unread”: by default, unread topics are those that you have previously opened and read for at least 4 minutes, and that have new posts (replies) submitted to them. Unread topics show a number in a blue circle indicating how many new posts are in the Topic.

See who is participating
There are several ways to see who is involved in topics.

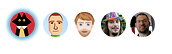
On the homepage, you will see a selection of avatars (profile pictures) of:
-
The user who started the Topic (always the first photo);
-
A selection of the most active participants;
-
and, who created the most recent Post (usually the last photo).
-
-
in some cases, the first photo has a blue border or blue halo to indicate that the original poster is also the most recent poster:
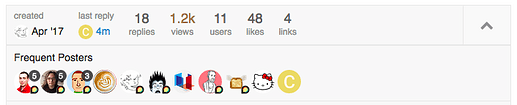
The box at the bottom of the OP tells you; who created the Post and when, gives a count of the replies and views on this Topic to date, and displays the avatars of the most frequent participants:
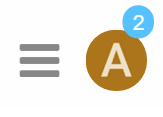
Navigation Tools
-
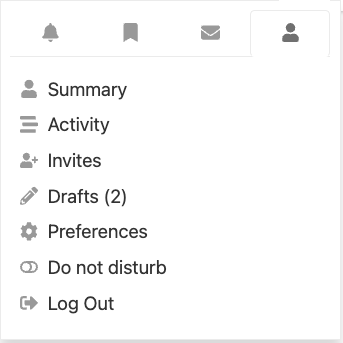
For the Menu, or your User page, use the icon buttons at the upper right:
Keep scrolling
Click a topic title and read down the list of replies in chronological order, following links or previewing replies and quotes as you go. Use your mouse to scroll the screen, or use the timeline scroll bar on the right which also shows you how far through the conversation you’ve read. On smaller screens, select the bottom progress bar to expand it.
Jump back in
-
Selecting a topic title will take you to your last read post in the Topic. To enter at the top ↑ or bottom ↓ instead, click the reply count or last reply date.

-
Topics above the light red line on a list are new or updated since your last visit. If you have read all the way to the end of a topic, the title will be light grey instead of black.
Related topics
Sometimes conversations are clearer if topics are split, where posts are moved to a more appropriate topic, or two related topics are merged. If a post is moved, a link will appear that will allow readers to jump to that comment wherever it has been moved to, and the person who posted it will also be notified.

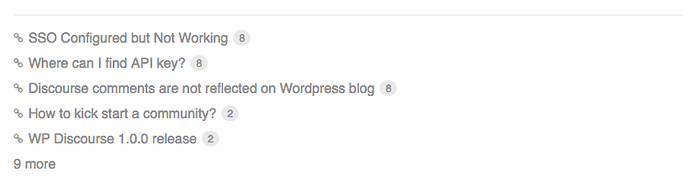
At the end of the OP, you will also see lists of related topics that
link to the one you are reading
Posting DIscussions and Blogs
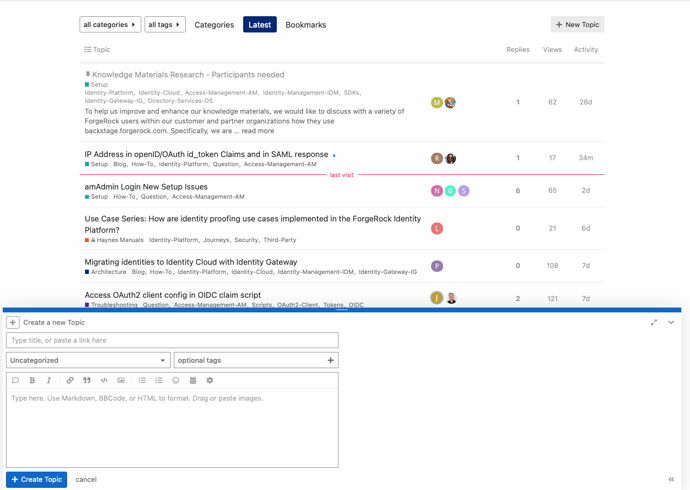
To create a new discussion topic or blog post, click on the
![]() button on the upper right, and the new topic composer will display:
button on the upper right, and the new topic composer will display:
-
Click in the “Type title, or paste a link here” text box to create your message’s Topic (subject).
-
Next, click in the text box with the statement "Type here ".
-
Use Markdown, BBCode, or HTML to format. Drag or paste images text to enter your message.
-
Select the
Create Topicbutton to publish your message or blog.
Taking Part in Conversation
Replying
Press
any!![]() Reply
button to open the editor panel at the bottom of your browser. You can
continue reading (and even search or navigate to different topics) while
you compose your reply.
Reply
button to open the editor panel at the bottom of your browser. You can
continue reading (and even search or navigate to different topics) while
you compose your reply.
The homepage shows all posts in the order they are published. It does not make you chase down multiple threaded paths. However, it still gives you many ways to follow conversations’ context.
To reply to a specific post in a topic, click the grey Reply button at the end of each Post, and your reply is linked to that Post.
-
If your reply is the next one published after the Post you are replying to, this will appear next in chronological order
-
If yours is NOT next, then two things happen after your Post is published:
-
Your Post will include a new link in its header with an image to show what this is ‘in reply to’ - clicking this link displays that previous Post for context next to your reply
-
The original Post includes a count of replies at the bottom - clicking this link displays the content of the replies
-

Drafts
Drafts will automatically be saved to your user profile as you write. If you minimize the editor or navigate to a different topic, the editor might disappear. To open a draft, return to the Topic you were replying to or click the highlighted bar at the bottom of your browser, and the editor will reappear with your draft.
You can find and view your open drafts by navigating to the User menu and selecting Drafts.
Quoting
To insert a quote, select the text you wish to quote, then press the
Quote button
![]() from
the composer menu.
from
the composer menu.
There is no need to quote a whole message: it helps to be specific. Repeat this for multiple quotes, even from different posts and different users. The quoted text will point to its original source.
Mentioning
To notify someone about your reply, mention their name. Type @ to
begin selecting a username. This will also search the name fields in
case you don’t know a particular username.

Emoji
To use Emoji,
press the emoji button
![]() in the editor or just type
in the editor or just type : to match by name, or traditional smileys
;)

Alternatively, click on more to see a complete list of Emoji to select
from.
Oneboxes (Link Previews)
To generate a summary for a link, paste it on a line by itself. To start
a topic with a link, paste the link into the title field.
Read more details about this feature at Create rich link previews with Onebox - Using Discourse - Discourse Meta.
Formatting
Your reply can be formatted using simple HTML, BBCode, or Markdown :
This is <b>bold</b>.
This is [b]bold[/b].
This is **bold**.
For more formatting tips, try our
10 minute tutorial.
Actions and Reactions
There are action buttons at the bottom of each Post:
![]()
-
To let someone know that you enjoyed and appreciated their Post, use the like button. Share the love!
-
Grab a copy-pasteable (permalink) link to any reply or Topic via the link button.
-
Use the … button to reveal more actions: Flag to privately let the author, or the site staff, know about a problem. Edit to edit your Post, if possible. Bookmark to find this Post later on your profile page:

Notifications
When someone is talking directly to you – by replying to you, quoting
your Post, mentioning your @username, or even linking to your Post – a
blue number will immediately appear over your profile picture at the
top right.
When you have been sent a Personal Message, you will receive the message in your Inbox, and a green number will appear over your profile picture to the left.
Click your profile image to scroll through all your notifications.

You can optionally receive all these notifications as push notifications to your desktop browser or Android device. Simply allow the site to send you notifications through your browser when it asks permission.
Don’t worry about missing a reply — you’ll be emailed any notifications that arrive when you are away.
You can also get notified about other interests and participation occurring on the site at the Category or Topic level.
Topic notifications
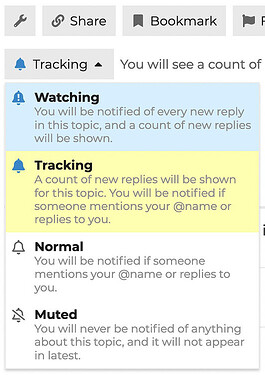
You can change your notification level for any individual topic via the
notification control at the bottom of each Topic:
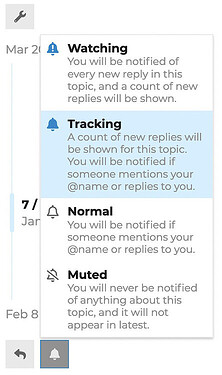
Or at the end of the timeline on the right of the Topic, if the Topic is
long:
Category notifications
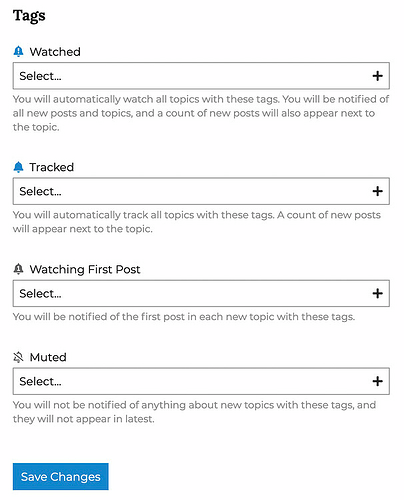
Notification levels can also be set per Category. To change any of these
defaults, see your user preferences, or visit the category page and use
the notification control icon
![]() above
the topic list on the right side of the panel:
above
the topic list on the right side of the panel:
Subscribing to a category
To subscribe to a category, navigate to the specific Category and set its notification status to “Watching”:

Now you’ll be notified of every new Post in this Category. These
notifications will appear as a blue bubble on your profile picture in
the top right of every page:
You’ll also be emailed with notifications when you’re not active on the
site.