Part 2: Integrating a Single-Page app (SPA) with ForgeRock Identity
Author: |
George Bafaloukas |
Created at: |
Jul 2021 |
Updated at: |
Jul 2022 |
This article was written by George Bafaloukas and Adam Crockett.
Overview
Who is this article for?
Step-by-step instructions follow for anyone who wishes to use hosted pages in their mobile or web app, with the help of the ForgeRock SDKs. The goal is to give you practical advice about themes and provide some best practices along the way.
Prior knowledge configuring ForgeRock Identity Cloud is helpful but not assumed.
This article is the second of four in a series:
-
Integrating a Single-Page App (SPA) with ForgeRock Identity Cloud (Part 2)
-
Integrating Native Mobile Apps with ForgeRock Identity Cloud (Part 3)
-
Navigate to a Specific Journey Using Centralized Login (Part 4)
What is a single-page app?
A single-page app (SPA) is an app that runs inside a browser and does not require page reloading during use. You use this type of app every day. For example: Gmail, Google Maps, Facebook, and GitHub.
A SPA is all about providing an outstanding user experience by imitating a “natural” environment in the browser: no page reloads, no extra wait time. A SPA lets you visit just one web page, which uses JavaScript to load all other content that requires JavaScript.
A SPA requests the markup and data independently, rendering pages in the
browser. SPAs frequently use popular JavaScript frameworks like
AngularJS, Vue.js, React, and more.
The ForgeRock Javascript SDK
ForgeRock provides the ForgeRock JavaScript SDK. Use the SDK to integrate yourSPAs with the ForgeRock Identity Cloud. The Forgerock JavaScript SDK lets you rapidly build JavaScript apps against the ForgeRock REST APIs.
The SDK supports:
-
Registration and authentication trees
-
Access token acquisition
-
Session handling
To learn more about ForgeRock JavaScript SDK features, visit the Forgerock SDK documentation.
Prerequisites
To gain more context, please visit the following links before reading further:
Note : Make sure to map the address of your app to your local IP:
127.0.0.1 skdapp.example.comIntegrating a SPA with ForgeRock Identity Cloud
Building the UI
Using the framework of your choice, create a new app. You will configure the app to authenticate using ForgeRock Identity Cloud.
When building your SPA, you have two options for integrating with ForgeRock:
-
Option 1: Integrate via APIs and build your own UI.
-
Option 2: Use the hosted pages in your app (Centralized UI).
The SDK supports both options, which lets you tailor your experience to your needs. Choose the Option that best meets your project and use case requirements.
A custom UI vs. a centralized UI
Building a custom UI for your SPA lets you have full control of the user experience, the branding, and the theme of your app. A custom UI gives you full customization control, but requires more development effort. Each app that uses the platform must build its own UI.
This might be problematic for projects where various SPAs point to a central authentication point to gain authentication privileges. In this case, if the UI/UX requirements allow it, we recommend using a Centralized UI.
What is a centralized UI?
The ForgeRock SDKs let you configure multiple apps on multiple platforms. You can reuse the user interface from ForgeRock Access Management (AM) or your own web app. You do not have to manage authentication yourself.
As the UI is centralized in the cloud, changes you make to an authentication journey in your AM instance are available to all apps that use the UI. You do not need to rebuild or redeploy the apps.
Since your app does not manage authentication journeys, the app does not need access to user credentials. This reduces complexity and risk.
The ForgeRock SDK manages and stores tokens, providing a seamless single sign-on experience.
Additionally, apps that use a centralized UI are not affected by the new third-party cookie restrictions being rolled out in modern web browsers.
To learn more about centralized UIs, visit How To - Enable Centralized UI.
Configuring ForgeRock Identity Cloud
Before you begin, follow the instructions in JavaScript - Step 1. Preparing AM to learn about configuring AM for HTTPS and CORS.
In the following example, you configure:
-
In Identity Cloud:
-
-
OAuth2.0 Provider
-
OAuth2.0 Client
-
-
In client Applications:
-
-
JS
-
Configure the OAuth2.0 provider
-
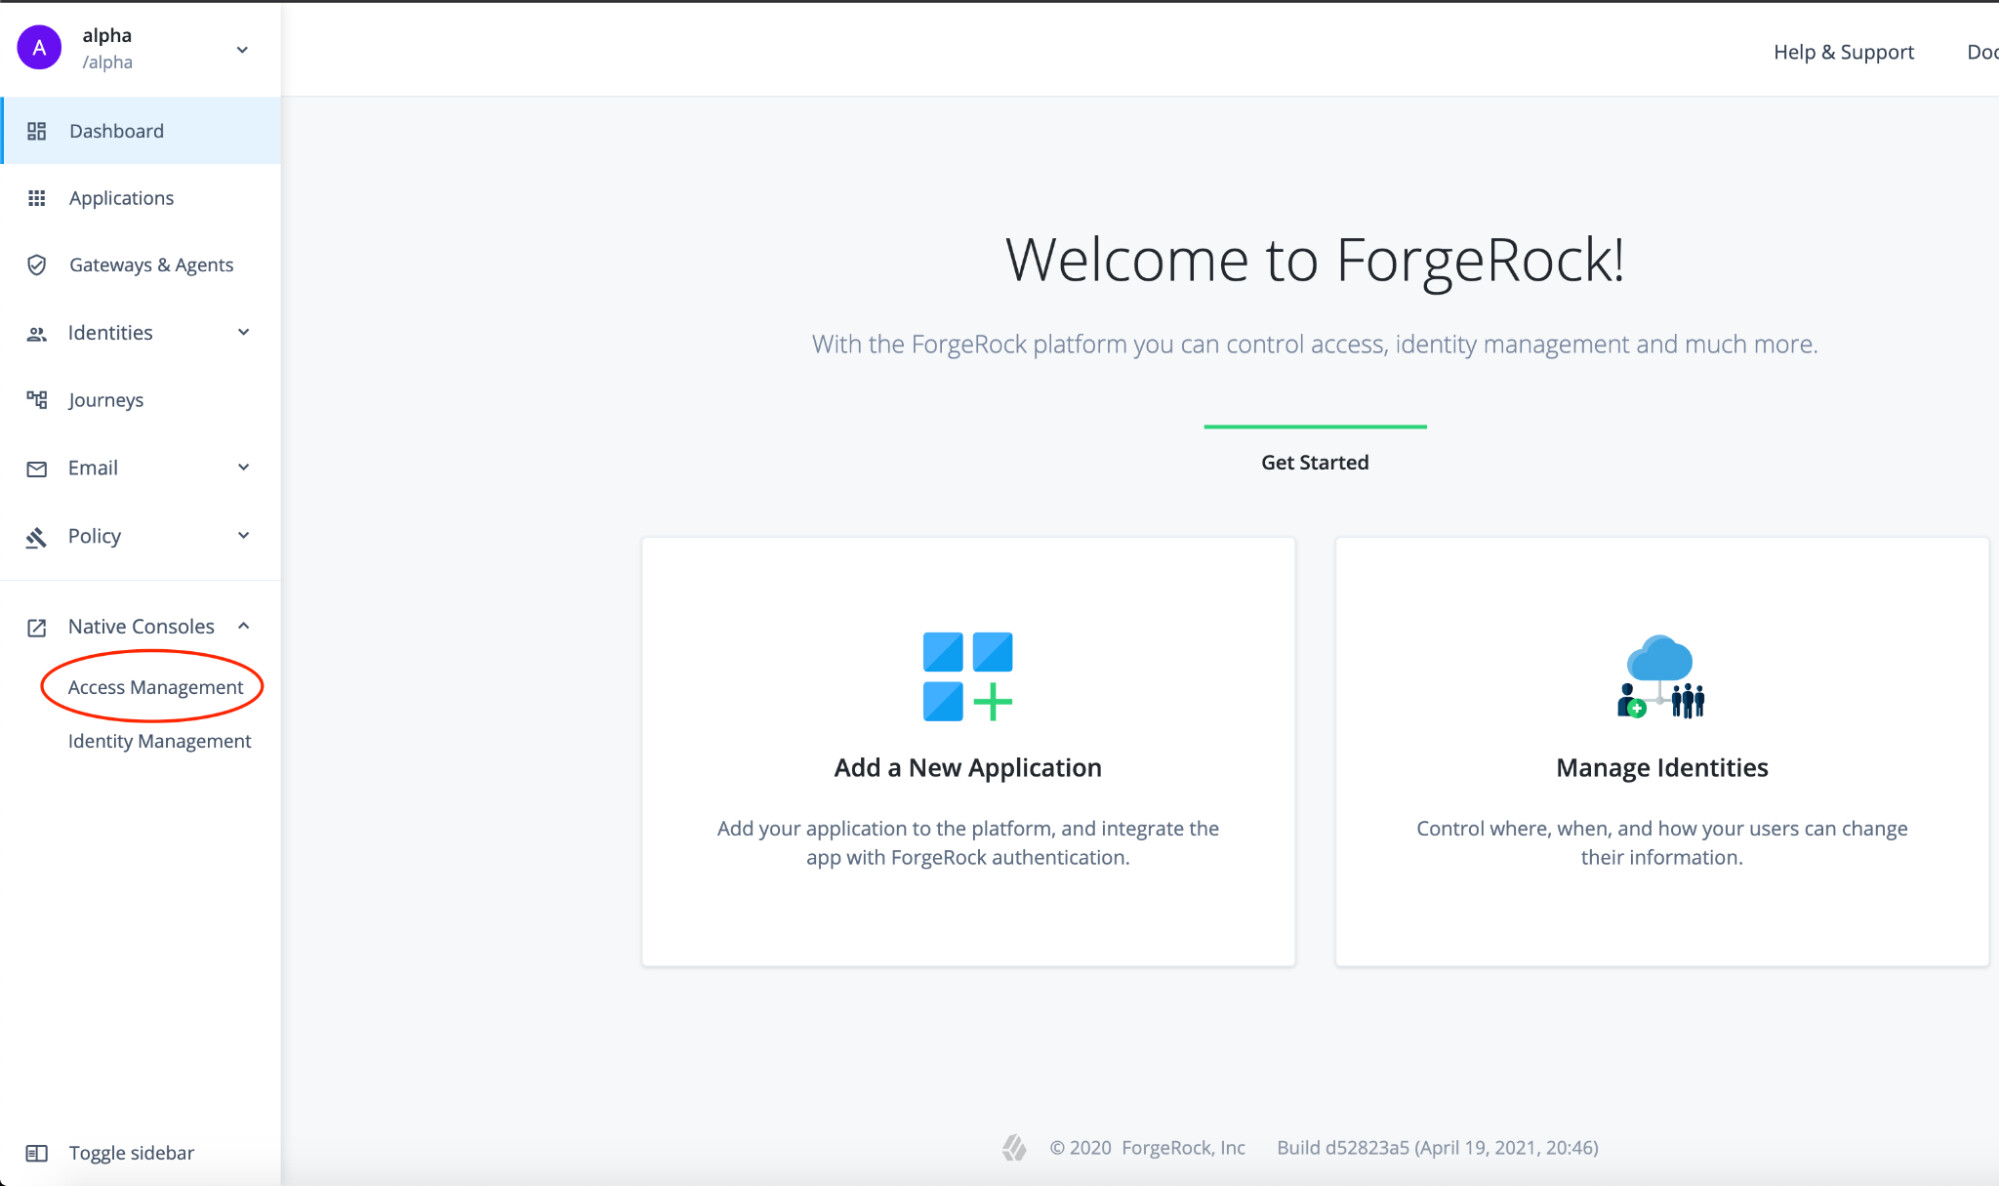
In the Platform Admin UI, log in to the AM Native console.
-
In the AM Native console, click on Services.
-
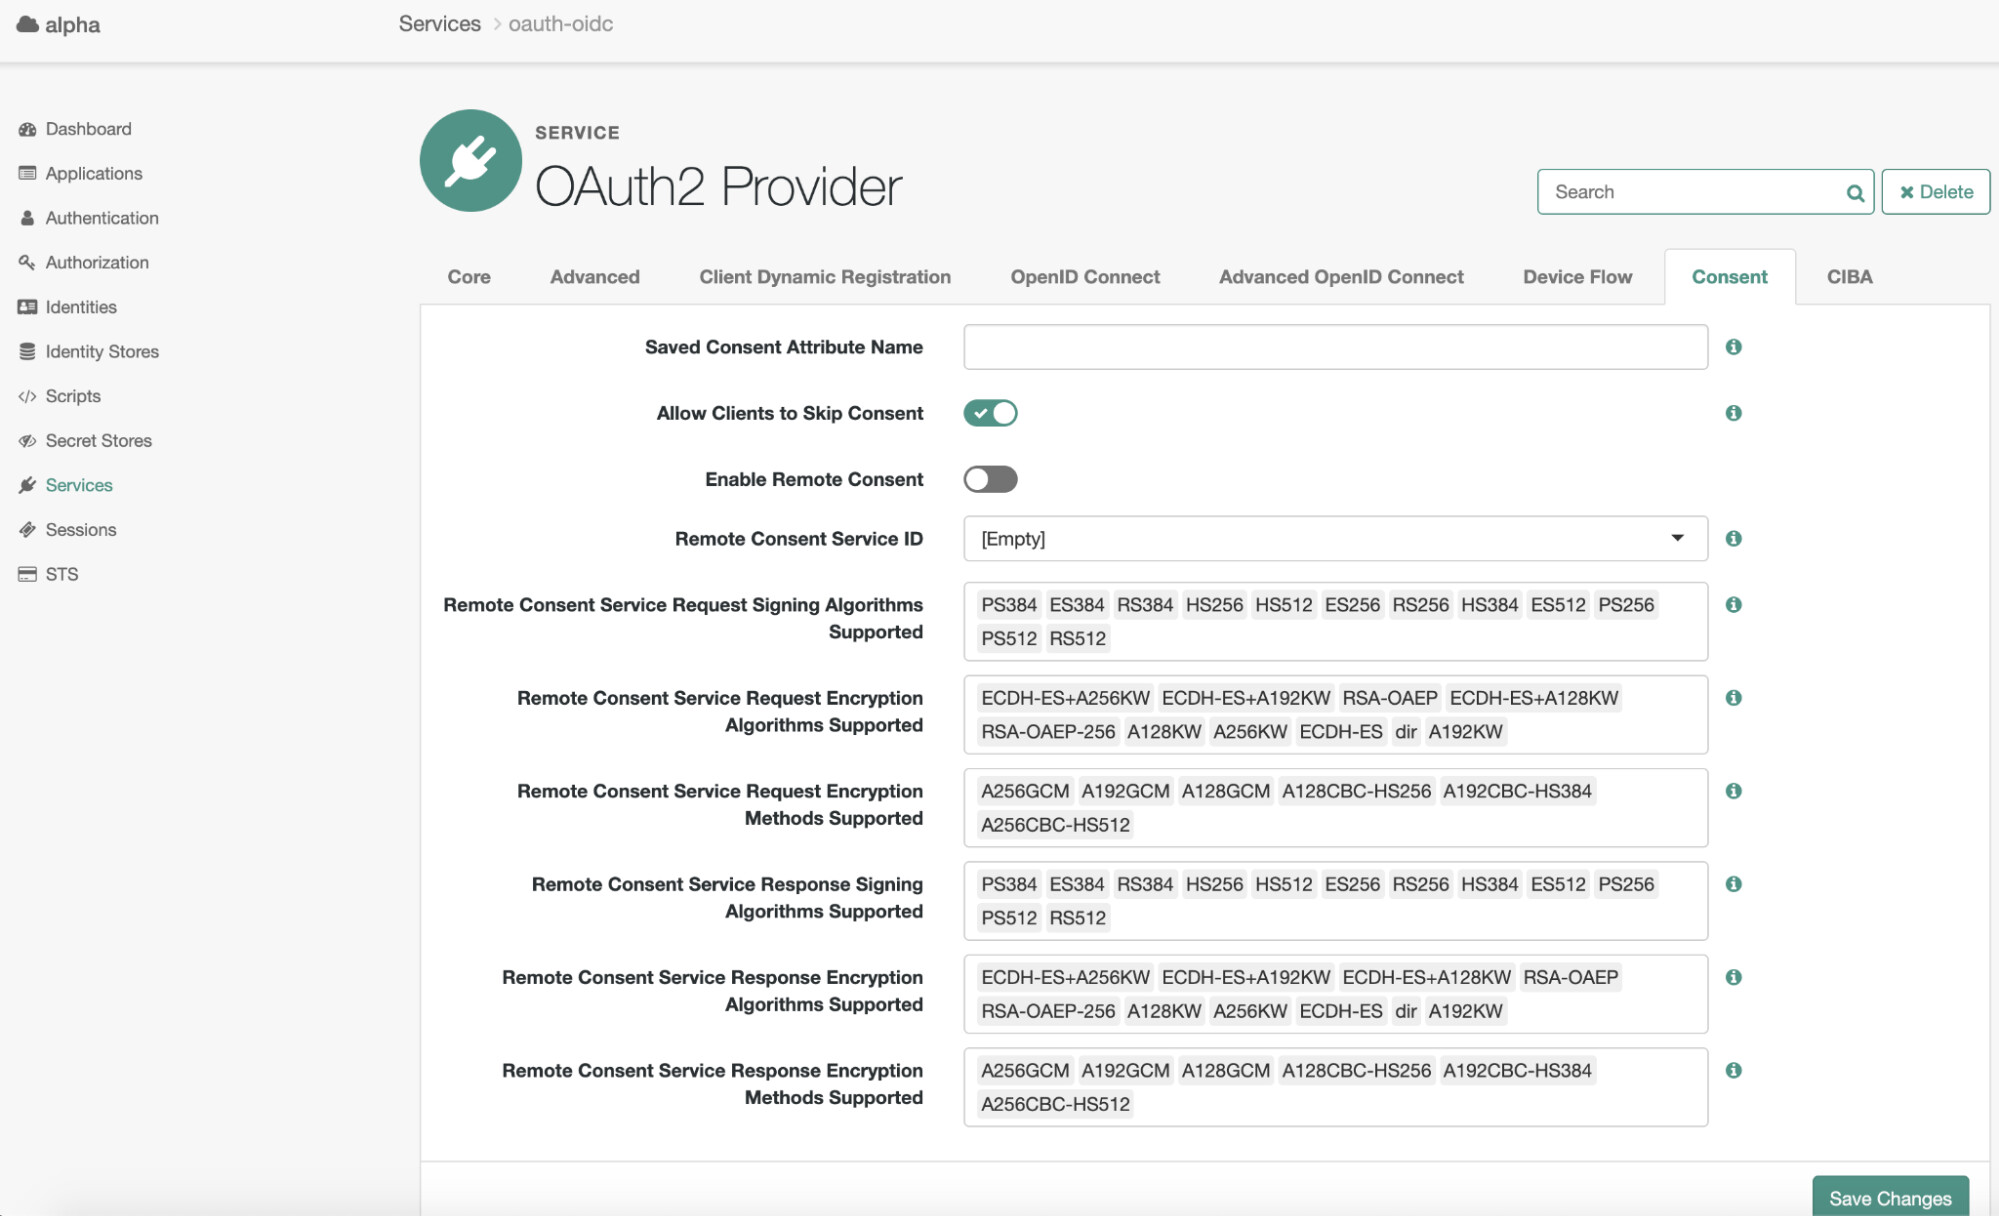
If there is no OAuth2 Provider, create one using the default settings.

-
In the OAuth2 Provider configuration, on the Consen*t tab, enable the *Allow Clients to Skip Consent option.
-
On the Configure OAuth2 tab, enable the Issue Refresh Tokens option.
-
On the Advanced OpenID Connect tab, enable the claims_parameter_supported option.
Configure the OAuth2.0 client
-
In the AM Native console, navigate to Applications → OAuth 2.0 → Clients.
-
Create a new OAuth 2.0 client named “ForgeRockSDKClient”.
-
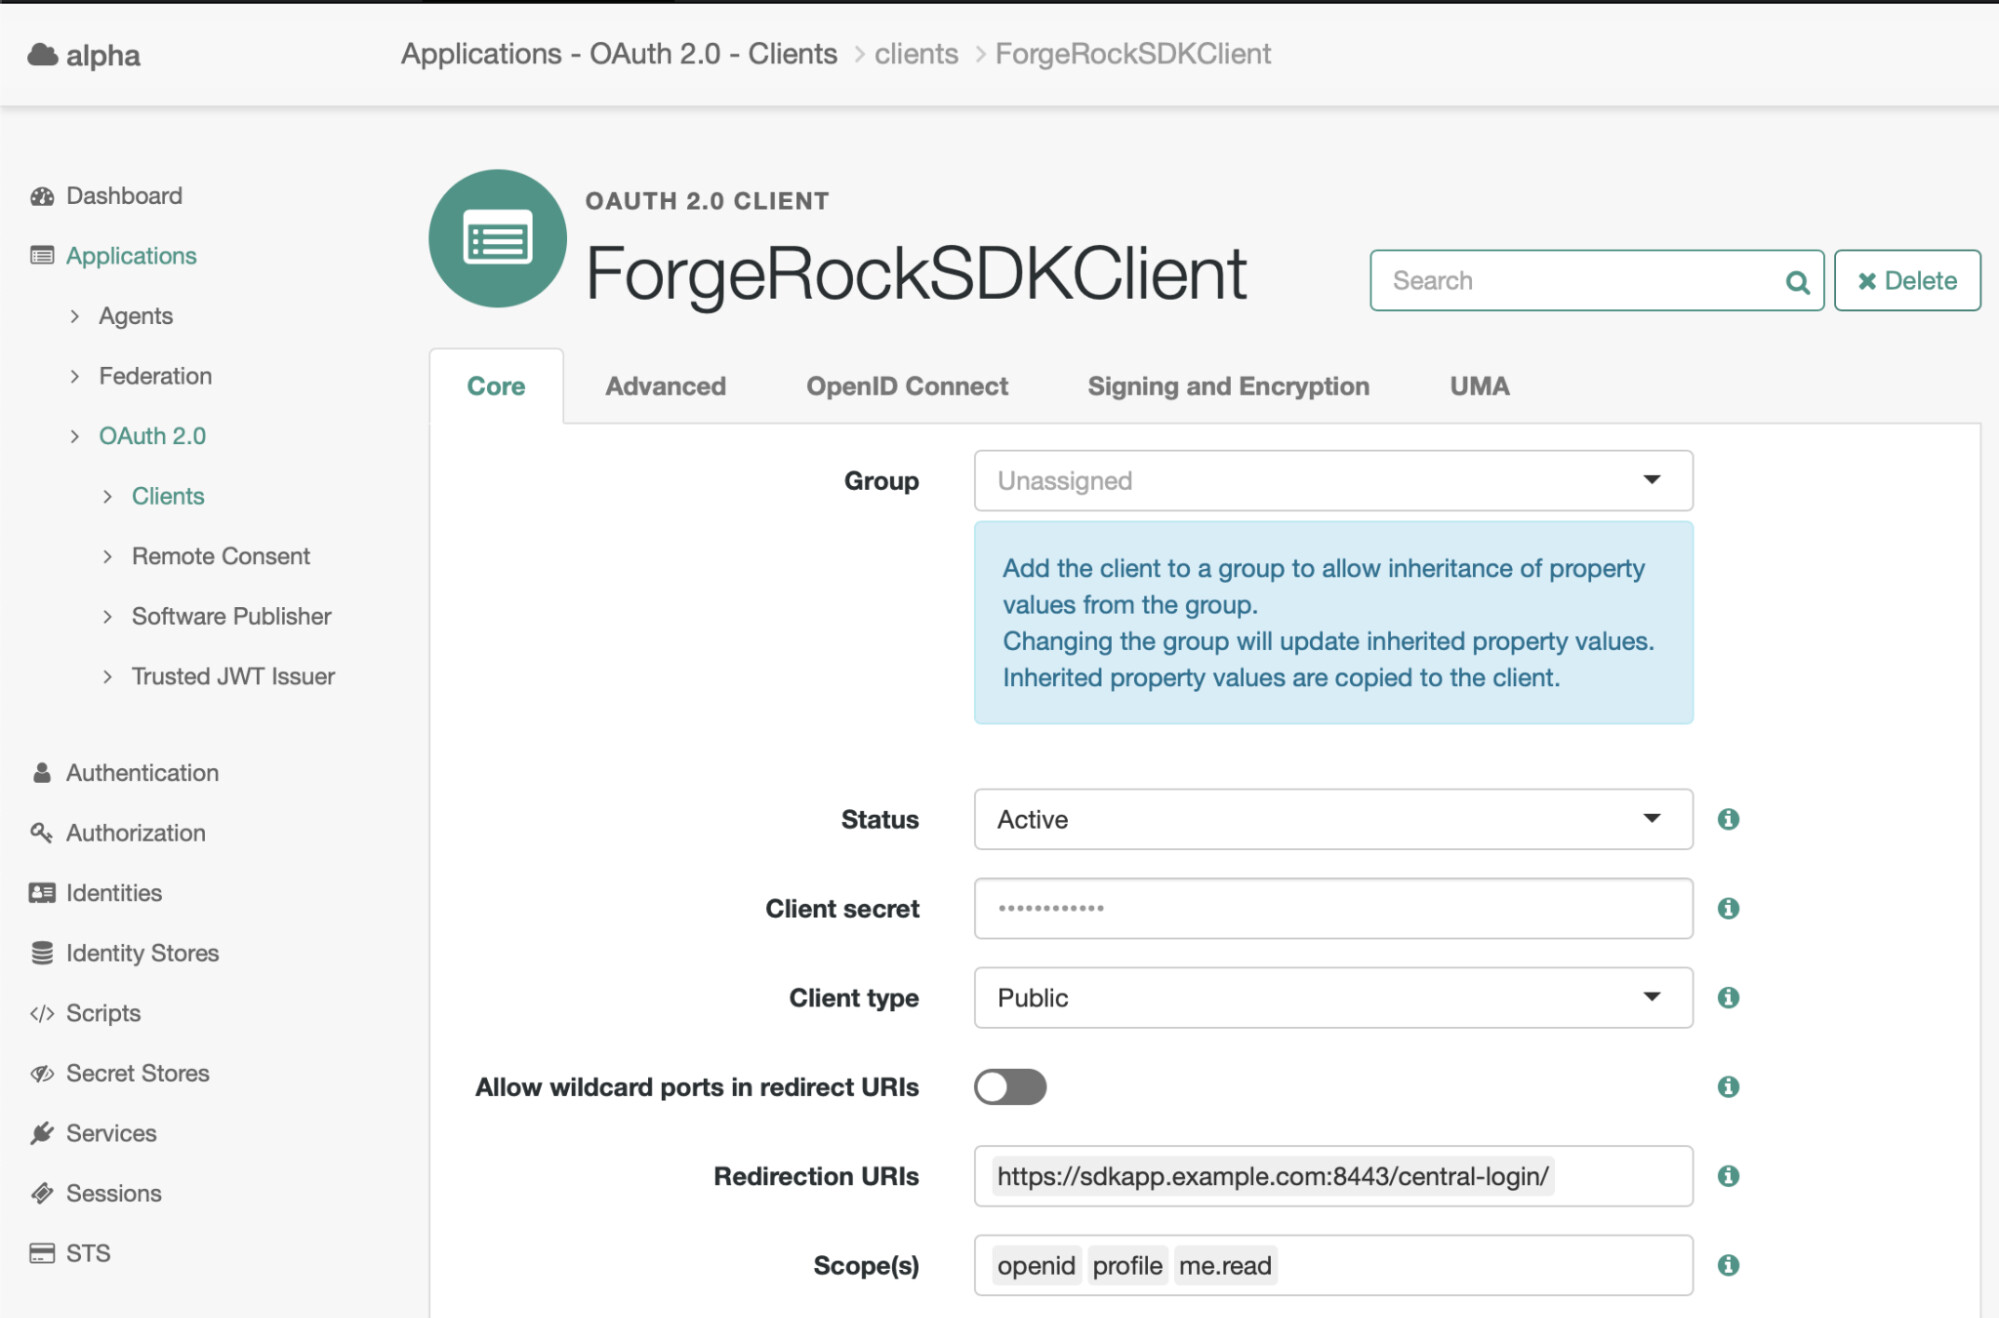
Set the following properties:
Client ID = ForgeRockSDKClient
Client secret = (leave blank)
Redirection URIs = https://sdkapp.example.com:8443/central-login/
Scope(s) = openid, profile, me.read
-
Click Create.
-
On the Core tab:
Set the Client type property to Public.
Disable the Allow wildcard ports in the redirect URIs property.
-
Click Save.
-
On the Advanced tab:
In the Grant Types filed, ensure that the Authorization Code value is present.
Set the Token Endpoint Authentication Method field to None.
Enable the Implied consent property.
-
Click Save.
+
+
Configuring your app to use a centralized UI
In this example, you use a Centralized UI to authenticate your app.
You configure the app to use the Forgerock Identity Cloud Authentication Hosted Page you used in Part One of this tutorial.
Note: To learn more about how to integrate and initialize the Forgerock Javascript SDK, please visit the ForgeRock JS SDK documentation
Let’s see how you can do that in more detail:
-
For this example, you are going to import the ForgeRock SDK using the NPM package, assuming you are using a CommonJS Bundler.
-
A CDN proxy and other approaches are available:
const ForgeRock = require ('@forgerock/javascript-sdk');-
Create a centralized login instance using the Config class.
-
There is a close relationship between your app configuration and your OAuth 2.0 client configuration. Make sure they match.

forgerock.Config.set({ clientId: 'ForgeRockSDKClient', redirectUri: 'https://sdkapp.example.com:8443/central-login/', // e.g. the same alias given from the prerequisites section scope: 'openid profile me.read', serverConfig: { baseUrl: '<AM Instance>', timeout: '90000' }, support: 'modern', realmPath: alpha, }); -
Create a Login Button with the tag ‘#loginBtn’.
-
Initiate authentication using the Centralized UI feature:
document.querySelector('#loginBtn').addEventListener('click', () => { /** * The key-value of `login: redirect` is what allows central-login. * @note async await could be used in place of promises for greater clarity */ forgerock .TokenManager .getTokens({ login: 'redirect' }) .then(() => { forgerock .UserManager .getCurrentUser() .then((user) => showUser(user)); }); }); -
Create a way to log out:
document.querySelector('#logoutBtn').addEventListener('click', () => {

try {

Forgerock

.FRUser

.logout()

.then(() => location.assign(`${document.location.origin}/central-login/`))

} catch (error) {

console.error(error);

}

});
Test your application
When running your app in a browser window, the app should redirect you to your themed FIDC tenant for authentication.
After successfully authenticating, the app should return you to your SPA.
+ === What’s next
+ Summary
+ In this article, you learned how to use a centralized UI to integrate your SPA with ForgeRock Identity Cloud’s hosted pages.
+ In the next article, you will learn how to integrate your iOS and Android Native apps with ForgeRock Identity Cloud, reusing your themed hosted pages.
+ Helpful Links
-
-
ForgeRock Knowlege Base > Identity Cloud > Home
===== Other Articles by This Author
This article was written by George Bafaloukas and Adam Crockett. Overview: Who is this article for? Step-by-step instructions follow for anyone who wishes to use hosted pages (more on that later in the article) in their mobile or web app, with the help of the ForgeRock SDKs. The goal is to give you practical advice on theming, show how the SDKs help the integration, and provide some best practices along the way. Prior knowledge configuring ForgeRock Identity Cloud is helpful, but not assum…
 Part
3: Integrating Native Mobile Apps with ForgeRock Identity Cloud
[.badge-category__name#Integrations#]
Part
3: Integrating Native Mobile Apps with ForgeRock Identity Cloud
[.badge-category__name#Integrations#]This article was written by George Bafaloukas and Adam Crockett. Overview Who is this article for? Step-by-step instructions follow for anyone who wishes to use hosted pages in their mobile or web app, with the help of the ForgeRock SDKs. The goal is to give you practical advice about themes and provide some best practices along the way. Prior knowledge configuring ForgeRock Identity Cloud is helpful but not assumed. This article is the third of four in a series: Creating Themes in For…
Part
4: Navigating to a Specific Journey Using Centralized Login with
ForgeRock Identity Cloud
[.badge-category__name#Setup#]This article was written by George Bafaloukas and Adam Crockett. Overview Who is this article for? Step-by-step instructions follow for anyone who wishes to use hosted pages in their mobile or web app, with the help of the ForgeRock SDKs. The goal is to give you practical advice about themes and provide some best practices along the way. Prior knowledge configuring ForgeRock Identity Cloud is helpful but not assumed. This article is the last of four in a series: Themes in ForgeRock Iden…