Extending Push Notifications to Include Geolocation Data
Author: |
Jon Knight |
Created at: |
May 2019 |
Updated at: |
Sep 2022 |
Summary
Instructions for extending push notifications to include geolocation data.
 +
In this article, I'll show you how to extend push notifications to
include geolocation data.
Everyone loves getting postcards and letters, but everyone really loves getting parcels and goodies. It’s all about the payload!
In a previous article, I talked about adding support for ForgeRock push notifications to your own IOS apps. By default, the ForgeRock push service only supports sending authentication requests as simple messages. The user reads the message, decides on an action, and usually responds with an Accept or Reject. In many cases that’s fine. If I start a log in, or initiate a payment, my phone buzzes with an approval request, and I’m pretty confident the request is down to me. But not always. Consider the case where a child or a partner initiates a payment from a shared bank account, and I’m the approver. My phone buzzes asking for approval, but I’m not 100% sure it’s genuine. In this example, a simple message does not provide the adequate information I need to make a decision. I’d like it to send something more, like a geolocation, or even a photo of the person requesting the payment.
How about extending the default ForgeRock push authentication behavior to convey that additional data? As it turns out, it’s pretty straightforward to do. We alter the default ForgeRock push authentication sender node, and then extend our custom push authenticator app to handle and display the additional context.
I’ve made the first part easy and published a new node on the ForgeRock Markeplace here. You can also grab it from github. The payload content is specified through shared state values in the node configuration. As long as you can get the data into your authentication tree, it can be added as a payload item to be sent with push notifications.
In the previous article, I included a sample app to handle the standard notifications. For this new project, I created an extended version here.
In the original sample, we handled an incoming authentication request by displaying an alert (UIAlertController). We’ll do the same here, but we’ll also add an MKMapView controller, so we can display a pretty map showing the geolocation of the request (assuming the authentication tree is configured to send it!).
First, we add the MKMapView controller to our view:
import UIKit
import AVFoundation
import MapKit
import SwiftyJSON   // https://cocoapods.org/pods/SwiftyJSON


@available(iOS 10.0, *)
class ViewController: UIViewController, AVCaptureMetadataOutputObjectsDelegate {

    var captureSession: AVCaptureSession!
    var previewLayer: AVCaptureVideoPreviewLayer!
    var mapView: MKMapView?


    override func viewDidAppear(_ animated: Bool) {
        self.mapView = MKMapView(frame: CGRect(x: 0, y: 0, width: self.view.frame.width, height: self.view.frame.height-500))
        self.view
On launching, the app now looks like this:
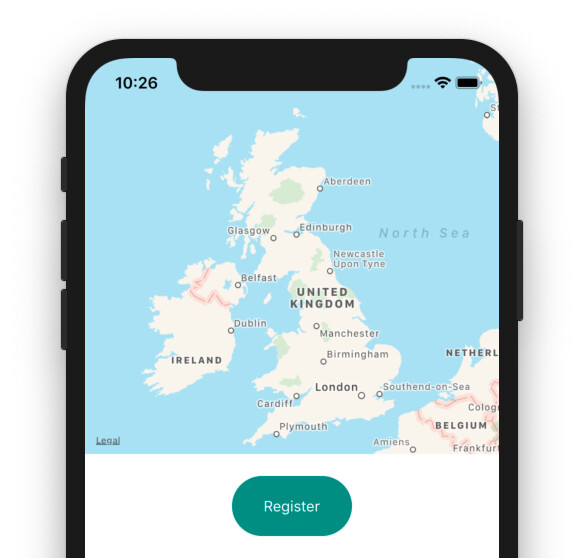
Basic map display
Now, we need to adapt the incoming authentication handler to update the map:
// Called by appDelegate to handle the incoming SNS message
func handleNotification(aps: [String: AnyObject]){
    AudioServicesPlaySystemSound(SystemSoundID(kSystemSoundID_Vibrate))
    if (aps["messageId"] as! String).starts(with: "AUTHENTICATE:") {
        print("Incoming authentication request")

        // Handle metadata such as geolocation sent with message payload
        if (aps["data"] != nil) {
            let data = aps["data"] as! String
            let payload: String = FRPushUtils().getPayload(dataJWT: data)
            let geo = JSON(parseJSON: (JSON(parseJSON: payload).rawString()!))
            if geo["location"].exists() {
                let location = JSON(parseJSON: geo["location"].rawString()!)
                print("LOCATION: \(location)")
                let loc:CLLocationCoordinate2D = CLLocationCoordinate2D(latitude: location["latitude"].double!, longitude: location["longitude"].double!)
                let region = MKCoordinateRegion.init(center: loc, latitudinalMeters: 2000, longitudinalMeters: 2000)
                self.mapView!.setRegion(region, animated: true)

                let annotation = MKPointAnnotation()
                let centerCoordinate = CLLocationCoordinate2D(latitude: location["latitude"].double!, longitude:location["longitude"].double!)
                annotation.coordinate = centerCoordinate
                annotation.title = "Login"
                self.mapView!.addAnnotation(annotation)
            }
        }

        let alert = UIAlertController(title: "Authentication Request", message: aps["alert"] as! String, preferredStyle: .alert)
        alert.addAction(UIAlertAction(title: "Approve", style: .default, handler: { action in self.sendLoginResponse(approved: true, aps:aps) }))
        alert.addAction(UIAlertAction(title: "Reject", style: .cancel, handler: { action in self.sendLoginResponse(approved: false, aps:aps) }))
        self.present(alert, animated: true)
    } else {
        print("Unexpected notification")
    }
}
That’s it! An incoming push message with geolocation payload updates the map:
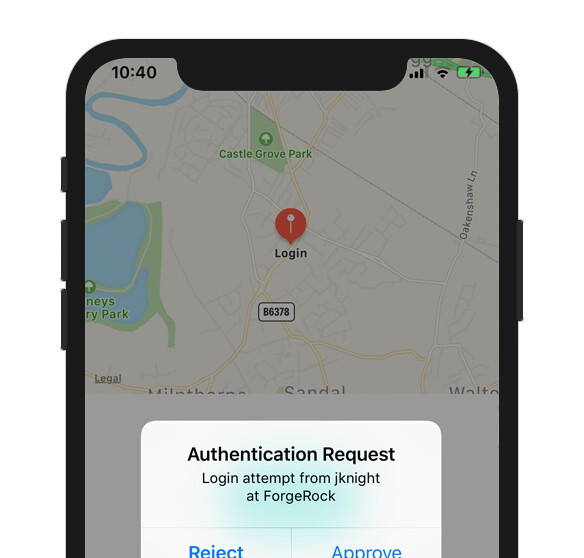
Handling an incoming push notification
For this particular example, the final piece of the puzzle is how to get the geolocation data so it can be passed to the push sender authentication node. There are a few community nodes available on ForgeRock Marketplace, but in this case I’m using this geolocation node, which calls a user’s browser native geolocation methods to get an accurate result.