Creating a Push Authenticator for Your Mobile Phone
Author: |
Jon Knight |
Created at: |
May 2019 |
Updated at: |
Oct 2022 |
Summary
Instructions for creating a push authenticator app for your mobile phone to handle registration and authentication using AM push notification.
For more information, see Knowledge Base Books > Push Services in AM/OpenAM
Introduction
In this article, you will learn how to create a push authenticator for your mobile phone. The push authenticator is an app that handles registration and authentication using AM push notification. Included is a sample iOS project to get started. You will:
-
Set up a push service with ForgeRock Authenticator
-
Implement registration and authentication flows
-
Configure the app to receive incoming push notifications
-
Add common cryptography
-
Include support for JWT and JSON objects
-
Add support for the registration flow
-
Get permission to use the camera
-
Compile and enjoy the app
Set up a push service with ForgeRock Authenticator
Download the free ForgeRock Authenticator app from a leading app store. Follow the instructions in Steffo Weber’s article to set up a sending service, application signing keys, and other configurations: Using Your Own SNS Messaging With ForgeRock Authenticator
Implement registration and authentication flows
Registration exchanges various data, including a shared secret, REST endpoints, and a challenge encoded in QR format. The client app scans the QR code, extracts the data, and POSTs to the REST endpoint with a challenge response that is encrypted using a mutual secret. The authentication flow is similar; it is essentially an encrypted response to a challenge, and the user’s accept or reject decision.
In the sample app, all interaction for both flows is in the FRPushUtils class. It handles the data encodings, the challenge responses, and interaction with the push service. You just need a simple user UI and some AV code to capture a QR code. Thankfully, Apple and iOS makes that fairly trivial.
If you’re starting with the sample app, change the bundle ID to match the ID associated with the push service, as Apple uses it to route messages to apps. If you aren’t starting with the sample app, we’ll assume you prepared the app, including code signing and any properties needed for the app to receive push notifications. Be sure to also include a copy of the FRPushUtils from the sample project.
Configure the app to receive incoming push notifications
In your AppDelegate.swift file, add the following before the main AppDelegate class:
import UIKit
import UserNotifications


var snsDeviceID: String?
When the app first launches, it will retrieve and store the device’s unique SNS push notification device ID. This is needed in the registration step.
Add or update the didFinishLaunchWithOptions function as follows:
func application(_ application: UIApplication, didFinishLaunchingWithOptions launchOptions: [UIApplication.LaunchOptionsKey: Any]?) -> Bool {
    registerForPushNotifications()
    return true
}
Add the following new functions, which manage the process of asking the user for permission to handle push notifications:
// Push Notification stuff
func registerForPushNotifications() {
    UNUserNotificationCenter.current()
        .requestAuthorization(options: [.alert, .sound, .badge]) {
            [weak self] granted, error in
            print("Permission granted: \(granted)")
            guard granted else { return }
            self?.getNotificationSettings()
    }
}

func getNotificationSettings() {
    UNUserNotificationCenter.current().getNotificationSettings {
        settings in
        print("Notification settings: \(settings)")
        guard settings.authorizationStatus == .authorized else { return }
        DispatchQueue.main.async {
            UIApplication.shared.registerForRemoteNotifications()
        }
    }
}


func application(
    _ application: UIApplication,
    didRegisterForRemoteNotificationsWithDeviceToken deviceToken: Data
    ) {
    let tokenParts = deviceToken.map { data in String(format: "%02.2hhx", data) }
    snsDeviceID = tokenParts.joined()
    print("Device SNS: \(snsDeviceID)")
    print("Device UDID: \(UIDevice.current.identifierForVendor!.uuidString)")
}


func application(
    _ application: UIApplication,
    didFailToRegisterForRemoteNotificationsWithError error: Error) {
    print("Failed to register: \(error)")
}
Notice that the SNS device ID is stored after you successfully registered to receive push notifications.
Add a function to handle all new incoming notifications. The function passes the incoming message payload to a function to display an alert to the user. We’ll discuss that later:
// Called when an SNS notification is received
func application(
    _ application: UIApplication,
    didReceiveRemoteNotification userInfo: [AnyHashable: Any],
    fetchCompletionHandler completionHandler:
    @escaping (UIBackgroundFetchResult) -> Void
    ) {

    print("userInfo: \(userInfo)")

    // Check message detail can be decoded
    guard let aps = userInfo["aps"] as? [String: AnyObject] else {
        completionHandler(.failed)
        return
    }

    // Call function to allow user to view and approve/reject request
    let mainController:ViewController = self.window?.rootViewController as! ViewController;
    mainController.handleNotification(aps: aps)
}
Add common cryptography
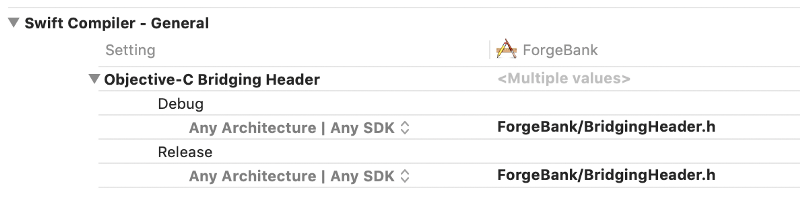
Access to iOS standard cryptography functions is needed, as registration and authentication flows involve encryption of a challenge using a shared secret. Since these functions aren’t available by default in Swift, we need to set up a bridging header to use the objective C methods.
Create/add a new header file (.h) to your project with the following code:
//
//  BridgingHeader.h
//  ForgeBank
//

#ifndef BridgingHeader_h
#define BridgingHeader_h

#import <CommonCrypto/CommonHMAC.h>


#endif /* BridgingHeader_h */
In your projects settings, go to Build Settings > Swift Compiler > General, and add your bridging header:
Include support for JWT and JSON objects
Add the following CocoaPods to your project Podfile (use pod init to create a new Podfile if needed) to make handling JWT and JSON objects easier:

Run pod install to install them. Because you’re using CocoaPods, you’ll need to open your XCode project by selecting the .xcworkspace file rather than the .xcodeproj file from now on.
Add support for the registration flow
Assuming your app has a suitable ViewController available, add support to use the device’s camera, and a delegate function to handle QR recognition:
import AVFoundation
@available(iOS 10.0, *)
class ViewController: UIViewController, AVCaptureMetadataOutputObjectsDelegate {
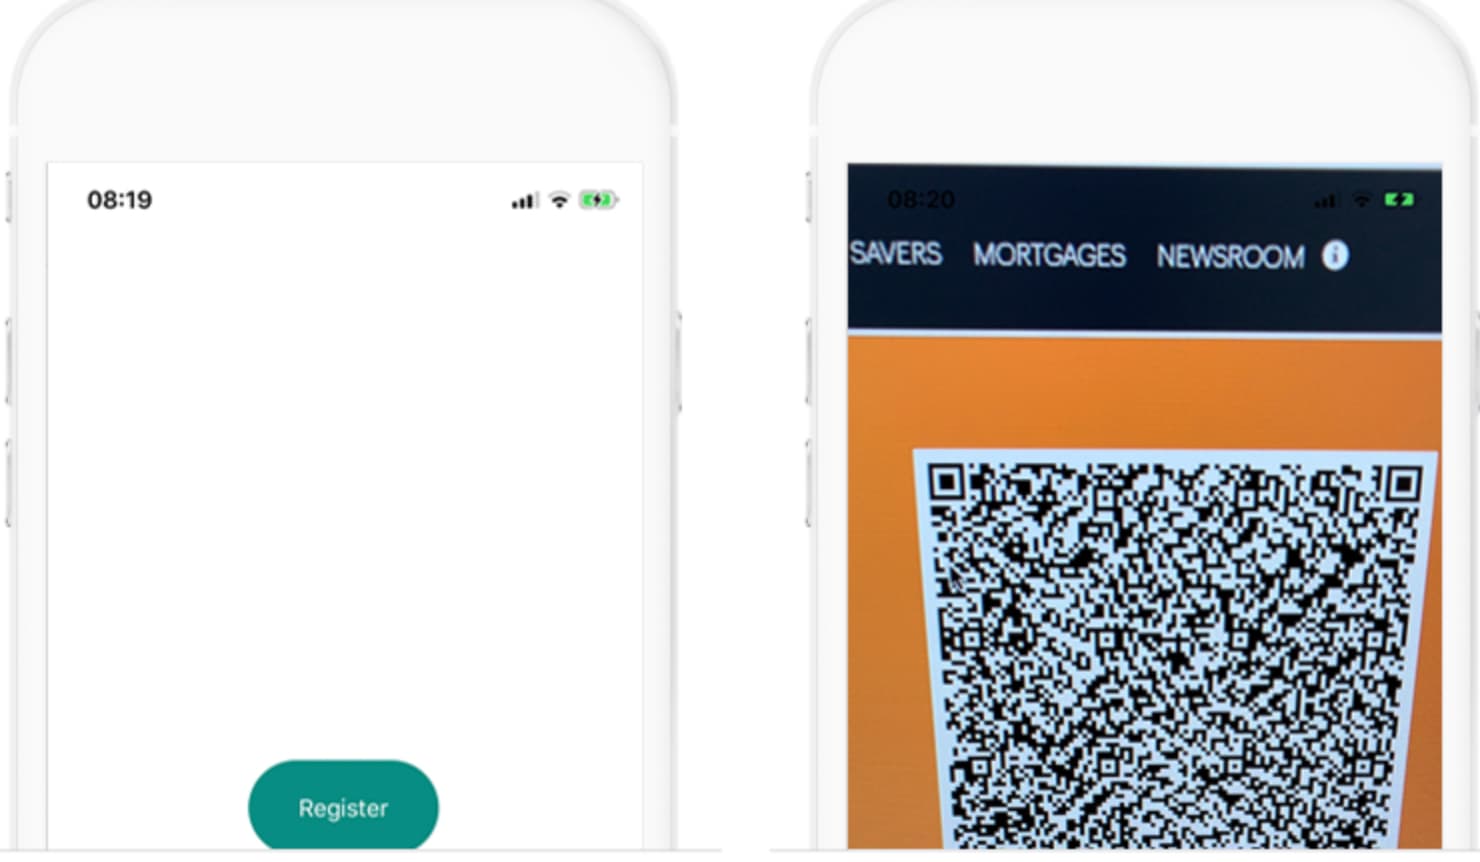
...Add a simple Register button to your storyboard, and wire it to a function like this:
var captureSession: AVCaptureSession!
var previewLayer: AVCaptureVideoPreviewLayer!

// Function to handle users wish to scan QR and register with an AM service
@IBAction func registerButton(_ sender: Any) {
    captureSession = AVCaptureSession()

    guard let videoCaptureDevice = AVCaptureDevice.default(for: .video) else { return }
    let videoInput: AVCaptureDeviceInput

    do {
        videoInput = try AVCaptureDeviceInput(device: videoCaptureDevice)
    } catch {
        return
    }

    if (captureSession.canAddInput(videoInput)) {
        captureSession.addInput(videoInput)
    } else {
        print("Failued to capture video input")
        return
    }

    let metadataOutput = AVCaptureMetadataOutput()

    if (captureSession.canAddOutput(metadataOutput)) {
        captureSession.addOutput(metadataOutput)

        metadataOutput.setMetadataObjectsDelegate(self, queue: DispatchQueue.main)
        metadataOutput.metadataObjectTypes = [.qr]
    } else {
        print("Failed to capture video input")
        return
    }

    previewLayer = AVCaptureVideoPreviewLayer(session: captureSession)
    previewLayer.frame = view.layer.bounds
    previewLayer.videoGravity = .resizeAspectFill
    view.layer.addSublayer(previewLayer)

    captureSession.startRunning()
}
This sets up video capture, displays a preview of the capture, and most importantly, tells iOS to start searching for the QR code.
Add the delegate function, which will be called by the AV system to handle a found QR code. It halts the video preview and calls the FRPushUtils.registerWithQRCode function with arguments containing the found QR code, the device’s SNS device ID, and some success/failure handlers to feed back the result to the user. Alert the user with the result:
// Called when an SNS notification is received
func application(
    _ application: UIApplication,
    didReceiveRemoteNotification userInfo: [AnyHashable: Any],
    fetchCompletionHandler completionHandler:
    @escaping (UIBackgroundFetchResult) -> Void
    ) {

    print("userInfo: \(userInfo)")

    // Check message detail can be decoded
    guard let aps = userInfo["aps"] as? [String: AnyObject] else {
        completionHandler(.failed)
        return
    }

    // Call function to allow user to view and approve/reject request
    let mainController:ViewController = self.window?.rootViewController as! ViewController;
    mainController.handleNotification(aps: aps)
}
Add the following code to handle an incoming notification, prompt the user for an accept/reject response, and send the response back to AM:
func registrationSuccessHandler() {
    print("Registration successful")
    let ac = UIAlertController(title: "Registration Successful", message: "Your device is now registered for authentication.", preferredStyle: .alert)
    ac.addAction(UIAlertAction(title: "OK", style: .default))
    present(ac, animated: true)
    captureSession = nil
    DispatchQueue.main.async(execute: {
        self.previewLayer.removeFromSuperlayer()
    });

}


func registrationFailureHandler() {
    print("Registration failed")
    let ac = UIAlertController(title: "Registration Failed", message: "Something went wrong.", preferredStyle: .alert)
    ac.addAction(UIAlertAction(title: "OK", style: .default))
    present(ac, animated: true)
    captureSession = nil
    DispatchQueue.main.async(execute: {
        self.previewLayer.removeFromSuperlayer()
    });
}
Get permission to use the camera
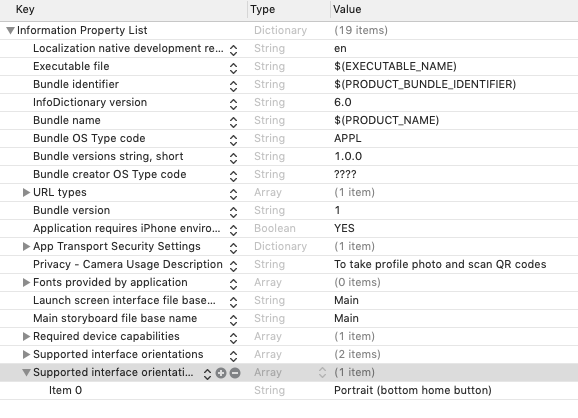
Permission from the user is needed to access the device’s camera. Browse the project’s Info.plist resource and add a new key for Privacy — Camera Usage Description. Set it to something descriptive like “To take profile photo and scan QR codes”:
Compile and enjoy your mobile phone app
Compile and run the app. You should have the basics of an app to handle registration and authentication flows using AM push notification. Besides making your app look pretty, you might want to consider the following enhancements:
-
In its current form, the app can only handle registration to a single AM deployment for a single user ID. That’s probably fine for the most use cases. You might want to extend it to become a generic authenticator (similar to the ForgeRock Authenticator) for multiple different accounts on different AM services.
-
Because the app doesn’t use any local security for the flows, you might want to add FaceID, TouchID, or a PIN, before letting the user approve or deny an authentication request.
-
The app doesn’t record a log of pending requests, or previously handled requests. Generally, authentication notifications have a short timeout period (defined by AM) so there’s little benefit in letting them queue up on the client. You could handle this if the use case warranted it. It might be useful to store a log of previous requests, so the user can see missed, approved, or rejected authentications.
In the next article, you’ll learn how to use an adapted version of the default AM push authentication node to send geolocation data.
Other Articles by This Author
Summary Instructions for extending push notifications to include geolocation data. In this article, I’ll show you how to extend push notifications to include geolocation data. Everyone loves getting postcards and letters, but everyone really loves getting parcels and goodies. It’s all about the payload! In a previous article, I talked about adding support for ForgeRock push notifications to your own IOS apps. By default, the ForgeRock push service only supports sending authentication requests…