How to re-send OTPs in PingOne Advanced Identity Cloud (AIC)
Author: |
Darinder Shokar |
Created at: |
Aug 2024 |
Updated at: |
Aug 2024 |
By Darinder Shokar
Originally posted on
https://medium.com/@darinder.shokar
Introduction
Some customer have the use case where they wish to give customers the option to re-send One Time Passcodes (OTPs). AIC can support this out-of-the-box, but only after the OTP has been validated or an incorrect OTP has been entered.
The power of PingOne AIC is it’s flexibility and ability to meet specific customer use cases easily through simple extension. In this case we’ll address this use case by creating a single Scripted Decision Node which incorporates OTP re-send functionality and for fun handles situations where a blank or expired OTP is entered.
Configuration Steps
The following steps will configure a sample journey which generates a HOTP and then allows the user to either verify the OTP or re-send the OTP.
The journey works with the Hosted Login UI, but crucially also a custom
UI where the Stage element can be used to present the callbacks
returned by this new node as desired. For example display re-send after
a 10 second delay, display verify and re-send side by side as two
buttons, etc.
The code repository is here.
Step 1 — Import the logging library
Library functions are a fantastic addition to PingOne AIC, which allow code re-use. One great example of this is logging. Instead of writing logging code again and again across the platform, you can write the logic once and import for re-use.
-
From the PingOne Platform UI, navigate to
Scriptson the left panel >Auth Scripts> BlueNew Script>Other>Library -
Enter a
Nameofds-node-logger-libandDescriptionofLibrary function to handle node loggingand in the JavaScript code block add the code from here -
Hit Save and Close
Example configuration:
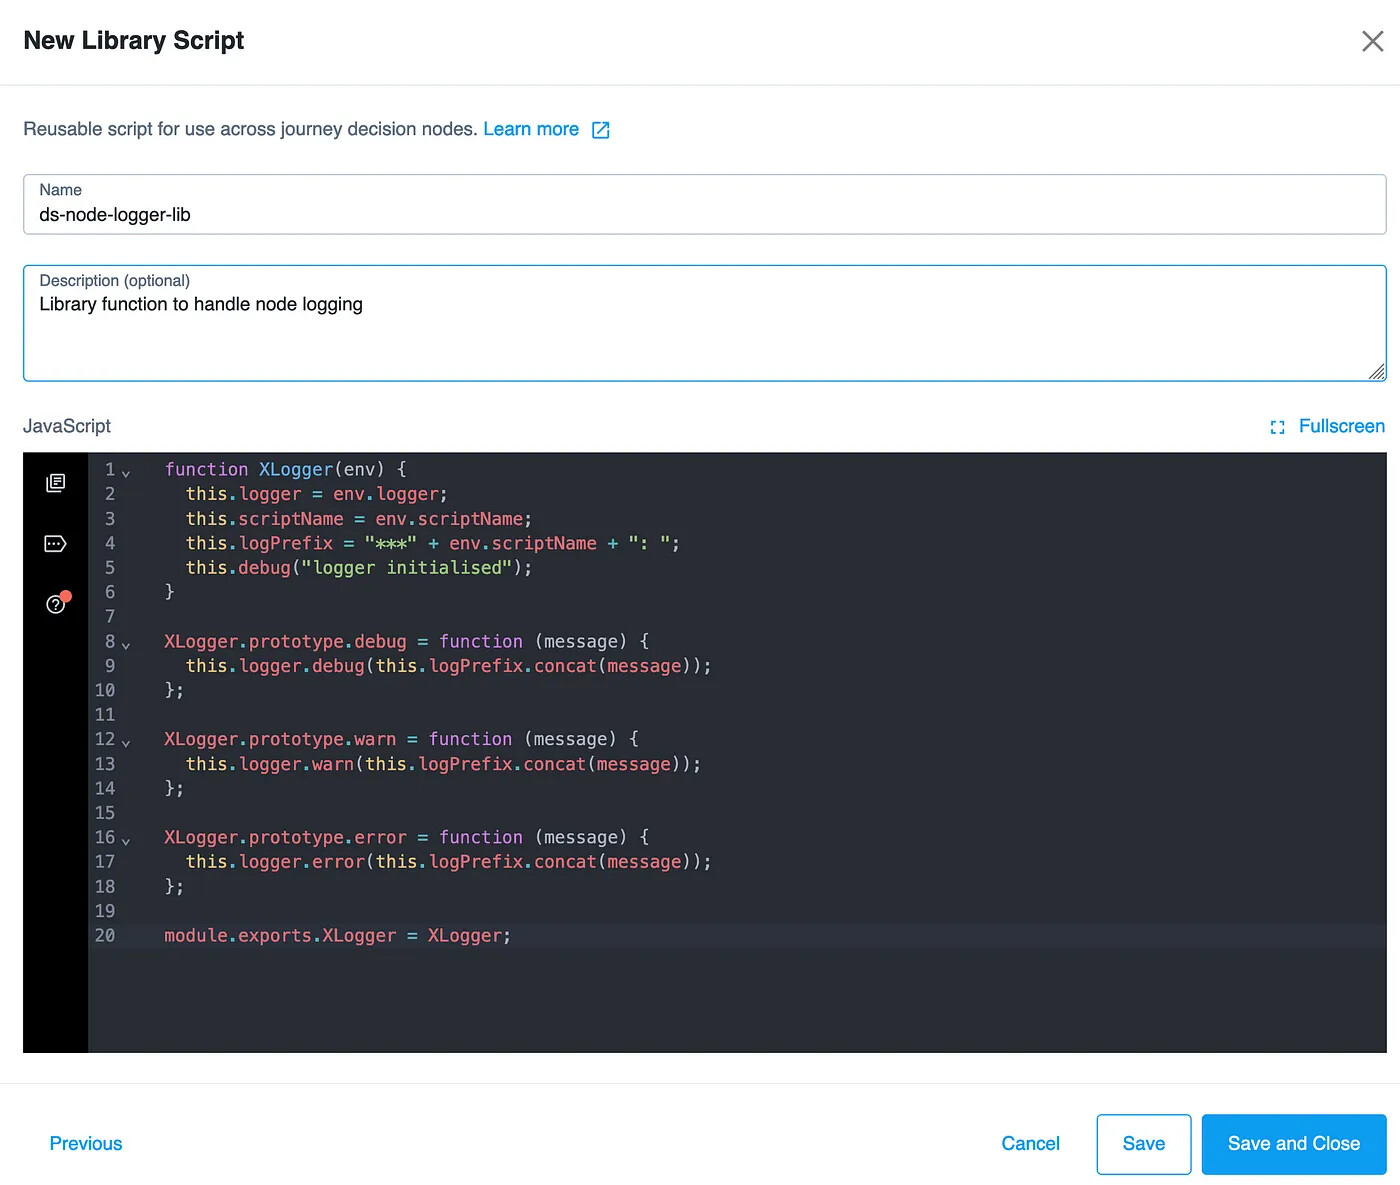
Library Function Configuration Example
Step 2— Import the sample journey
Now we’re ready to import the sample journey.
Note for ease of demonstration and testing purposes this journey displays the OTP in a text window to the user. For real use, OTPs MUST be delivered via a secure channel (e.g. email, SMS, Voice, etc).**
-
Download the journey JSON export file to your local machine from here
-
From the platform UI, navigate to
Journeyson the left panel >Import> Browse for the journey JSON file > HitNext>Import -
In the journey list select
HOTPWithRetryand copy thePreview URL -
From a different browser / private browser window navigate to this URL to test functionality
The example HOTPWithRetry journey will look like this
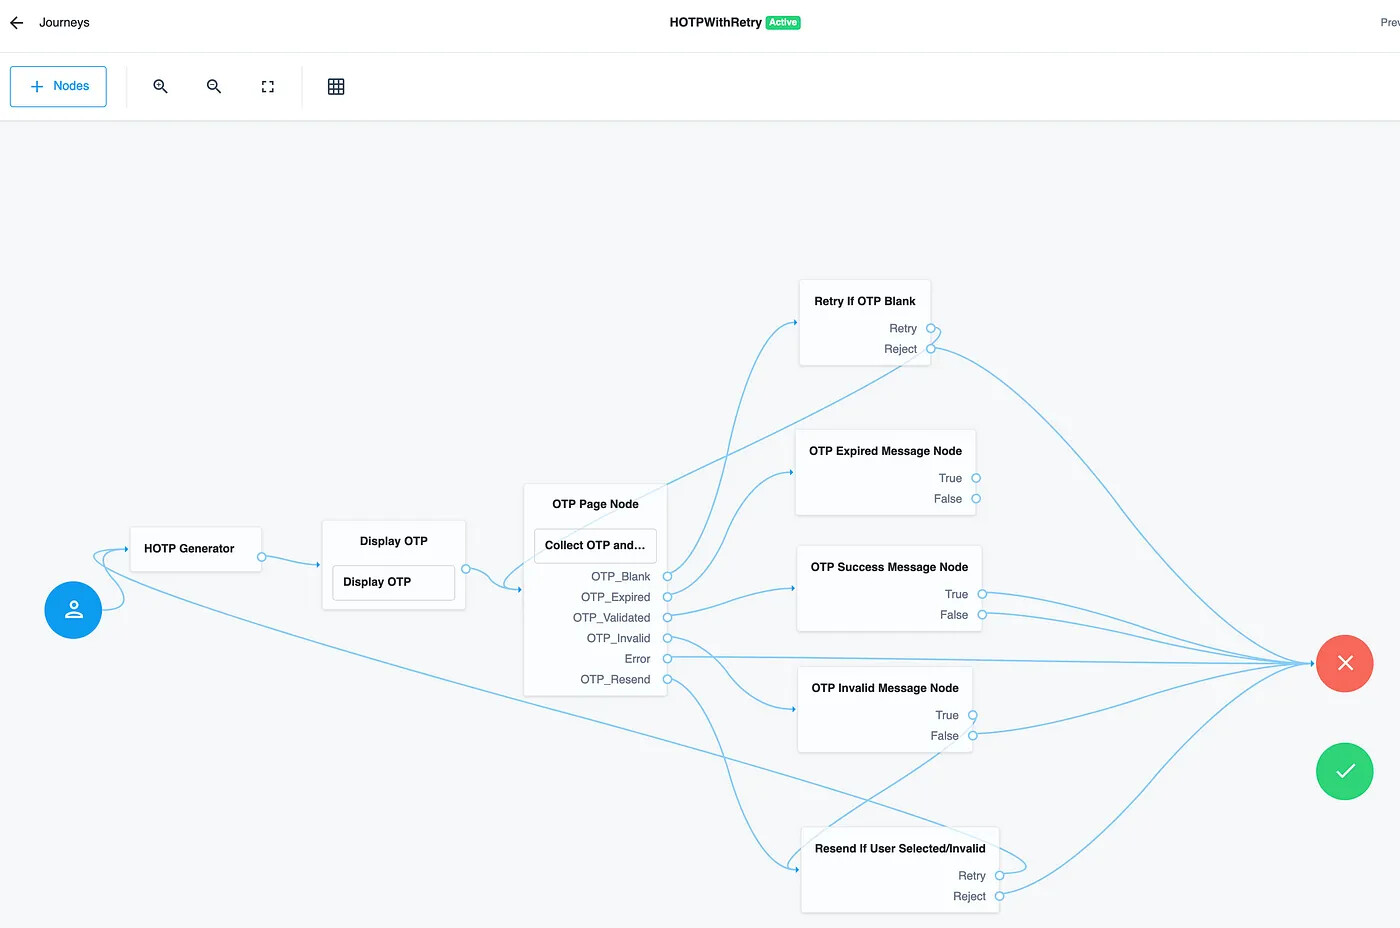
HOTPWithRetry Journey
Journey Breakdown
This section describes the journey flow:
-
The journey first generates a secure HOTP before displaying it the user. As discussed earlier this is for demonstration purposes only; for real use the display
OTP must be replaced by secure delivery of the OTP via email for example. -
The new node with the re-send functionality is then invoked from within a Page Node. The Page Node is important as it allows a custom UI to interpret the callbacks returned by this node and present the data as desired via the
Stageelement -
Based on if the user decides to verify or re-send the OTP, different logic is invoked. For verify the OTP is checked if blank, expired, matches and for re-send a loop is invoked to generate a new OTP and resend.
-
For testing purposes each outcome connects to a message node to display the end-result to the user.