Use case: Allow end users to update their business profile (marketing
Author: |
Lucy Billington |
Created at: |
Nov 2022 |
Updated at: |
Dec 2022 |
Use case overview
Putting users in control of their business profile attributes, such as communication email preferences, helps you to build trust with your customers.
In ForgeRock Identity Cloud, you can configure which business profile attributes customers can see and which ones they can update. For example, users can opt-in or opt-out of communications such as news and updates, special offers, and loyalty program updates. Email addresses of users who have opted in will be automatically synchronized to a target system such as a marketing platform or loyalty program. Email communication preferences can be set and controlled with a synchronization rule to a target system.
If required, you can force a particular communication preference, such as account security alerts, to always be “true” (enabled) so that the user can’t opt out of receiving these alerts.
Steps to achieve this use case
This use case demonstrates how to configure Identity Cloud to enable customer preferences for receiving the following communication emails:
-
news and updates
-
special offers and services
-
loyalty program updates
-
account security alerts
In this use case, the preferences data for each communication type is synced to a managed object that stores a list of email addresses of users who have opted in. Account security alerts are configured so that the user’s email address is always synced to the list, regardless of user preference.
This use case can be achieved in four simple steps:
-
Update the preferences property in the alpha_user managed object
-
Create managed objects for email communication subscribers
-
Create mappings from alpha_user to the target email lists
-
Enable preferences for end users (in the end user UI)
Update the preferences property in the alpha_user managed object
-
Sign in to the Identity Cloud admin UI using your admin tenant URL, in the format
https://<tenant-name>/am/XUI/?realm=/#/. -
Go to Native Consoles > Identity Management > Configure > Managed Objects.
-
Select the Alpha_user managed object.
-
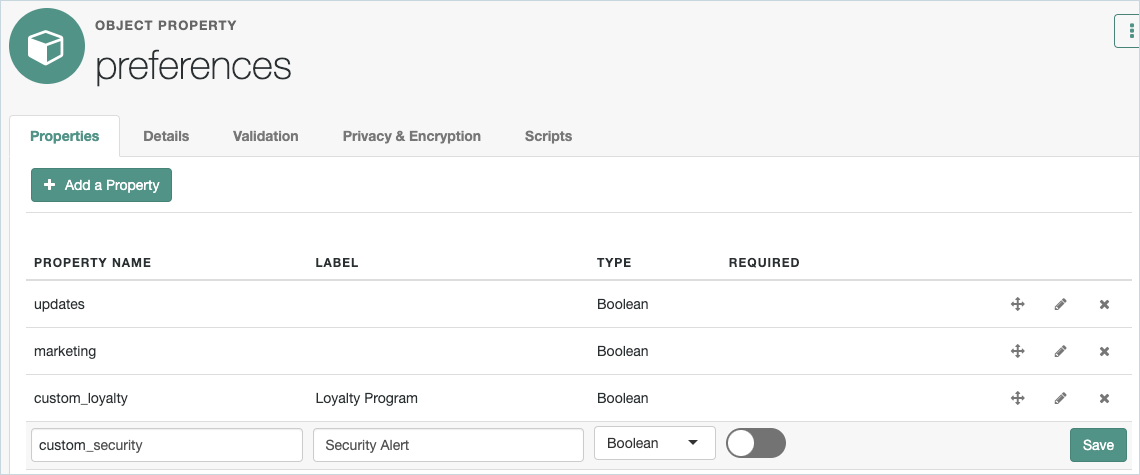
In the Properties tab, select the
preferencesproperty. -
Click Add a Property.
-
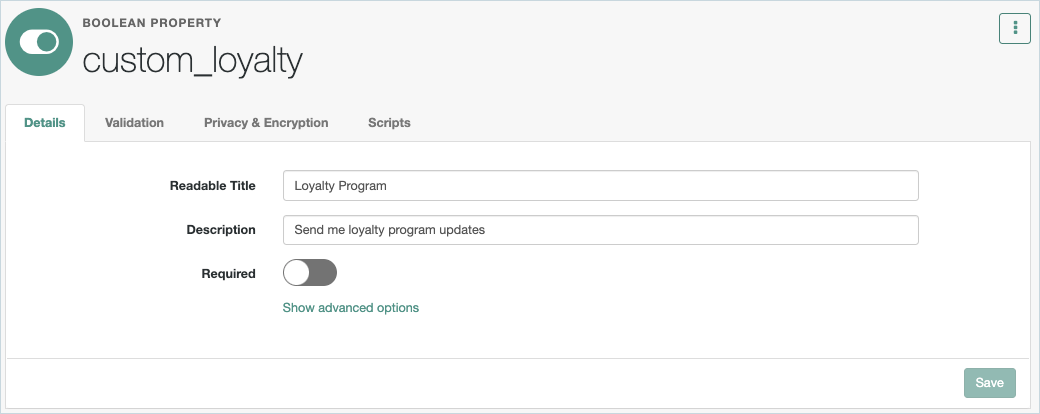
Enter the following details and click Save:
-
Property name: custom_loyalty
-
Label: Loyalty Program
-
Type: Boolean

-
-
Click the Edit icon and enter a description of “Send me loyalty program updates” and click Save.
-
Click Add a Property.
-
Enter the following details and click Save:
-
Property name: custom_security
-
Label: Security Alert
-
Type: Boolean
-
-
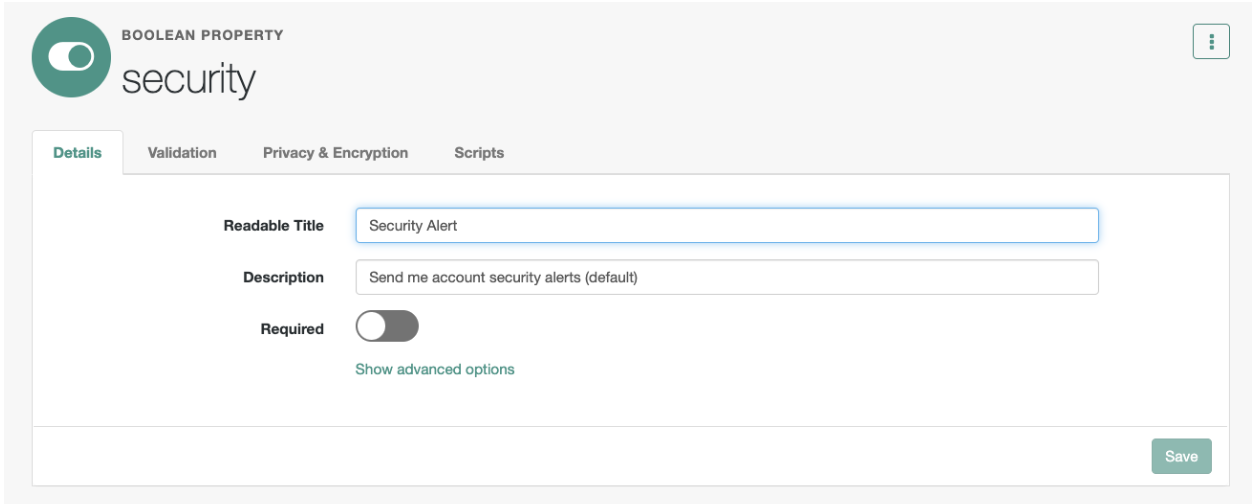
Click the Edit icon, enter a description of “Send me account security alerts (default)” and click Save.
-
In the Details tab, set the Security Alert to
true. This will set the security alert preference to “On” by default for all users.
-
Click Save.
-
Go to Managed Objects > alpha_user.
-
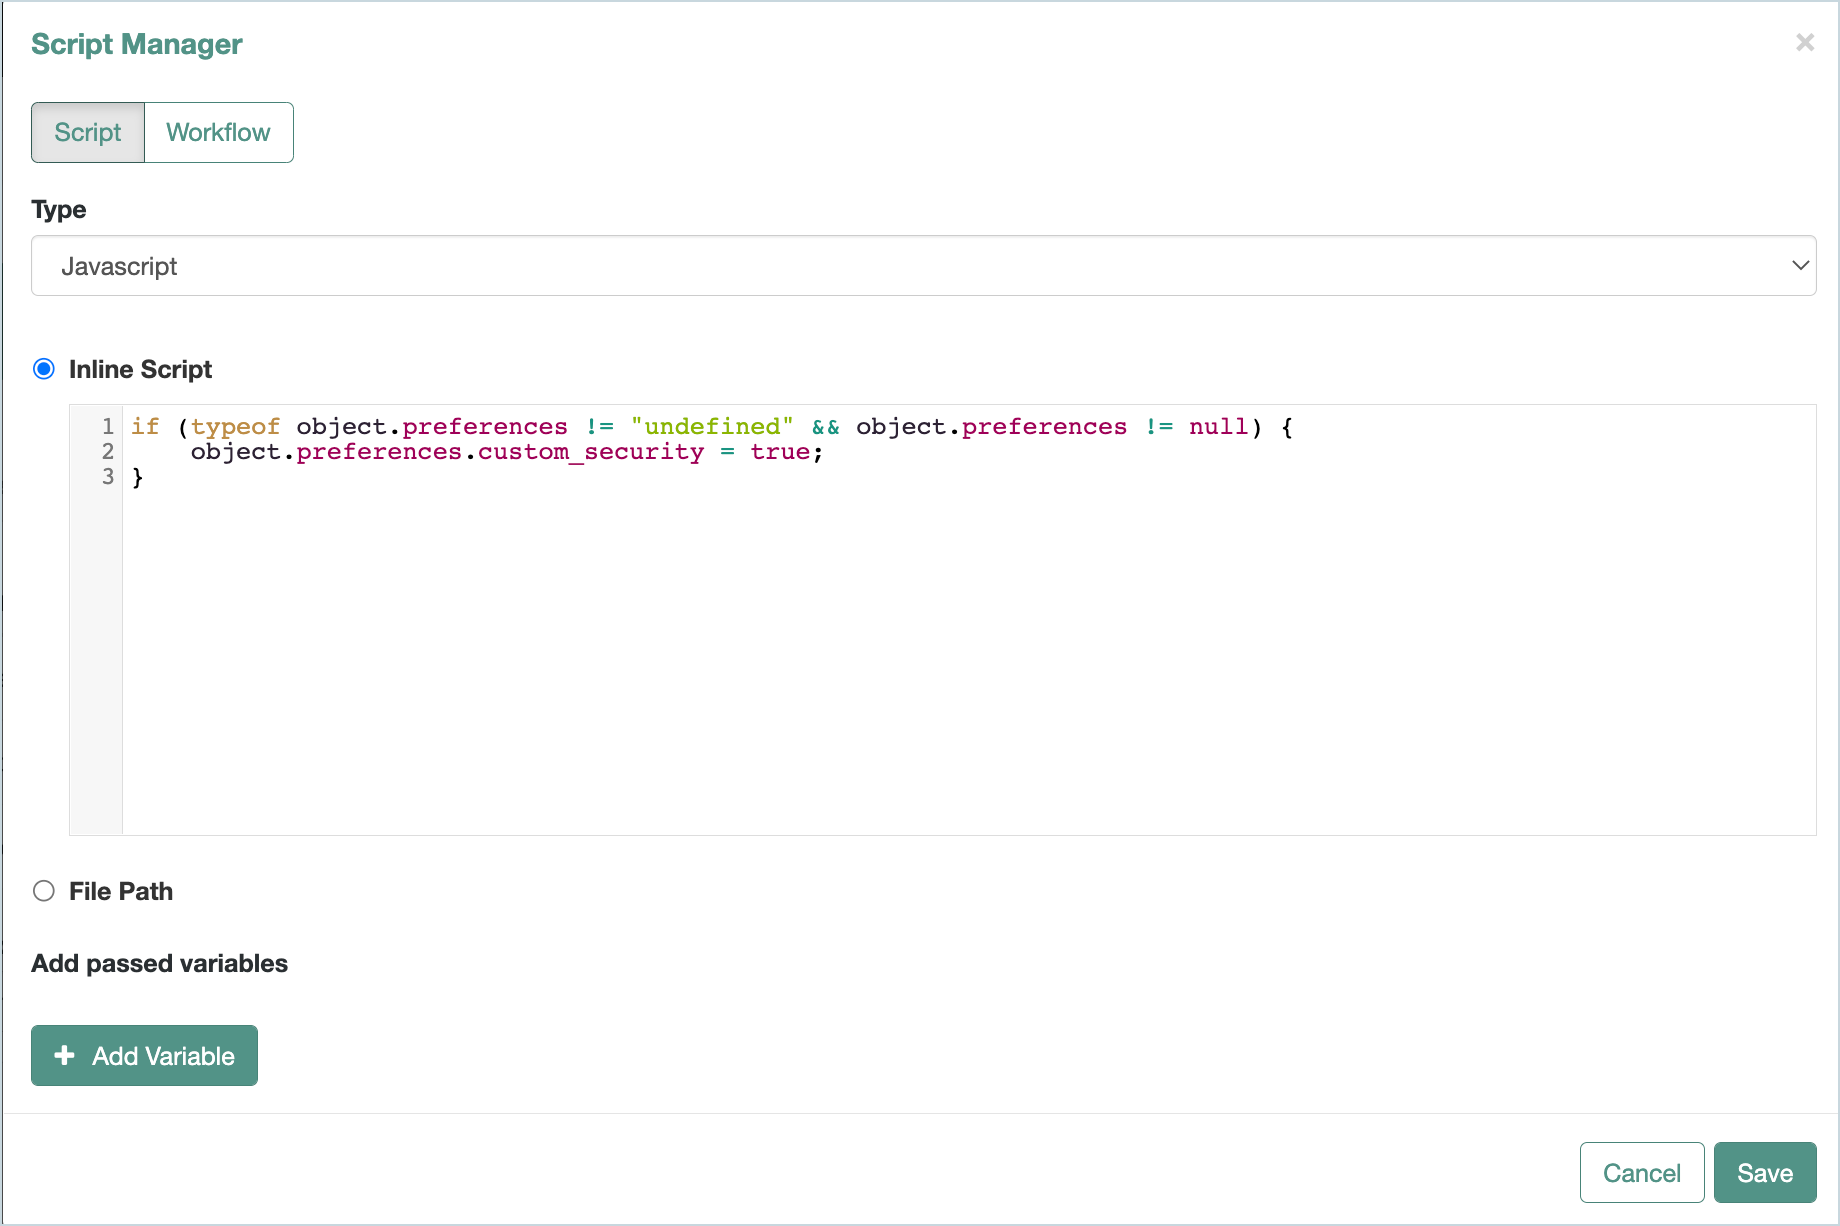
In the Scripts tab:
a. Select
onStore.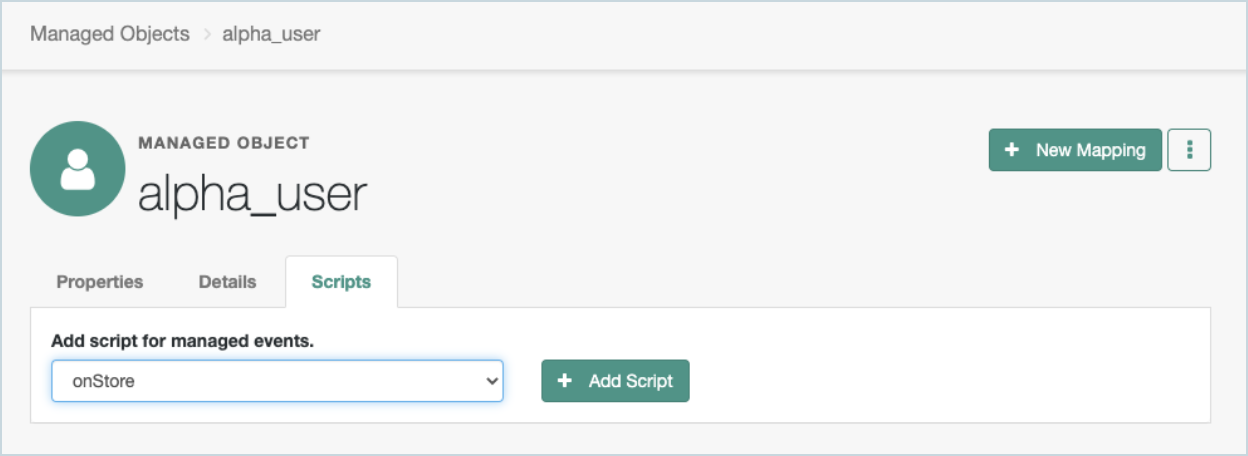
b. Click Add Script.
c. Add the following JavaScript+
if (typeof object.preferences != "undefined" && object.preferences != null) {
    object.preferences.custom_security = true;
}
+ d. Click Save.
+
Create managed objects for email communication subscribers
We’ll create a managed object for the target to store email addresses of subscribers to: email_offers (special offers and services), email_news (news and updates), email_loyalty (loyalty program updates), and email_security (account security alerts).
-
Go to Native Consoles > Identity Management > Configure > New Managed Object.
-
Enter the managed object details for the target to store the email communication subscribers for special offers and services. The managed object in this example is called
email_offers.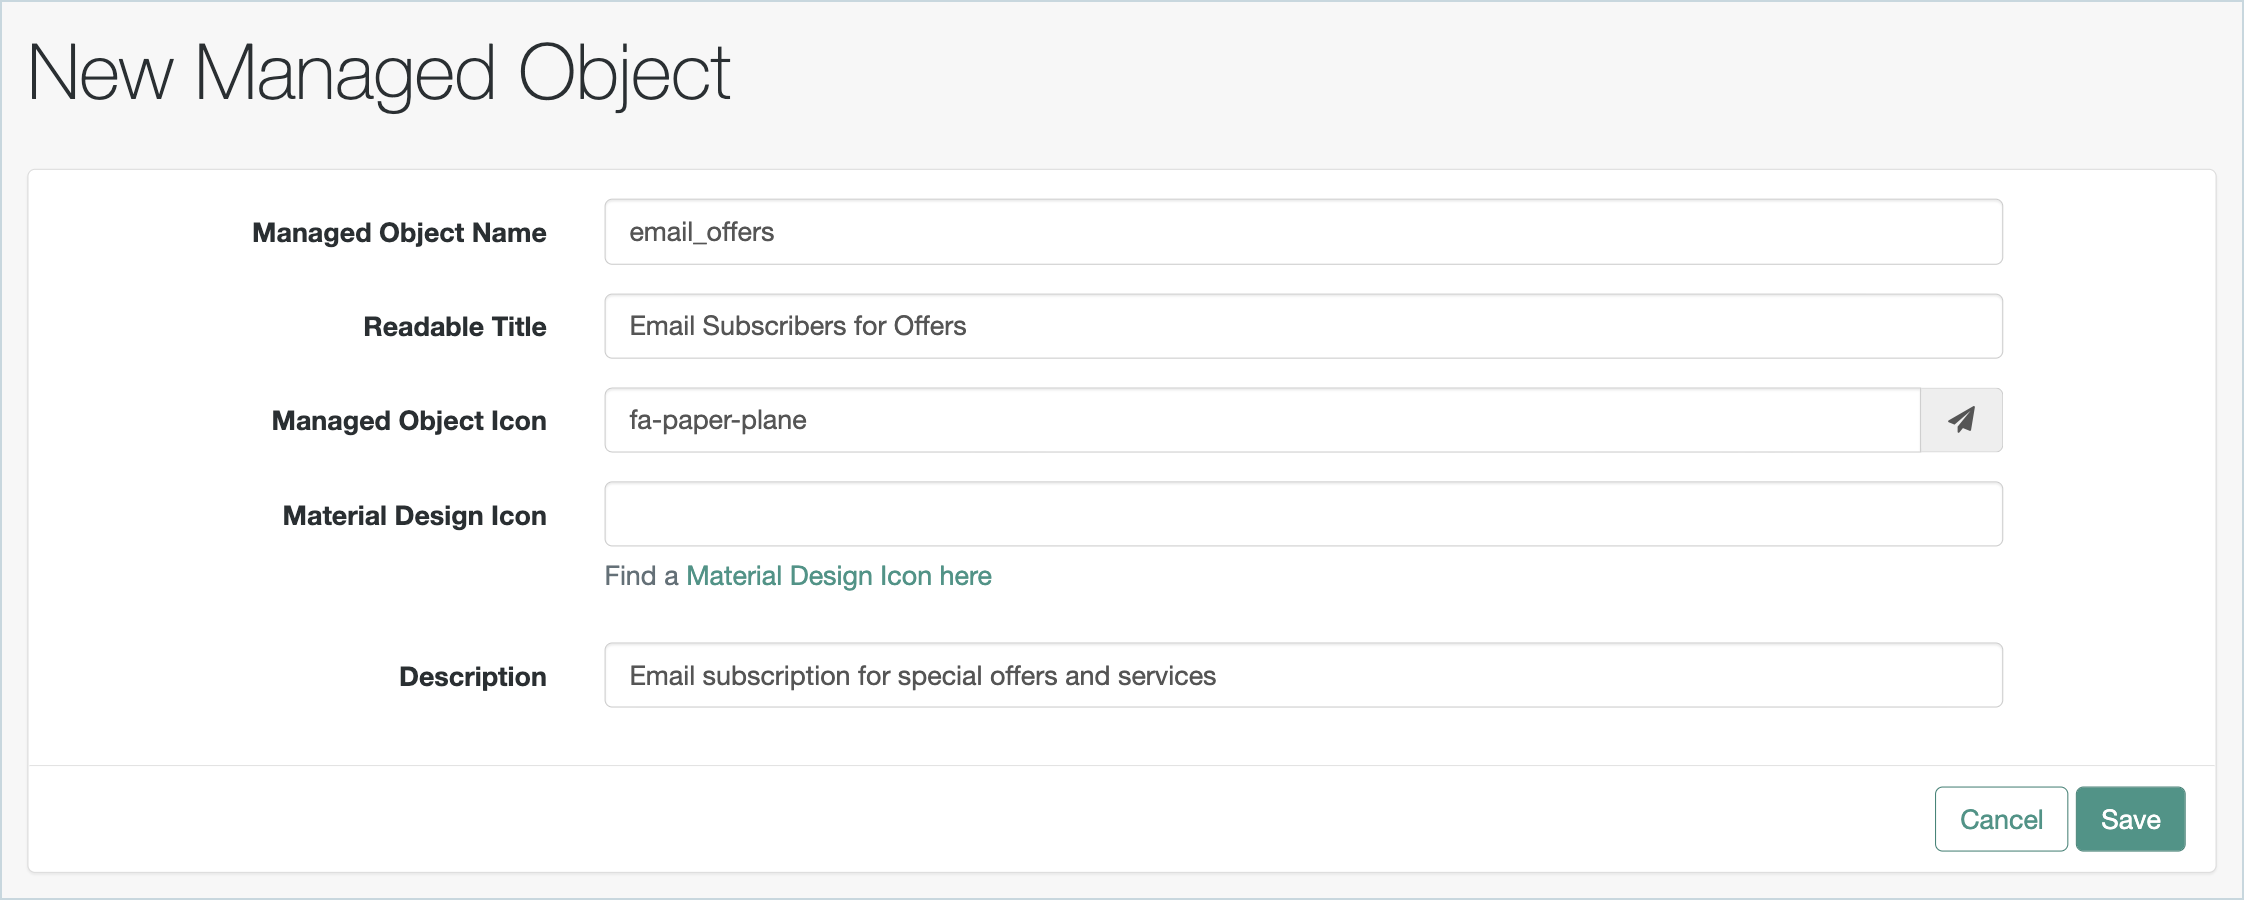
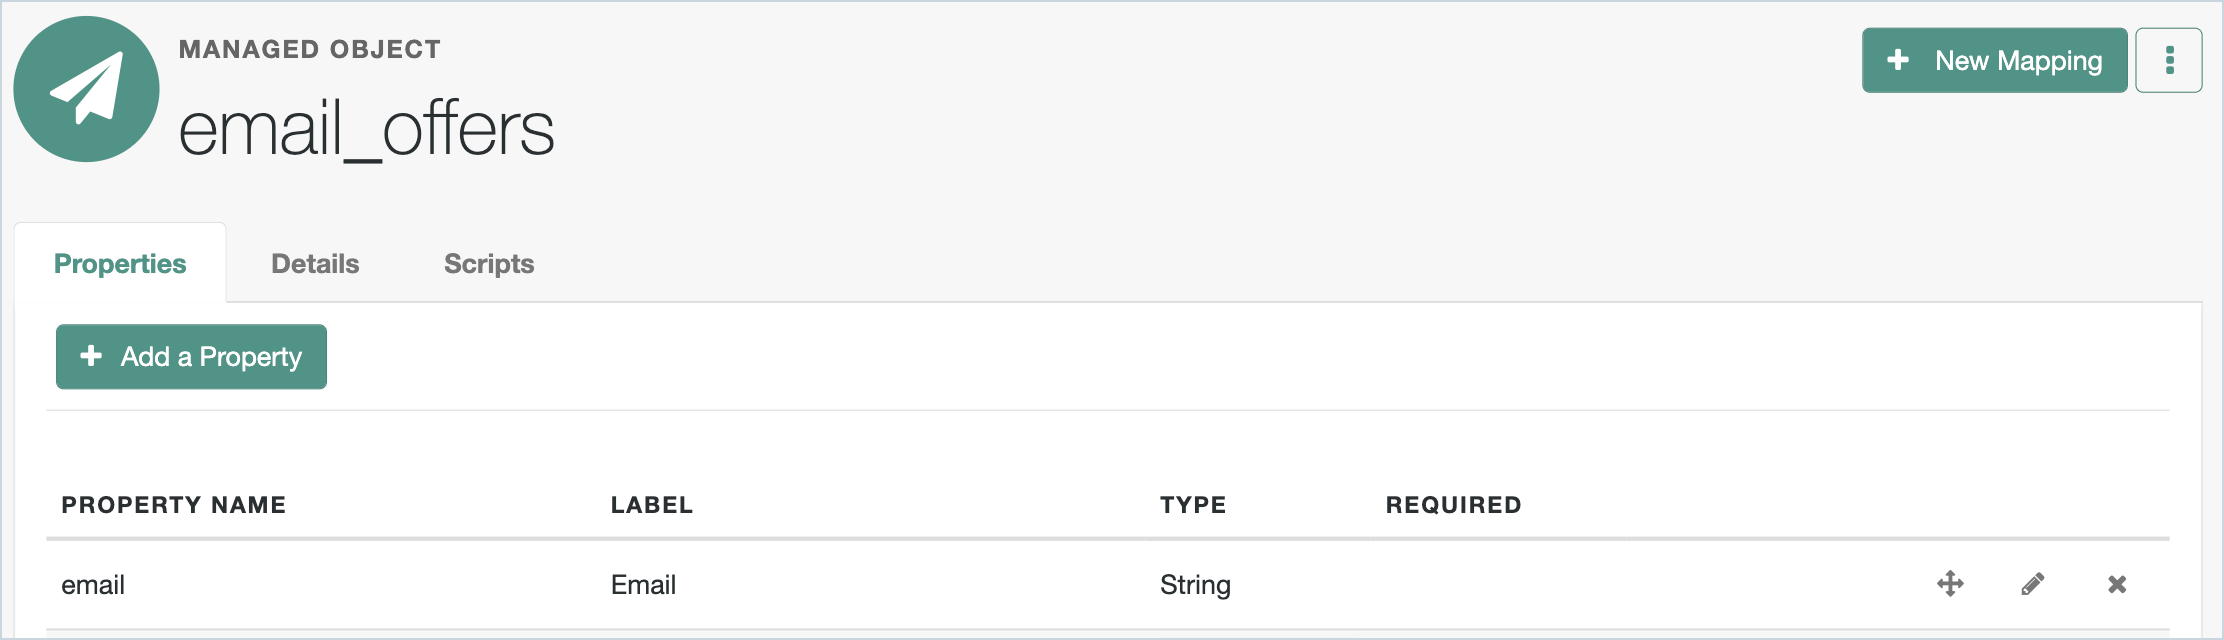
-
Add the email property to the email_offers managed object, with the String type.
-
Go to Configure > New Managed Object.
-
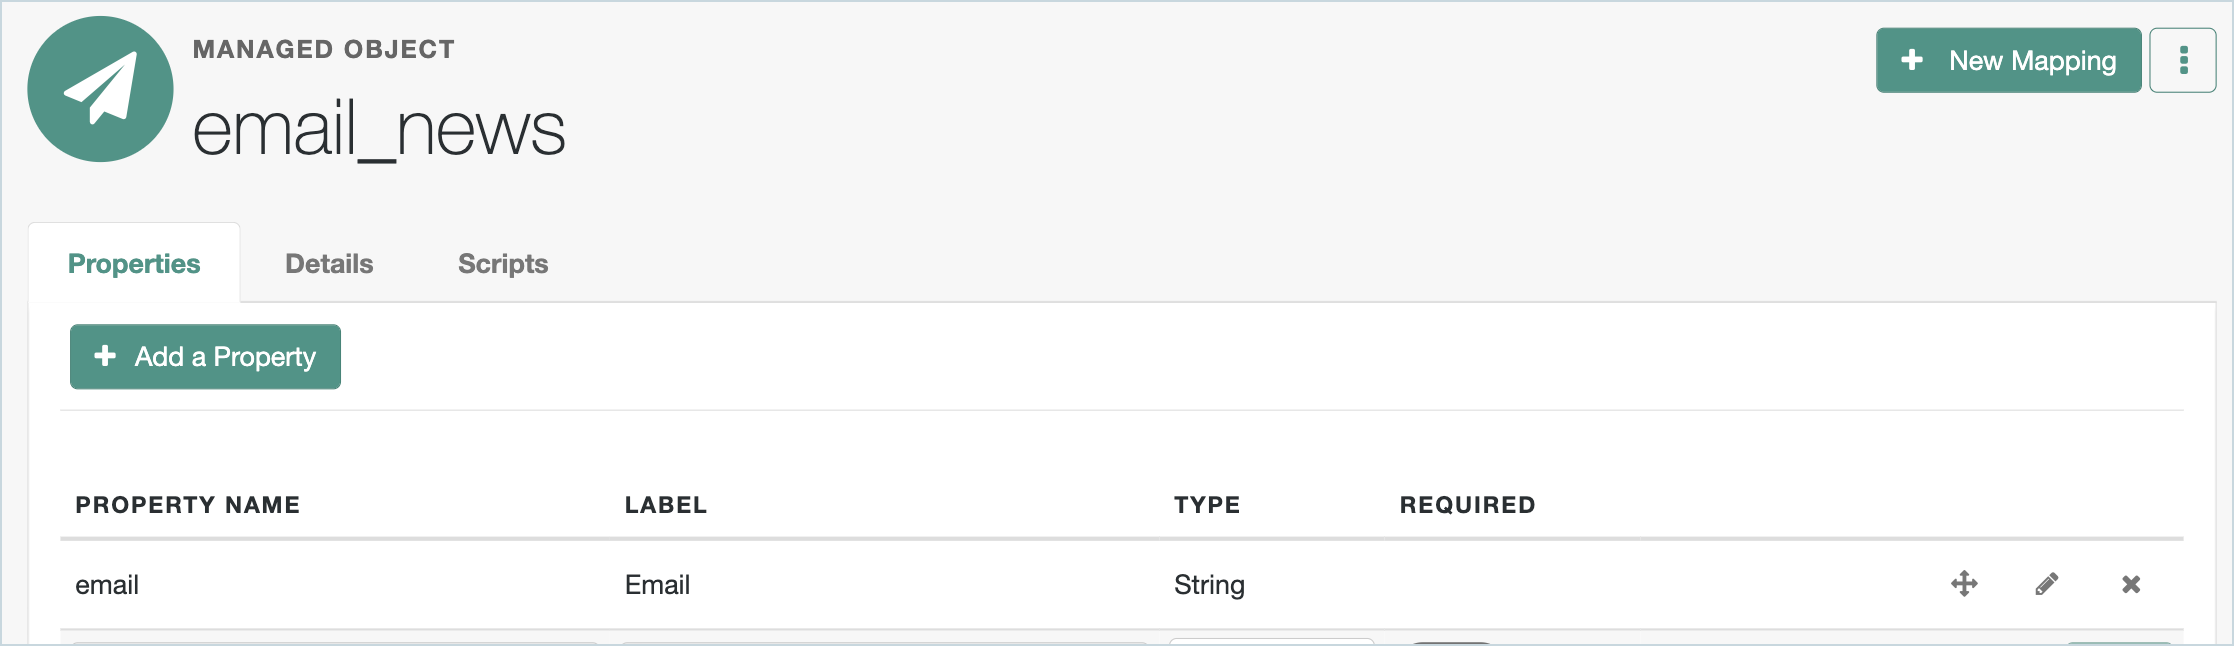
Enter the managed object details for the target to store the email notification subscribers for news and updates. The managed object in this example is called
email_news.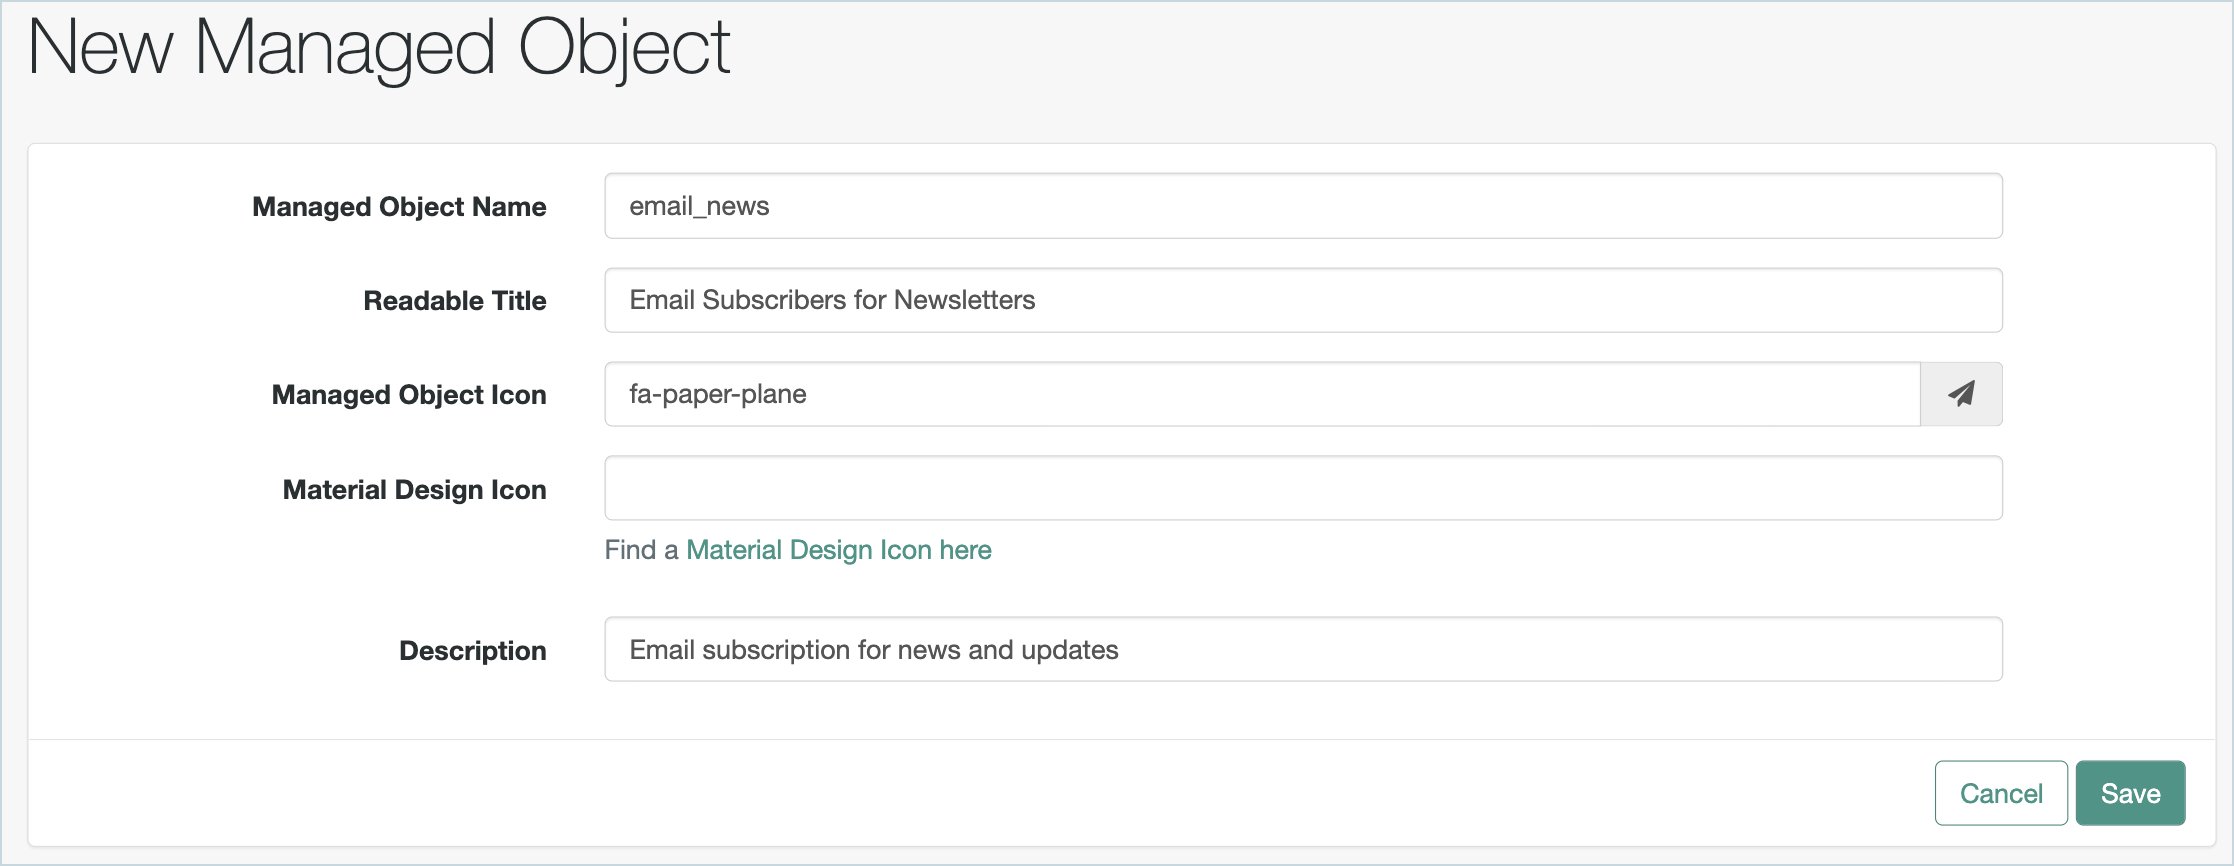
-
Add the email property to the email_news managed object, with the String type.
-
Go to Configure > New Managed Object.
-
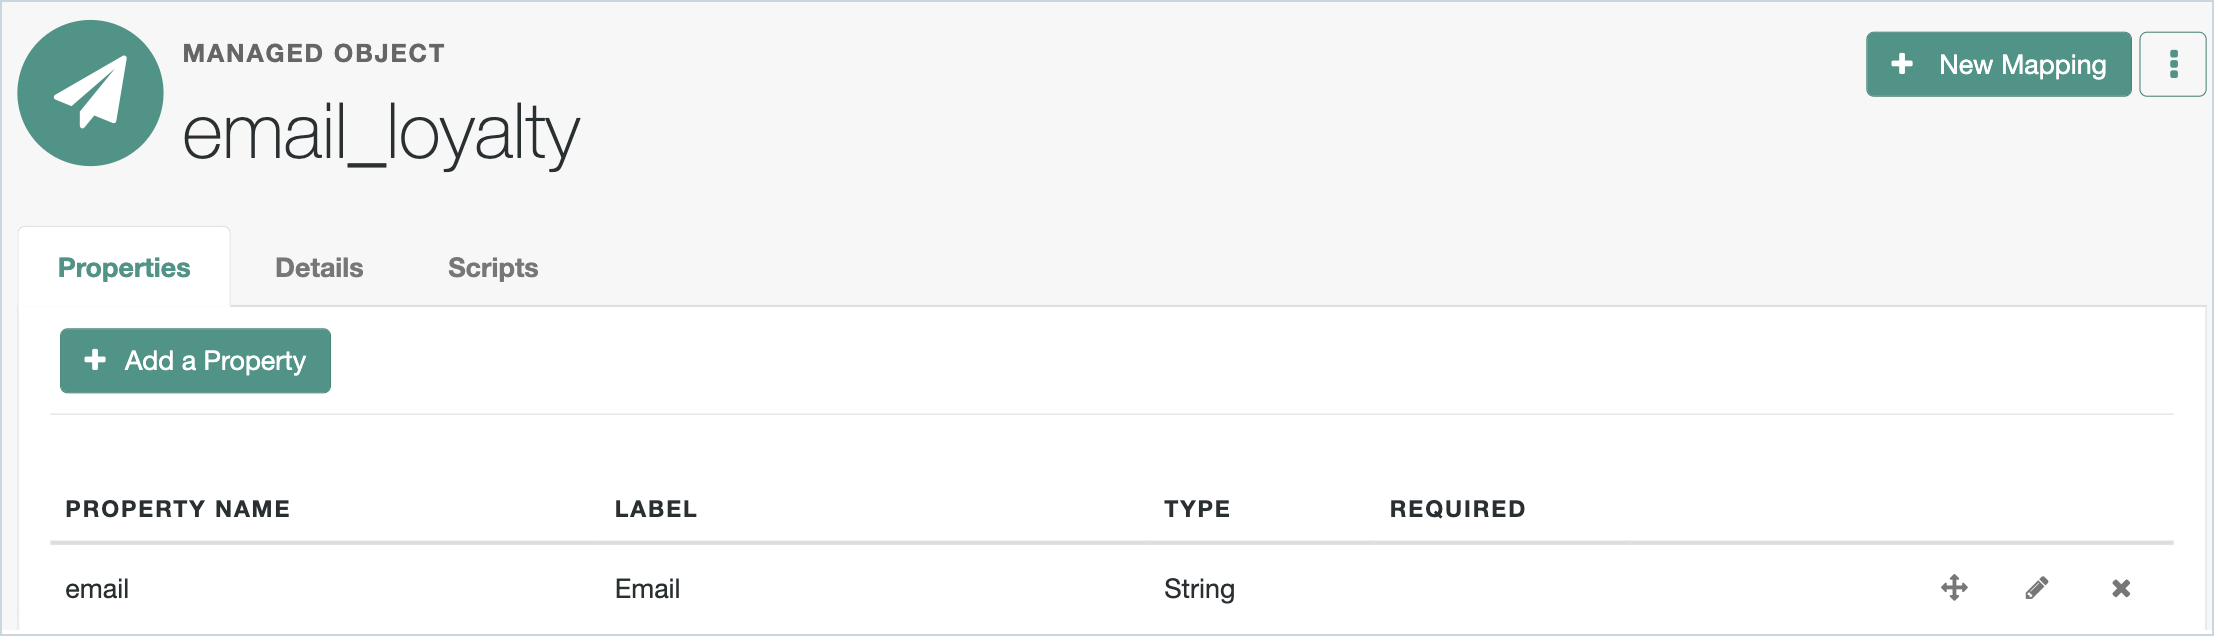
Enter the managed object details for the target to store the email notification subscribers for loyalty program updates (loyalty). The managed object in this example is called
email_loyalty.
-
Add the email property to the email_loyalty managed object, with the String type.
-
Go to Configure > New Managed Object.
-
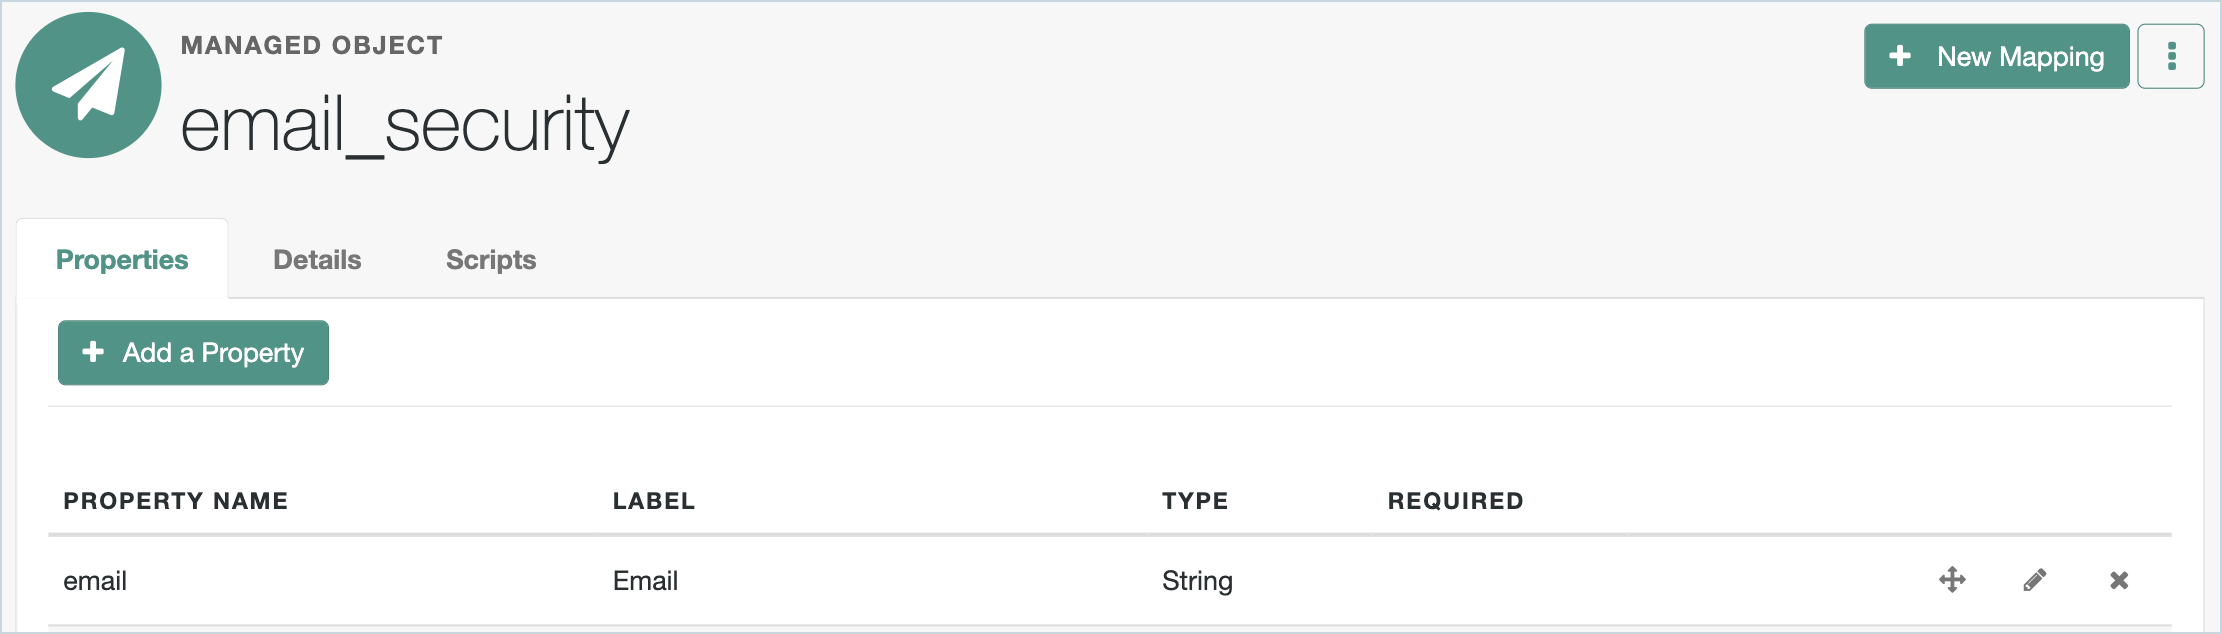
Enter the managed object details for the target to store the email notification subscribers for account security alerts and updates. The managed object in this example is called
email_security.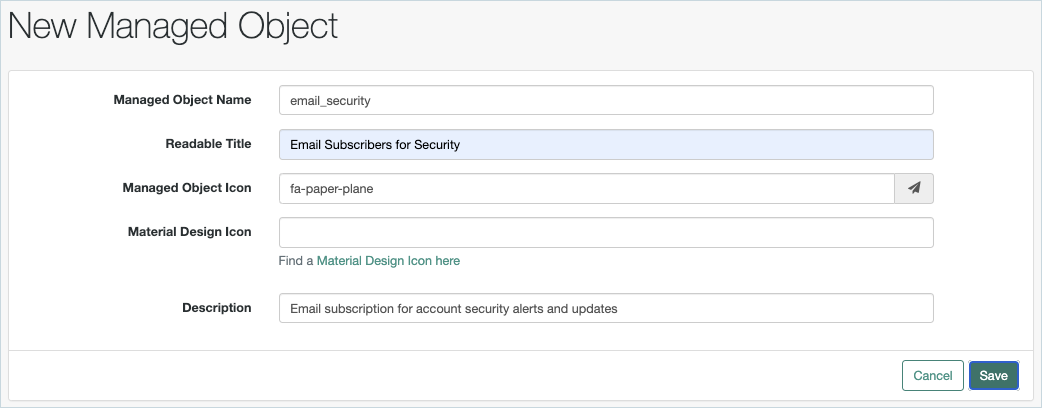
-
Add the email property to the email_security managed object, with the String type.
Create mappings from alpha_user to the target email lists
We’ll create mappings for email_offers, email_news, email_loyalty, and email_security.
Email_offers:
-
In the Identity Cloud admin UI, go to Native Consoles > Identity Management > Configure > Mappings and click New Mapping.
-
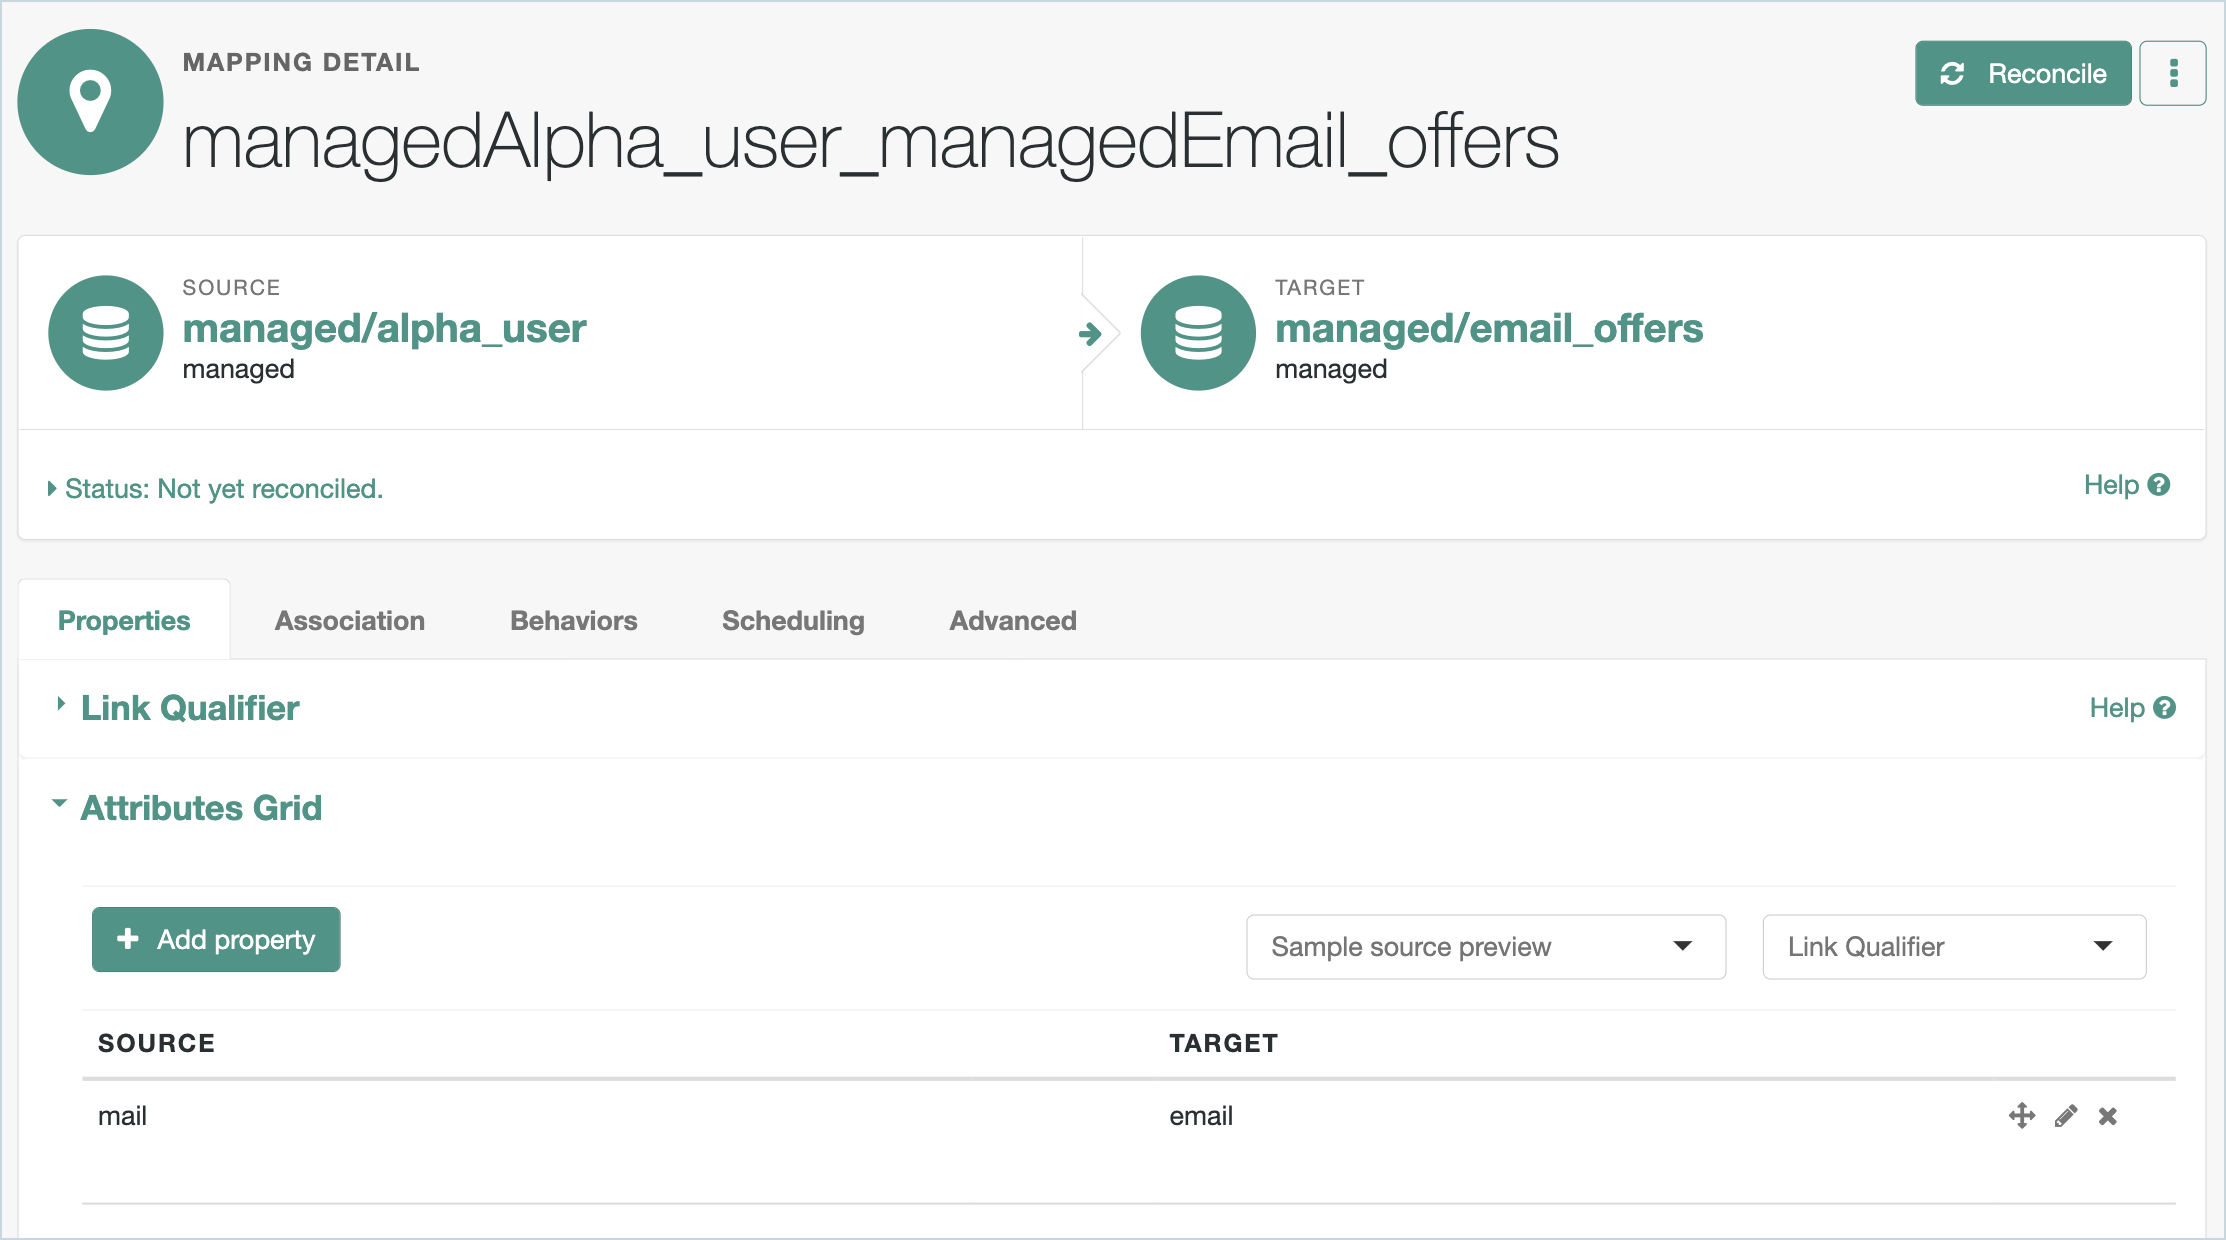
Create a mapping from alpha_user to email_offers.
-
In the Properties tab, add property mapping from the source to the target for the following: mail > email.
TIP: Use Quick Mapping for quick and easy drag-and-drop property mapping.
-
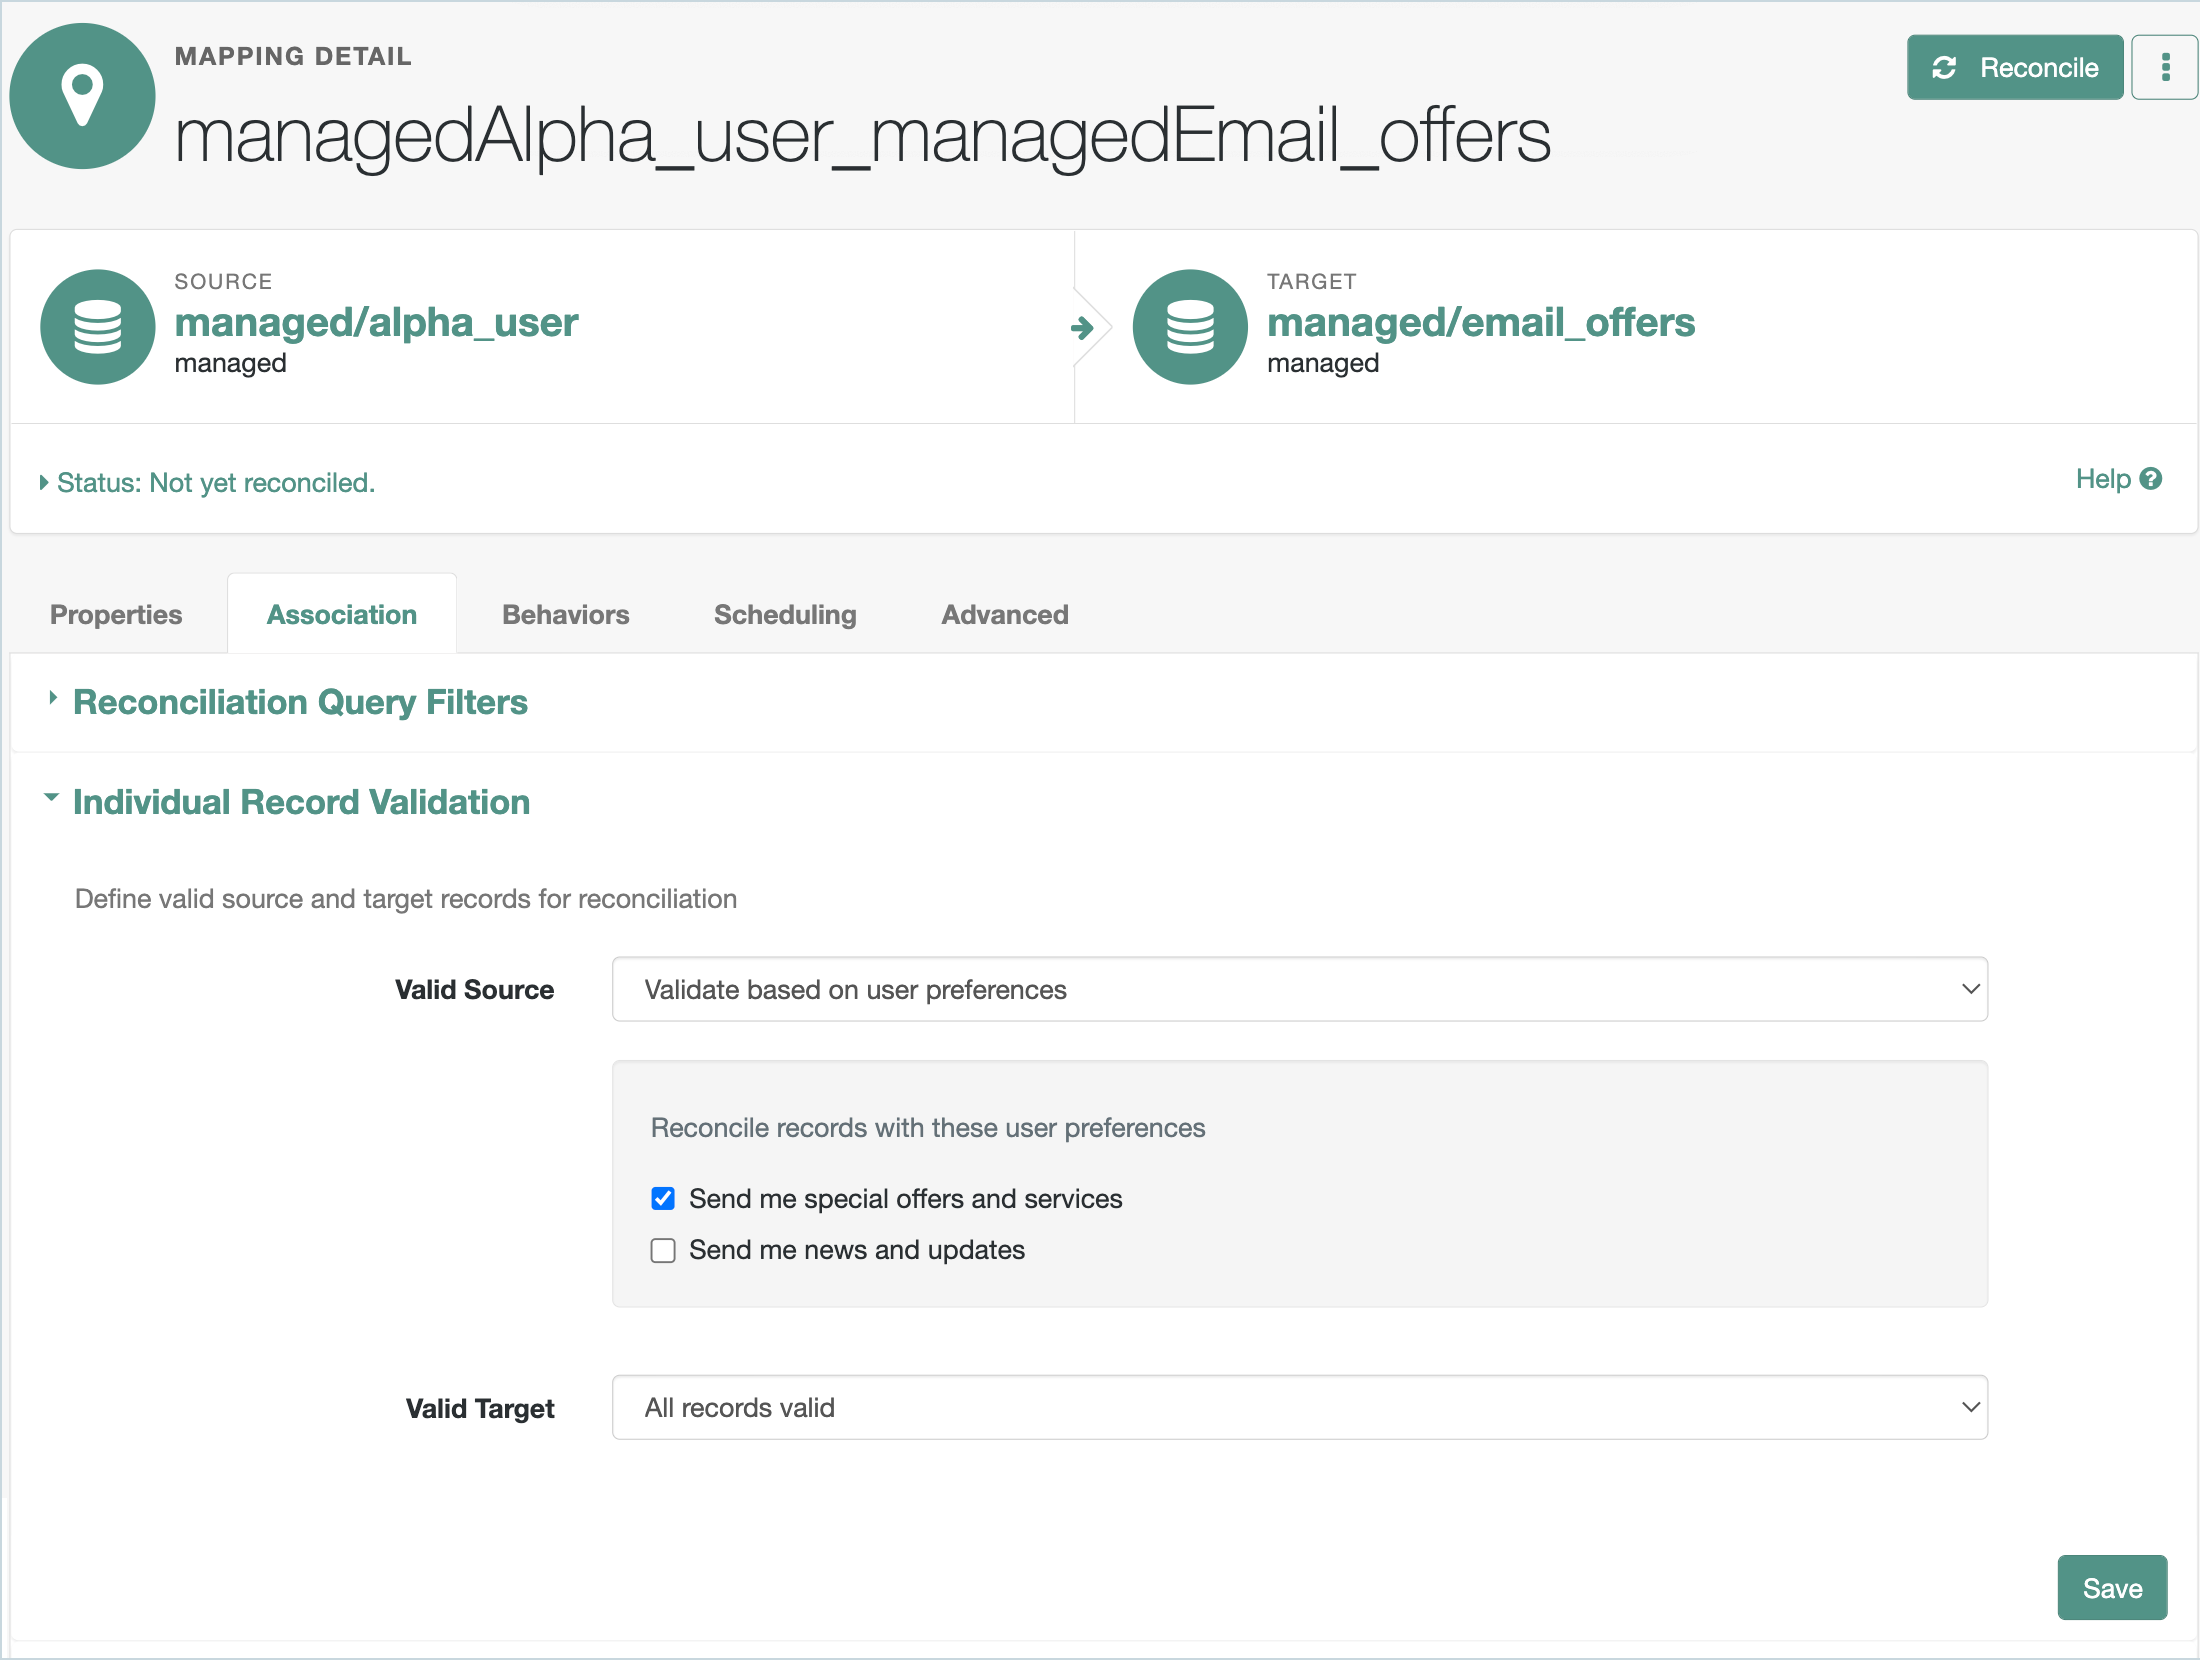
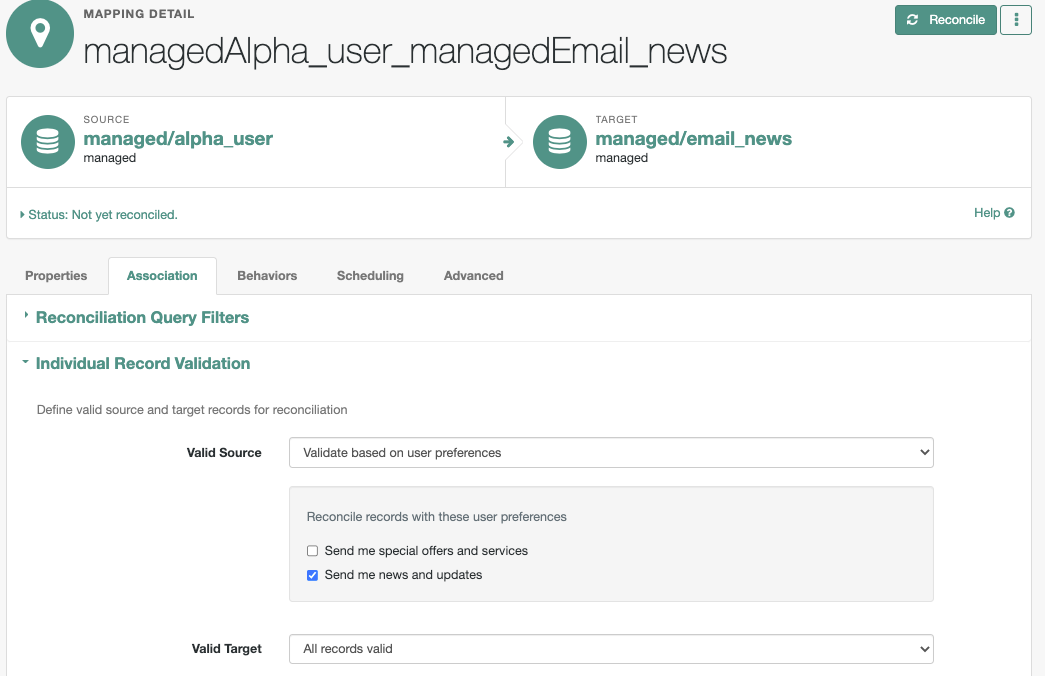
In the Association tab > Individual Record Validation:
-
Set the Valid Source to
Validate based on user preferences. -
Select Send me special offers and services.
-
Click Save.
-
-
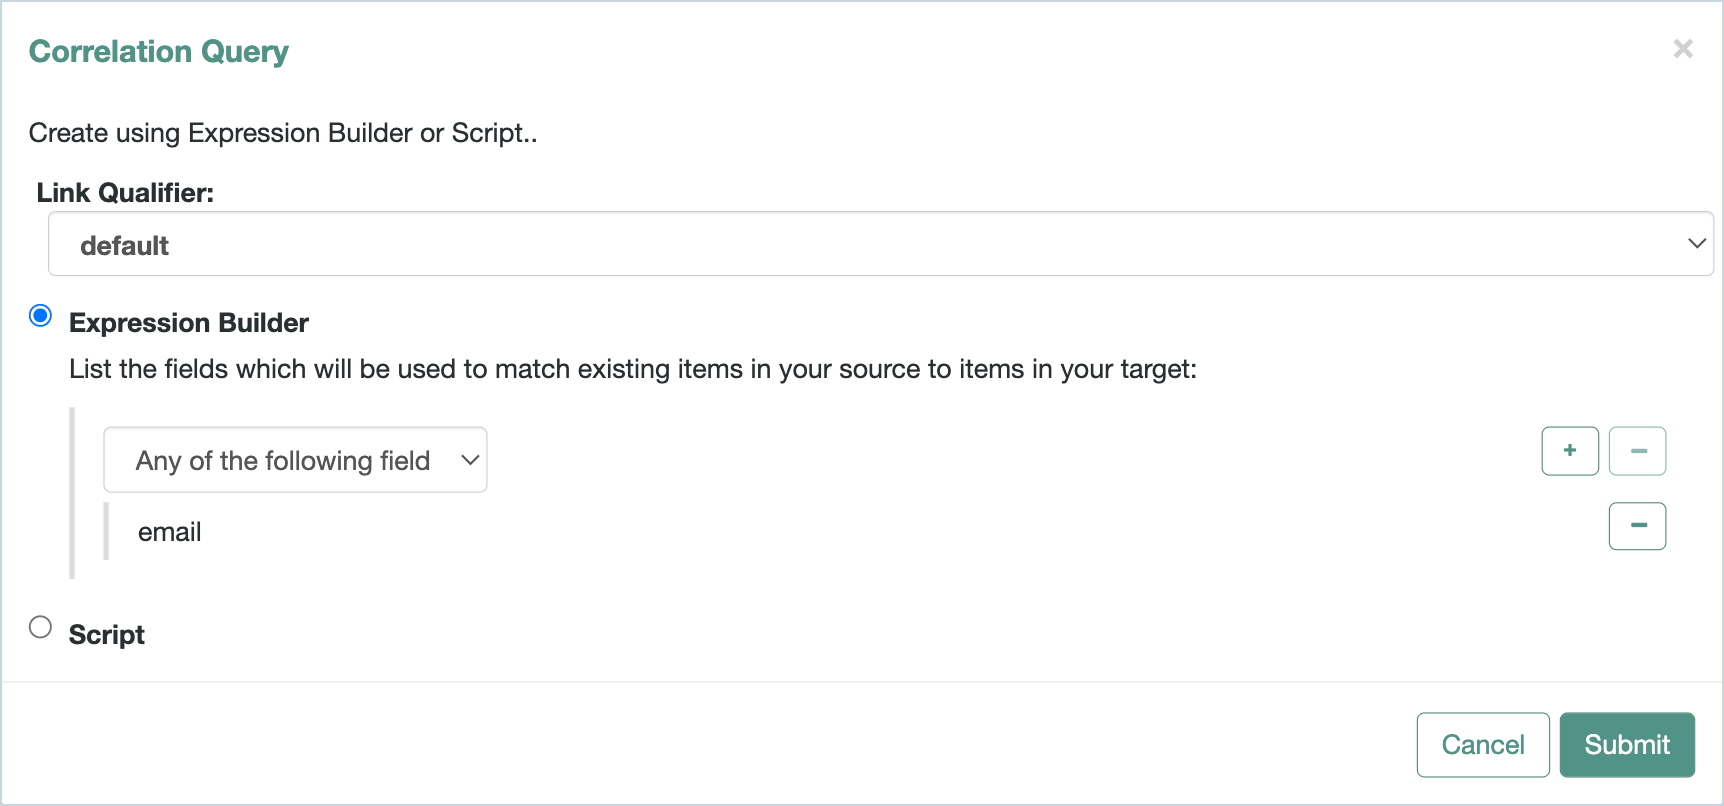
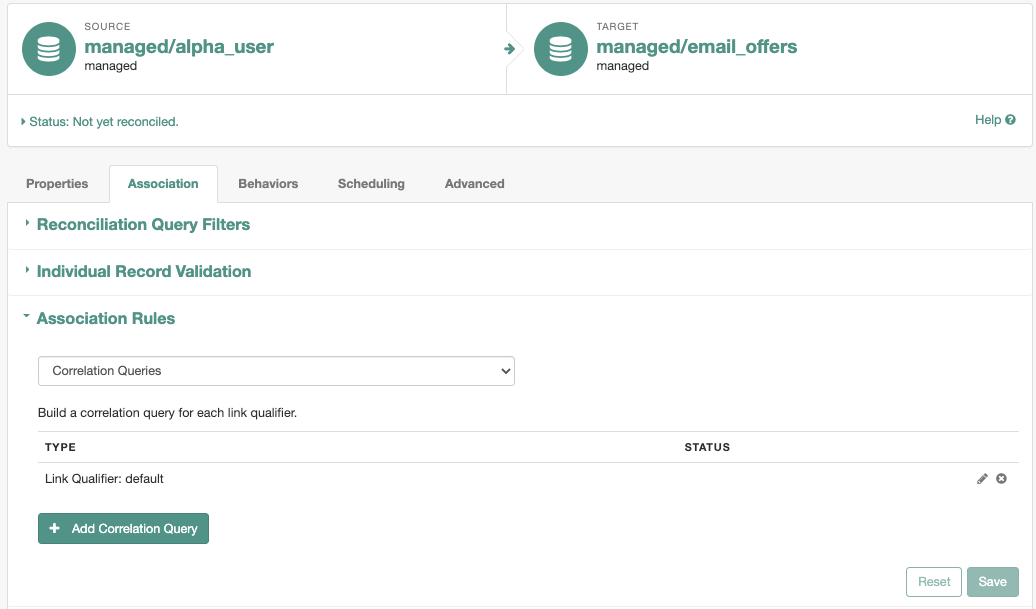
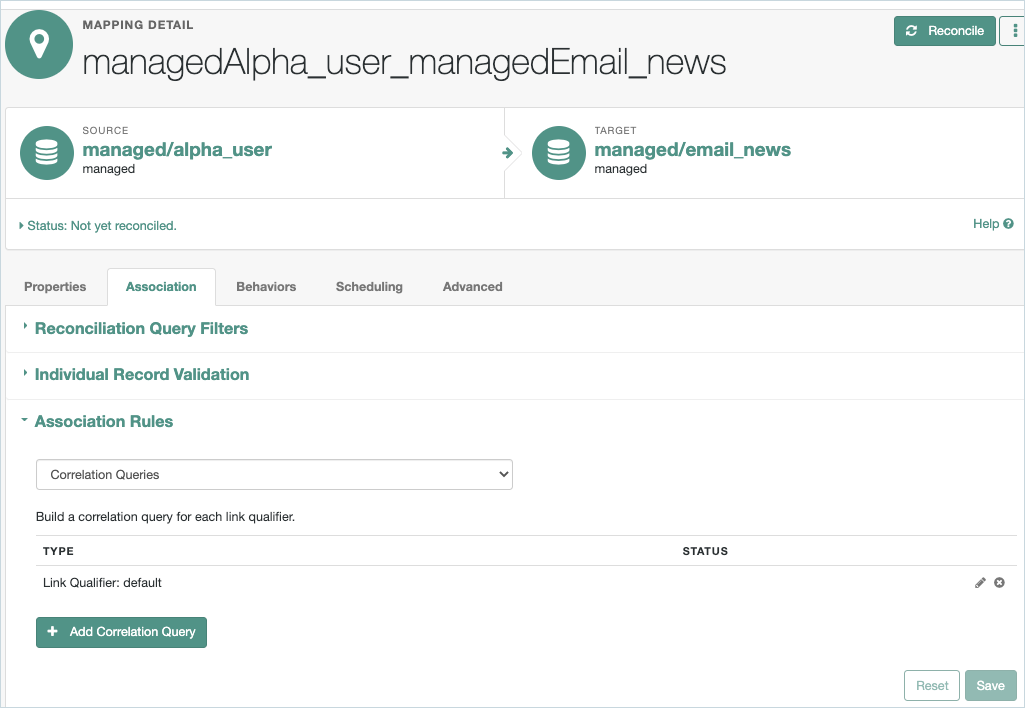
In the Association tab > Association Rules:
-
Select
Correlation Queries. -
Click Add Correlation Query.
-
Select the
defaultLink Qualifier. -
Click the + icon and select `email `.
-
Click Submit.
-
-
Click Save > Save and Don’t Reconcile.
-
In the Behaviors tab, set the Current Policy to
Default Actionsand click Save.
Email_news:
-
In the Identity Cloud admin UI, go to Native Consoles > Identity Management > Configure > Mappings and click New Mapping.
-
Create a mapping from alpha_user to email_news.
-
In the Properties tab, add property mapping from the source to the target for the following: mail > email.
TIP: Use Quick Mapping for quick and easy drag-and-drop property mapping.

-
In the Association tab > Individual Record Validation:
-
Set the Valid Source to
Validate based on user preferences. -
Select Send me news and updates.
-
Click Save.
-
-
In the Association tab > Association Rules:
-
Select
Correlation Queries. -
Click Add Correlation Query.
-
Select the
defaultLink Qualifier. -
Click the + icon and select `email `.
-
Click Submit.
-
-
Click Save > Save and Don’t Reconcile.
-
In the Behaviors tab, set the Current Policy to
Default Actionsand click Save.
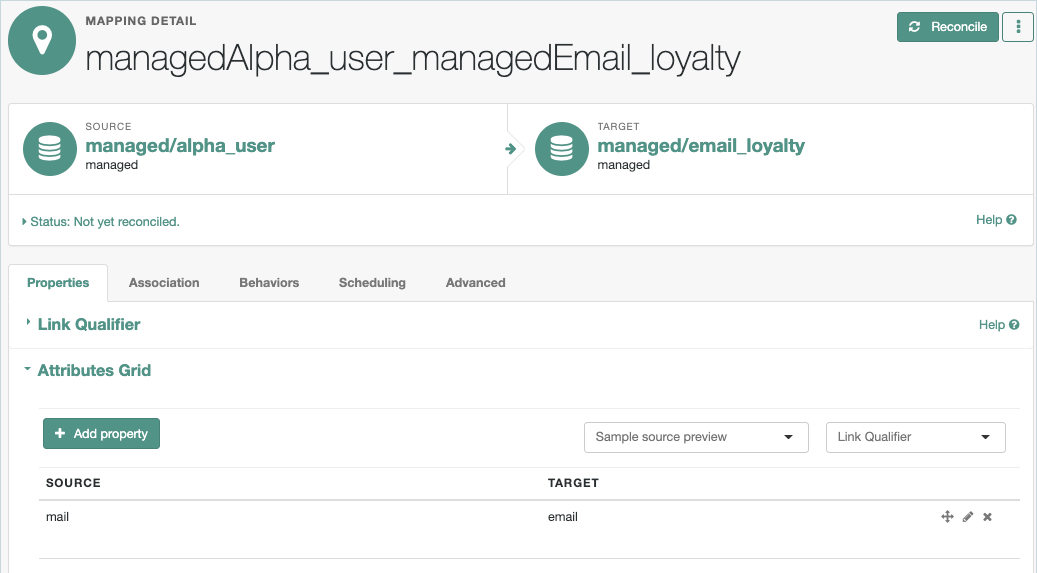
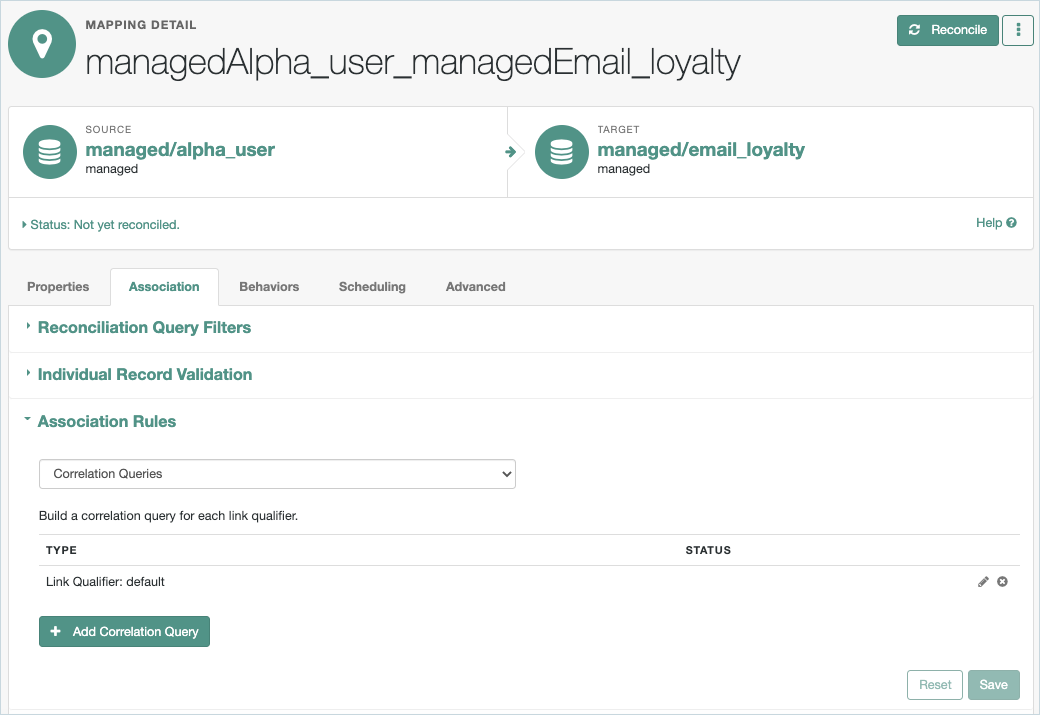
Email_loyalty:
-
In the Identity Cloud admin UI, go to Native Consoles > Identity Management > Configure > Mappings and click New Mapping.
-
Create a mapping from alpha_user to email_loyalty.
-
In the Properties tab, add property mapping from the source to the target for the following: mail > email.
TIP: Use Quick Mapping for quick and easy drag-and-drop property mapping.
-
In the Association tab > Individual Record Validation:
-
Set the Valid Source to
Validate based on custom script. -
Add the following JavaScript to add filtering condition based on the custom_loyalty preference selection:
Source.preferences.custom_loyalty == true
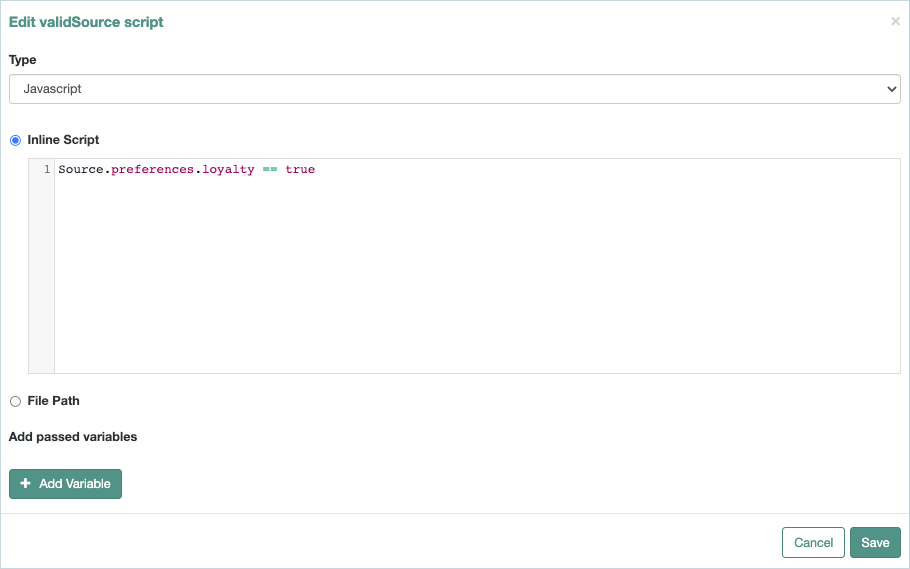
c. Click Save.
-
-
In the Association tab > Association Rules:
-
Select
Correlation Queries. -
Click Add Correlation Query.
-
Select the
defaultLink Qualifier. -
Click the + icon and select `email `.
-
Click Submit.
-
-
Click Save > Save and Don’t Reconcile.
-
In the Behaviors tab, set the Current Policy to
Default Actionsand click Save.
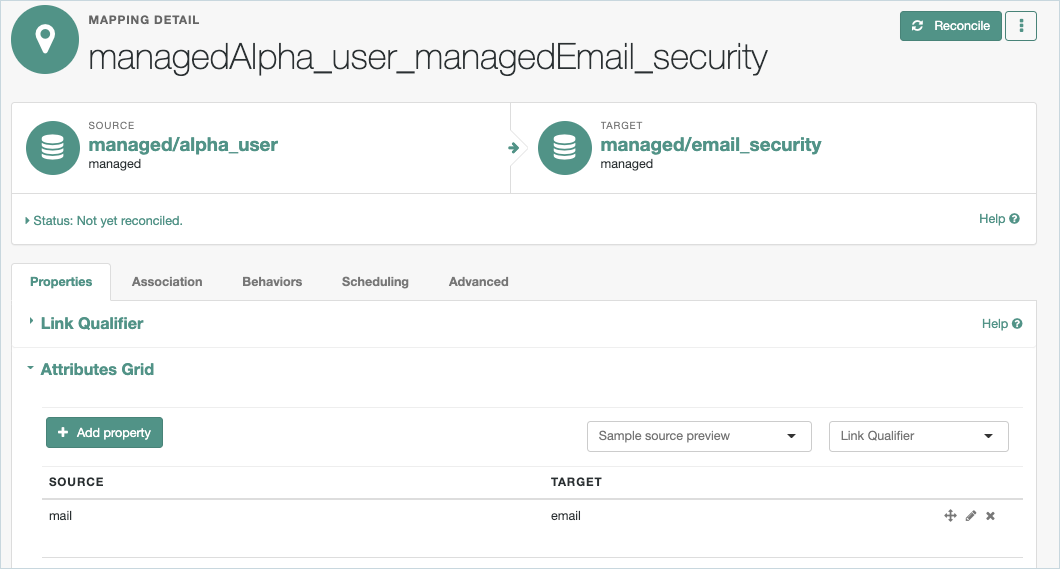
Email_security:
-
In the Identity Cloud admin UI, go to Native Consoles > Identity Management > Configure > Mappings and click New Mapping.
-
Create a mapping from alpha_user to email_security.
-
In the Properties tab, add property mapping from the source to the target for the following: mail > email.
TIP: Use Quick Mapping for quick and easy drag-and-drop property mapping.
-
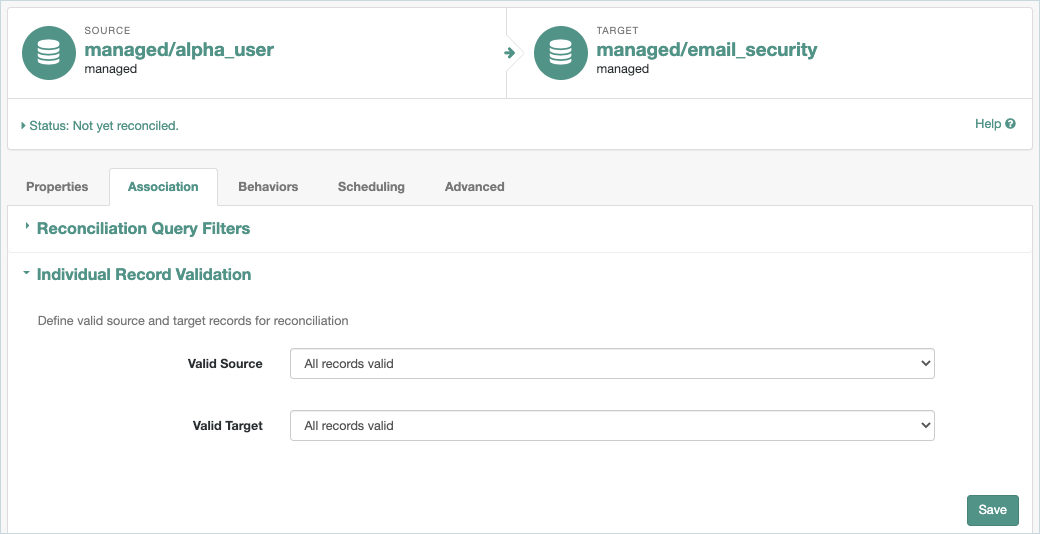
In the Association tab > Individual Record Validation:
-
Set the Valid Source to
All records valid. This will sync all source records without filtering, to achieve a forceable email subscription of account security alerts and notifications for all users by default. -
Click Save.
-
-
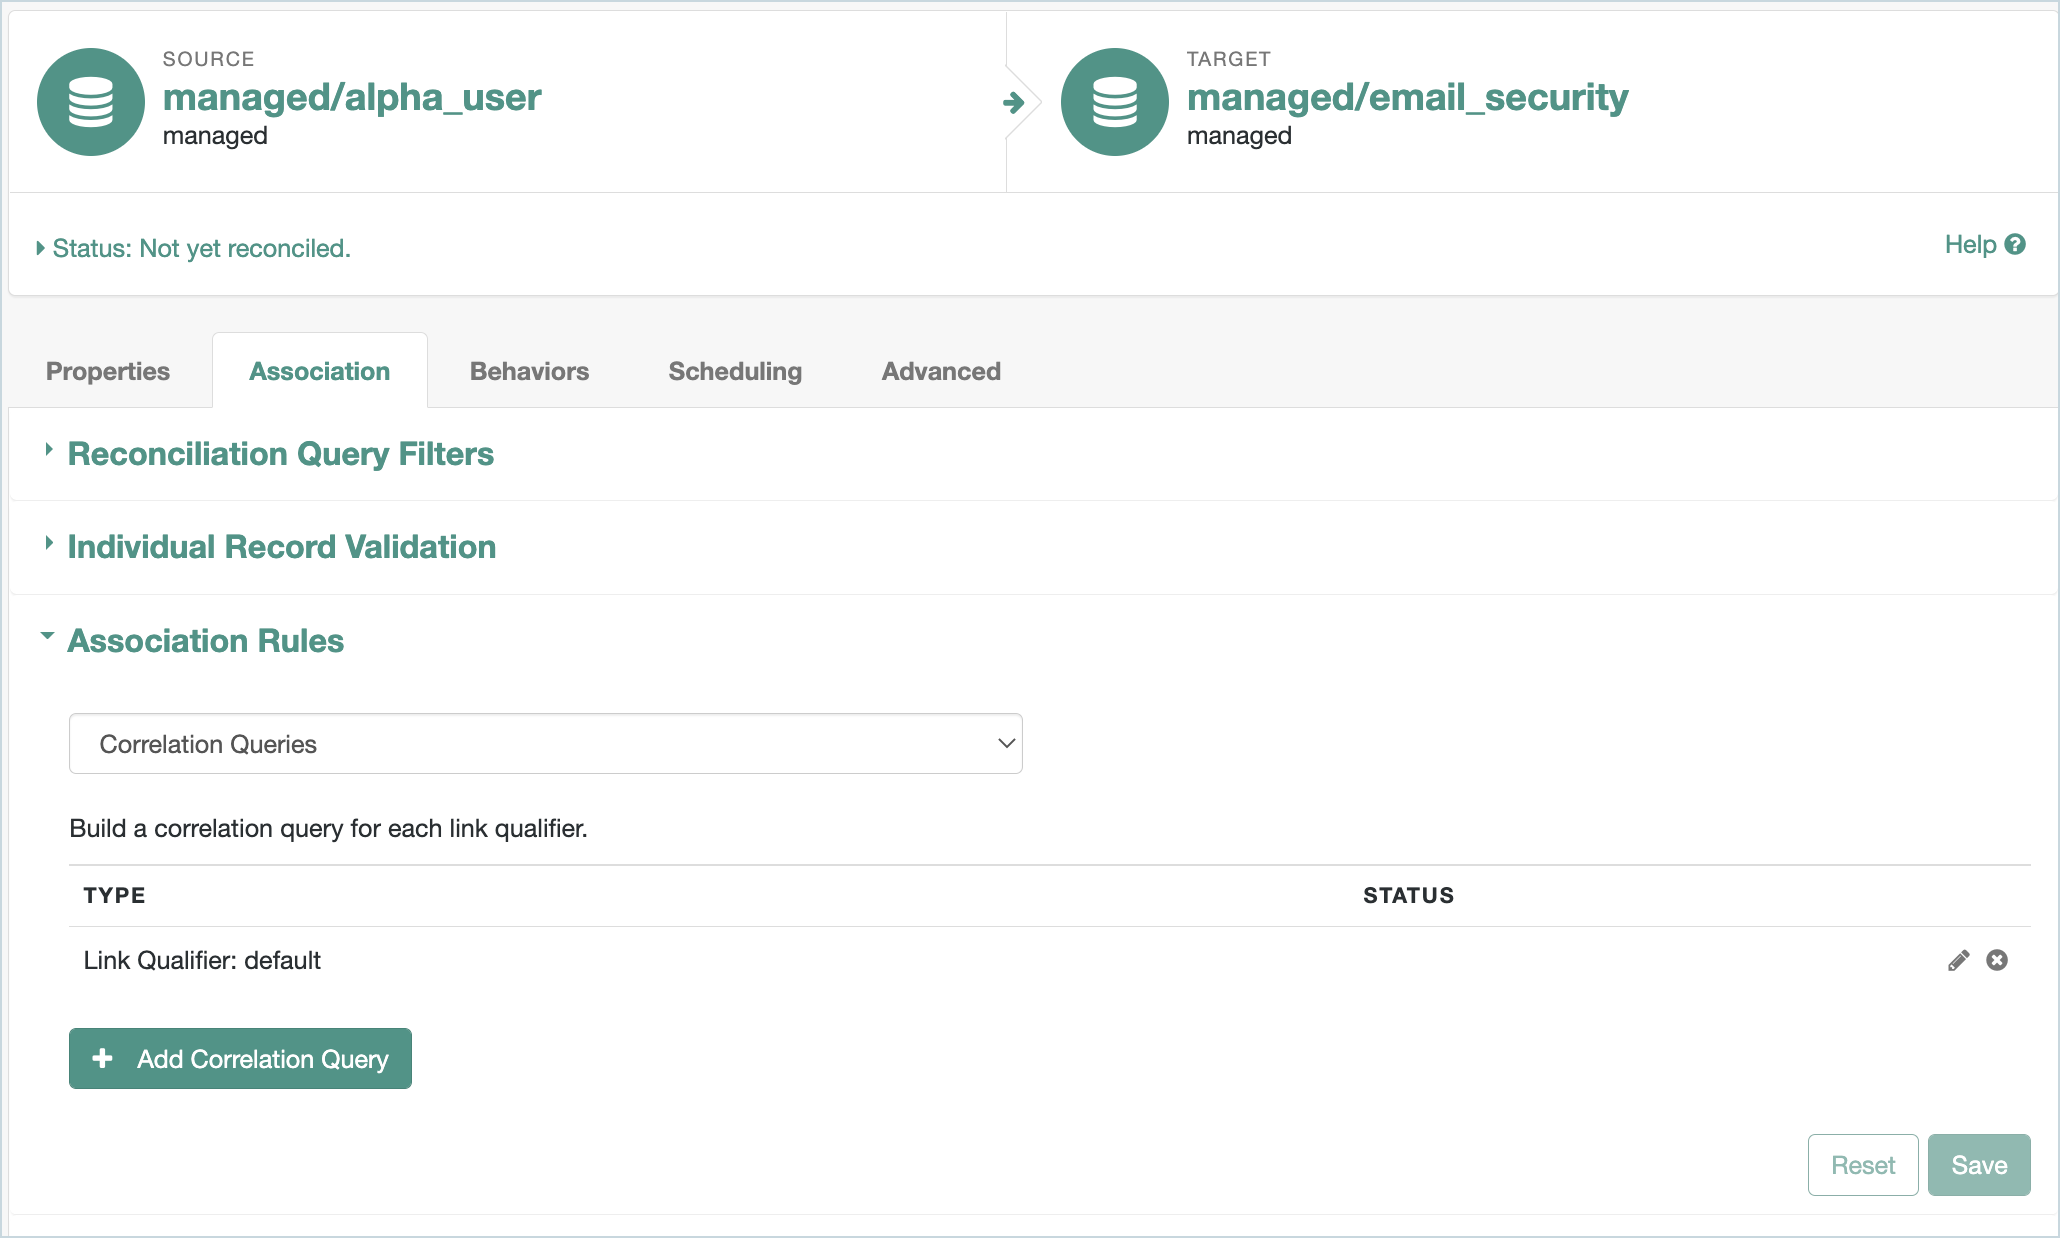
In the Association tab > Association Rules:
-
Select
Correlation Queries. -
Click Add Correlation Query.
-
Select the
defaultLink Qualifier. -
Click the + icon and select `email `.
-
Click Submit.
-
-
Click Save > Save and Don’t Reconcile.
-
In the Behaviors tab, set the Current Policy to
Default Actionsand click Save.
Enable preferences for end users
-
In the Identity Cloud admin UI, go to Hosted Pages and select the Realm Default theme.
-
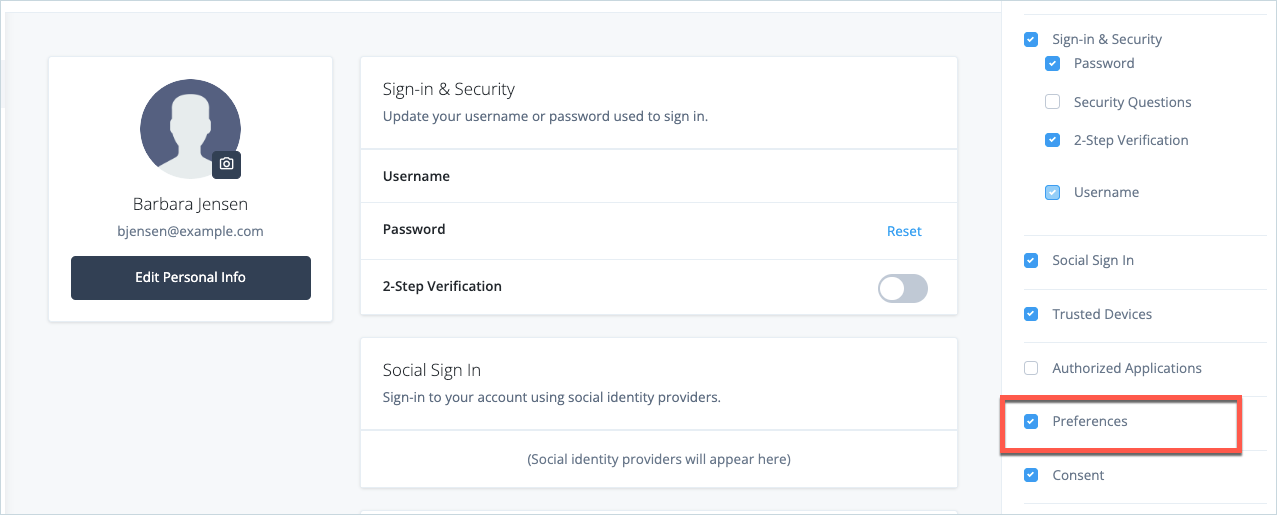
Go to Account Pages > select Layout, and select the Preferences option.
-
Click Save.
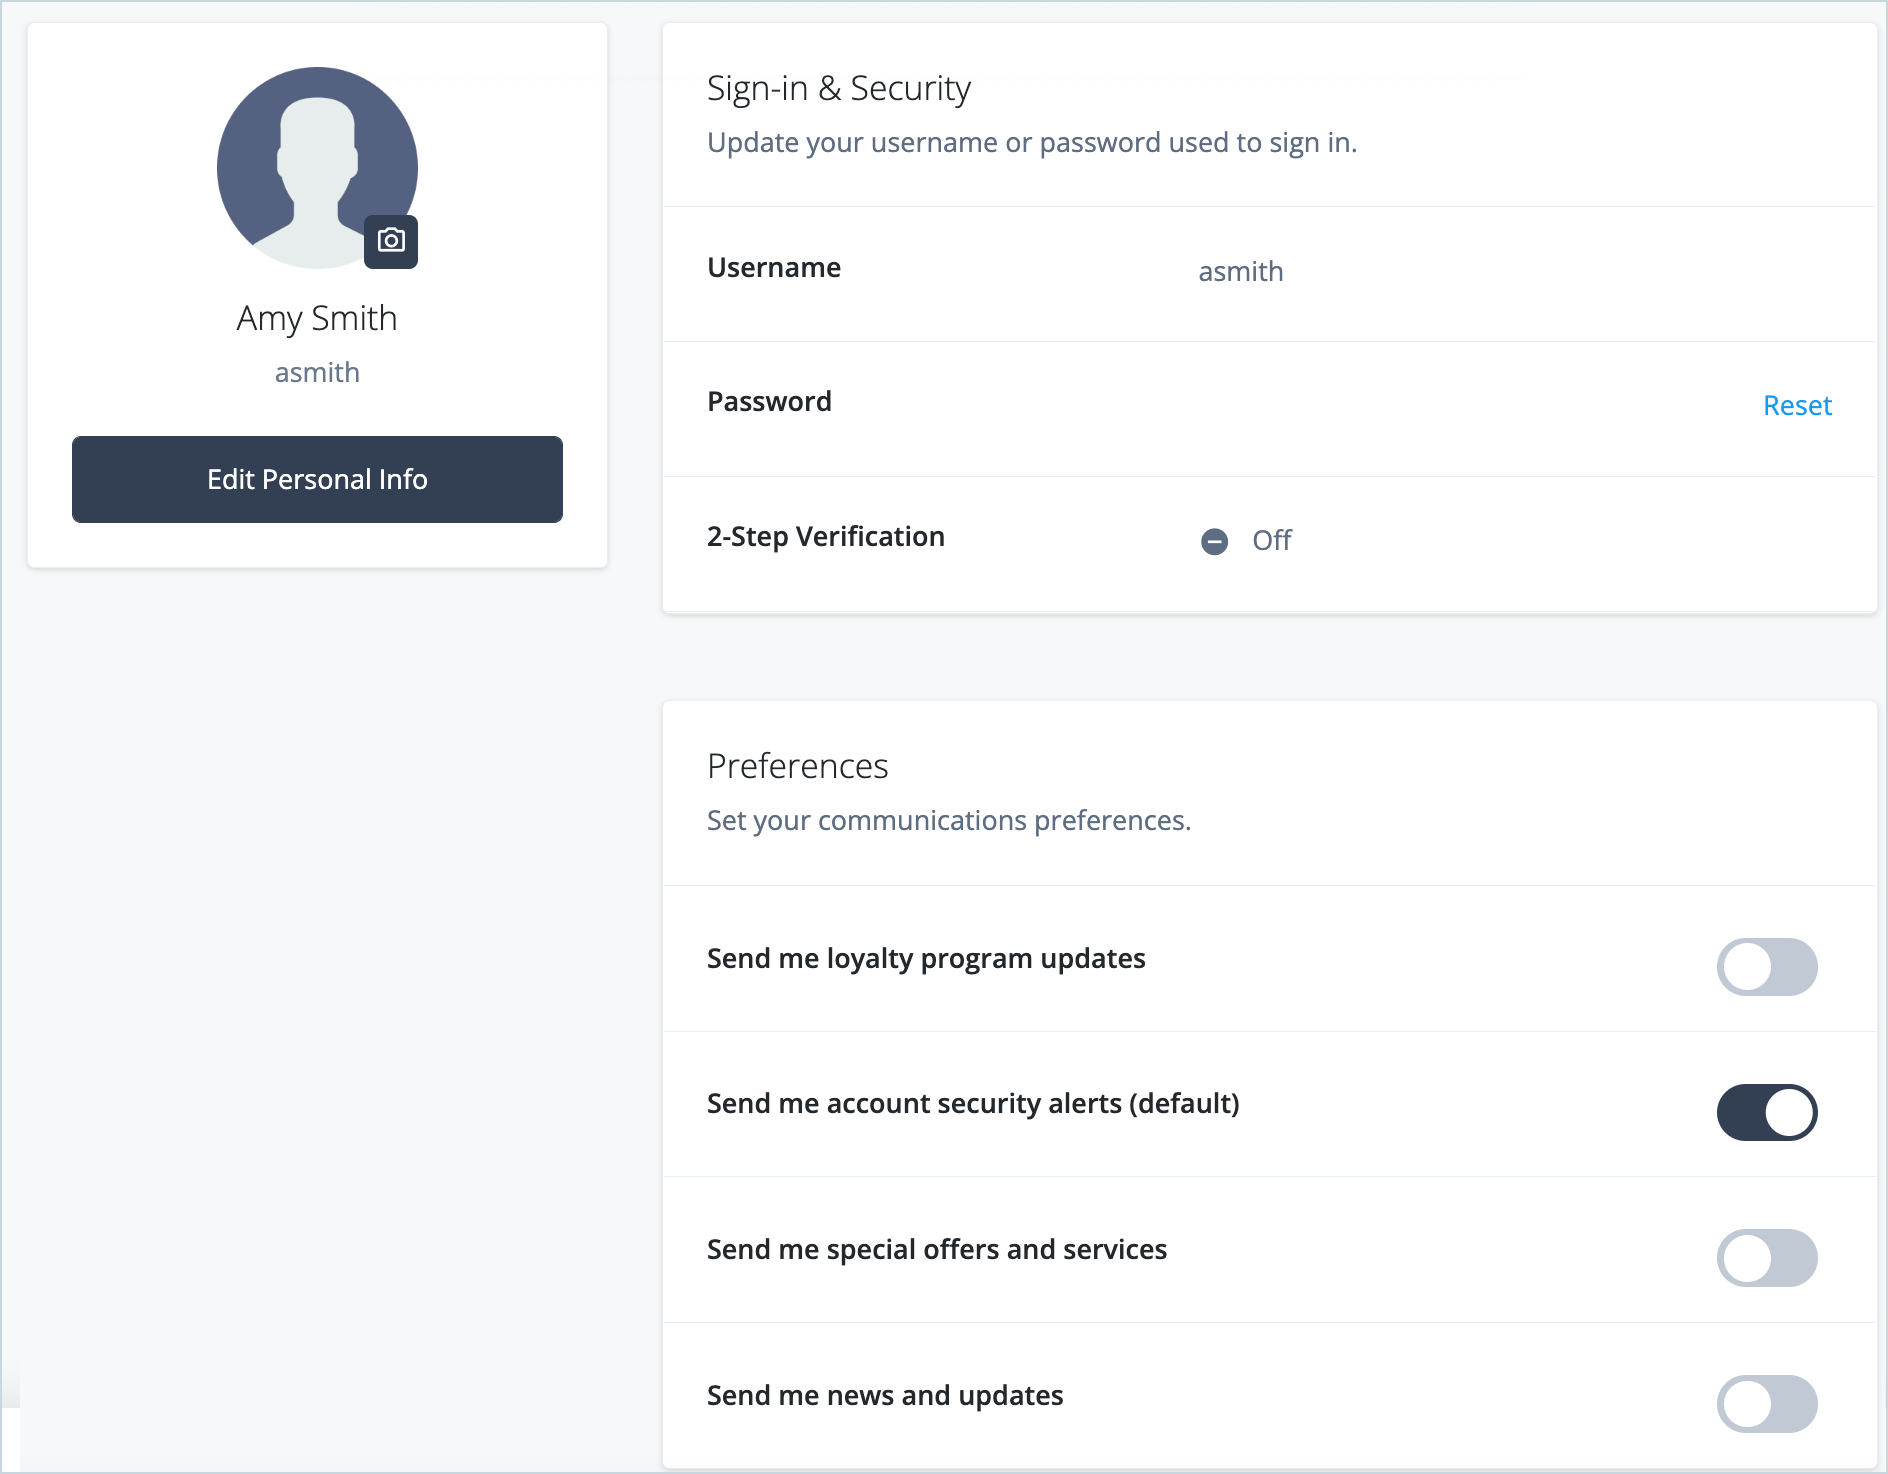
The Preferences option will now appear on the end user’s Profile page, allowing them to select their communication preferences.
Testing the use case
-
Using Incognito or Browsing mode, log in to Identity Cloud as an end user.
-
Click Edit Your Profile.

-
In the Profile dashboard, scroll down to the Preferences section.
-
Toggle the Send me news and updates to On.

The email address of the test user is automatically synchronized to the target email subscribers list. To verify this
-
In the Identity Cloud admin UI, go to Native Consoles > Identity Management > Manage > Email_News.

A user can change their preferences at any time. Once a preference has been removed, their email address will no longer appear in this list.
The user’s email address is always synced to the Email Security list by default, regardless of the user preference selection on security alerts.