Use case overview
Organizations may wish to segment users by presenting different user journeys depending on information such as the user’s location, device type, organization, or the application they are calling. This segmentation of users is a very common use case that is easily implemented in ForgeRock Identity Cloud.
For this simple use case, we’ll demonstrate how to present a registration journey that is determined by the end user’s geographic location. In our example, the registration journey and associated branding will depend on whether the user is in the San Francisco area, Bristol (UK) area, or outside these locations. Only users with a detected location (either San Francisco or Bristol) will be able to register using a social provider.
Steps to achieve this use case
For this use case, we’ll create a user journey that gathers the user’s location and checks it against geofencing nodes that are configured for two different locations; San Francisco and Bristol. The correct registration journey will be called depending on the user’s location.
Prerequisites
-
Three registration journeys have already been created; one each for San Francisco, Bristol, and the rest of the world.
The journeys for the known locations (San Francisco and Bristol) include social registration. See How do I create end user journeys for social registration and login in Identity Cloud? for further information.
-
Two custom themes have been added in Hosted Pages; one each for San Francisco and Bristol. See Add a custom theme for further information.
-
The corresponding theme has been applied to the San Francisco and Bristol registration journeys, using the Override theme feature in journey editing. See Apply a custom theme to a journey for further information.
Create the user journey
-
Sign in to the Identity Cloud admin UI using your admin tenant URL, in the format
<tenant-name>/am/XUI/?realm=/#/. -
Go to Journeys > New Journey.
-
Enter a unique name for the user journey, select which identities will authenticate using this journey, (optionally) enter a journey description, and click Save.
-
Create a journey similar to this:
Node descriptions:
- Device Profile Collector - Gathers metadata about the device used to authenticate. See Device Profile Collector node for further information.
- Check SF and Check Bristol - These are Device Geofencing nodes that compare the collected device location metadata with the configured trusted locations configured. See Device Geofencing node for further information.
- Register /w SF Journey, Register /w Bristol Journey and Register /w Rest Journey - These are Inner Tree Evaluator nodes that allow you to nest journeys as children within a parent journey. See Inner Tree Evaluator node for further information.
-
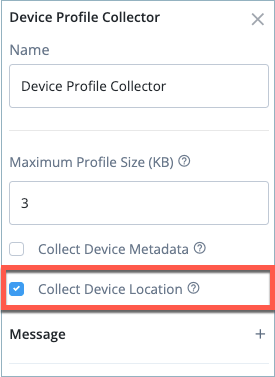
Click on the Device Profile Collector node and select the Collect Device Location check box.
-
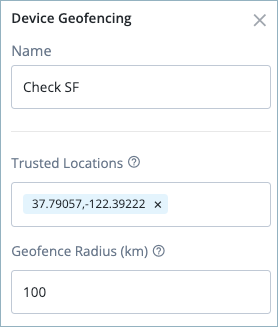
Click on the first Device Geofencing node (named Check SF) and enter the following:
- Trusted Locations: The latitude and longitude value for San Francisco. Separate the values with a comma; for example,
37.79057,-122.39222. - Geofence Radius (km): Enter
100as the maximum distance, in kilometers, that a device can be from the trusted location.
- Trusted Locations: The latitude and longitude value for San Francisco. Separate the values with a comma; for example,
-
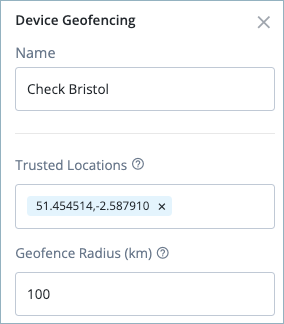
Click on the second Device Geofencing node (named Check Bristol) and enter the following:
- Trusted Locations: The latitude and longitude value for Bristol. Separate the values with a comma; for example,
51.454514,-2.587910. - Geofence Radius (km): Enter
100as the maximum distance, in kilometers, that a device can be from the trusted location.
- Trusted Locations: The latitude and longitude value for Bristol. Separate the values with a comma; for example,
-
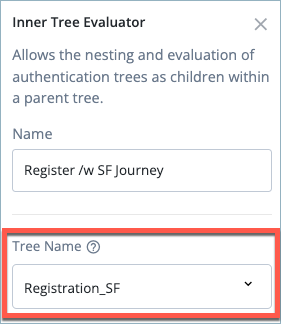
Click on the first Inner Tree Evaluator node (named Register /w SF Journey) and select the pre-configured registration journey for users in San Francisco.
-
Repeat Step 8 for the Register /w Bristol Journey and Register /w Bristol nodes, adding the corresponding preconfigured registration journey for the location.
-
Click Save to save the journey.
Testing the use case
To test this use case you may need to use VPN connections to different locations.
The browser you use to test the end user journey must allow access to the location service.
Test the registration journey from different locations
-
In the Identity Cloud admin UI, go to Journeys.
-
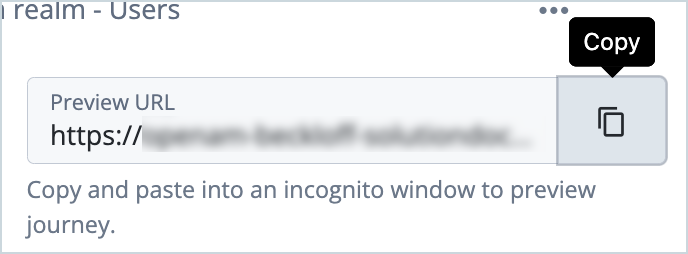
Click the user journey you created previously and copy the Preview URL.
-
From the first location you are testing, paste the preview URL into a browser using Incognito or Browsing mode.
NOTE: You may be prompted to allow location services for your browser.
The Registration screen corresponding to your current location is displayed; the registration journey and theme should correspond to those configured for the location.
In this example, we’re logging in from San Francisco. Note that the registration journey uses the corresponding theme and includes social sign-up.
-
Repeat Steps 2 and 3 for each location you have configured.
The following example shows how the registration screen appears if the user signs in from Bristol:
The following example shows how the registration screen appears when the user authenticates from a region outside San Francisco or Bristol. Notice that social authentication is not available. Also, since no theme was specified for this journey, Identity Cloud uses the default theme.
Conclusion
Identity Cloud provides a powerful set of capabilities to enable a tailored user experience based on information such as geolocation.
Hosted pages provide an easy way to communicate a specific brand identity without requiring heavy UI development. With flexible user journeys, registration flows can be easily configured with different themes and options for different user locations.
Additional resources
Documentation:
- Identity Cloud hosted pages
- Journeys
- Device Profile Collector node
- Device Geofencing node
- Inner Tree Evaluator node
Training videos:
- Identity Cloud Deep Dive: Access Management: Device Profile Nodes
- Getting Started with Identity Cloud: Configure Themes
Acknowledgements: Andre Posner


