Use case: Configure simple consent management in ForgeRock Identity
Author: |
Lucy Billington |
Created at: |
Nov 2022 |
Updated at: |
Dec 2022 |
Use case overview
Consent management helps you to build trust by giving users the power to control their personal information, security and privacy preferences. It also addresses many regulatory requirements, including allowing users to save their profile data locally and the right to delete their profile.
This use case demonstrates how to configure simple consent management in ForgeRock Identity Cloud. This will allow end users to decide whether their email addresses are shared with third parties for marketing purposes.
In this example, the consented data is synced to a managed object that is used to store a marketing list. Rights to read this managed object can be given through an internal role. Alternatively, these rights can be given to an application, which the third party would then use to query values. Another option is to sync the managed marketing list to a marketing application that needs to consume it. This would enable the management of the user consent data provisioning to, and deprovisioning from, the target application.
Steps to achieve this use case
This use case can be achieved in three simple steps:
-
Create a managed object that will be used as a target marketing list to store the user-consented data.
-
Create a mapping from alpha_user to the marketing list managed object.
-
Enable personal data sharing for end users in the end user UI.
Create a managed object
-
Sign in to the Identity Cloud admin UI using your admin tenant URL, in the format
https://<tenant-name>/am/XUI/?realm=/#/. -
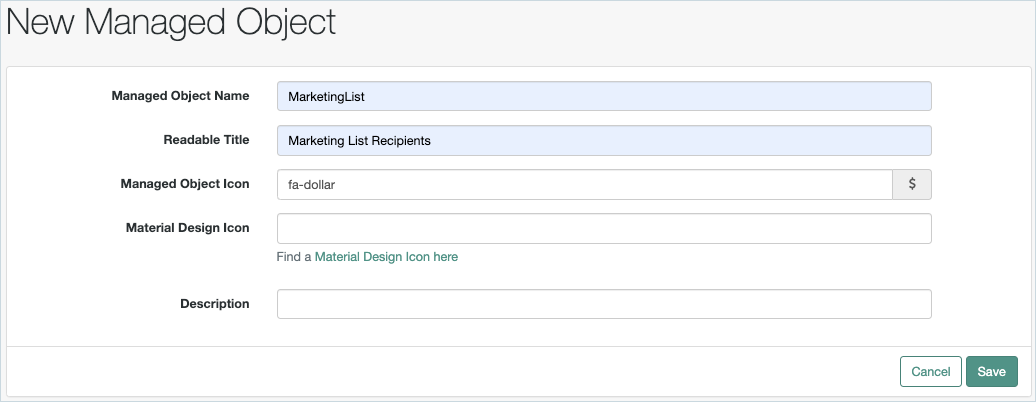
Go to Native Consoles > Identity Management > Configure > Managed Objects and click New Managed Object.
-
Enter the managed object details and click Save. The managed object in this example is called MarketingList.
-
Add the following properties in the MarketingList managed object:
email,firstname,lastname. Each of these properties should have the String type.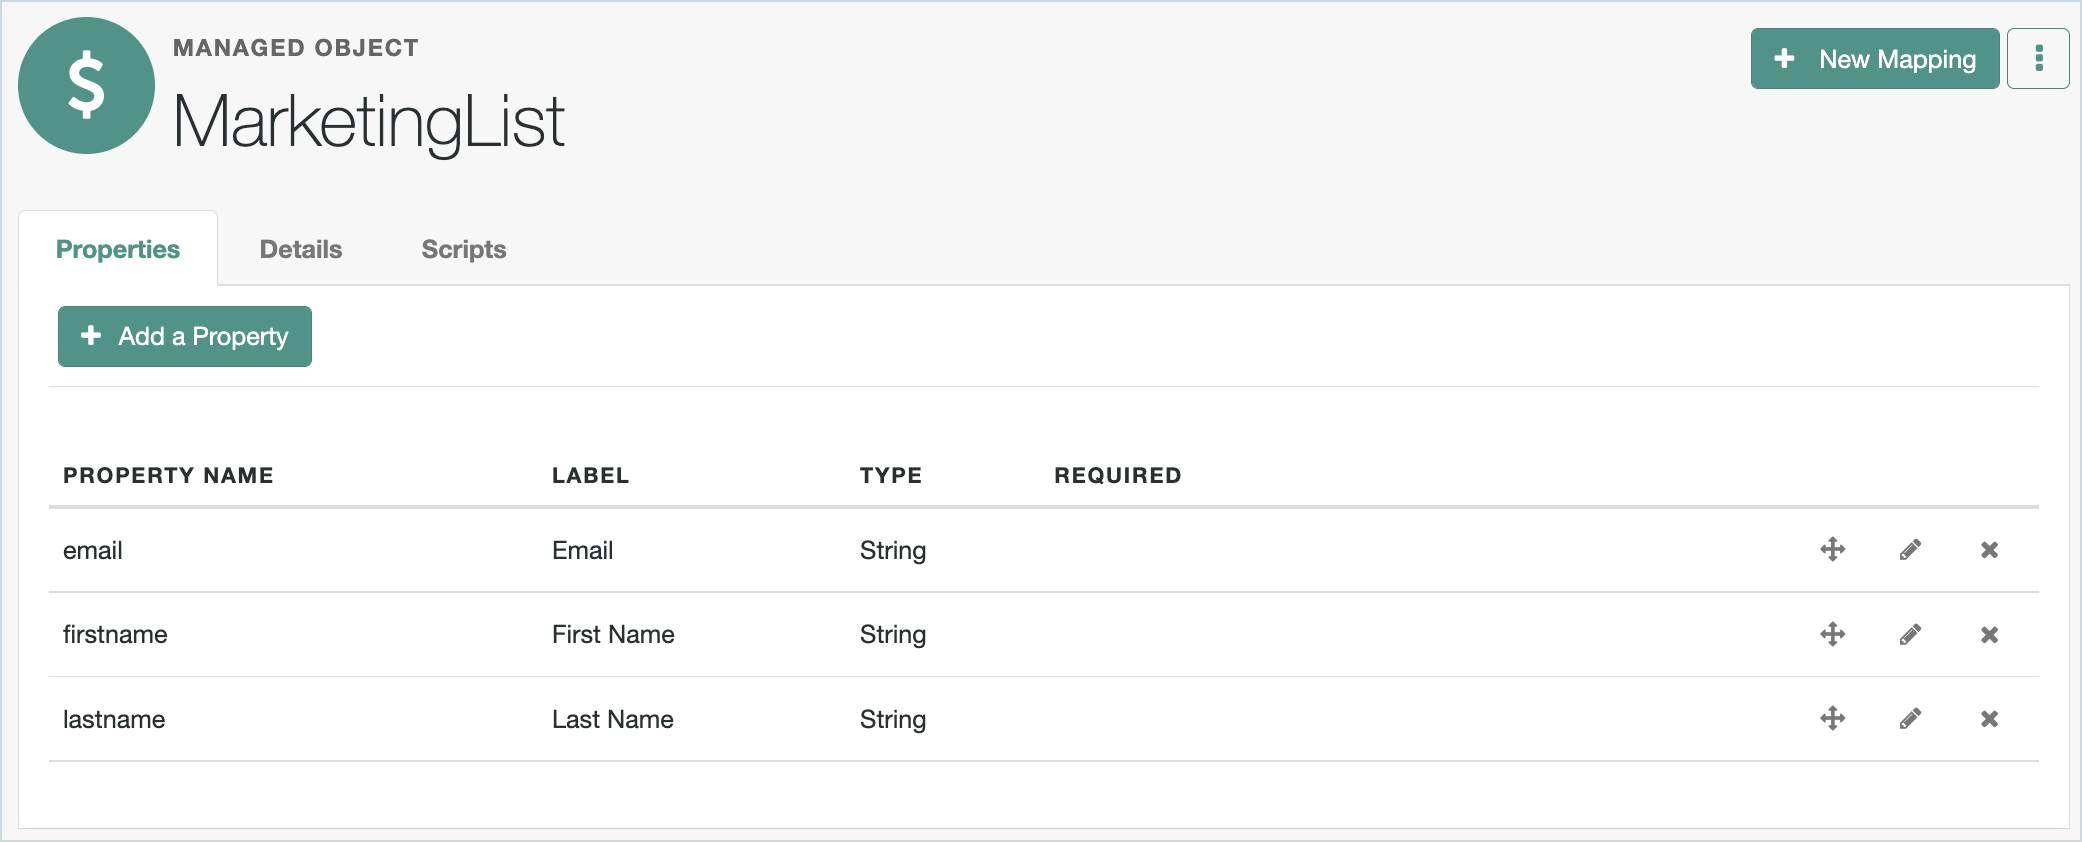
Create a mapping
-
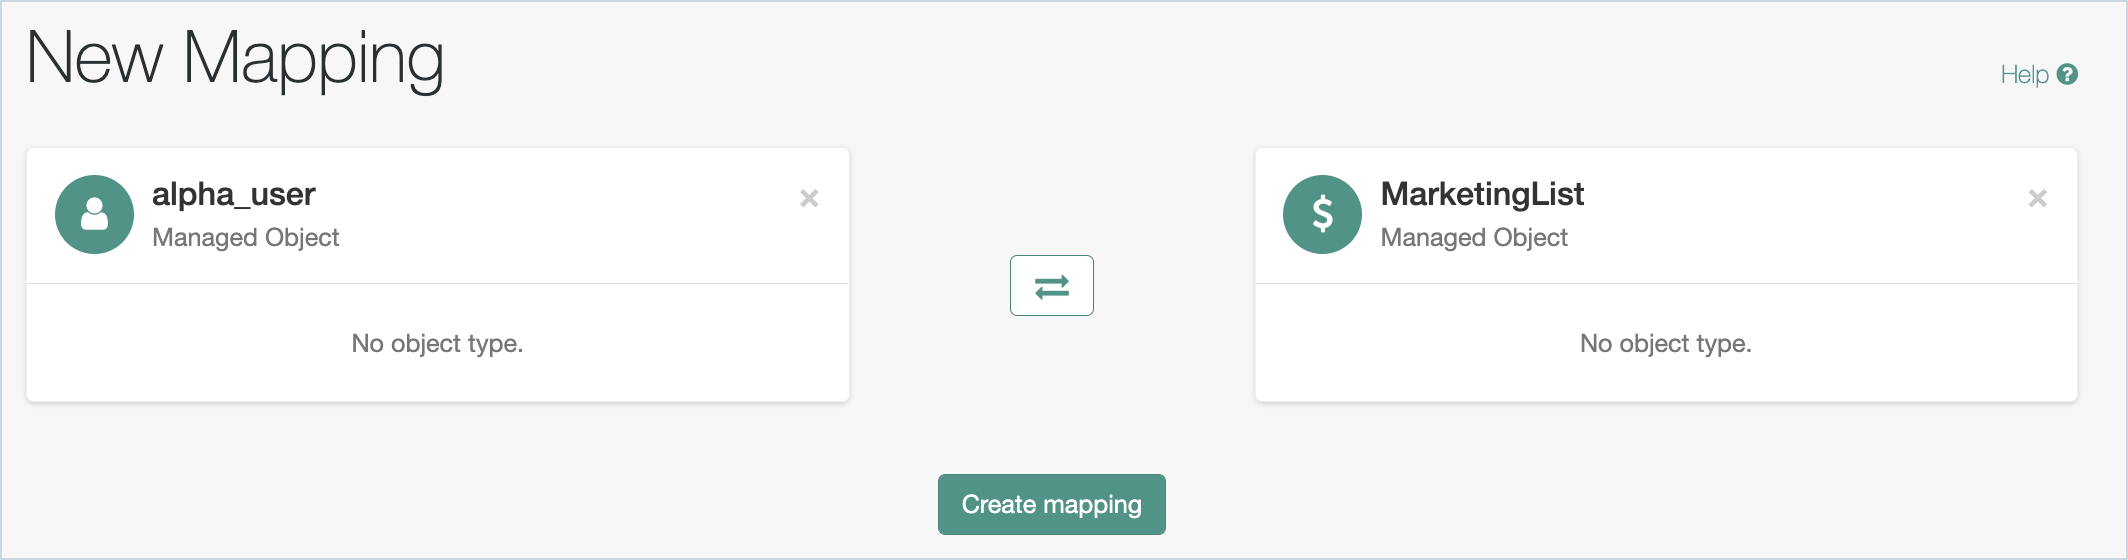
In the Identity Cloud admin UI, go to Native Consoles > Identity Management > Configure > Mappings and click New Mapping.
-
Create a mapping from alpha_user to MarketingList.
-
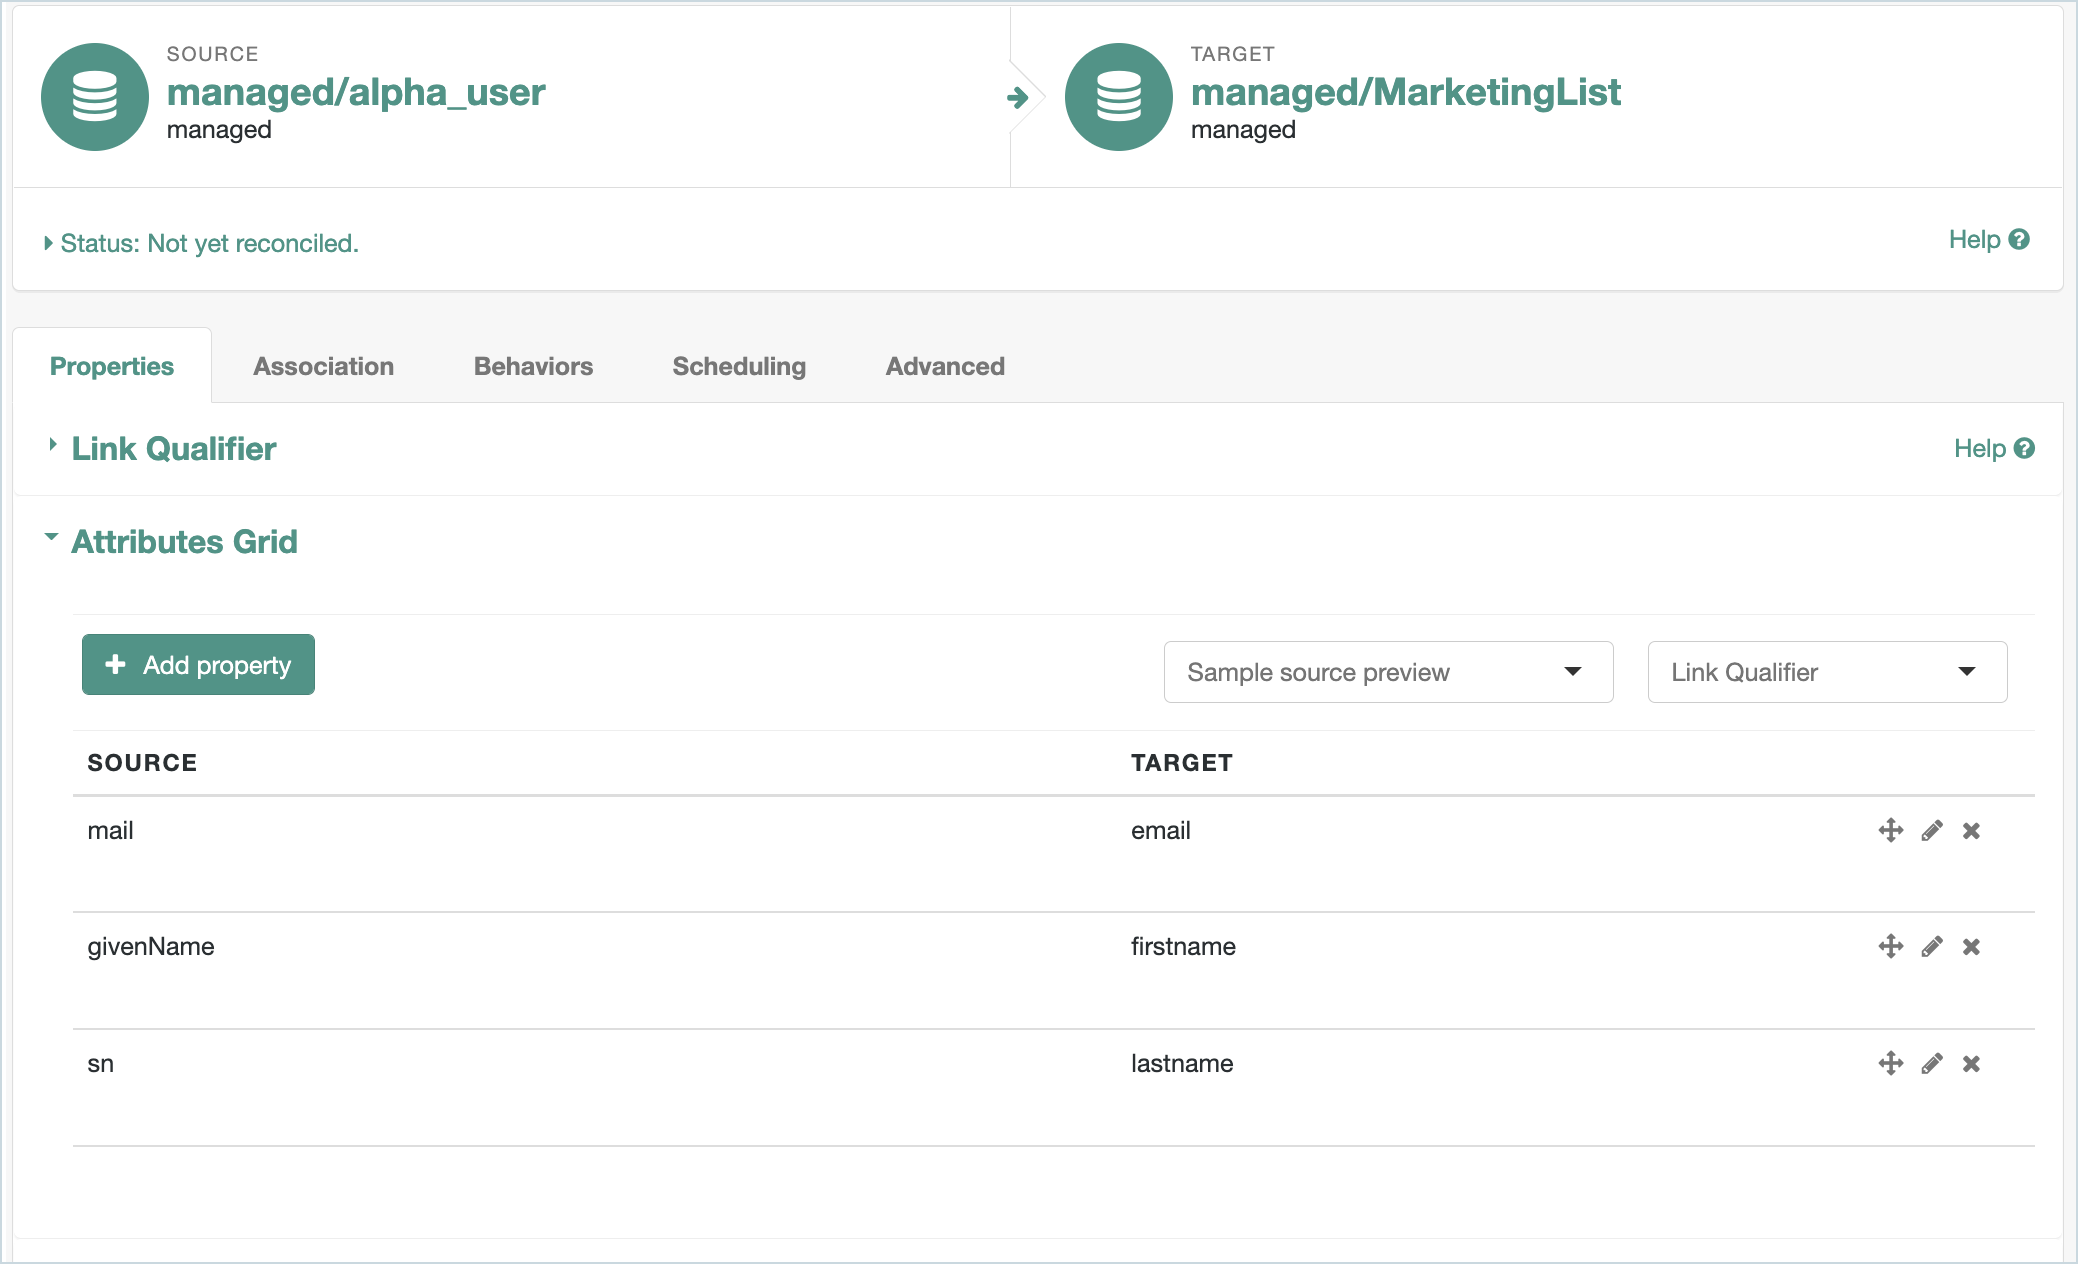
In the Properties tab, add property mapping from the source to the target for the following:
-
mail > email
-
givenName > firstname
-
sn > lastname
TIP: Use Quick Mapping for quick and easy drag-and-drop property mapping.
-
-
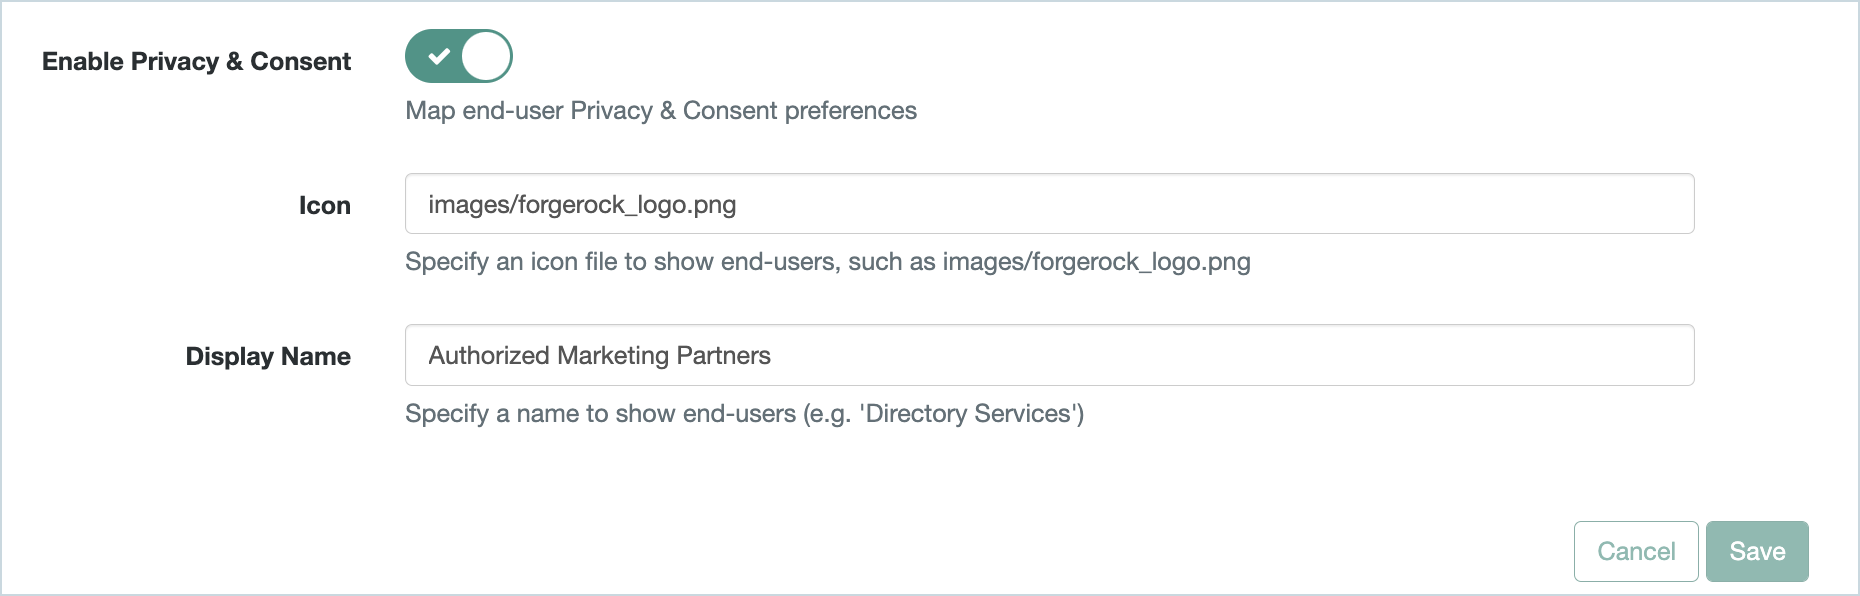
In the Advanced tab:
-
Select Enable Privacy & Consent. This will enforce the end user’s preferences whenever synchronization with the target system occurs.
-
Enter a Display Name for the mapping, for example, Authorized Marketing Partners. This display name will be visible to end users.
-
-
Click Save.
Enable personal data sharing for end users
-
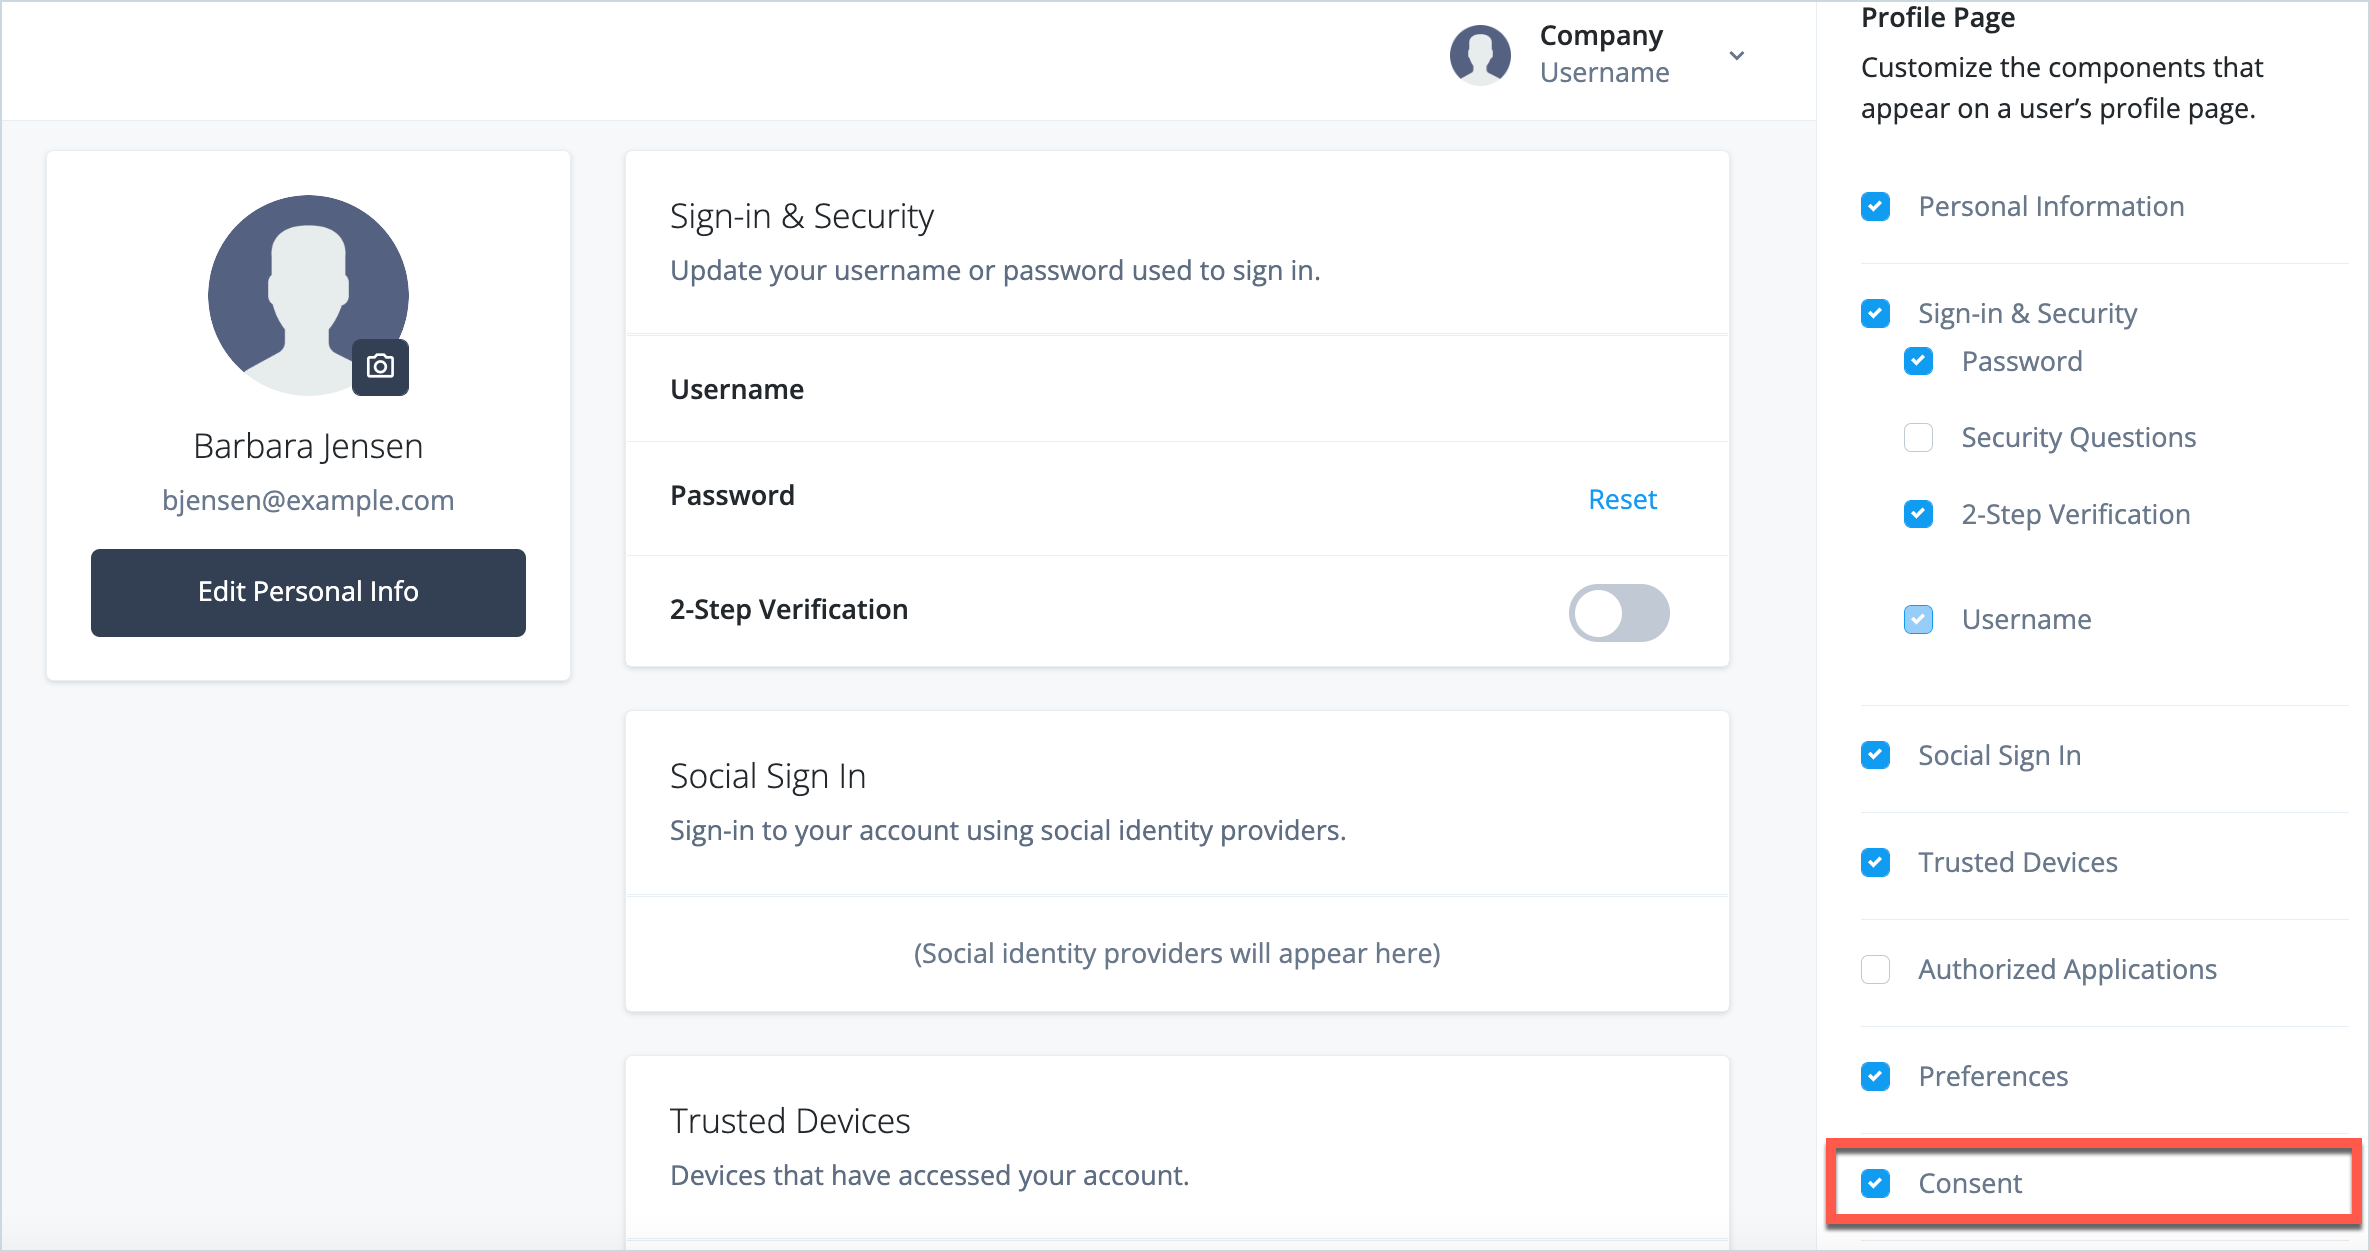
In the Identity Cloud admin UI, go to Hosted Pages and select the Realm Default theme.
-
Go to Account Pages > select Layout, and select the Consent option.
-
Click Save.
The Personal Data Sharing option will now appear on the end user’s Profile page, allowing them to control how their details are shared with third parties.
Testing the use case
-
Using Incognito or Browsing mode, log in to Identity Cloud as an end user.
-
Click Edit Your Profile.

-
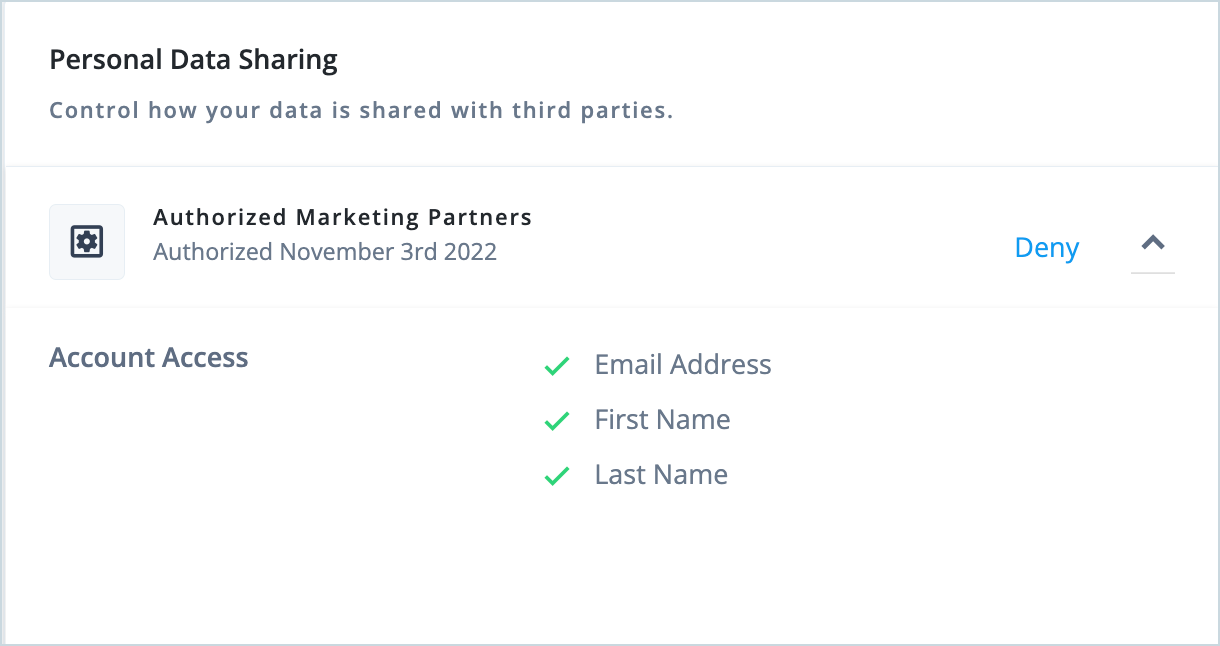
In the Profile dashboard, scroll down to the Personal Data Sharing section.

-
Click Allow next to Authorized Marketing Partners.

-
Click Allow.
The consented account data and the consent authorization date are shown for Authorized Marketing Partners in the Personal Data Sharing section.
The consented data is automatically synchronized to the target marketing list for sharing. To verify this:
-
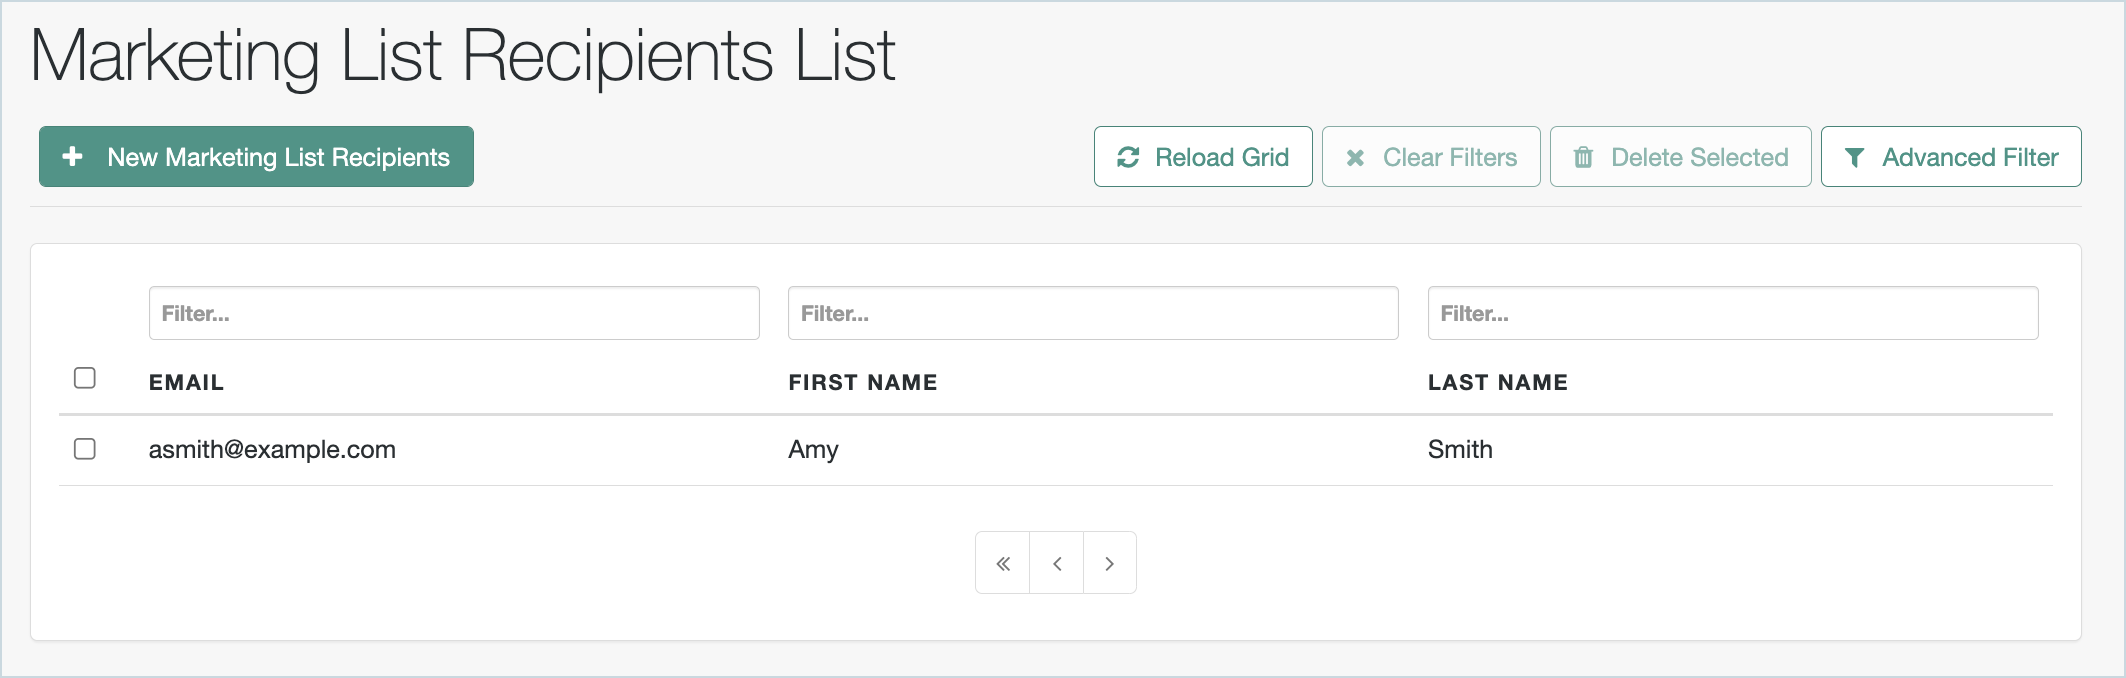
In the Identity Cloud admin UI, go to Native Consoles > Identity Management > Manage > MarketingList
The user’s consented data is shown in the marketing list recipients.
A user can revoke their consent at any time by clicking Deny in the Personal Data Sharing section of their user profile. Once revoked, their details will no longer appear in this list.