Use case: Configure Terms & Conditions (T&Cs) for an organization in
Author: |
Lucy Billington |
Created at: |
Mar 2023 |
Updated at: |
Mar 2023 |
Use case overview
Providing different Terms & Conditions (T&Cs) for groups of users depending on their needs is a common use case that can be addressed in ForgeRock Identity Cloud.
There are many situations where you may wish to present different T&Cs to different user groups. For example, based on the user’s locale, the application, the realm, or the organization to which the user belongs. In this example use case, we’ll focus on providing T&Cs based on the user’s organization. This is easily achieved using the flexible Organization model and Journeys capabilities of Identity Cloud.
We’ll demonstrate how to configure an organization with multiple T&Cs versions. We’ll then create a user journey that determines which organization the user belongs to, retrieves the appropriate active T&Cs for the organization, and prompts the user to accept or deny the T&Cs when logging in. If the user accepts the T&Cs presented, the version accepted will be stored in their profile.
Steps to achieve this use case
The use case has four stages:
Prerequisites and assumptions
-
We have already created a Get Access Token node, which will be used to acquire the access token required to interact with Identity Management services in Identity Cloud.
See How do I acquire an access token for Identity Cloud API calls in a Scripted Decision node? for further information.
-
We have configured an organization called Company A. See Organizations for further information on organizations in Identity Cloud.
-
A test end user has been created in the identity repository.
-
The end user for this use case is assumed to be a member of only one organization (Company A).
-
Once the end user has accepted the organization’s T&Cs, this will NOT be checked by the provided script at subsequent login. This means that the end user will always be prompted to accept the currently active version of the T&Cs each time they log in. It is a reader exercise to extend this approach so that a user is only prompted to accept the currently active version of T&Cs at subsequent login if they haven’t yet already done so.
-
For brevity, and to focus on the specific use case, the sample journey does not perform registration or authentication of the user. A real world application of this would typically require the user to enter some credentials to be validated, or the user to be created, prior to accessing the T&Cs.
-
T&Cs are stored and presented in a single language. There is no locale support in this approach.
Add a T&C property to the organization managed object
In this example, we’ll add a T&C version property to the alpha_organization.
-
Sign in to the Identity Cloud admin UI using your admin tenant URL, in the format
https://<tenant-name>/am/XUI/?realm=/#/. -
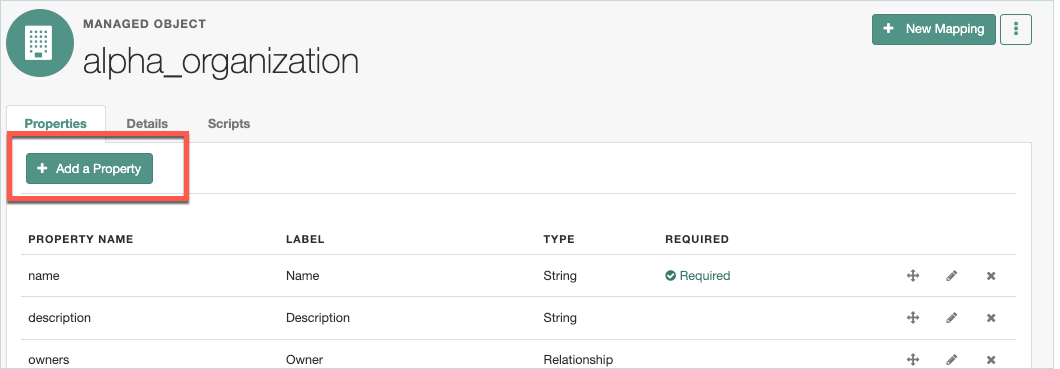
Go to Native Consoles > Identity Management > Configure > Managed Objects.
-
Click Alpha_organization.
-
Click Add a Property.
-
Add the Terms & Conditions property with the following details:
-
Property Name:
tNc, Label:Terms & Conditions, Type:Object
-
-
Click the Edit icon next to the tNc property.

-
Add a version array:
-
Property Name:
version, Label:Version, Type:Array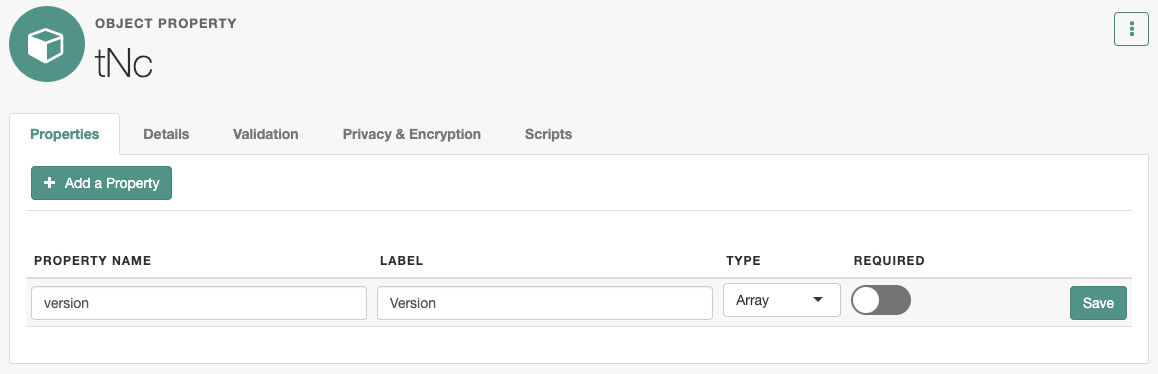
-
-
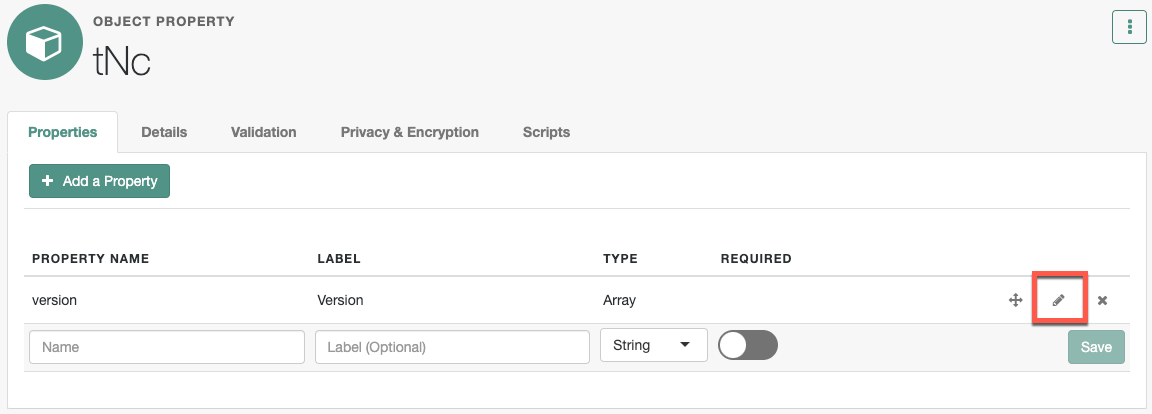
Click the Edit icon next to the version array property.
-
Change the Item Type to
Objectand add the following properties:-
Property Name:
Version, Label:Version, Type:Number -
Property Name:
TAndC, Label:Terms & Conditions, Type:String -
Property Name:
Active, Label:Active, Type:Boolean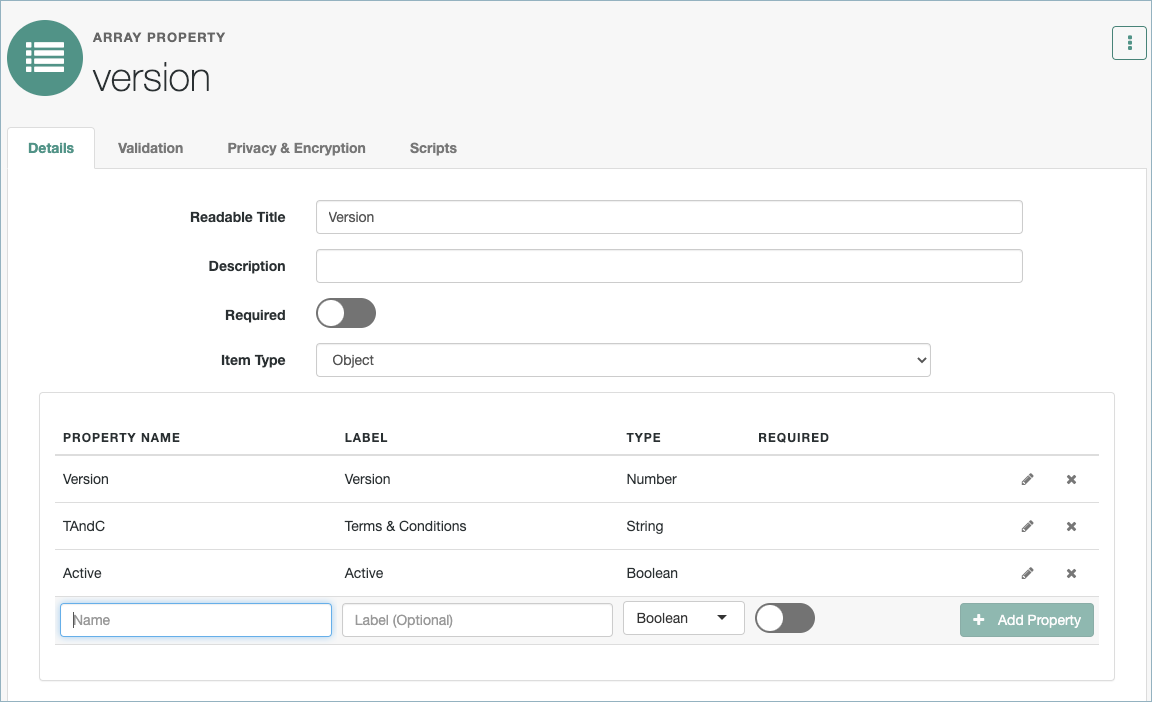
-
-
Click Save.
Create T&Cs versions for the organization
In this example, we’ll create T&C versions for an organization called Company A.
-
Sign in to the Identity Cloud admin UI using your admin tenant URL, in the format
https://<tenant-name>/am/XUI/?realm=/#/. -
Go to Identities > Manage > Alpha realm - Organizations.
-
Click on the organization that you want to add T&Cs to. In our example, we’re using Company A.
-
Click Terms & Conditions.

-
Click + to add two T&C versions; version 1 and 2. The text you enter in the TAndC fields is the terms and conditions that will be displayed to end users.
-
Set Version 2 as Active.
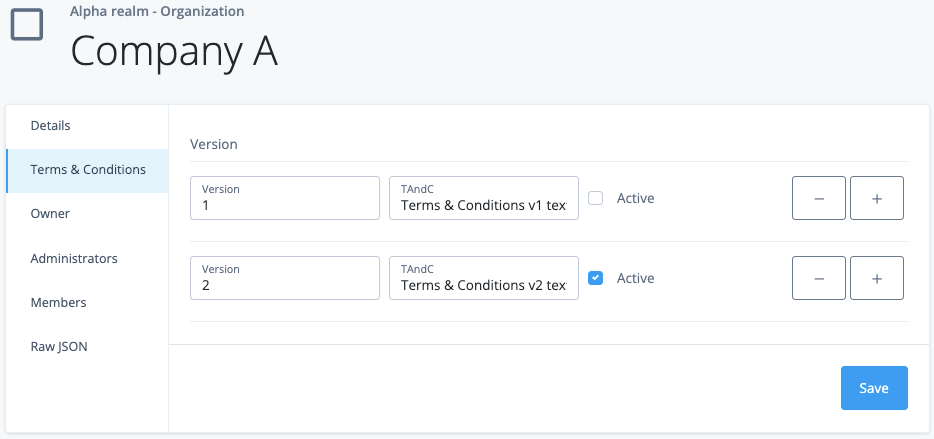
-
Click Save.
Create the scripts for the user journey
You will need to create three scripts for the user journey:
-
GetTnC
-
GetTnCFromOrg
-
SaveT&C
GetTnC
Create the following GetTnC script. This script retrieves the active
T&Cs for the organization that the user is a member of.
/*
 * This sample script retrieves the active Terms and Conditions for the organization that the user is a member of.
 * The Organization Name, Terms/Conditions and Version is added to shared state for later use
 * The user's currently accepted T&Cs for the organisation is NOT checked by this script.
 *
 *
 * A user is assumed to be a member of 1 and only 1 organization.
 * The organization data model must have been updated to include the `tNc` object property
 * The organization must have one active tNc in its data.
 * This script assumes managed/alpha_organization is being used
 *
 * Requires following ESVs:
 * 1. esv.tenant.env.fqdn - for example: openam-mycompany-mytenant-usw1.id.forgerock.io
 *
 * Assumes a valid access token with correct scopes already exist in shared state in the nodeConfig.accessTokenStateField variable
 * See: https://backstage.forgerock.com/knowledge/kb/article/a20028489 on how to acquire the access token
 */

var nodeConfig = {
  nodeName: "GetTandC",
  tenantFqdnEsv: "esv.tenant.env.fqdn",
  accessTokenStateField: "idmAccessToken"
};

var nodeLogger = {
  debug: function (message) {
    logger.message("***" + nodeConfig.nodeName + " " + message);
  },
  warning: function (message) {
    logger.warning("***" + nodeConfig.nodeName + " " + message);
  },
  error: function (message) {
    logger.error("***" + nodeConfig.nodeName + " " + message);
  },
};

var nodeOutcomes = {
  SUCCESS: "success",
  ERROR: "error"
};

var javaImports = JavaImporter(
  org.forgerock.openam.auth.node.api.Action
);

var accessToken;
var tenantFqdn;
var retVal = "";

function getTandC(){
  try {
      var user = nodeState.get("username");
      var _id = nodeState.get("_id").asString();
      var theOrg = idRepository.getAttribute(_id, "fr-idm-managed-user-memberoforgid");
      nodeState.putShared("theOrg_id", theOrg.toString());

      var IDM_API_TOKEN = accessToken;

  // IDM API Configuration
      var IDM_API_URI = "https://" + tenantFqdn + "/openidm/managed/alpha_organization/" + theOrg.toArray()[0] + "?_fields=*,parent/_id,parent/name,parent/description";

      nodeLogger.debug("IDM API call: " + IDM_API_URI + "; _id: " + _id + "; OrgId: " + theOrg + "; AccessToken: " + IDM_API_TOKEN);

      var loginDoRequest = new org.forgerock.http.protocol.Request();
      loginDoRequest.setMethod('GET');
      loginDoRequest.setUri(IDM_API_URI);
      loginDoRequest.getHeaders().add("Content-Type", "application/json; charset=UTF-8");
      loginDoRequest.getHeaders().add("Authorization", "Bearer " + IDM_API_TOKEN);

      var response = httpClient.send(loginDoRequest).get();
      nodeLogger.debug("Response from IDM: " + response.getEntity().getString());
      var result = JSON.parse(response.getEntity().getString());
      nodeState.putShared("theOrgName", result.name);
      nodeLogger.debug("Org Name: " + result.name);

      for (var x = 0; x < result.tNc.version.length; x++){
          if (result.tNc.version[x].Active){
              retVal = result.tNc.version[x].TAndC;
              nodeState.putShared("theVersion", result.tNc.version[x].Version);
              x = result.tNc.version.size;
          }
      }
      nodeState.putShared("theTNC", retVal);
      nodeLogger.debug("Outcome: SUCCESS");
      outcome = nodeOutcomes.SUCCESS;
  } catch (e) {
      retVal = e.toString();
      outcome = nodeOutcomes.ERROR;
  }
}

(function () {
  try {
    nodeLogger.debug("Node starting");

    accessToken = nodeState.get(nodeConfig.accessTokenStateField).asString();

    if (!accessToken) {
      nodeLogger.debug("Access token not found in shared state variable:" + nodeConfig.accessTokenStateField);
      action = javaImports.Action.goTo(nodeOutcomes.ERROR).build();
      return;
    }

    nodeLogger.debug("Access Token: " + accessToken);

    tenantFqdn = systemEnv.getProperty(nodeConfig.tenantFqdnEsv);
    if (!tenantFqdn) {
      nodeLogger.error("Couldn't get FQDN from esv " + config.tenantFqdnEsv);
      action = javaImports.Action.goTo(nodeOutcomes.ERROR).build();
      return;
    }

    nodeLogger.debug("FQDN: " + tenantFqdn);

    outcome = nodeOutcomes.ERROR;
    getTandC()
  } catch (e) {
    nodeLogger.error("Exception encountered " + e);
    action = javaImports.Action.goTo(nodeOutcomes.ERROR).build();
    return;
  }
})();
Accept or Deny
Create the following GetTnCFromOrg script. This script prompts the
user to accept or deny the T&Cs.
config = {
    "message": {"en-US": nodeState.get("theTNC").asString()},
    "messageYes": {"en-US": "Accept"},
    "messageNo": {"en-US": "Decline"}
};
Save T&C
Create the following SaveT&C script. This script saves the T&Cs with
the user identity.
/*
  - Data made available by nodes that have already executed are available in the sharedState variable.
  - The script should set outcome to either "true" or "false".
 */

try {
    var theOrgName = nodeState.get("theOrgName").asString();
    var theVersion = nodeState.get("theVersion").toString()

    var tNc = theOrgName + "|" + theVersion + "|" + new Date();

    var username = nodeState.get("_id").asString();
    var attribute = "fr-attr-str1";
    idRepository.setAttribute(username, attribute, [tNc]);

} catch (e) {
    nodeState.putShared("Problem saving T&C", e.toString());
}

outcome = "true";
Create the user journey
-
Sign in to the Identity Cloud admin UI using your admin tenant URL, in the format
https://<tenant-name>/am/XUI/?realm=/#/. -
Go to Journeys > New Journey.
-
Enter a unique name for the journey, select which identities will authenticate using this journey, (optionally) enter a journey description, and click Save.
-
Build a journey similar to this:
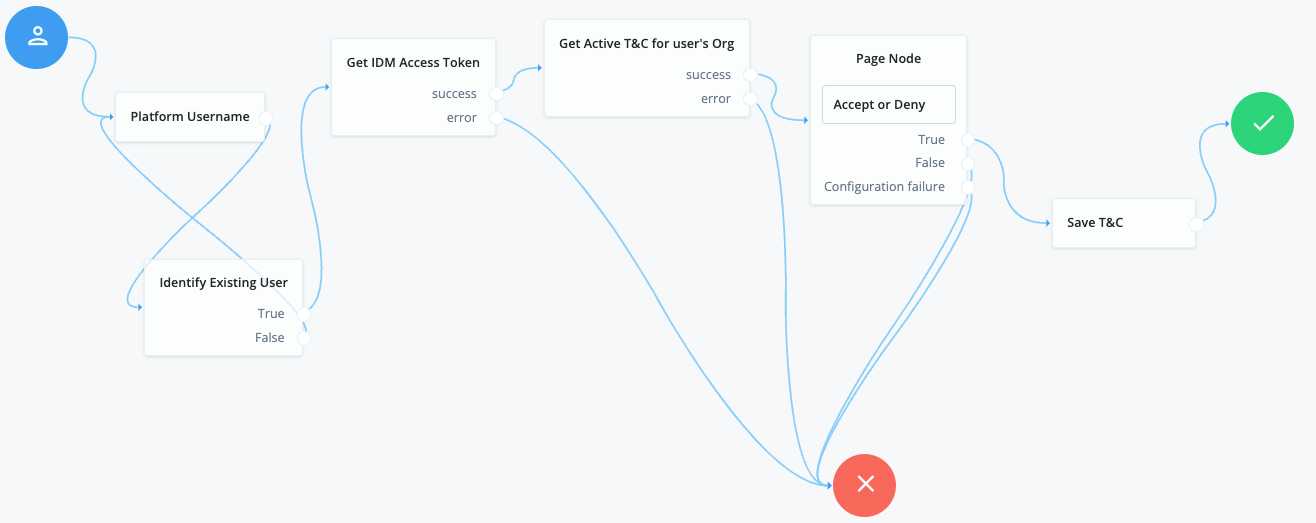
Node descriptions: * Platform Username - Prompts the user to enter their username. See Platform Username node for further information. * Identity Existing User - Checks the username against the identity repository. If that fails, the user is prompted to re-enter their username. See Identify Existing User node for further information. * Get IDM Access Token - This Scripted Decision node allows you to acquire an access token for subsequent API calls using a service account. See How do I acquire an access token for Identity Cloud API calls in a Scripted Decision node? for further information. * Get Active T&C for user’s Org - This Scripted Decision node retrieves the active T&Cs for the organization that the user is a member of. See Step 5 for further information. * Page Node - This Page node contains the Accept or Deny node and displays a message to the user. See Step 6 for further information. * Accept or Deny - This Configuration Provider node allows the user to accept or deny the T&Cs. See Step 7 for further information. * Save T&C - This Scripted Decision node flags the user’s identity as having accepted the T&Cs. See Step 8 for further information.
-
Click the Get Active T&C for user’s Org node and configure the node as follows:
-
Script: Select the
GetTnCscript you created previously. -
Outcomes: Enter
successanderror. -
Script Inputs: Add
idmAccessToken.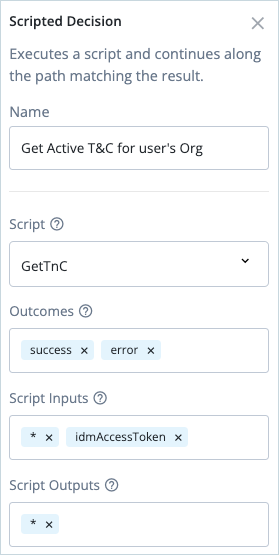
-
-
Click the Page Node and add a page description similar to this:
` Accept your organization’s T&Cs.`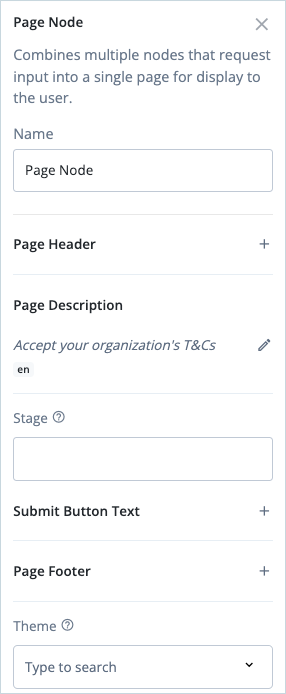
-
Click the Accept or Deny node, select the
GetTnCFromOrgscript you created previously, and selectMessage Nodeas the Node Type.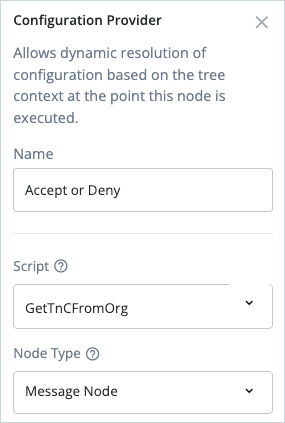
-
Click the SaveT&C node, select the
SaveT&Cscript you created previously, and addtrueto the Outcomes.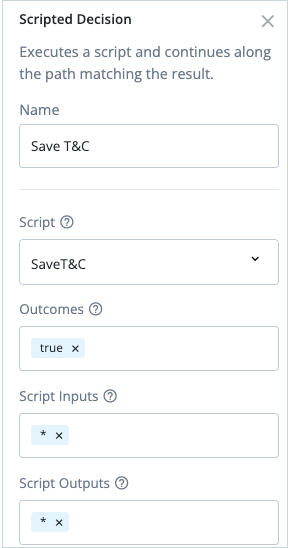
-
Click Save to save the Journey.
Testing the use case
To test the use case, make sure that your test end user is a member of Company A and does not belong to any other organizations.
-
In the Identity Cloud admin UI, go to Journeys.
-
Click the journey you created previously and copy the Preview URL.
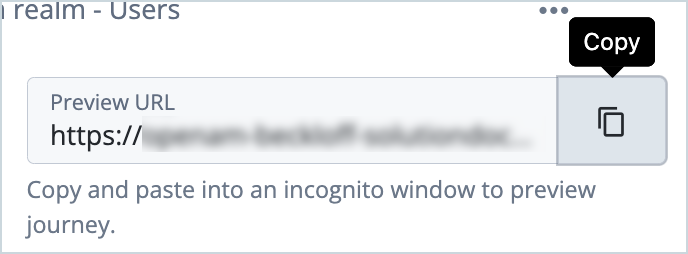
-
Paste the preview URL into a browser using Incognito or Browsing mode.
-
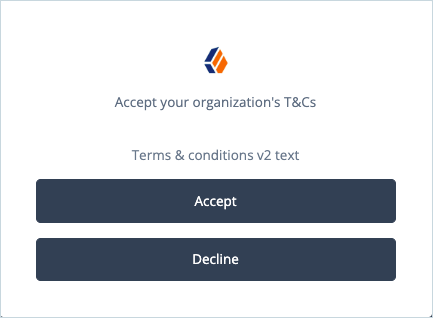
Enter the test user’s username in the Sign In screen and click Next.
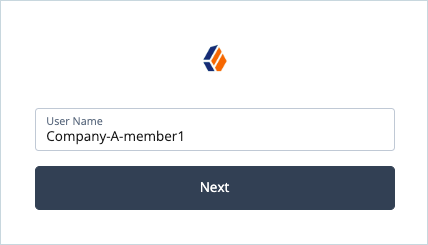
The organization’s currently active T&Cs are displayed.
-
Click Accept to accept the T&Cs.
Conclusion
This simple use case has demonstrated how to present different T&Cs to different user groups based on the user’s organization. This is easily achieved using the flexible Organization model and Journeys capabilities of Identity Cloud.