Use case: Map attributes from an external user store to ForgeRock
Author: |
Lucy Billington |
Created at: |
Mar 2023 |
Updated at: |
Mar 2023 |
Use case overview
Mappings in ForgeRock Identity Cloud are used to represent one-way or bi-directional synchronization between a source and a target user store. They specify the relationship between objects and their attributes in the two data stores.
This simple use case looks at synchronization mapping from an external LDAP user store to the ForgeRock identity service. It covers how to create a mapping, as well as concepts including configuring data transformation, individual record validation, situations and actions, and reconciliation.
Steps to achieve this use case
This use case assumes that you already have an LDAP connector configured. See Use case: Connect ForgeRock Identity Cloud with an LDAP user store for further information.
Create a mapping
-
Sign in to the Identity Cloud admin UI using your admin tenant URL, in the format
https://<tenant-name>/am/XUI/?realm=/#/. -
Go to Native Consoles > Identity Management > Configure > Mappings.
-
Click New Mapping.
-
Select the source and target resource, and click Create mapping > Create mapping.
In our example, we’re mapping
System/PreviousCIAM/accounttoManaged/alpha_user**: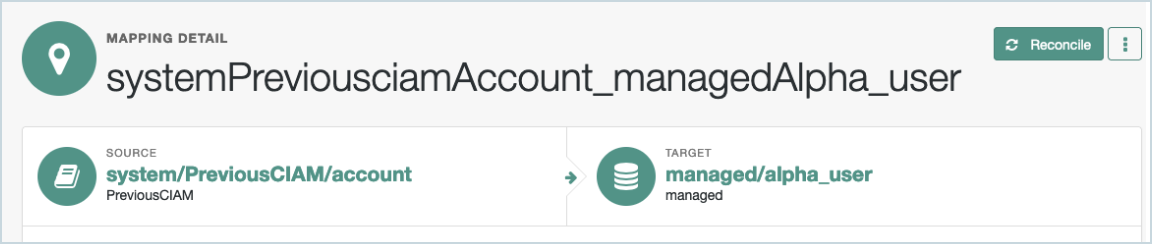
-
Configure the mapping by adding target properties to their corresponding source properties. See Configure mappings using the IDM admin UI for further information.
Once the mapping is complete, the individual attributes from the Source on the left are mapped to the Target on the right, similar to this example:
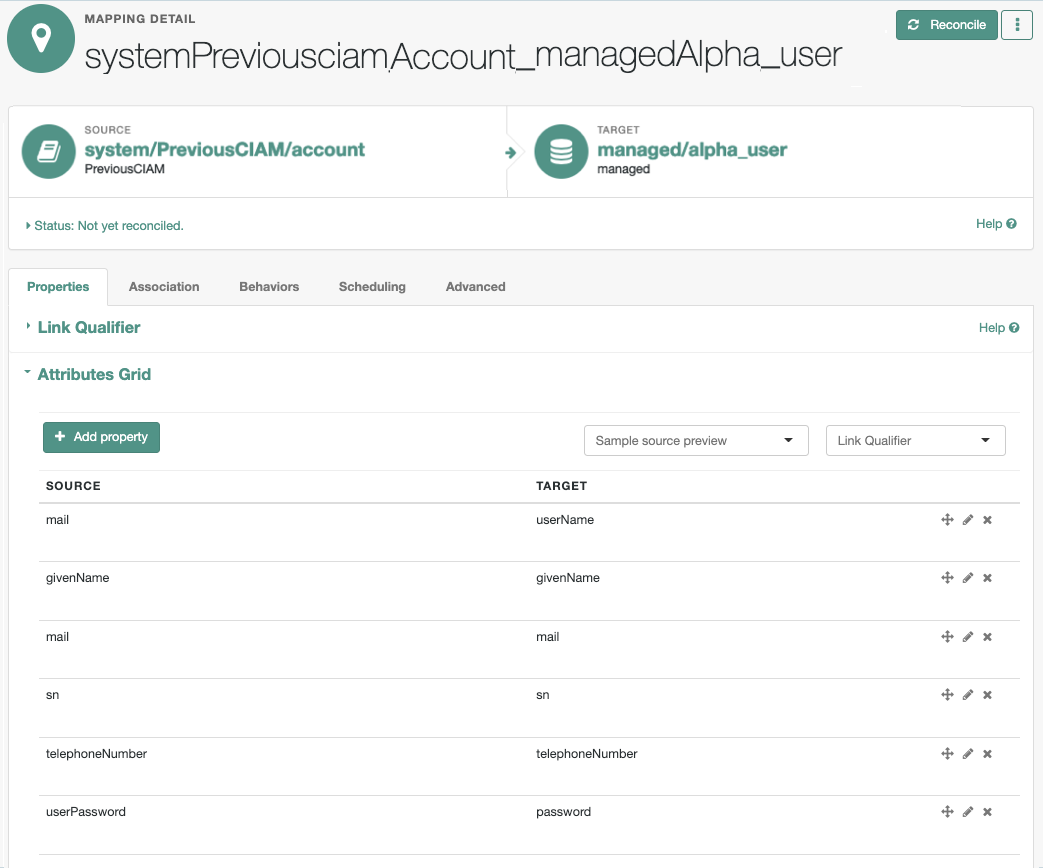
Note that in our example, the source attribute mail has been mapped to the target attribute userName. This will require that the users use their email addresses to log in.
Data transformations
Identity Cloud caters to more complex use cases where you might need to transform the data. For example, to encrypt, decrypt or tokenize the data, or obfuscate it in some other way.
In the following example, we’ll use a transformation script to decode the password property in base64 format. This may be required if you need to migrate users, including their passwords, from the remote Directory Services (DS) system.
-
On the Properties tab, select the property, for example,
password. -
Click the Transformation Script tab.
-
Enter a script similar to this:
//Set the text of {ds_abbr} userPassword as the value of the password:
if (source != null) {
   var base64 = Packages.org.forgerock.util.encode.Base64url;
   decodedTarget = new Packages.java.lang.String(base64.decode(source));
   target = decodedTarget;
 }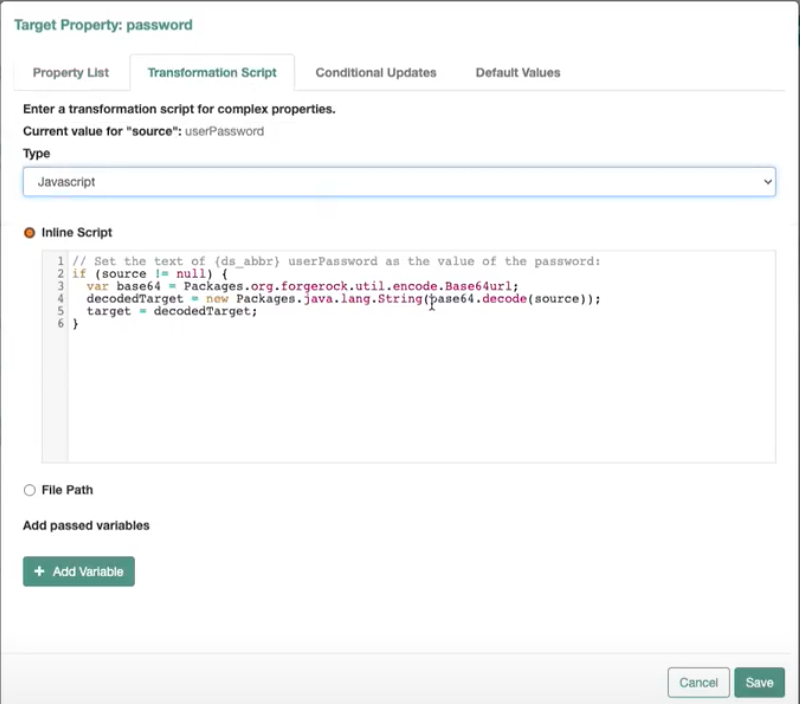
-
Click Save.
See Synchronize passwords for further information on synchronizing hashed user passwords from your DS deployment into Identity Cloud.
Individual record validation
You can restrict the user records that are considered for synchronization.
There are several options for this. In our example, we’ll use an inline script to only consider the synchronization of source identities whose Description attribute represents the fixed string “usa”.
-
Click the Association tab.
-
Under Individual Record Validation, select
Validate based on custom script.
-
Click the Edit (pencil) icon next to Inline Script.
-
Enter a script, similar to this:
 // Only process accounts belonging to usa
  source.description==”usa”
-
Click Save.
Situations and actions
When identities are synchronized, Identity Cloud inspects both the source and the target and performs a comparison. Based on that comparison for each identity record, a situation is derived with an associated configurable action. The action that is taken for each situation is defined in the policies section of your synchronization mapping.
For example, in a situation where a source object exists, but the target has no matching record, Identity Cloud performs the Create action in order to create the record.
To view and configure situations and actions for a mapping:
-
Click the Behaviors tab.
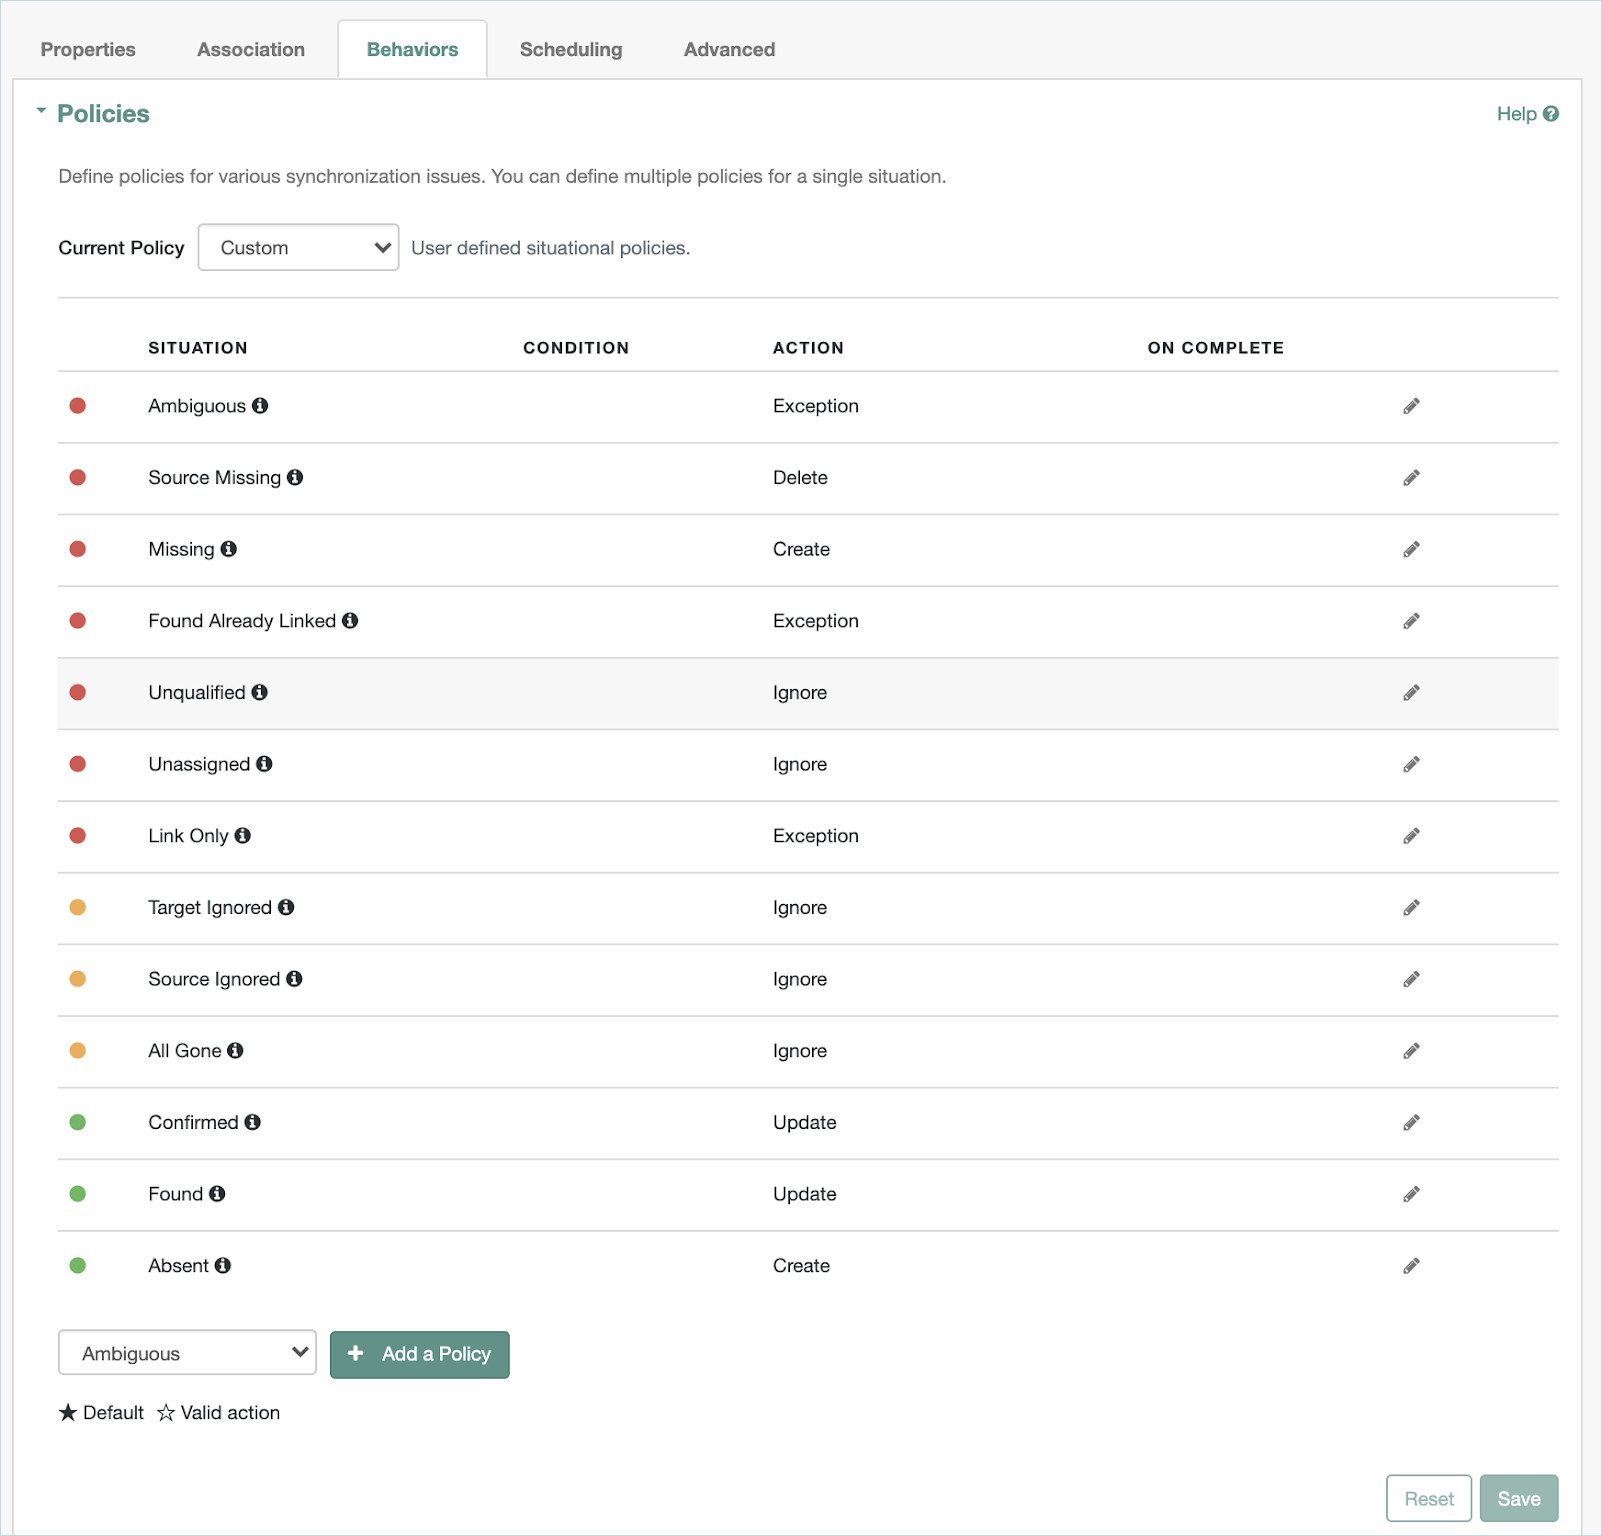
Note the Absent situation has the value Create. This will result in users from the source system being created in Identity Cloud.
See Situations & actions for further information on configuring situations and actions.
Reconciliation
Reconciliations can be scripted, manual or scheduled. They can be a one-off bulk synchronization or scheduled to perform a regular synchronization to keep two data stores in sync.
To configure a scheduled reconciliation:
-
Click the Scheduling tab.
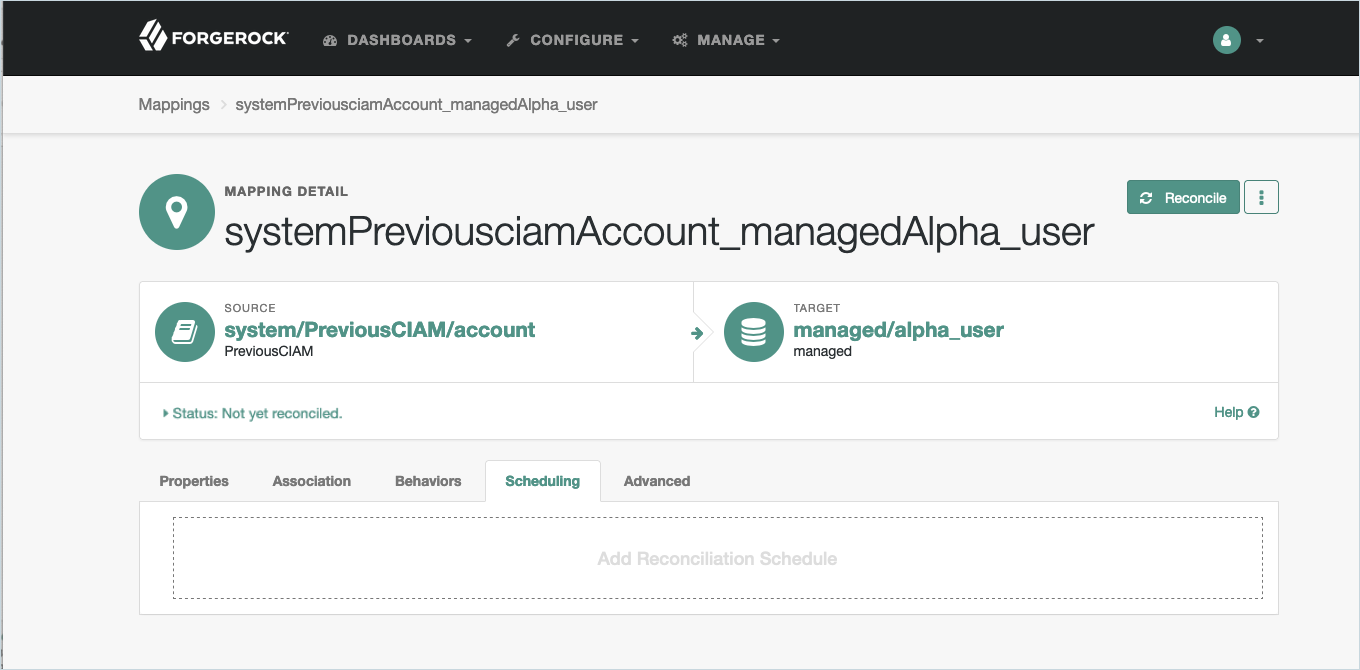
-
Click Add Reconciliation Schedule.

-
Enter the schedule details and click Save.