Use case: Map existing AD groups to roles in ForgeRock Identity Cloud
Author: |
Lucy Billington |
Created at: |
Jun 2023 |
Updated at: |
Jun 2023 |
Use case overview
In ForgeRock Identity Cloud, Active Directory (AD) groups are assigned to roles either dynamically through a mapping between the two identity stores or statically through the UI or REST.
In this use case, we’ll demonstrate how the relationship between AD groups and Identity Cloud roles can be managed by:
-
Using AD groups to control ForgeRock role membership
-
Using ForgeRock roles to control membership of existing AD groups
Pre-configuration
AD groups and users
For the examples in this use case, an AD group called 2d has been
configured, with the following group members:
-
2d-user1 -
2d-user2 -
2d-user3
Connectors
A Remote Connector Server (RCS) has been deployed and connected to Identity Cloud. See Sync identities for further information.
A connector to Active Directory has already been configured. See LDAP connector for further information.
Mappings
See Resource mapping for further information on setting up a mapping between an external resource and Identity Cloud.
For the examples in this use case, the following two mappings have been created:
-
A mapping from AD to Identity Cloud: System/AD/Account → managed/Alpha_user
-
A mapping from Identity Cloud to AD: managed/Alpha_user → System/AD/Account
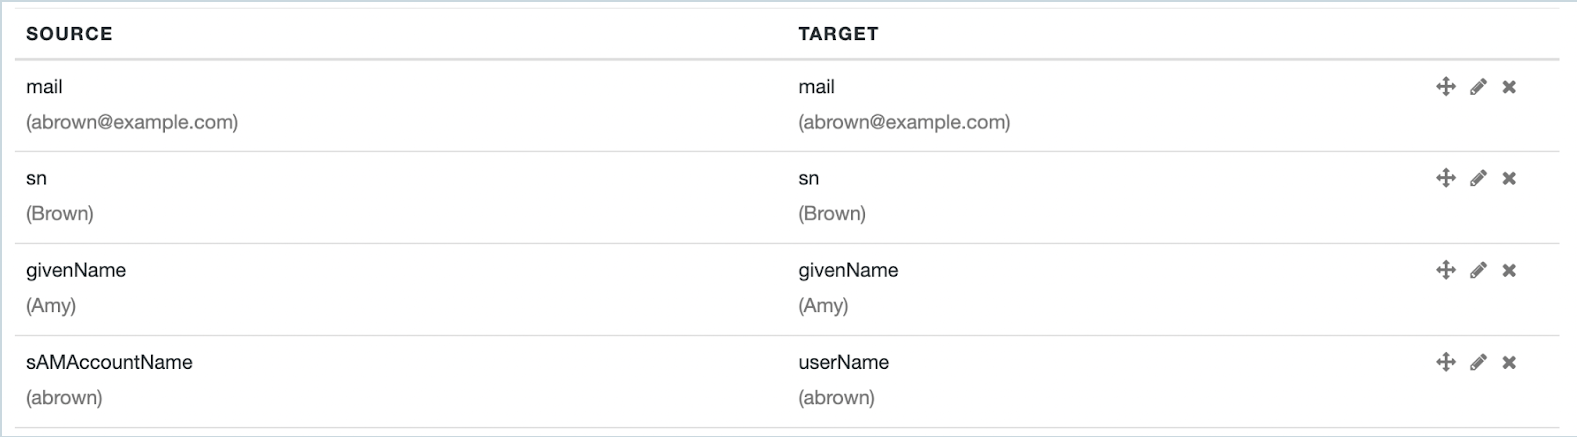
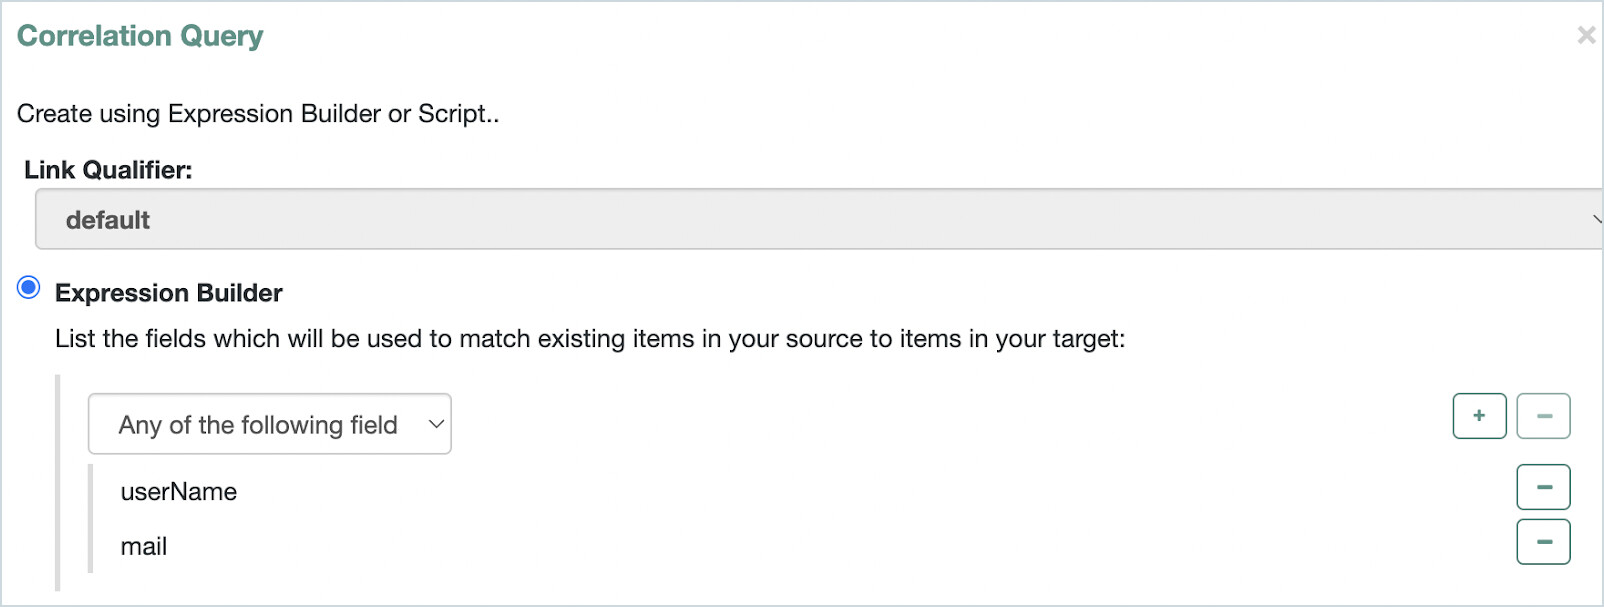
System/AD/Account → managed/Alpha_user
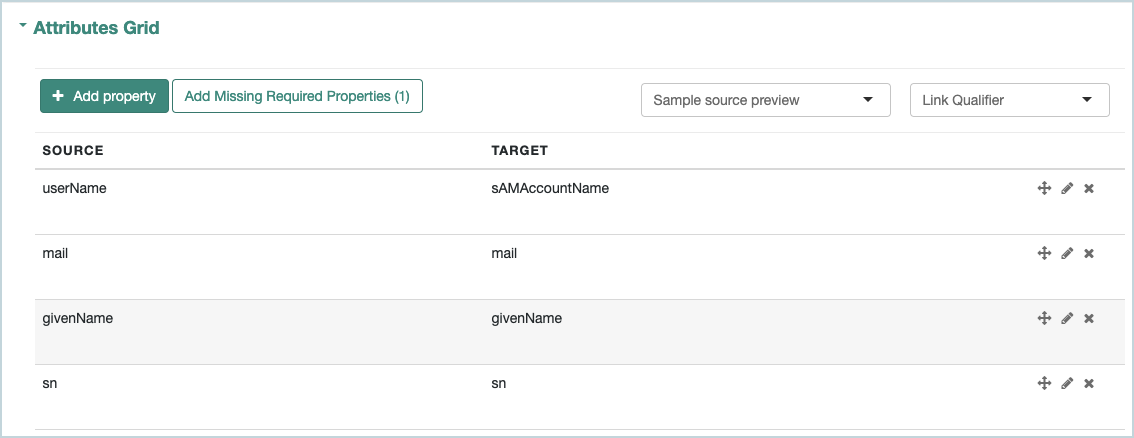
The following attributes have been mapped (Attributes Grid):
The following correlation query has been configured (Association > Association Rules > Correlation Queries > Add Correlation Query):

Use AD groups to control ForgeRock role membership
With this configuration, adding a user to a group in AD and then reconciling the mapping will result in that user appearing in a specified AD group member’s role in Identity Cloud.
-
Sign in to the Identity Cloud admin UI using your admin tenant URL, in the format
https://<tenant-name>/am/XUI/?realm=/#/. -
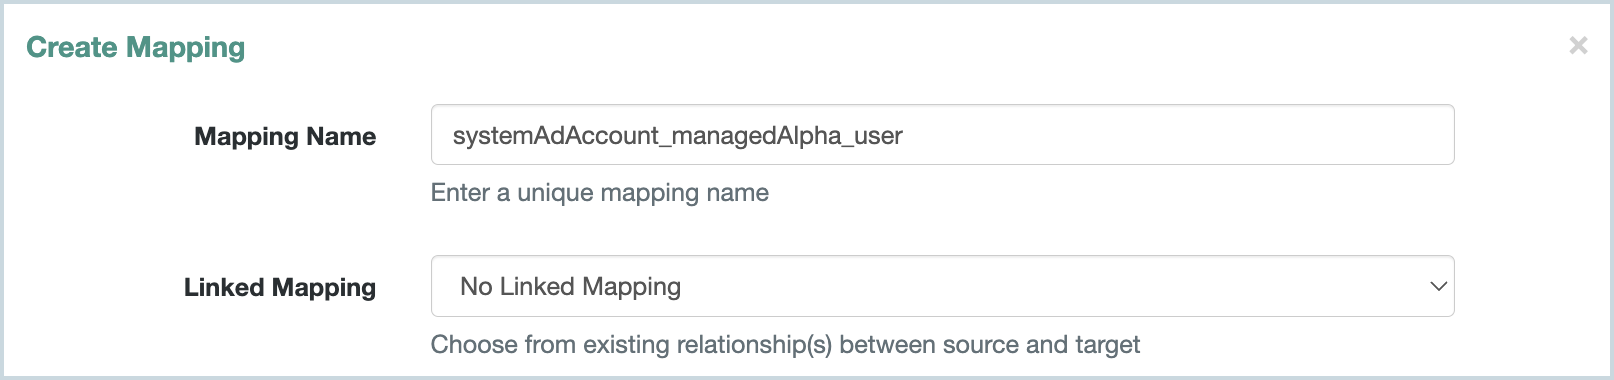
Go to Native Consoles > Identity Management > Configure > Mappings > <mapping>. In our example, we’ve selected systemAdAccount_managedAlpha_user.
-
Go to Properties > Attributes Grid > Add property.
-
Add the property
ldapGroups `→frIndexedMultivalued5`. -
Click Reconcile to reconcile the mapping.
-
In the Identity Cloud admin UI, go to Identities > Manage > Alpha realm - Users and select an AD group user, for example,
2d-user1. -
Click the Raw JSON tab and copy the group name string, for example:
"CN=2d,OU=groups,OU=orgUnitName,DC=server,DC=domainComponent,DC=org" -
Go to Identities > Manage > Alpha realm - Roles > New Alpha realm - Role.
-
Create a role, similar to this example:
-
Name:
AD Group members -
Description:
Role consisting of members of the AD Group -
Settings > Condition > Set up (toggle on A conditional filter for this role) > Advanced editor:
/frIndexedMultivalued5 co "CN=2d,OU=groups,OU=orgUnitName,DC=server,DC=domainComponent,DC=org"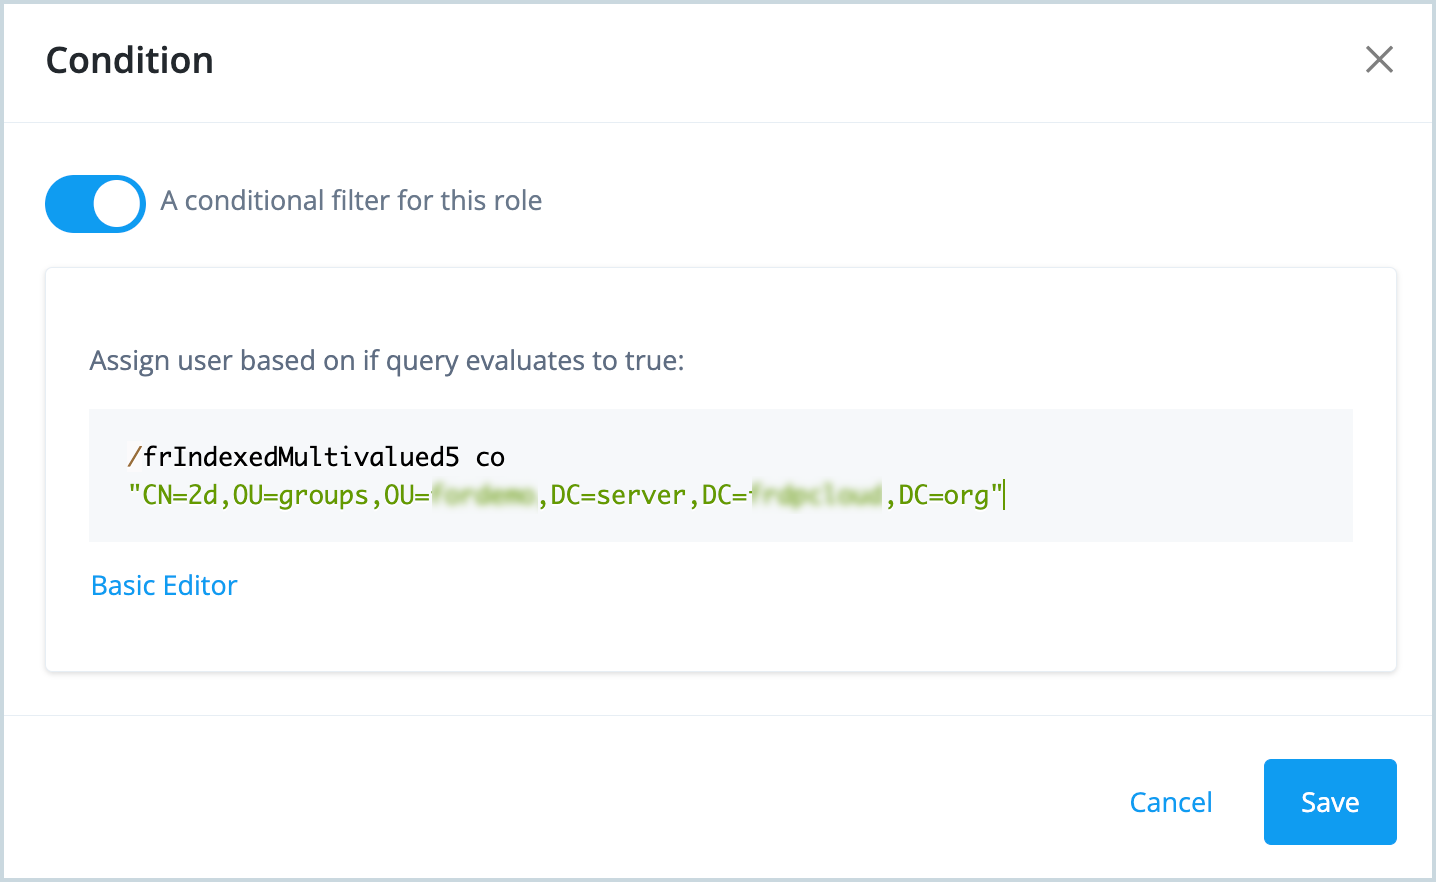
-
-
Click Save.
-
Click the Role Members tab and notice that all three users in the AD 2d group (2d-user1, 2d-user2, and 2d-user3) are now role members.
Adding another user to that group in AD, then reconciling, will result in that user appearing in the 2d AD Group members role in Identity Cloud.
Use ForgeRock roles to control membership of existing AD groups
With this configuration, adding a user to a role in Identity Cloud will result in that user getting membership of a specified AD group.
-
In Active Directory, create a new group called
staticand make note of the distinguishedName of this group (in the Attribute Editor), similar to this:CN=static,OU=groups,OU=orgUnitName,DC=server,DC=domainComponent,DC=org. -
Sign in to the Identity Cloud admin UI using your admin tenant URL, in the format
https://<tenant-name>/am/XUI/?realm=/#/. -
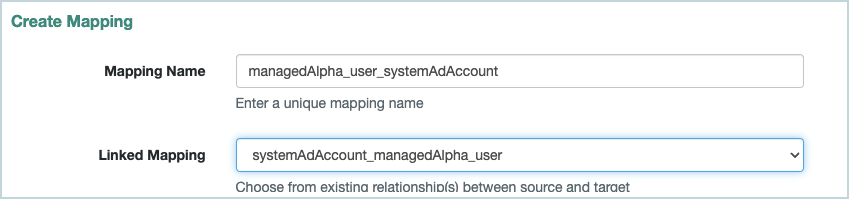
Go to Identities > Manage> Alpha realm - Assignments > New Alpha Realm - Assignment and create an assignment:
a. Enter a name and description for the assignment, and select the mapping.
In our example, the assignment will be applied to the mapping,
managed/alpha_user > system/AD/account.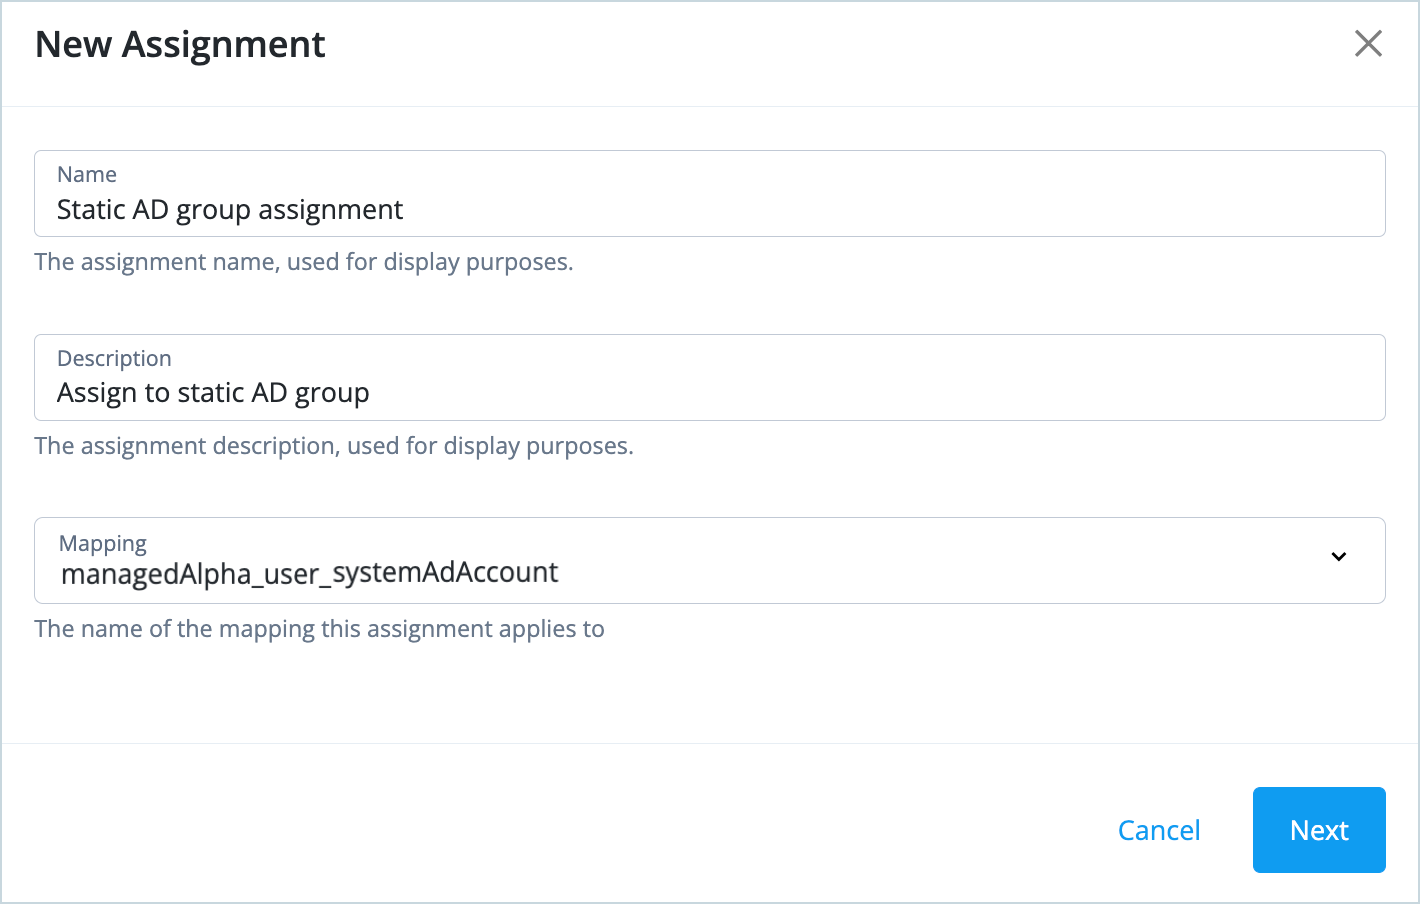
b. Click Next.
c. Click Add an attribute.
d. Select an attribute from the drop-down list, and enter a value for the attribute, similar to this: * Target system attribute:
ldapGroups* Value: Enter the distinguishedName of the static group, for example["CN=static,OU=groups,OU=orgUnitName,DC=server,DC=domainComponent,DC=org"]+
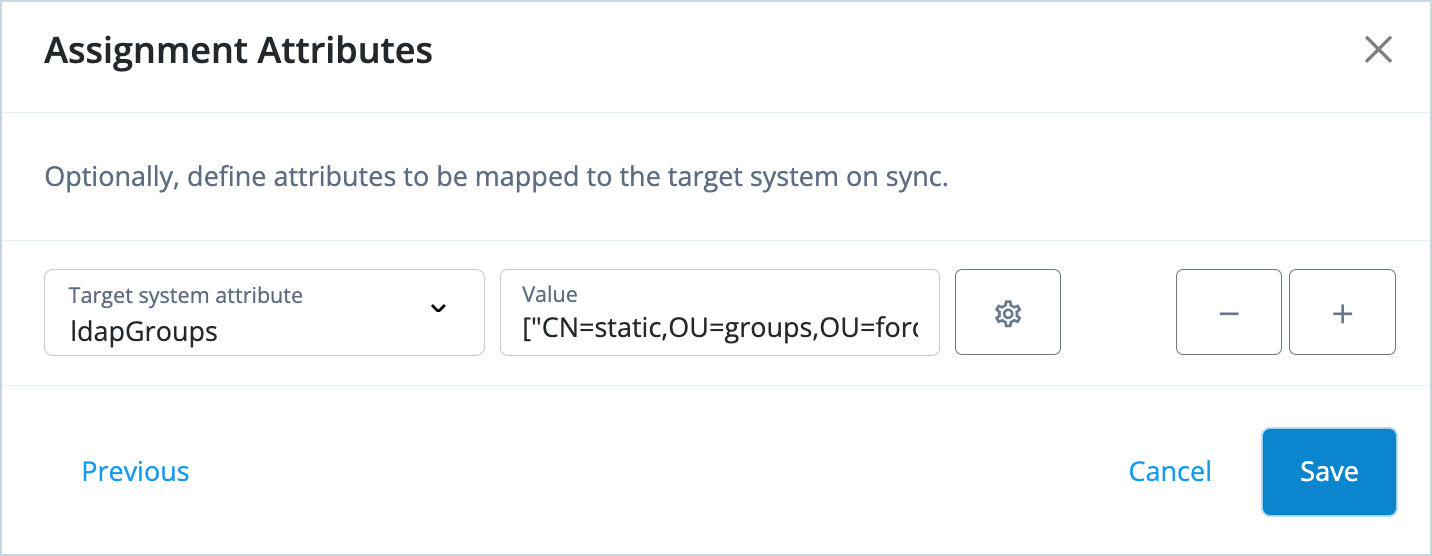
+ e. Click Save.
-
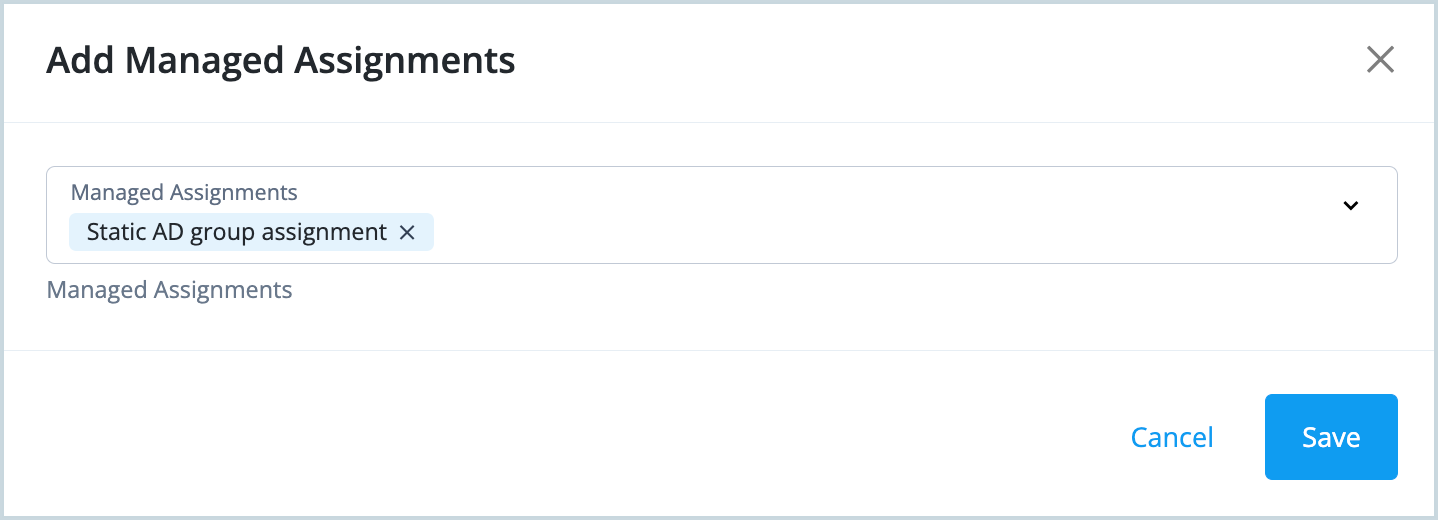
Go to Identities > Manage > Alpha realm - Roles > New Alpha realm - Role and create a role:
a. Enter a name for the role (
Static rolein our example). You don’t need to add any role assignments or time constraints. Click Next.b. Click Managed assignments > Add Managed Assignments.
c. Select the Static AD group assignment that you just created and click Save.
-
Add a new role member to the role you just created.
Notice that the new user gets the group membership in AD.