Deploying ForgeRock Access Manager on OpenShift Online (Part 2)
Author: |
Patryk Krolikowski |
Created at: |
Feb 2018 |
Updated at: |
Oct 2022 |
Summary
Instructions for deploying ForgeRock® Access Manager on OpenShift® Online using using manifests and the oc command-line interface (CLI) tool. This is the second of two related articles. You can find the first article here.
Requirements
Following are requirements for creating an all-in-one setup with an embedded directory store. This article assumes you already have the following:
-
An OpenShift Online account. We will use this account to create a new project to run the example that we will create in this article.
-
A CLI client to interact with OpenShift. This is similar to Kubernetes kubectl, and is called oc. Download it from OpenShift GitHub.
-
A Docker image available in a registry. If you don’t have this, follow the steps in “Deploying Forgerock Access Manager on OpenShift Online (Part 1)” to create it. NEED ACTIVE LINK
Let’s get started.
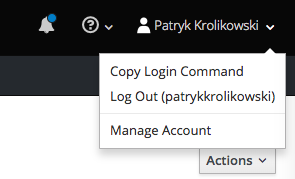
Log in to OpenShift. To do this is, log in to your OpenShift Web Console (https://manage.openshift.com → Open Web Console) and select your user icon. Select Copy Login Command from the menu:
Paste it into the CLI:
$ oc login https://api.pro-eu-west-1.openshift.com --token=XXXXXXXXCreate new project called am-playground:
$ oc new-project am-playgroundOnce this is completed, you will automatically change the context to that project.
Preparing to deploy
Before we can deploy our example, we need these configuration objects from OpenShift:
-
Secret: Used to store credentials needed when pulling the image from private Docker repository.
-
Persistent Volume Claim: Used to request a persistence volume for our configuration. OpenShift subscribers with a paid plan should have a persistent volume. The size of the volume will depend on your plan.
-
Image Stream: An object that stores links to images used in the project (a virtual view of images).
-
Deployment Config: A user-defined template that describes the main deployment components.
-
Service: An internal load balancer that proxies connections to pods. It is consistently available during a pod’s lifecycle.
-
Route: Similar in concept to ingress in Kubernetes, it exposes a service to externally reachable URLs.
Sample definitions of these objects in the form of YAML manifests can be found on my GitHub repo: GitHub - scureq/openshift-artifacts under the Manifests directory. Note that creating manifests is beyond the scope of this article.
Building Secrets in Docker
If you are working in a private Docker repo, you need to use image pull secrets to access the images you need to create containers during the pod-building process.
The oc has a subcommand, new-dockercfg, which provides instructions for building a Docker-specific secret:
oc secrets new-dockercfg private-docker \
--docker-server=docker.io \
--docker-username=DOCKERID \
--docker-password=PASSWORD \
--docker-email=EMAIL_ADDRESS
While this seems simple, I painfully discovered that it fails with Docker Hub. This is most likely because it builds a secret with type kubernetes.io/dockerfg, and puts it inside contents of a newer format type, kubernetes.io/dockerconfigjson. As a result, the secret is ineffective when it pulls from a Docker Hub registry. In order to fix this, we need to create a secret in a less automated way.
If you have config.json, a Docker configuration file containing your Docker registry credentials , you can use it as a source for your secret creation. The config.json file might use a credsStore like osxkeychain in MacOS X. If it does, to read actual credentials you can either:
a) Disable Securely store docker logins in macOS keychain temporarily, and reenable it right after performing the steps below, or
b) Create the file using the template below, and substitute the value of auth key with your base64-encoded dockered:password credentials.
Base64-encode the file and put the resulting string into the YAML manifest used for creating a secret.
If you go with option b, a sample config.json will look something like this:
{
   "auths" : {
     "https://index.docker.io/v1/" : {
       "auth" : [BASE64 encoded 'dockerid:password']
  }
 }
}
To base64-encode that file, enter:
$ cat config.json | base64The output should look something like this:
ewogICAiYXV0aHMiIDogewogICAgICJodHRwczovL2luZGV4LmRvY2tlci5pby92MS8iIDogewogICAgICAgImF1dGgiIDogW0JBU0U2NCBlbmNvZGVkICdkb2NrZXJpZDpwYXNzd29yZCddCiAgIH0KICB9Cn0KStore the string, as you may need it when you work with a private Docker image registry.
Building an AM Application
Now that the we’ve completed the process of creating secrets, we can build an AM application.
In my GitHub Repo, you’ll find a file called openam-template.yaml. This is a manifest of type template, which groups all of the necessary objects needed in our project.
First, we need to ensure our project is really empty:
$ oc get allThis command should not return any results.
Now we can use open-template.yaml. In order to build our application, we need to pass some parameters to it. To list these parameters, enter:
$ oc process --parameters -f openam-template.yamlIt should return something like this:

Note that the VALUE column shows default values for parameters that are not specified.
Let’s build our AM application with this single command:
$ oc process -f openam-template.yaml -p DEPLOYMENT=demo -p DOCKER_CREDS=[REMEMBER THAT BASE64 ENCODED STRING?] -p IMAGEREPO=docker.io/steffow/openam-eval | oc create -f -The output should look like this:
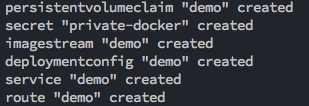
To see the status, enter:
$ oc get allit should return something similar to the output below:
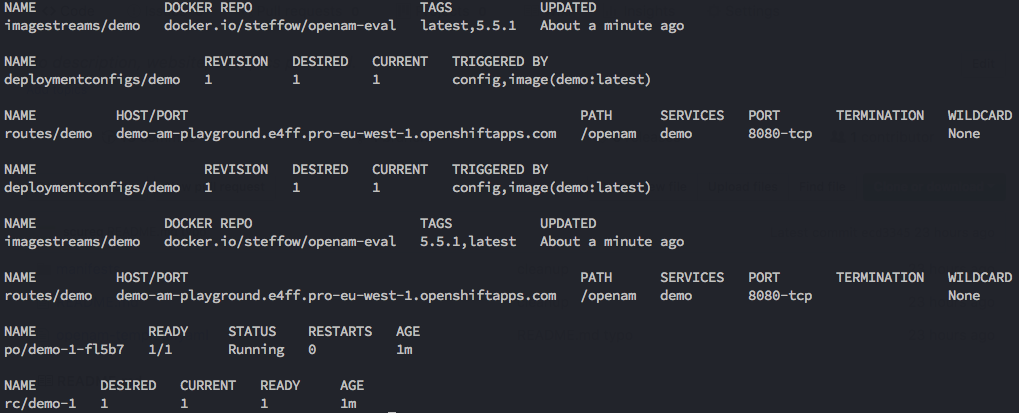
Note that po/demo-x-xxxx might still show a Creating status. It should change to Running within a minute or so.
AM should be up, running, and ready to be configured. To verify this, go to the URL in routes/demo.
In our case, it is http://demo-am-playground.e4ff.pro-eu-west-1.openshiftapps.com/openam. The configurator screen should display.
Complete the installation according to the instructions in the previous article.
Remove the pod by entering:
$ oc delete po/demo-1-fl57bOpenShift will automatically create a new one with the AM configuration intact:

To remove everything with one command, enter:
$ oc process -f openam-template.yaml -p DEPLOYMENT=demo -p IMAGEREPO=docker.io/steffow/openam-eval | oc delete -f -You have successfully created an all-in-one setup with an embedded directory store.