Getting Started with Scripting in ForgeRock Identity Cloud: Part 4 -
Author: |
Rajesh Rajasekharan |
Created at: |
Sep 2023 |
Updated at: |
Mar 2024 |
This is Part 4 of 5 in the series Getting started with Scripting in ForgeRock Identity Cloud.
Adding properties to a user session ~ 10 minutes
On successful authentication, a session is created for the authenticated user. Sometimes certain applications in an infrastructure expect certain properties/attributes to be made available in a user session. A script can create session properties with the fields and methods of the Action interface.
For example, in the following code snippet, the outcome is set to true
using the Action interface in addition to adding a custom session
property:
  var goTo = org.forgerock.openam.auth.node.api.Action.goTo
action = goTo("true").putSessionProperty("mySessionProperty", "myPropertyValue").build()Creating the script
-
In the Identity Cloud Admin UI, go to /alpha > Scripts > Auth Scripts > + New Script.
-
Select Journey Decision Node and click Next.
-
Provide the following details:
Name: session-property
Description: Script to add custom session property
JavaScript: Replace the placeholder code in the inline editor with code below:var goTo = org.forgerock.openam.auth.node.api.Action.goTo action = goTo("true").putSessionProperty("mySessionProperty", "myPropertyValue").build()
-
Click Save and Close.
Using the Journey Decision Node script in an authentication journey
-
In the Identity Cloud admin UI, go to /alpha > Journeys.
-
Create a PwdGrant journey by choosing PasswordGrant > ⋯ > Duplicate option.
-
Use the information below as reference to complete the Duplicate Journey form:
Name: PwdGrant
Identity Object: Alpha realm - Users managed/alpha_user
Description: Modified Password Grant journey -
Click Save.
-
Drag the Scripted Decision (Utilities) node on to the PwdGrant journey.
-
Select the Scripted Decision node.
-
Give the node a more meaningful name, for example, “Set My Session Property”.
-
Under the Script drop down, choose the “session-property” script you created earlier.
-
In Outcomes, type
trueand hit enter. Notice that the Scripted Decision node now has an outcome that can be connected to other nodes in the journey.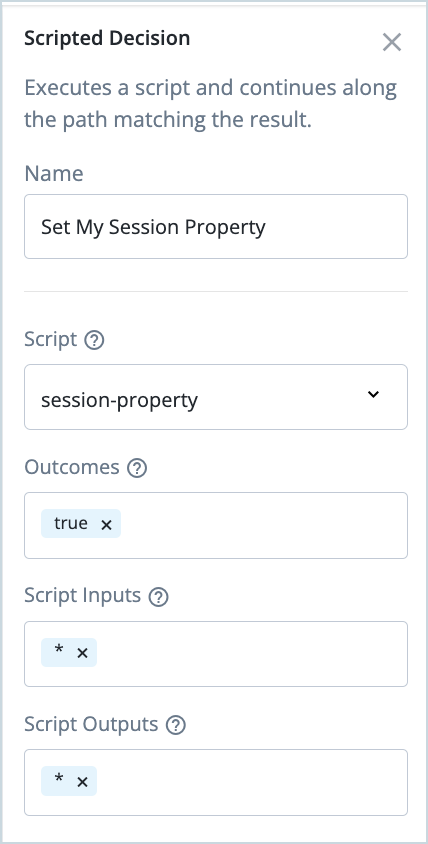
-
Connect the
Trueoutcome of the DataStore Decision node to the Scripted Decision node (e.g. Set My Session Property) -
Connect the outcome of the Scripted Decision node (Set My Session Property) to the Success node.
Whitelisting session properties in Identity Cloud
The session properties added in a script must be whitelisted by the Access Management component in Identity Cloud.
Perform the steps below to add the session property used in the script to the Session Property Whitelist service.
-
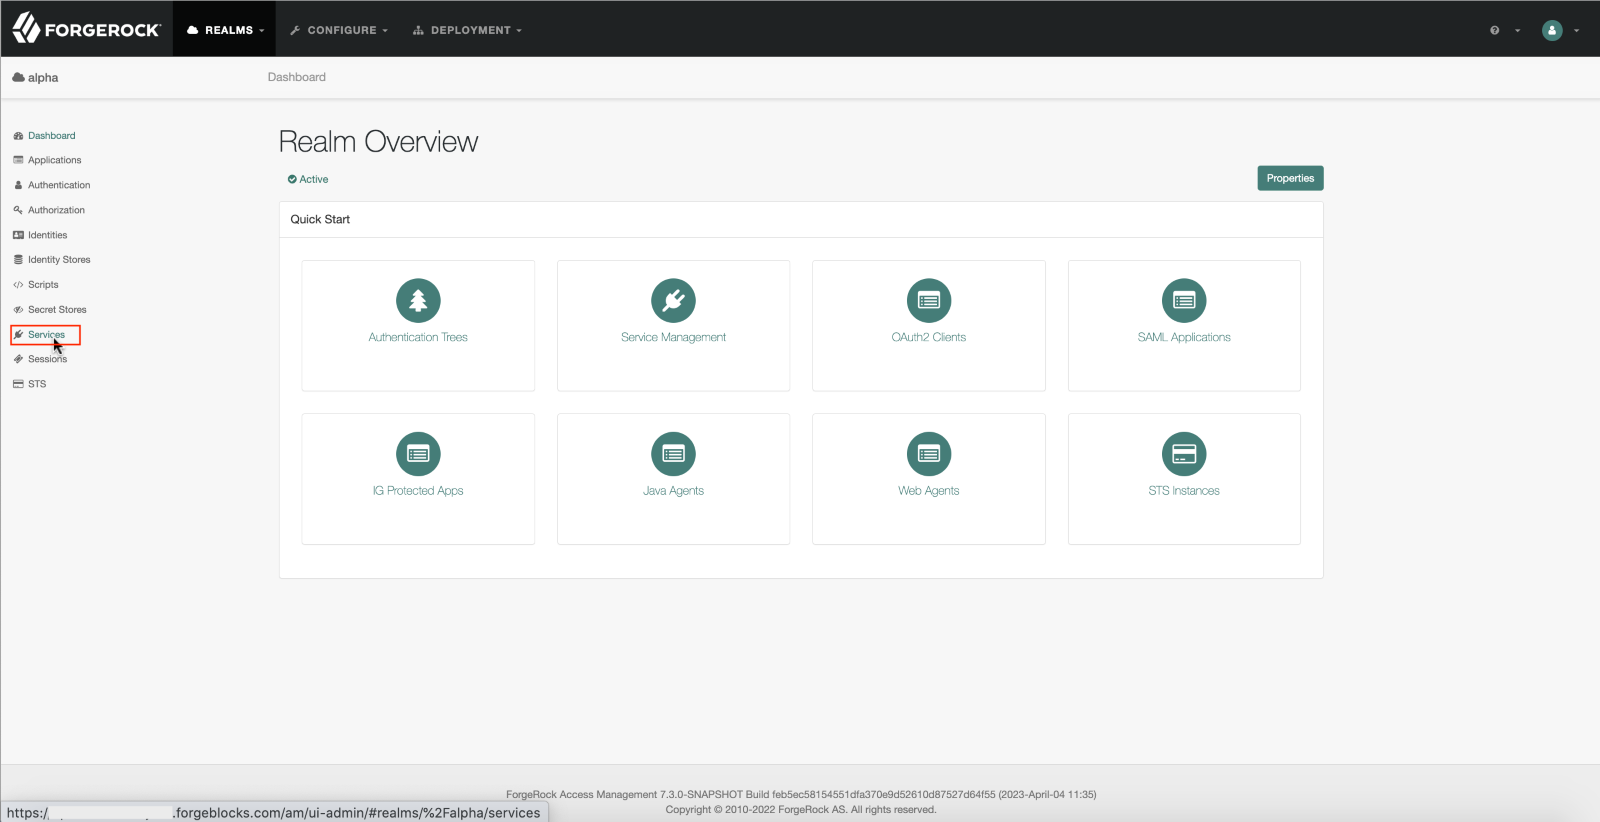
In the Identity Cloud Admin UI, go to /alpha > Native Consoles > Access Management.

-
In the Access Management admin UI, go to alpha > Services.
-
If the Session Property Whitelist Service is not already configured, click +Add a Service.

-
Type to look for and select the “Session Property Whitelist Service”.

-
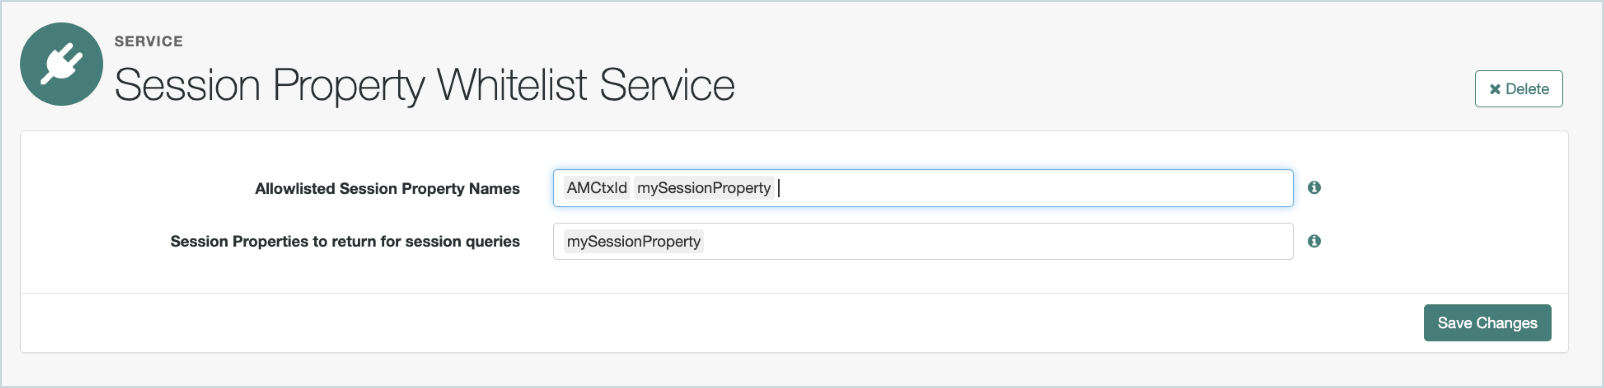
On the Session Property Whitelist Service configuration page, type and add the session property “mySessionProperty”, and click Create.

-
On the Session Property Whitelist Service configuration page, type and add “mySessionProperty” in the Allowlisted Session Property Names and click Save Changes.
Testing the journey
Testing the journey involves introspection of the user’s active session after successful authentication with Identity Cloud. To acquire the user’s session (token) and to later introspect it, the Identity Cloud REST API is the most convenient option.
The REST API is covered in detail in
this
guide. The following examples use the curl command, available by
default in most operating systems to invoke HTTP calls to the Identity
Cloud REST endpoints.
-
The following
curlcommand sends a HTTP POST request to the/authenticateREST endpoint of Identity Cloud, specifically the PwdGrant journey with the credentials of the Identity Cloud user “fruser10”.On successful authentication, the response from Identity Cloud is a session (token) for the user.
  $ curl --location --request POST 'https://<tenant-fqdn>/am/json/realms/root/realms/alpha/authenticate?authIndexType=service&authIndexValue=PwdGrant' \
  --header 'X-OpenAM-Username: fruser10' \
  --header 'X-OpenAM-Password: Rock5tar10$' \
  --header 'Content-Type: application/json' \
  --header 'Accept-API-Version: resource=2.1' | jq .
Example response:
{ "tokenId": "AlbCsbwIkihHpiy-OpeFHvN2yvA.*AAJTSQACMDIAAlNLABw0WEcxQnFubDFtSHJScGhHdEs5OVc0eFhMdkE9AAR0eXBlAANDVFMAAlMxAAIwMQ..*", "successUrl": "/enduser/?realm=/alpha", "realm": "/alpha" } -
The session token received above is used in the following REST call to get the user’s session details. The user’s session details in the response from Identity Cloud has the session property
mySessionPropertywith its value added by the script.Note that the
/sessionsendpoint used below expects the cookie name of the Identity Cloud tenant, which can be found by navigating to Tenant settings > Global Settings > Cookie in the Identity Cloud admin UI.$ curl --location --request POST 'https://<tenant-fqdn>/am/json/realms/root/realms/alpha/sessions?_prettyPrint=true&_action=getsessioninfo' \ --header 'Accept-API-Version: resource=4.0' \ --header 'Content-Type: application/json' \ --header '<cookie-name>: <tokenId received above>' | jq .Example response:
   {
       "username": "a3655285-d900-4833-a92b-6dd1f9b07b22",
       "universalId": "id=a3655285-d900-4833-a92b-6dd1f9b07b22,ou=user,o=alpha,ou=services,ou=am-config",
       "realm": "/alpha",
       "latestAccessTime": "2023-05-09T13:52:03Z",
       "maxIdleExpirationTime": "2023-05-09T14:22:03Z",
       "maxSessionExpirationTime": "2023-05-09T15:52:02Z",
       "properties": {
        "AMCtxId": "13ce497e-8feb-4394-9d85-4dabdca96cc7-2297277",
        "mySessionProperty": "myPropertyValue"
       }
   }
Further reading
Other guides in the Getting started with Scripting in ForgeRock Identity Cloud series:
Other useful links:
Please provide us your feedback on this guide.