Getting started with the ForgeRock Identity Cloud REST API: Part 6 -
Author: |
Rajesh Rajasekharan |
Created at: |
Jul 2023 |
Updated at: |
Mar 2024 |
This is Part 6 of 8 in the series Getting started with the ForgeRock Identity Cloud REST API.
Identity profiles & OAuth 2.0 flows
This guide provides examples of running ForgeRock Identity Cloud
identity profiles & OAuth 2.0 flow requests using both Postman and
curl commands.
Before you begin
This guide assumes that you have already prepared the ForgeRock Identity Cloud Postman Collection environment and run the collection prerequisites. See Part 1 - Introduction and Part 2 - Prerequisite requests for further information.
Example using Postman ~ 5 min
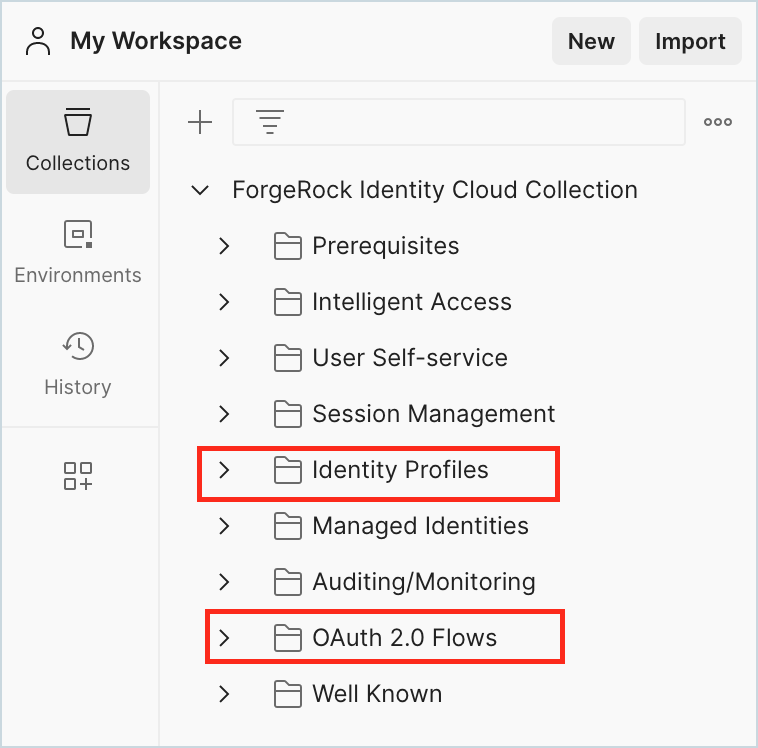
This guide uses example REST calls from two sections of the ForgeRock Identity Cloud Postman Collection:
-
Identity Profiles
-
OAuth 2.0 Flows
-
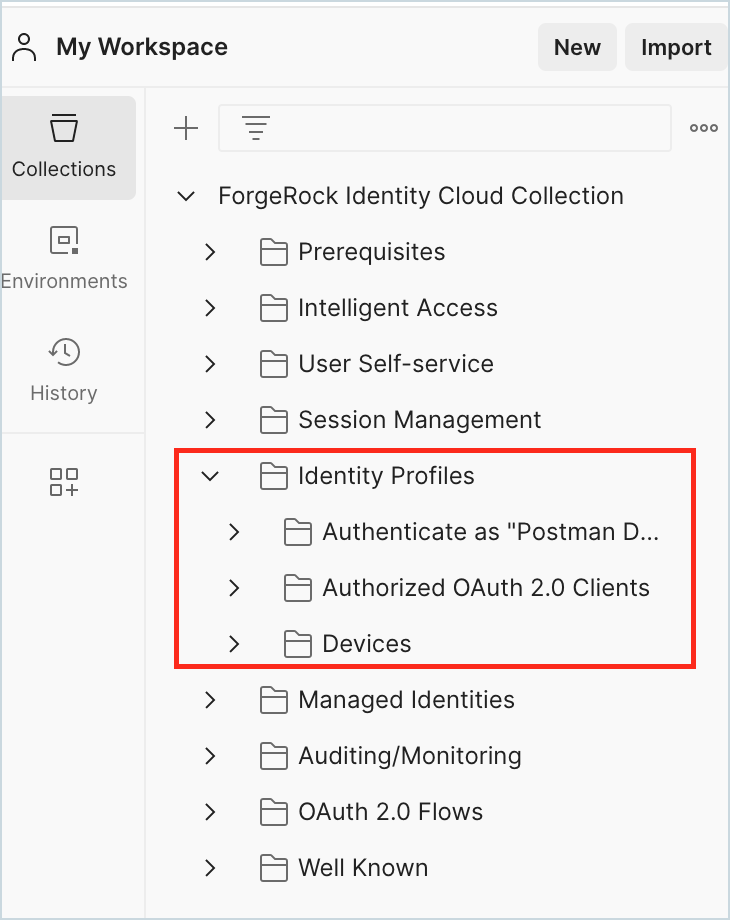
In Postman, expand the Identity Profiles section of the ForgeRock Identity Cloud Postman Collection.
-
Go to Identity Profiles > Authenticate as Postman Demo User and examine Step 1 through to Step 3.
The Authenticate as Postman Demo User sub-section of Identity Profiles has example REST calls to:
-
-
Start authentication with an Identity Cloud journey.
-
Authenticate as “postmanDemoUser”.
-
Using the session token of the user authenticated, get user session information from the “/sessions” endpoint of Identity Cloud.
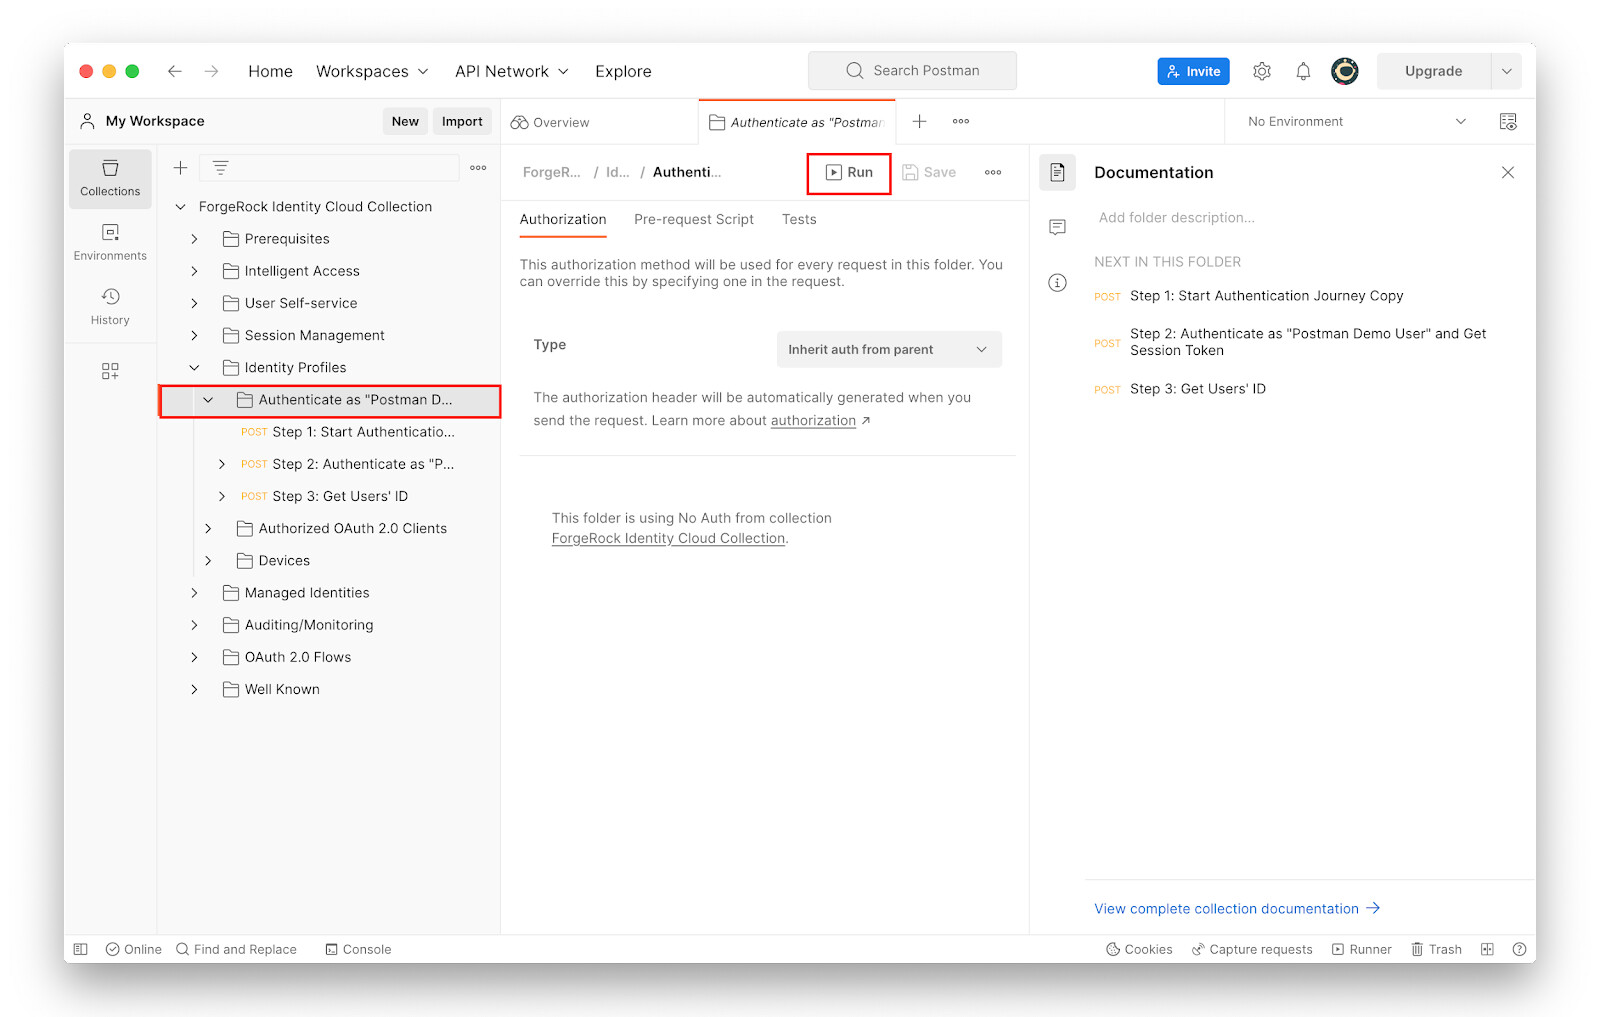
Note that all the above have already been discussed in the earlier sections of this guide, in Part 2 - Prerequisite requests and Part 5 - Session management. . Select the Authenticate as Postman Demo User sub-section and click Run.
+
-
On the RUN ORDER page, ensure all three steps of Authenticate as Postman Demo User are selected and click Run Forgerock Identity Cloud Collection.

-
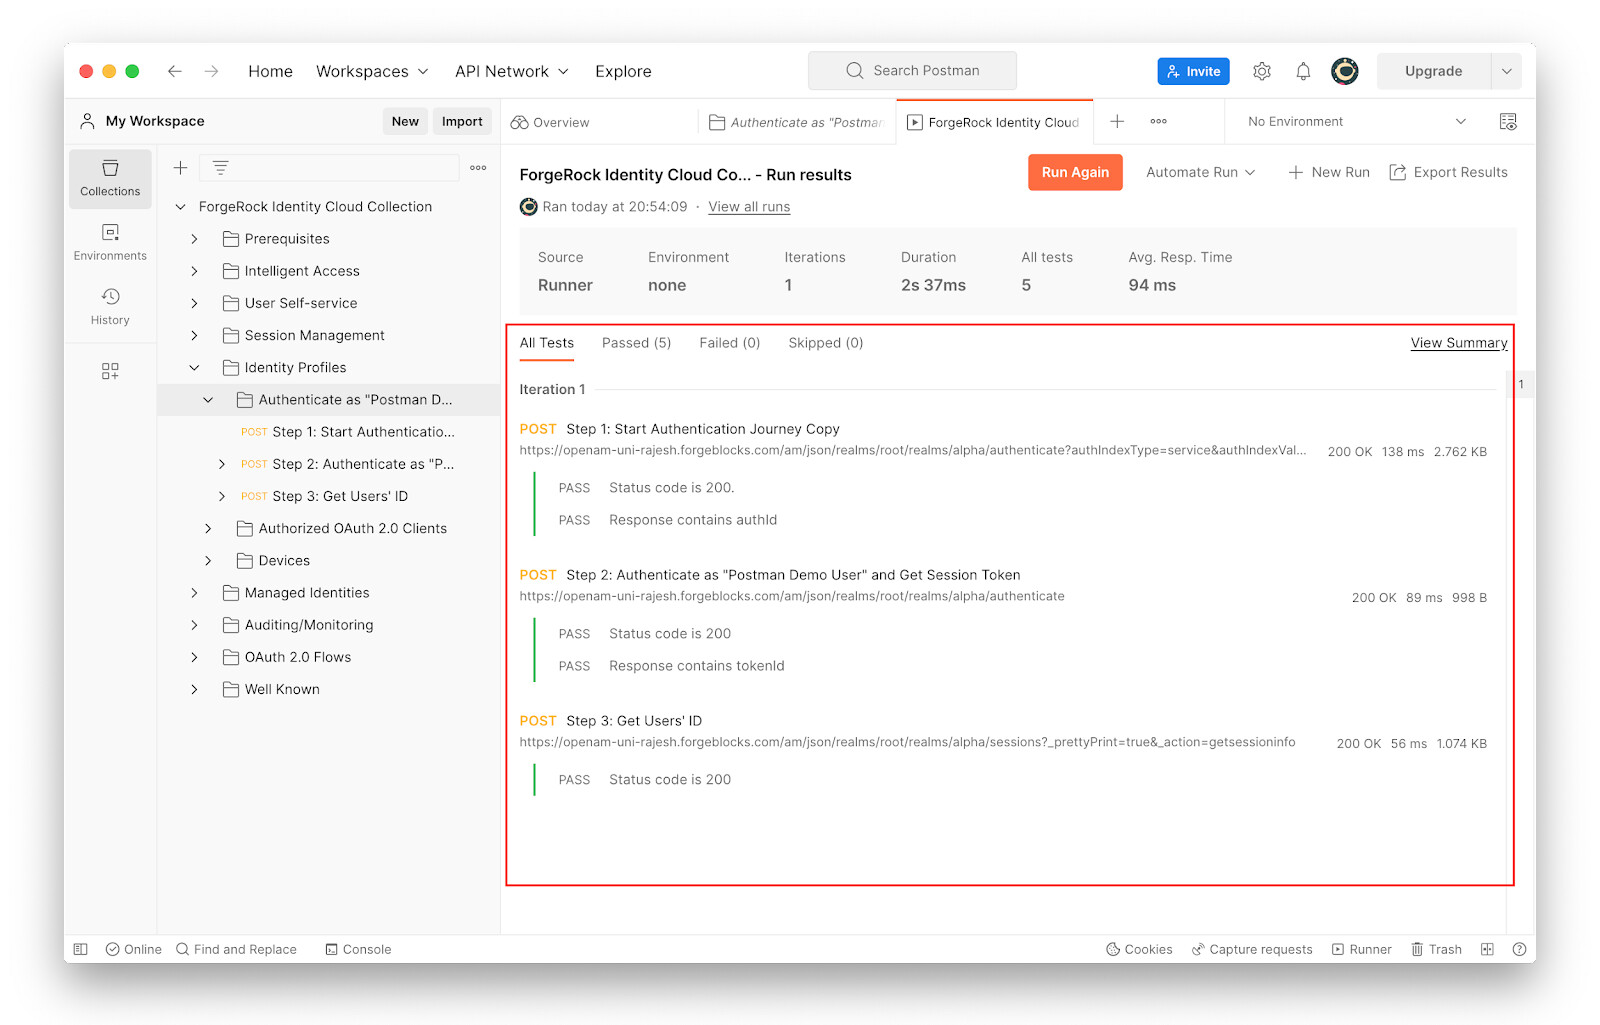
Confirm that all three steps were completed successfully.
-
Go to Authenticate as Postman Demo User > Step 3.
-
Click on the Tests tab and notice a variable
demoUserIdis set to the value of the username returned as a part of thegetSessionInfocall to the/sessionsendpoint. ThedemoUserIdvariable is used in a later step.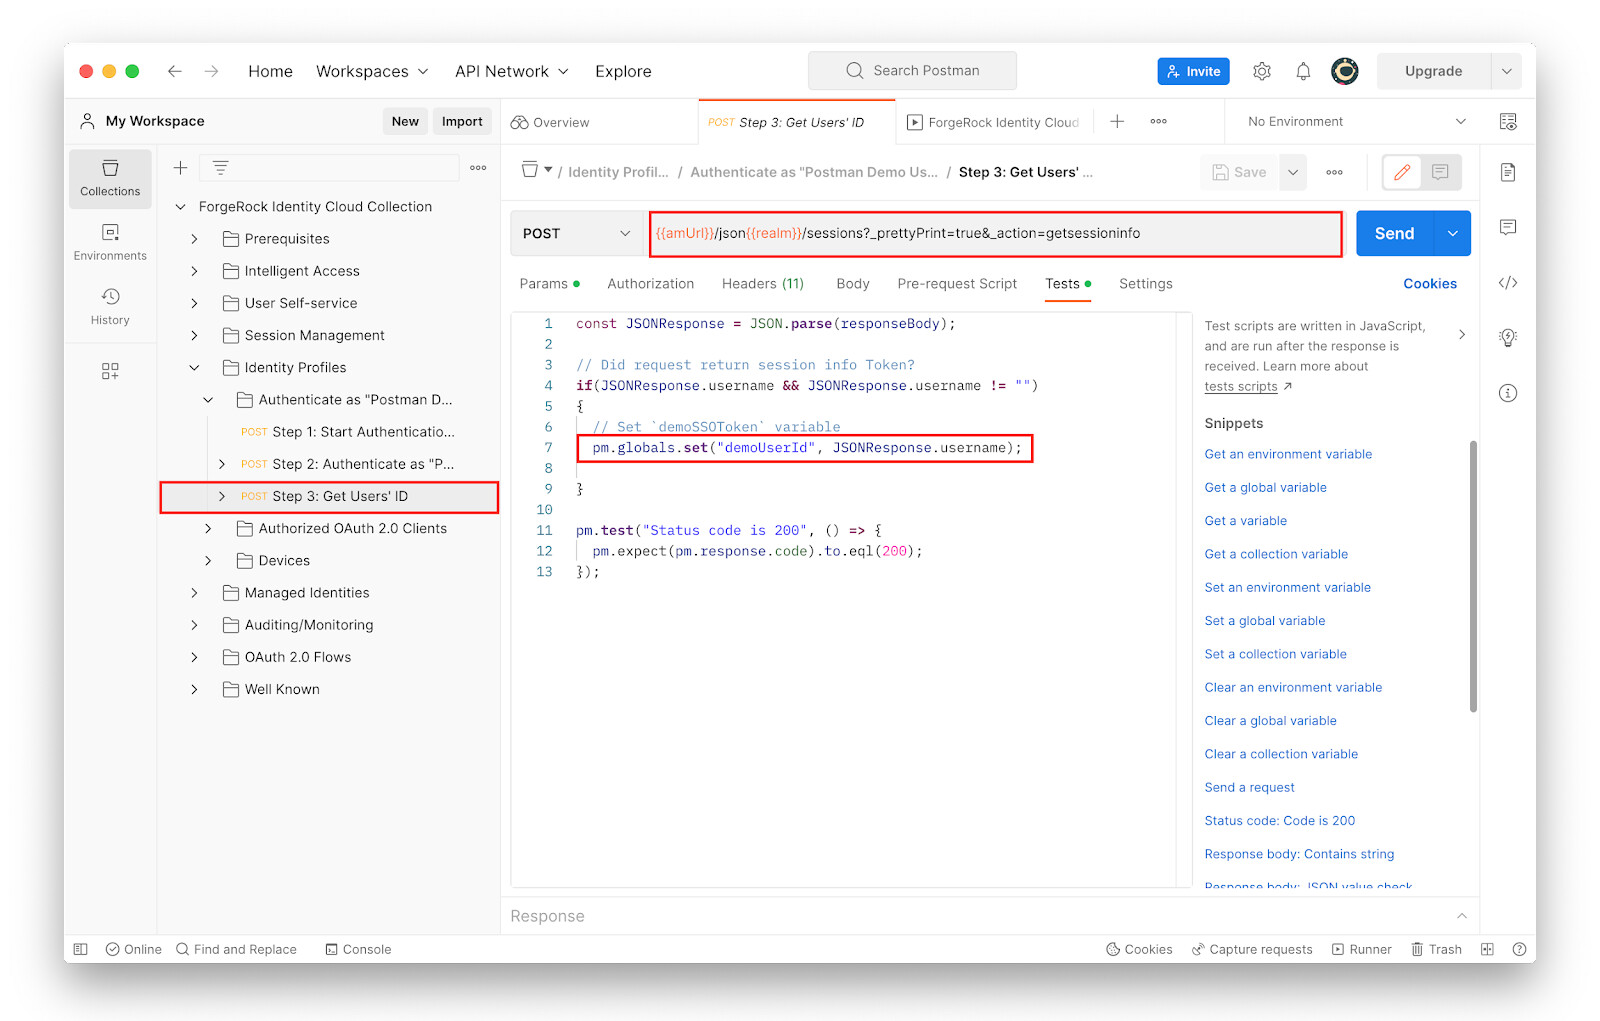
-
To confirm the
demoUserIdvariable now has a value, go to Identity Profiles > Authorized OAuth 2.0 Clients > Step 1 and hover the mouse over the{{demoUserId}}variable in the request URI.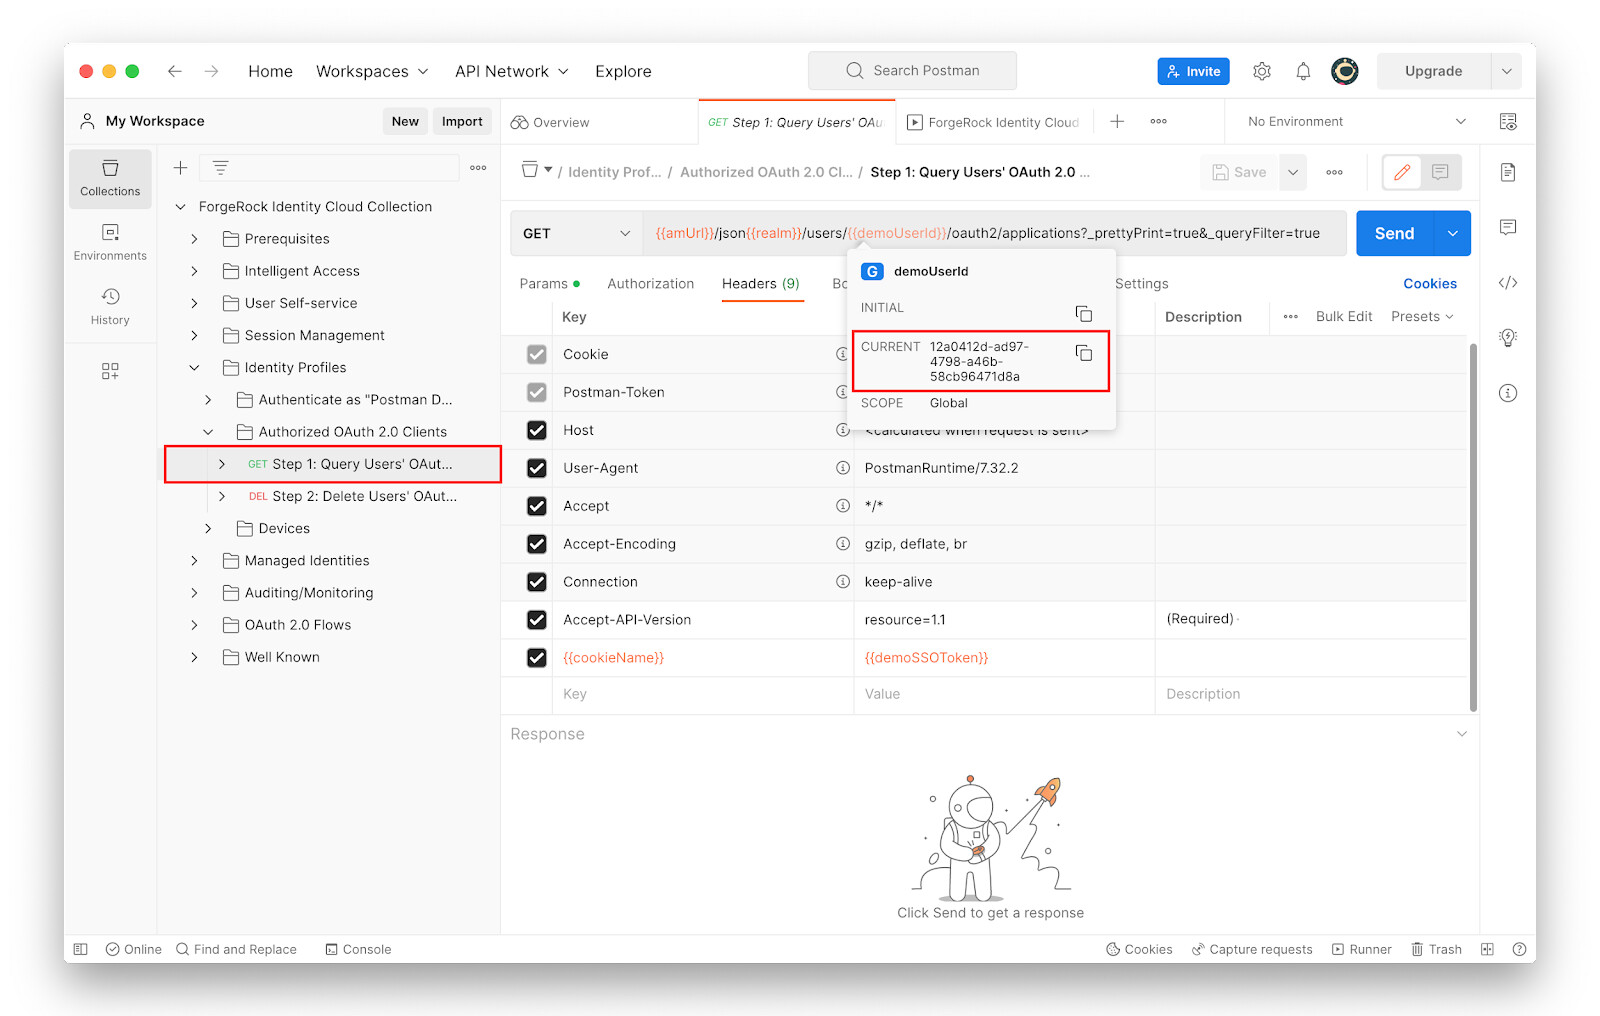
The /users/oauth2/applications endpoint above lists all OAuth 2.0 clients holding active tokens granted for a user. Since the
postmanDemoUserhas no OAuth 2.0 access tokens yet, a request to the endpoint will return an empty result.Note that if the request returns a
401 Unauthorizederror, it means the user’s session has expired. In this case, run Step 1 through to Step 3 of the Authenticate as Postman Demo User folder again. -
To request an access token using an OAuth 2.0 Client, go to ForgeRock Identity Cloud Collection > OAuth 2.0 Flows.
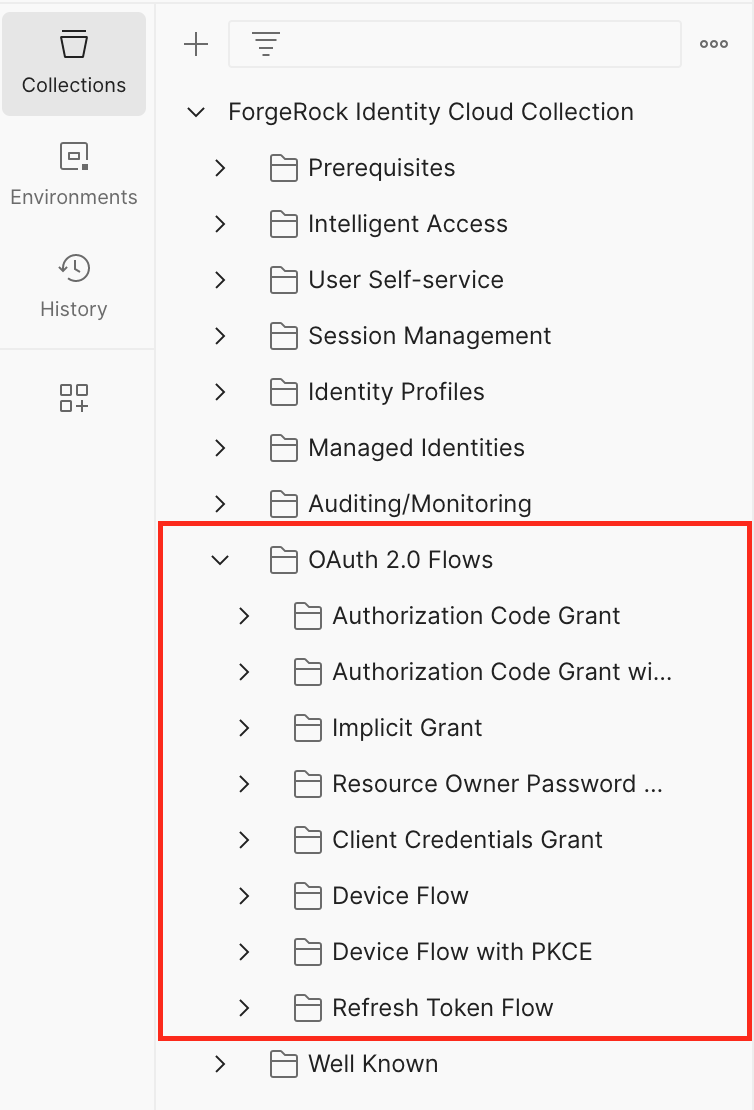
It is beyond the scope of this guide to discuss OAuth (Open Authorization) or OAuth 2.0 flows in any detail, but to make sense of the example REST calls we use here. In OAuth 2.0, a user (known as Resource Owner in OAuth 2.0 context) authorizes an OAuth 2.0 Client (such as a mobile application) to access their protected resources. To access protected resources on behalf of its resource owner, the OAuth 2.0 client must get an access token from an Authorization Server. The participants in the example are as follows:
-
-
Authorization Server: ForgeRock Identity Cloud.
-
OAuth 2.0 Client: PostmanConfidentialClient already configured in the Prerequisites section. See Part 2 - Prerequisite requests for further information.
-
Resource Owner:
postmanDemoUserThere are many ways, known as Grant Types, in which an OAuth 2.0 client acquires an access token from an authorization server. In this example, we will only use the Resource Owner Password Credential Grant Type (ROPC). . Go to ForgeRock Identity Cloud Collection > OAuth 2.0 Flows > Resource Owner Password Credential Grant.
+
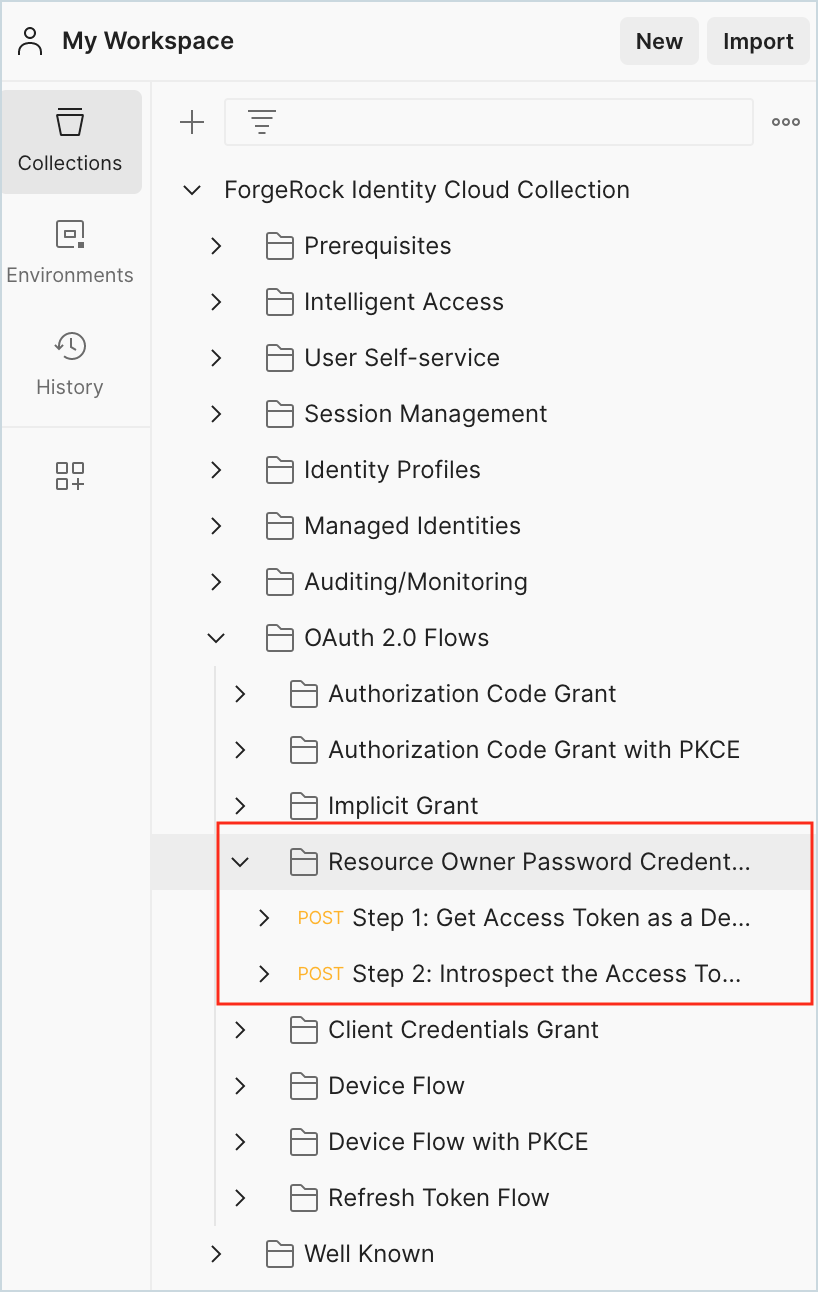
-
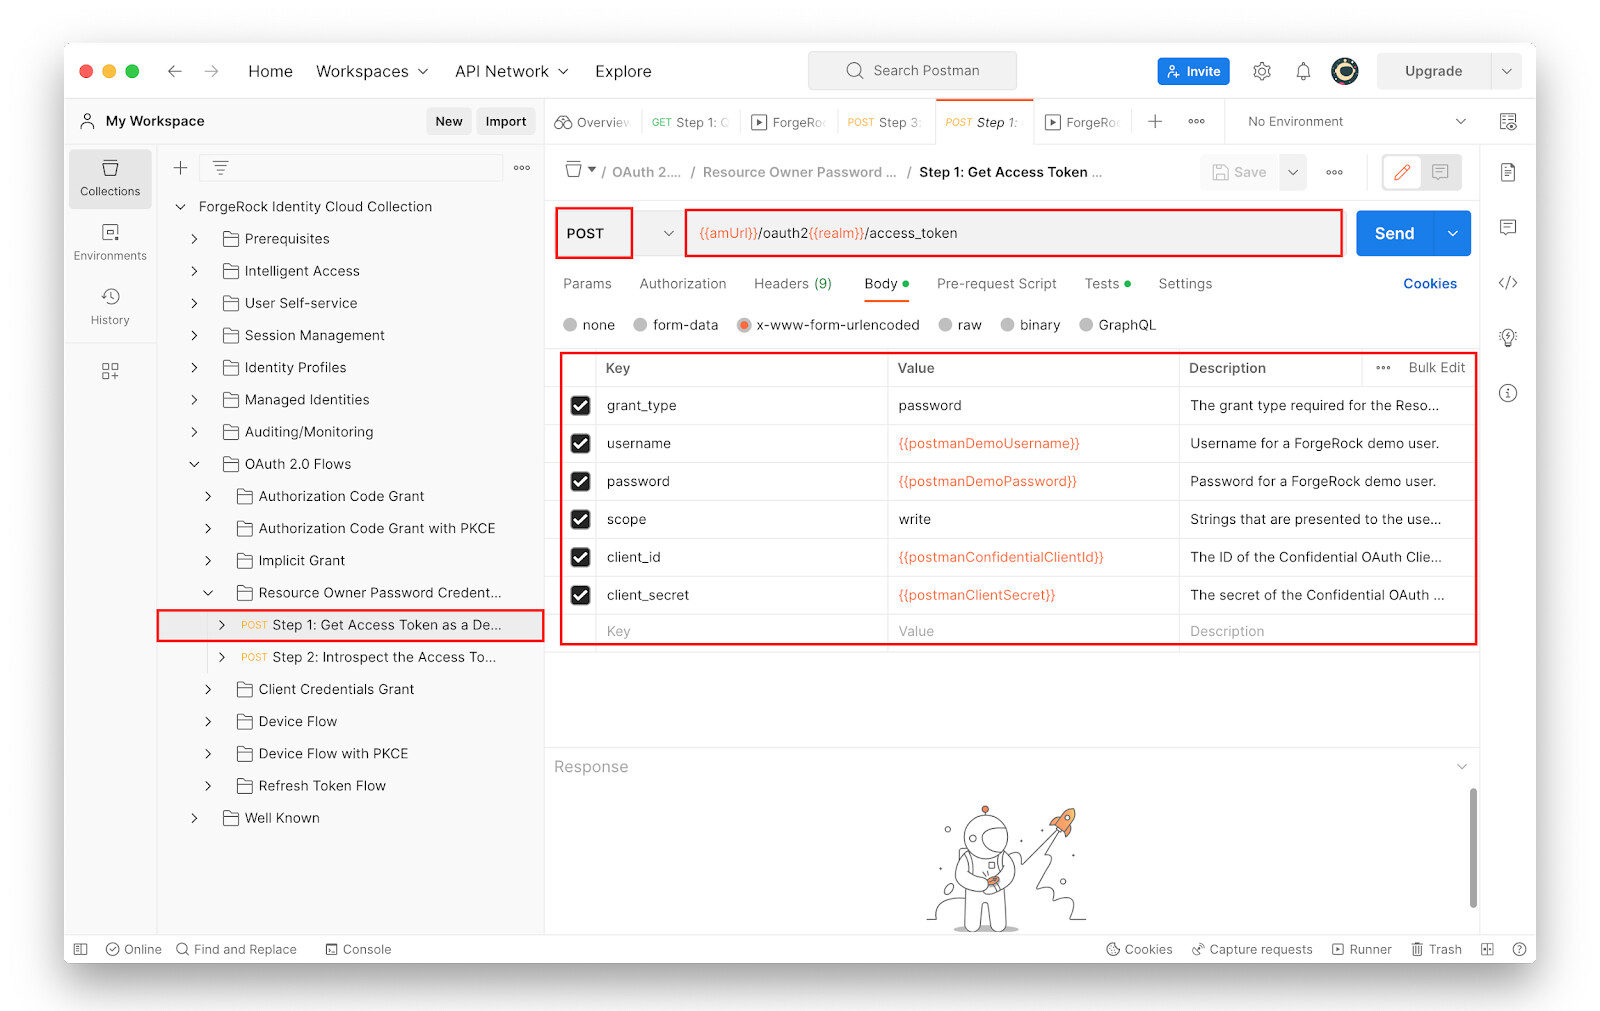
Select Step 1 and study the following:
-
-
The request type: POST
-
The request URL:
{{amUrl}}/oauth2{{realm}}/access_token -
The request body that sends the OAuth 2.0 Client Credentials and Resource Owner (postmanDemoUser) credentials.
Note that the postmanDemoUser (Resource Owner) does not require a valid Identity Cloud session token for this request to succeed.
 . With OAuth 2.0 Flows > Resource Owner Password Credential Grant >
Step 1 selected, click Send.
. With OAuth 2.0 Flows > Resource Owner Password Credential Grant >
Step 1 selected, click Send.+ An access token and a refresh token are granted by the Identity Cloud Authorization Server. A refresh token is used to request a new access token when it expires.
-
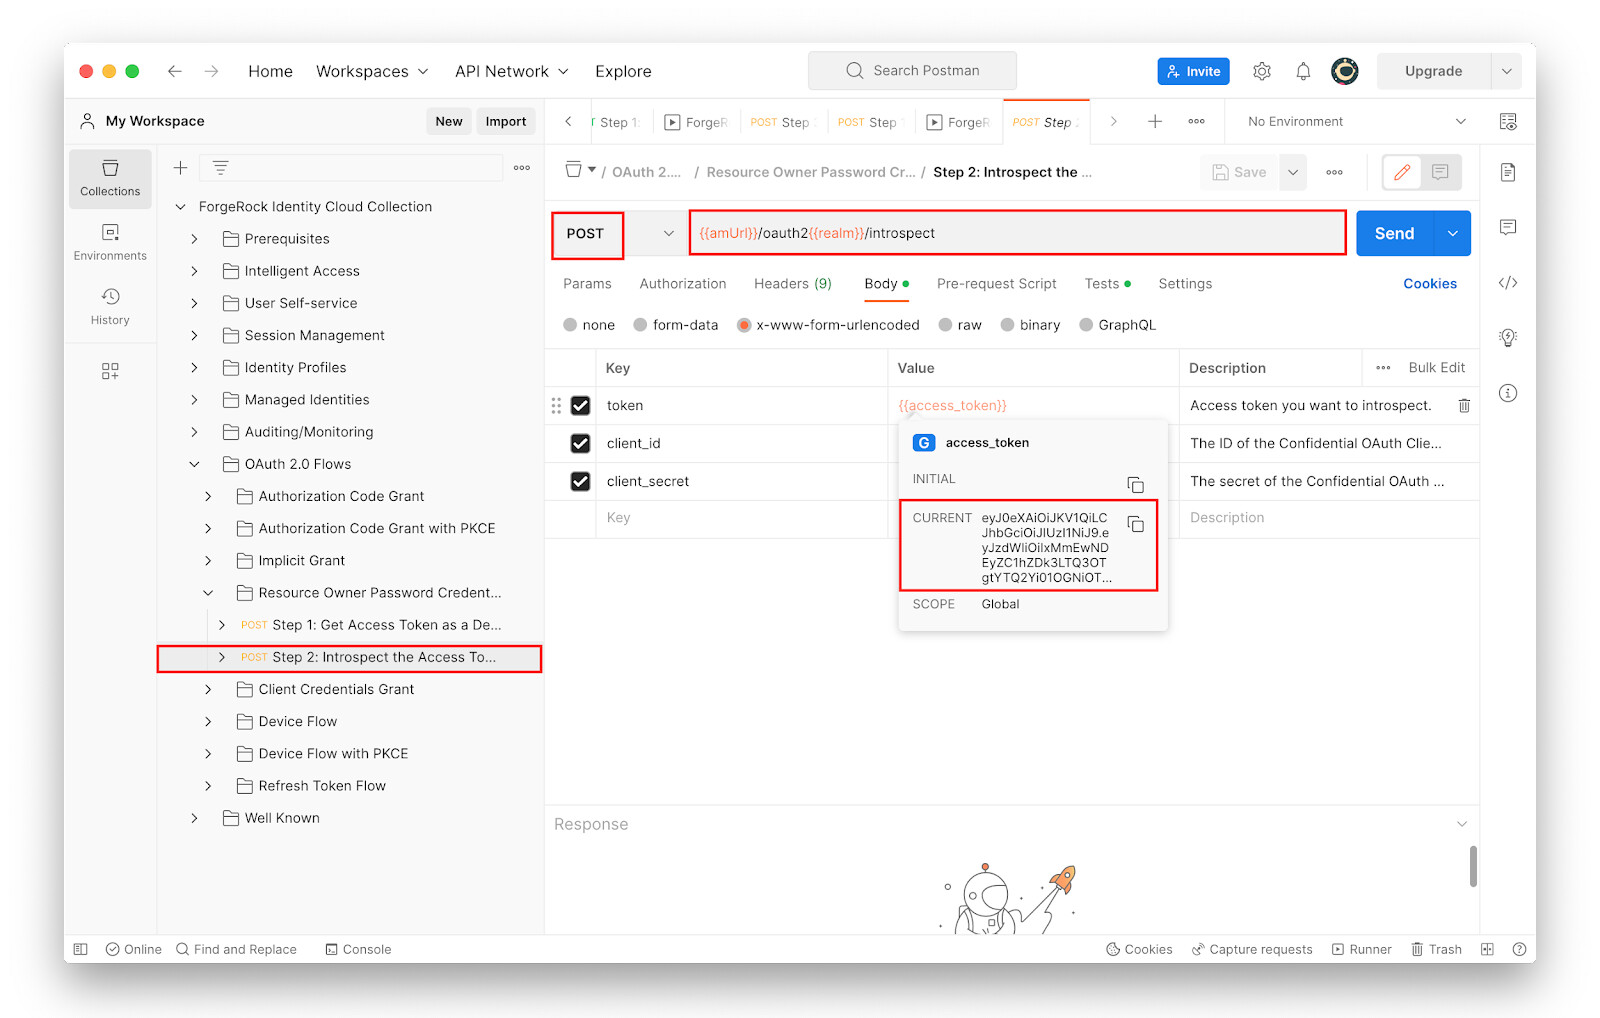
Go to OAuth 2.0 Flows > Resource Owner Password Credential Grant > Step 2 and study the following:
-
-
The request type: POST
-
The request URL:
{{amUrl}}/oauth2{{realm}}/introspect -
The request, specifically the
{{access_token}}variable value, which now points to the access token received in the above step.Note that the “/introspect” endpoint is used to validate access tokens.
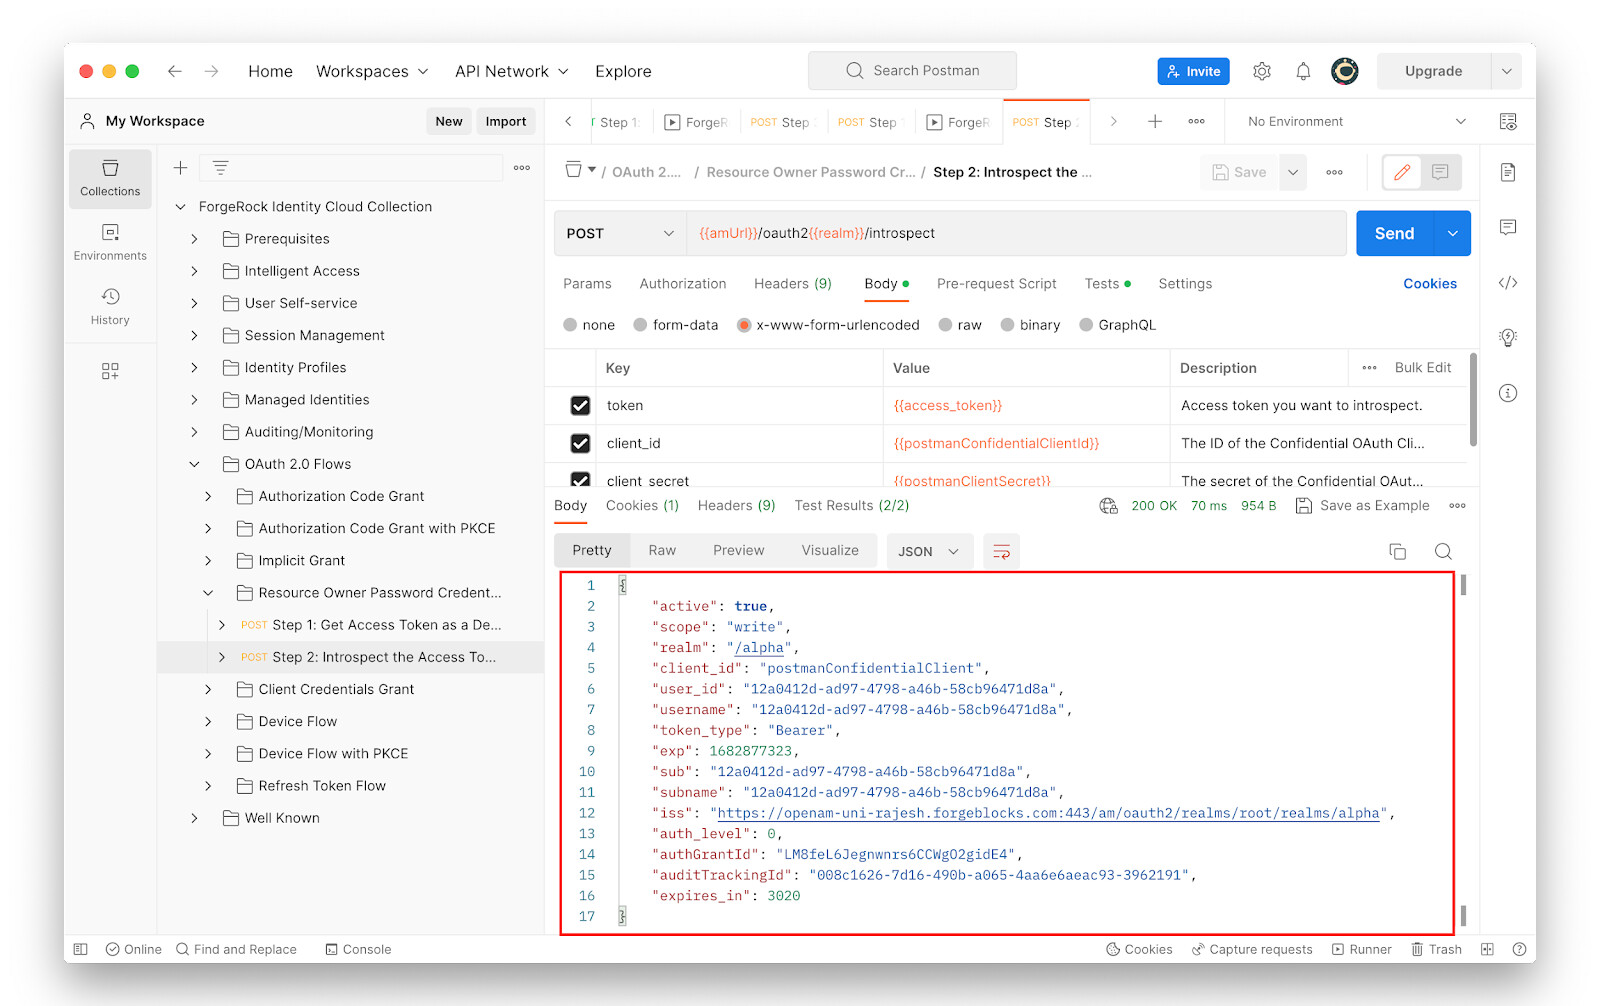
 . Select OAuth 2.0 Flows > Resource Owner Password Credential Grant
> Step 2 and click Send.
. Select OAuth 2.0 Flows > Resource Owner Password Credential Grant
> Step 2 and click Send.+ A JSON response with token validation information is received from Identity Cloud.
+
+ Now that the postmanDemoUser used an OAuth 2.0 Client to get an access token, let’s revisit the
/users/<username>/oauth2/applicationsendpoint.-
Go to Identity Profiles > Authorized OAuth 2.0 Clients > Step 1 and click Send.
Note that if the request returns a
401 Unauthorizederror, go to Authenticate as Postman Demo User and re-run Step 1 through to Step 3.
-
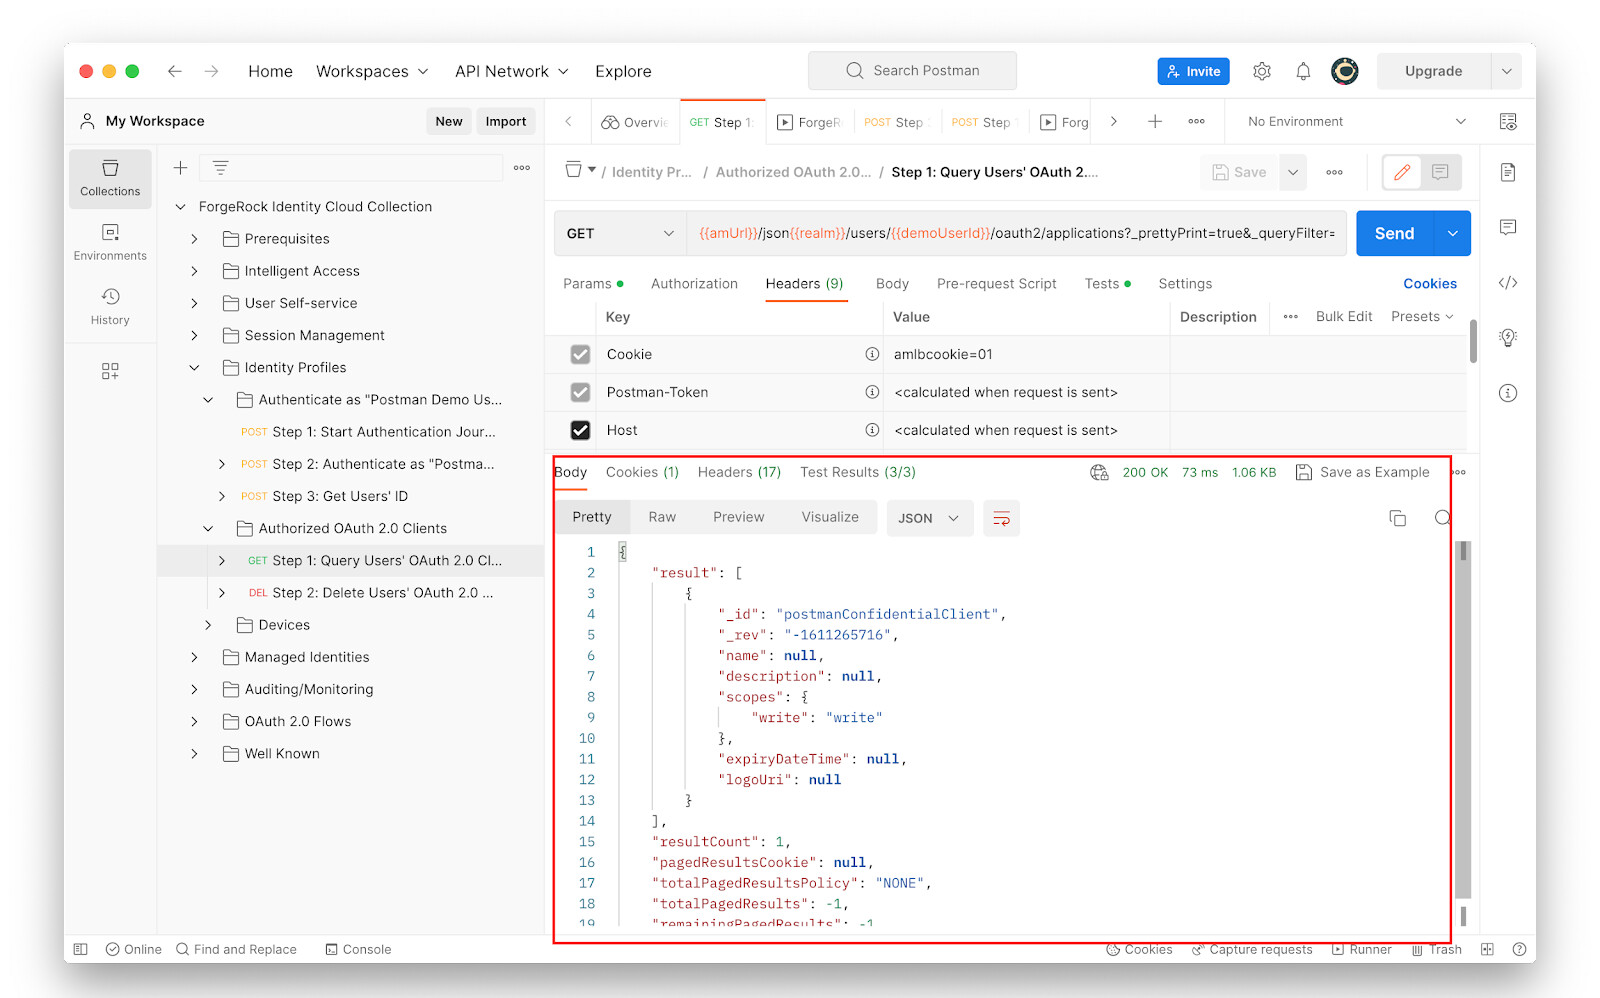
The response from Identity Cloud confirms the OAuth 2.0 application “postmanConfidentialClient” holding an active access token granted for the user “postmanDemoUser”.
-
Go to Authorized OAuth 2.0 Clients > Step 2 and study the following:
-
The request type: DELETE
-
The request URL:
{{amUrl}}/json{{realm}}/users/{{demoUserId}}/oauth2/applications/{{oauth2App}}?_prettyPrint=true#1.1_deleteNote that the request has a variable
{{oauth2App}}, which now has the name of OAuth 2.0 Client returned in the previous step.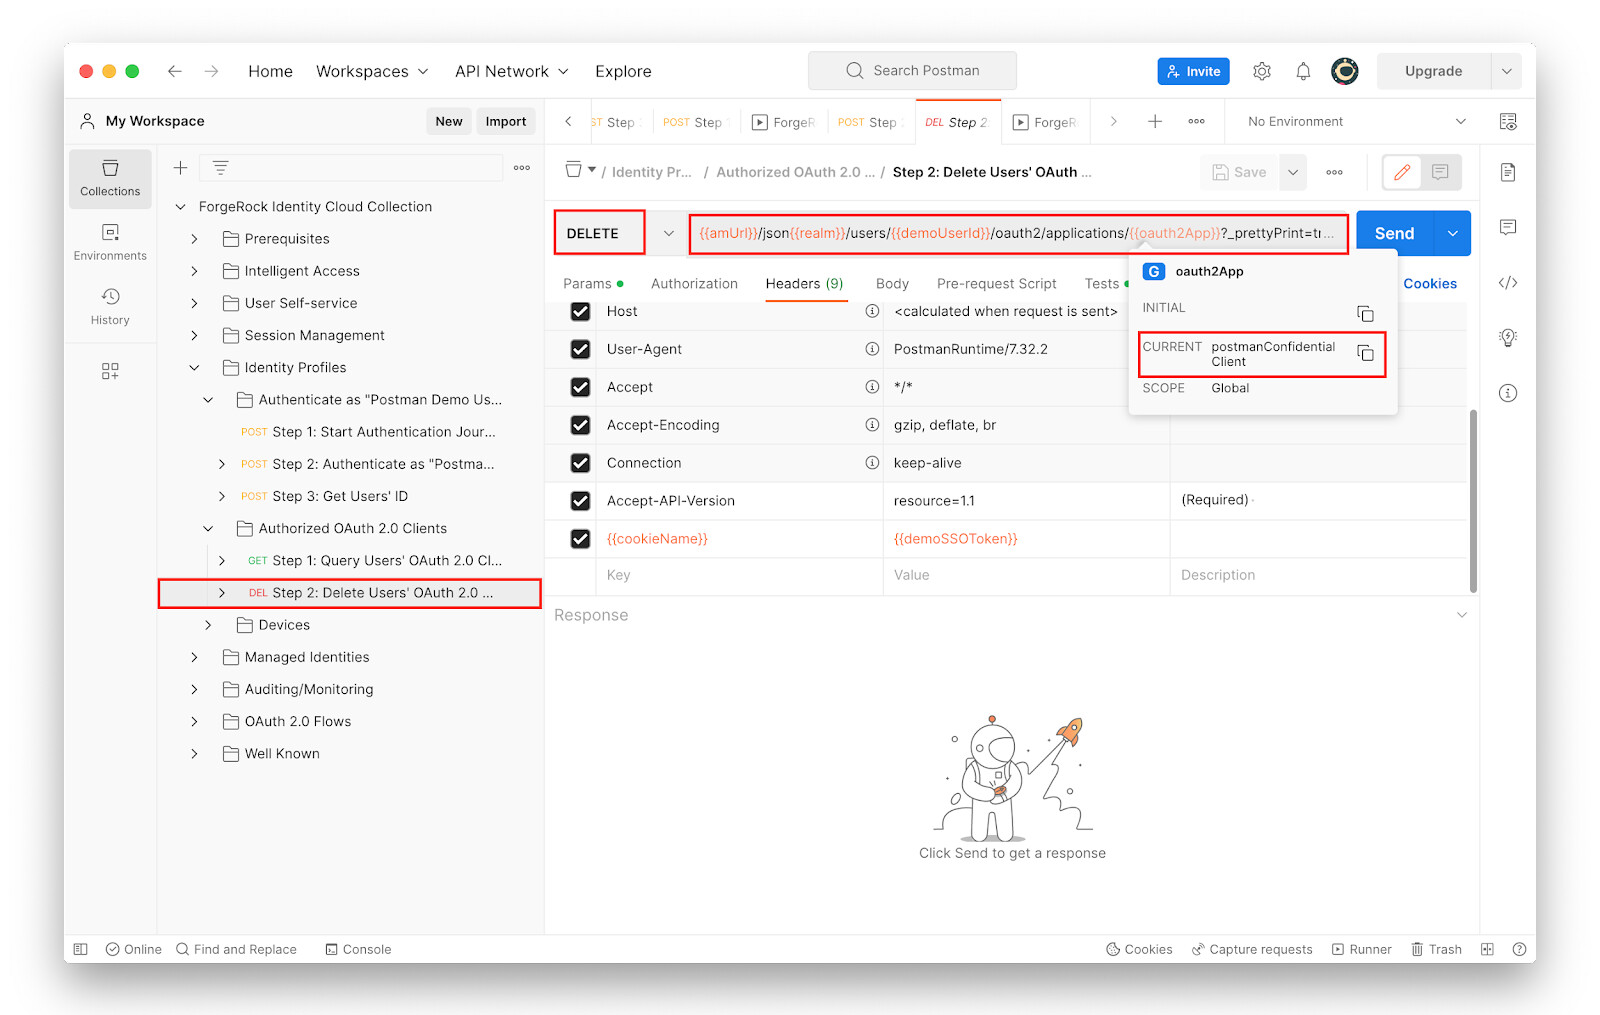
-
-
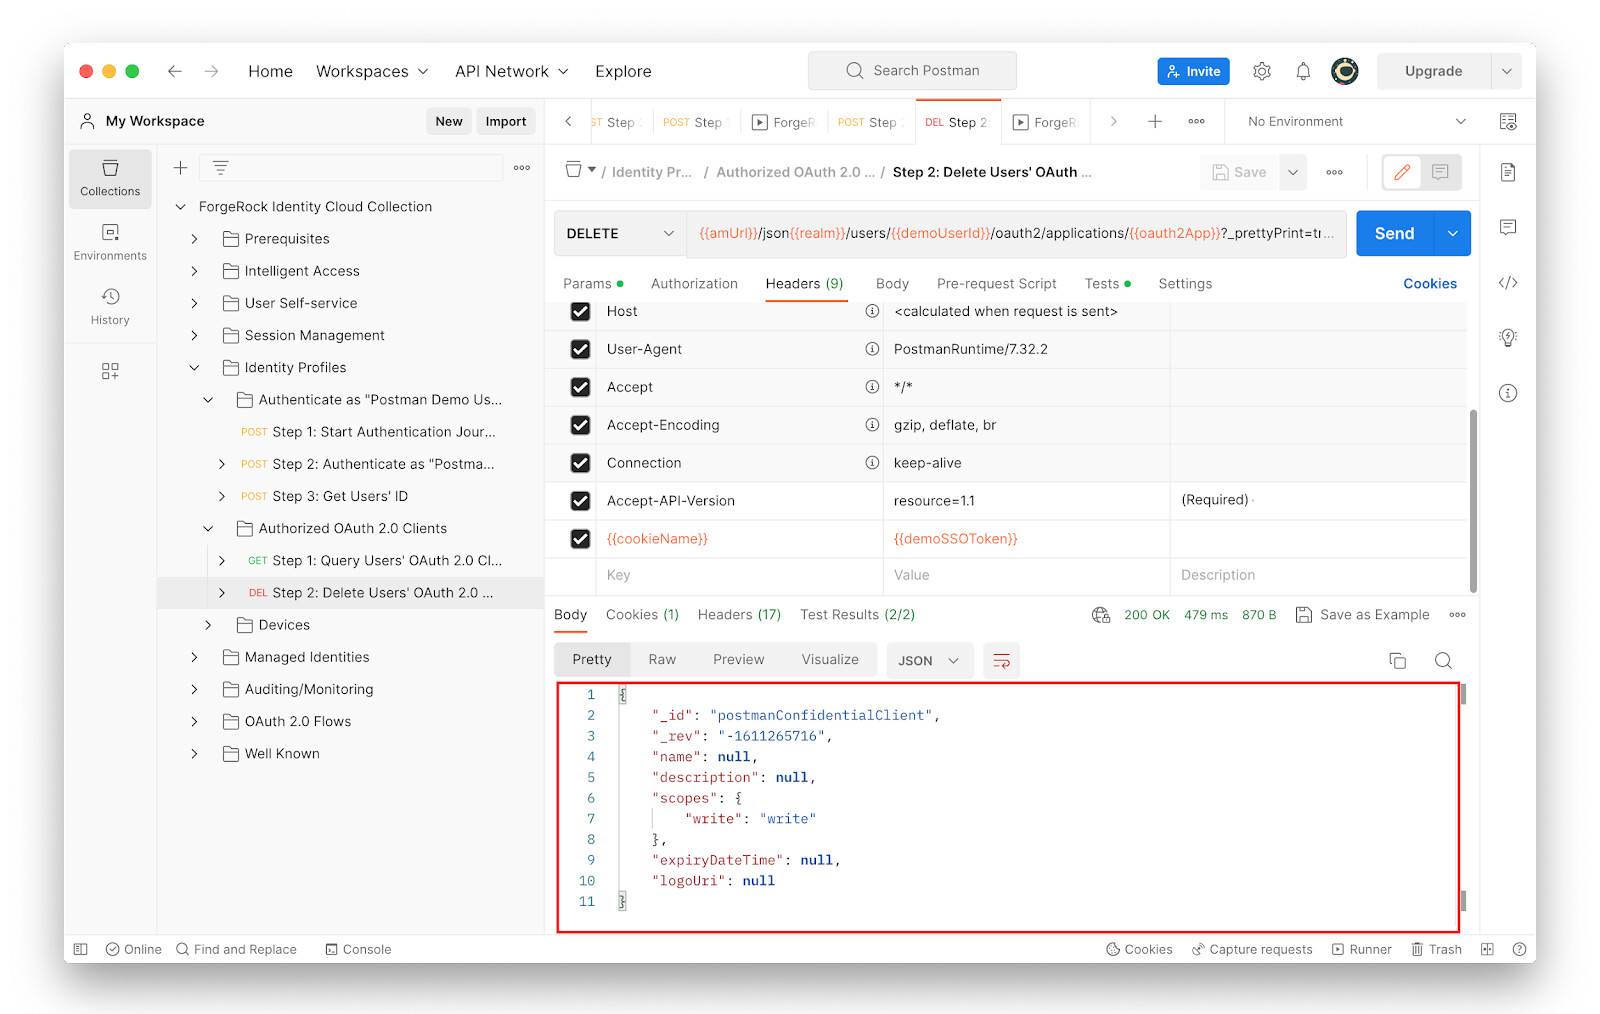
With Authorized OAuth 2.0 Clients > Step 2 selected, click Send.
The JSON response from Identity Cloud confirms the deletion of all active access tokens granted for the “postmanDemoUser” using the OAuth 2.0 client “postmanConfidentialClient”.
-
To confirm the above, select Authorized OAuth 2.0 Clients *> Step 1* and click Send. The request returns an empty result.
-
Optionally, try another OAuth 2.0 Flow, say Authorization Code Grant from the OAuth 2.0 Flows folder, to get an access token using “postmanConfidentialClient” OAuth 2.0 application on behalf of the user “postmanDemoUser”. In the Authorization Code Grant flow, an OAuth 2.0 Client first requests an Authorization Code from the Authorization Server. Then in a separate step the OAuth 2.0 Client exchanges the Authorization Code it received for an access token.
Examples using curl ~ 5 min
The following OAuth 2.0 Authorization Code Grant Flow uses the curl
command to:
-
Authenticate the ‘postmanDemoUser’ at the “/json/authenticate” endpoint of Identity Cloud, using the PasswordGrant journey.
-
Send a request to the “/authorize” endpoint for an authorization code. The ‘postmanDemoUser’ session token is required for this request.
-
The authorization code received above is exchanged for an access token by sending a request to the “/access_token” endpoint
-
The access token received above is validated by sending a request to the “/introspect” endpoint.
Note that some portions of the command outputs are either modified or truncated to protect sensitive information and for brevity.
-
The “postmanDemoUser” is authenticated at the “/authenticate” endpoint.
$ curl --request POST  \
--header 'X-OpenAM-Username: postmanDemoUser' \
--header 'X-OpenAM-Password: p0stmanD3moPas$word' \
--header 'Content-Type: application/json' \
--header 'Accept-API-Version: resource=2.1' \
'https://<id-cloud-env>/am/json/realms/root/realms/alpha/authenticate?authIndexType=service&authIndexValue=PasswordGrant' | jq .
Example response:
{ "tokenId": "Wn02L06ZeBElWKDeMRS89p31sXA.*AAJTSQACMDIAAlNLABxFVUNlb2ZPa2R5NWxRUm9CcWl0alNEbitLV1k9AAR0eXBlAANDVFMAAlMxAAIwMQ..*", "successUrl": "/enduser/?realm=/alpha", "realm": "/alpha" } -
Substitute the cookie name with the Identity Cloud tenant cookie name and token ID with the session token received above in the following command and send a request to the “/authorize” endpoint for an authorization code. Be sure to substitute tokenID for csrf in the command below.
$ curl --location 'https://<id-cloud-tenant>/am/oauth2/realms/root/realms/alpha/authorize' \
--header 'Cookie: <cookie name>=<token Id>' \
--header 'Content-Type: application/x-www-form-urlencoded' \
--data-urlencode 'scope=write ' \
--data-urlencode 'response_type=code' \
--data-urlencode 'client_id=postmanConfidentialClient' \
--data-urlencode 'redirect_uri=https://httpbin.org/anything' \
--data-urlencode 'decision=allow' \
--data-urlencode 'csrf=<token Id>' \
--data-urlencode 'state=abc123' \
--data-urlencode 'service=PasswordGrant' | jq .
Example response:
{ "args": { "client_id": "postmanConfidentialClient", "code": "ZrUHkzdFMVMhehC9-Sp79_Omtk8", "iss": "https://<id-cloud-tenant>:443/am/oauth2/realms/root/realms/alpha", "state": "abc123" }, "data": "", "files": {}, "form": {}, "headers": { "Accept": "*/*", "Content-Type": "application/x-www-form-urlencoded", "Host": "httpbin.org", "User-Agent": "curl/7.64.1", "X-Amzn-Trace-Id": "Root=1-644eb857-37131acd71d39bb7086a4434" }, "json": null, "method": "GET", "origin": "49.205.135.231", "url": "https://httpbin.org/anything?code=ZrUHkzdFMVMhehC9-Sp79_Omtk8&iss=https%3A%2F%2F<id-cloud-tenant>%3A443%2Fam%2Foauth2%2Frealms%2Froot%2Frealms%2Falpha&state=abc123&client_id=postmanConfidentialClient" } -
Replace the
{{authorization_code}}placeholder below with the authorization code received in the step above. Send the request to “/access_token” endpoint for an access token.$ curl --location 'https://<id-cloud-tenant>/am/oauth2/realms/root/realms/alpha/access_token' \ --header 'Content-Type: application/x-www-form-urlencoded' \ --data-urlencode 'grant_type=authorization_code' \ --data-urlencode 'code={{authorization Code}}' \ --data-urlencode 'client_id=postmanConfidentialClient' \ --data-urlencode 'client_secret=postmanClientSecret' \ --data-urlencode 'redirect_uri=https://httpbin.org/anything' | jq .Example response:
{ "access_token": "<-—output truncated-->.cFXxqwQ0ZocawQqJ5luy7nKuQV9kwV0TyT0a5OYd9u4", "refresh_token": "<-—output truncated-->.bPaJvAkdRa4T9Z4yl7Hrz6KyDxdd4zzVeciuYn9sojY", "scope": "write", "token_type": "Bearer", "expires_in": 3599 } -
Replace the
{{access token}}placeholder in the command below with the access token received in the step above. Send the request to “/introspect” endpoint to validate the access token received.$ curl --location 'https://<id-cloud-tenant>/am/oauth2/realms/root/realms/alpha/introspect' \ --header 'Content-Type: application/x-www-form-urlencoded' \ --data-urlencode 'token={{access token}}' \ --data-urlencode 'client_id=postmanConfidentialClient' \ --data-urlencode 'client_secret=postmanClientSecret' | jq .Example response:
{
 "active": true,
 "scope": "write",
 "realm": "/alpha",
 "client_id": "postmanConfidentialClient",
 "user_id": "12a0412d-ad97-4798-a46b-58cb96471d8a",
 "username": "12a0412d-ad97-4798-a46b-58cb96471d8a",
 "token_type": "Bearer",
 "exp": 1682917107,
 "sub": "12a0412d-ad97-4798-a46b-58cb96471d8a",
 "subname": "12a0412d-ad97-4798-a46b-58cb96471d8a",
 "iss": "https://<id-cloud-tenant>:443/am/oauth2/realms/root/realms/alpha",
 "auth_level": 0,
 "authGrantId": "v1Ge0DDF1OK1Tn6biJ5f3B_xIx0",
 "auditTrackingId": "008c1626-7d16-490b-a065-4aa6e6aeac93-4828382",
 "expires_in": 3502
}