Use case: Manage risk scoring models (AI and ML) in ForgeRock Identity
Author: |
Lucy Billington |
Created at: |
Mar 2023 |
Updated at: |
Mar 2023 |
Use case overview
The ability to manage risk scoring models for artificial intelligence (AI) and machine learning (ML) is supported in the Autonomous Access service in ForgeRock Identity Cloud.
Autonomous Access uses the power of AI to monitor login requests in real-time, blocking malicious attempts and adding authentication steps when it detects anomalous behaviors. Administration tasks of Autonomous Access include running the AI/ML training pipeline, tuning the AI/ML models, and making adjustments to the risk configuration.
For this use case, we’ll demonstrate how the Autonomous Access Result node can feed the result (success or failure) of an authentication journey back to the AI engine for learning purposes. We’ll then show how Autonomous Access AI/ML training models can be tuned for greater accuracy and performance.
NOTE: ForgeRock Professional Services (FPS) run the tuning of training models as any misconfiguration can result in failed operations
Steps to achieve this use case
There are two parts to this use case:
-
Create a risk levels authentication journey
-
Tune the AI/ML training models
Create a risk levels authentication journey
First, we’ll demonstrate how to create an Autonomous Access user journey that detects ‘Success’ and ‘Failure’.
Create the journey
To create a risk level authentication journey:
-
Sign in to the Identity Cloud admin UI using your admin tenant URL, in the format
https://<tenant-name>/am/XUI/?realm=/#/. -
Go to Journeys > New Journey.
-
Enter a unique name for the journey, select which identities will authenticate using this journey, (optionally) enter a journey description, and click Save.
-
Create a journey similar to this:
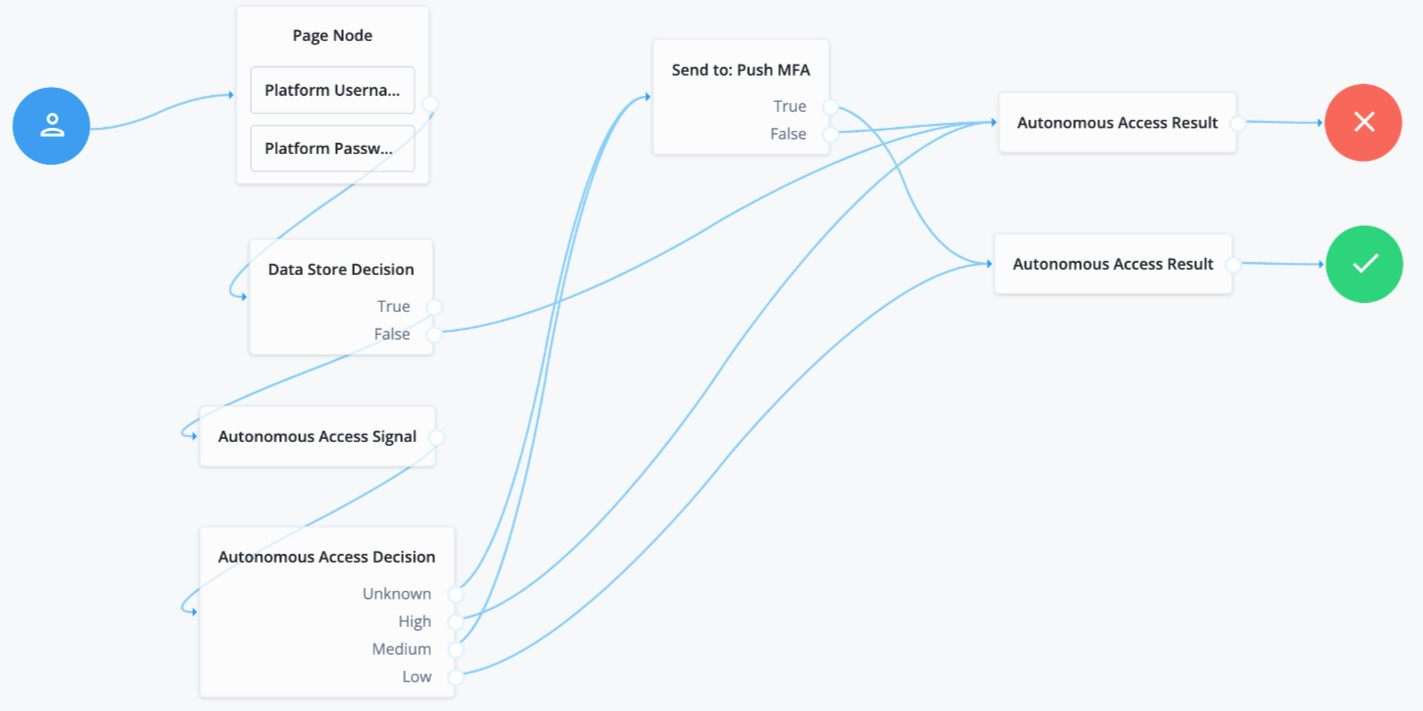
Node descriptions: * Platform Username - Prompts the user to enter their username. See Platform Username node for further information. * Platform Password - Collects the user’s password. See Platform Password node for more information. * Data Store Descision - Verifies that the username and password values match those in the data store configured for the realm. See Data Store Decision node for further information. * Autonomous Access Signal - Allows you to specify the heuristics and/or anomaly detection to be included in risk score generation during the AI/ML pipelines. See Signal node for further information. * Anonymous Access Decision - Takes the data sent by the Signal node and lets you direct the flow to actionable paths depending on where the risk score falls within the range of high, medium, low, and unknown scores. See Decision node for further information. * Send to: Push MFA - This is an Inner Tree Evaluator node that sends the user to a push MFA journey. * Autonomous Access Result - Provides the final outcome and risk prediction results from the AI/ML analytics. See Result node for further information.
-
Click the Autonomous Access Result node linked to the failure outcome and select
FAILUREas the Final Journey Outcome.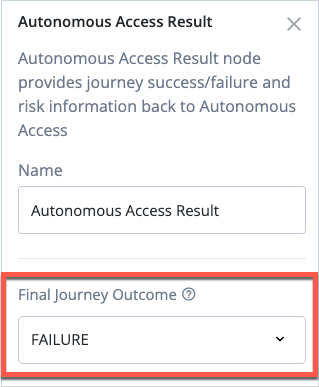
-
Click Save to save the Journey.
With this journey, the Autonomous Access Result nodes correlate the user and context assessed by the Autonomous Access engine. The authentication result is then fed back to AI/ML.
Tune the AI/ML training models
Autonomous Access includes a training process that automates machine learning pipelines to generate AI/ML models. The training pipeline uses input data and advanced heuristics to generate AI/ML models, which are then iteratively refined to improve their accuracy.
After the initial training process is completed, the AI/ML training models can be further fine-tuned to improve their accuracy and performance.
NOTE: ForgeRock Professional Services (FPS) will run this task as any misconfiguration can result in failed operations.
To run the training pipeline:
-
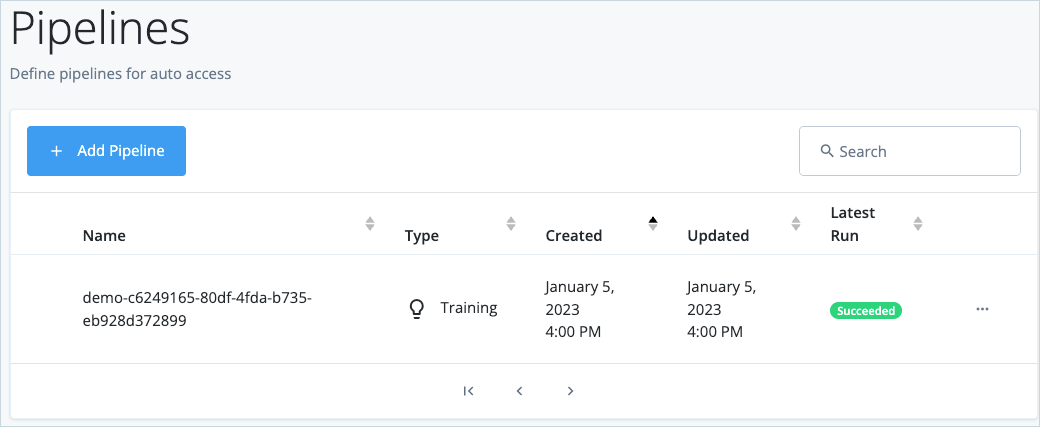
In the Identity Cloud admin UI, go to Pipelines.
-
Click Add Pipeline.
-
Enter a descriptive name for the training pipeline, select the data source to use for the pipeline, and select the type
Training.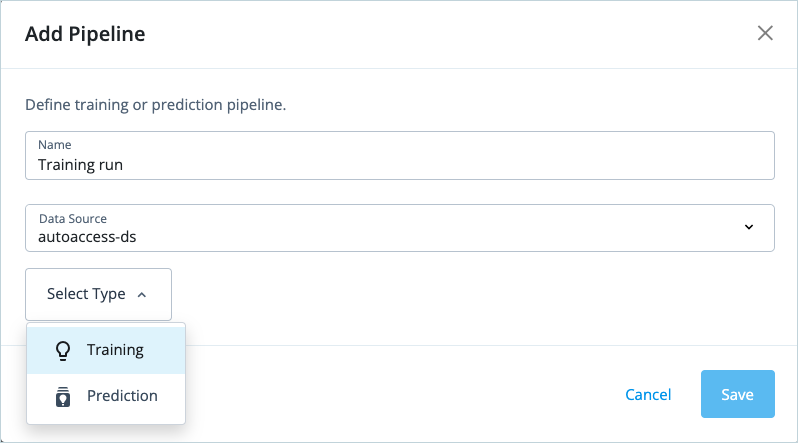
-
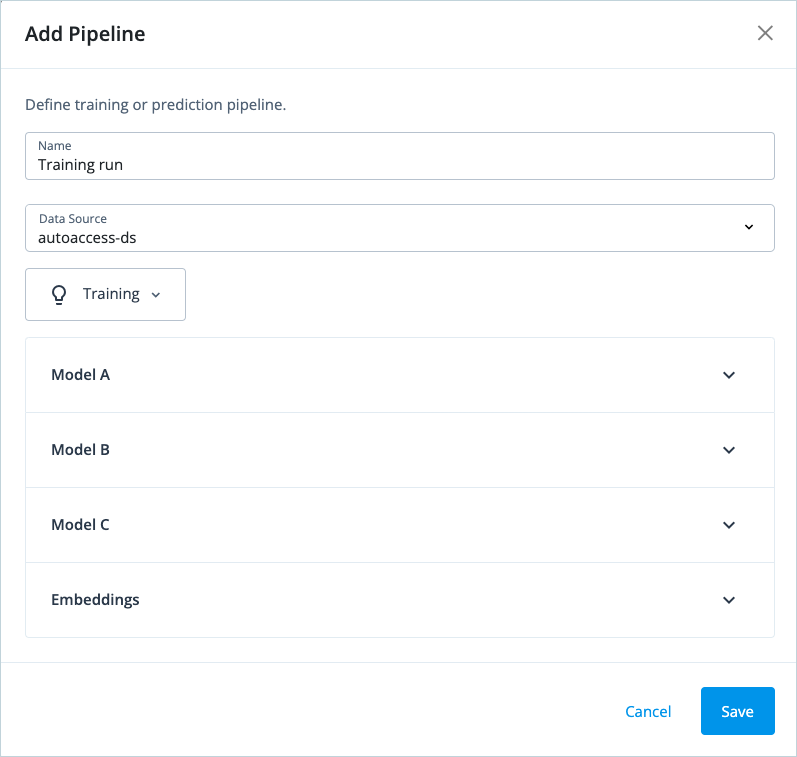
Adjust the model settings, if appropriate. Further information on these settings can be found in the Autonomous Access documentation.
-
Click Save.
-
Click the three dots, click Run Pipeline, and then click Run.
Depending on the size of your data source and your pipeline settings, the training run may take some time to process. In the event of a successful run, the status will be set to “Succeeded,” indicating that your AI/ML models are ready to use.
For more detailed information on running the training pipeline, see Run Training.
To tune the AI/ML training models:
-
In the Identity Cloud admin UI, go to Pipelines.
-
Click the three dots next to a training run, and then click View Run Details.
-
On the Training Execution Details, click the three dots, and then click View Results.
The training results are displayed.
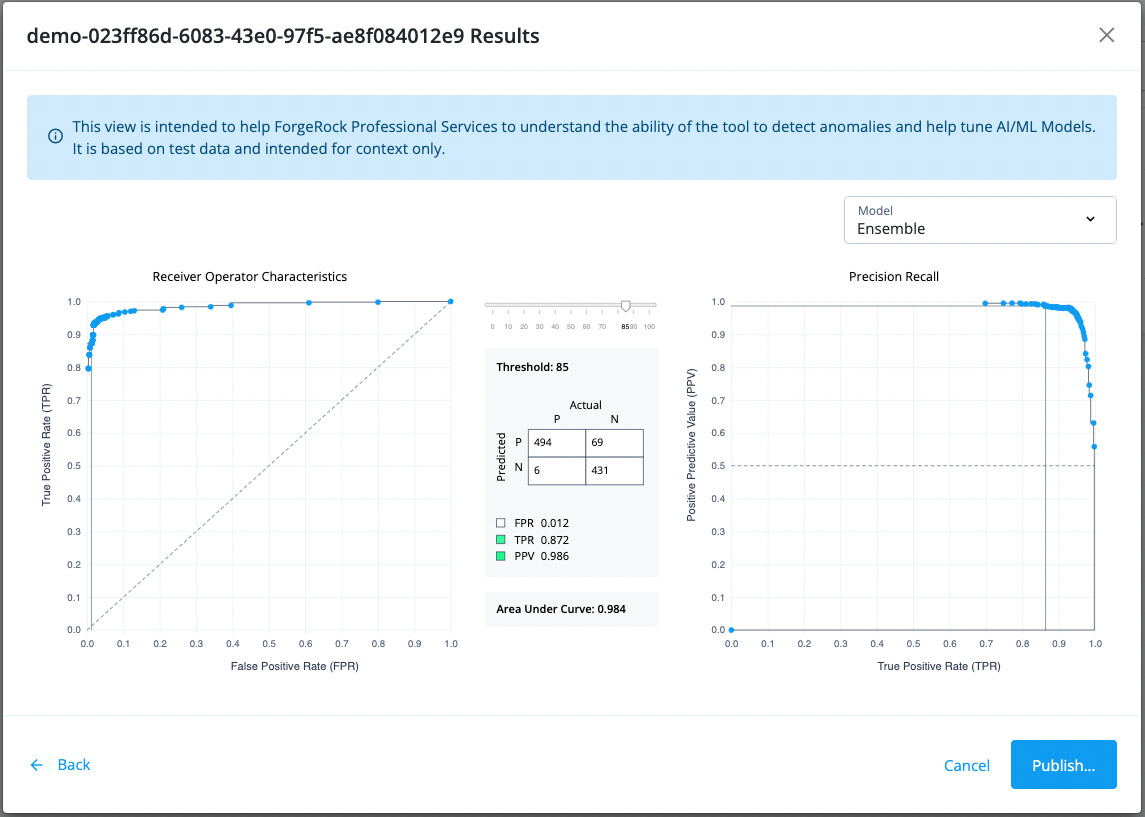
-
Tune each model by adjusting the threshold (Ensemble, Model A, Model B, Model C).
-
Click Publish to save the training models. Once published, you can only overwrite it with another training run.
For more detailed information on tuning the AI/ML training models, see Tuning Training.
Conclusion
This simple use case has demonstrated how to easily implement a journey for risk level authentication and tune the AI/ML training models in Autonomous Access.
For further information on how Autonomous Access can help with AI-driven threat prevention, see ForgeRock Autonomous Access and the additional resources below.