Configuring the ForgeRock Identity Cloud Postman Collection (Part 3 of
Author: |
Keith Daly |
Created at: |
Jul 2023 |
Updated at: |
Jul 2023 |
Originally posted on keithdaly-identity.medium.com

In my previous post, I went over the topics of setting up Postman, obtaining and importing the ForgeRock Identity Cloud Postman collection, configuring variables for use with multiple environments, and understanding the mechanisms for passing information between requests.
In this post, I will cover the steps needed to configure the collection with your tenant. It is worth noting that I am running this against a test tenant for completing demos and understanding the REST endpoints available by ForgeRock ID Cloud. Please also test in your test/dev environment.
Note: This is part 3 in a series. Here are the links to the first 2 in
case you would like to start there:
All
about Postman variables (Part 1 of 3)
Configuration
for working with multiple environments (Part 2 of 3)
Step 1: Configure your system to communicate with your cloud tenant
We covered how to set variables in the last post, but as a refresher, your new collect will have variables configured in the collection (click your collection name, then “variables” to access them). This is fine for a single use test, but keep in mind that you may want to recreate them as environment variables so that your collection can be used with multiple systems but simply selecting the environment name in the drop-down.
The following picture shows the initial state, with the variables defined in the collection. Change the sample values to match your tenant. User account passwords, logApiKey and logAPISecret will be used later. It is perfectly fine to either define them here first, or come back an add them after creating the objects.
![]() Note:
The only option for “collection” variables is “default”, with no
“secret” option, so there is not the “shoulder-surfing protection, as
there is with “environment” variables.
Note:
The only option for “collection” variables is “default”, with no
“secret” option, so there is not the “shoulder-surfing protection, as
there is with “environment” variables.
To make the process a bit easier, you can import my starter file for your environment. See the “ForgeRock Identity Cloud Postman Collection — Configuration for Working With Multiple Environments” post for details.
The imported contents (note that the type is set already for passwords and secret values):
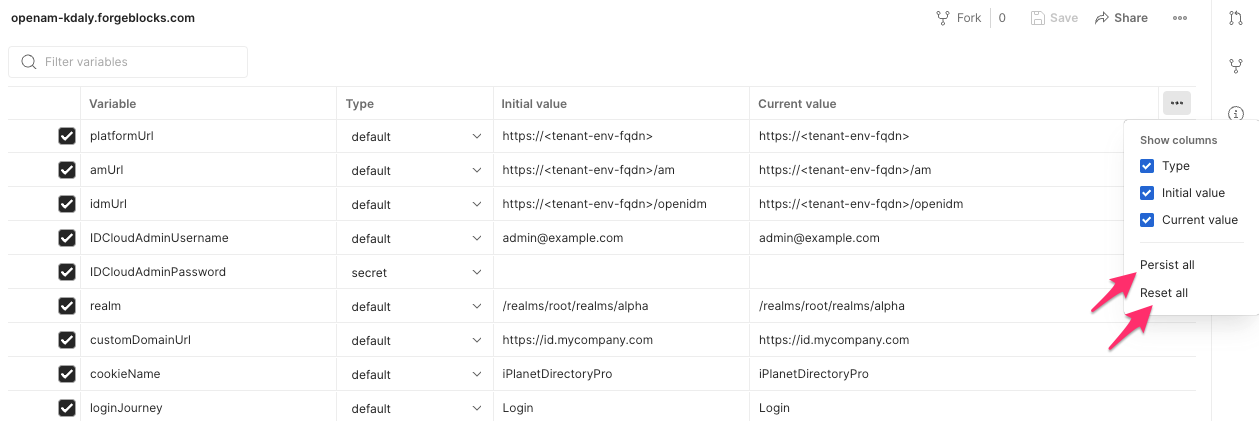
Once this is imported change the values to suit your environment.
![]() Note:
There are two columns: initial value and current value. This allows you
to define starting value, make changes when testing, then either revert
to original or keep the current value, making it the new initial. To
facilitate that revert or persist action, there is a “persist all” and
“reset all” action available from the environment menu.
Note:
There are two columns: initial value and current value. This allows you
to define starting value, make changes when testing, then either revert
to original or keep the current value, making it the new initial. To
facilitate that revert or persist action, there is a “persist all” and
“reset all” action available from the environment menu.
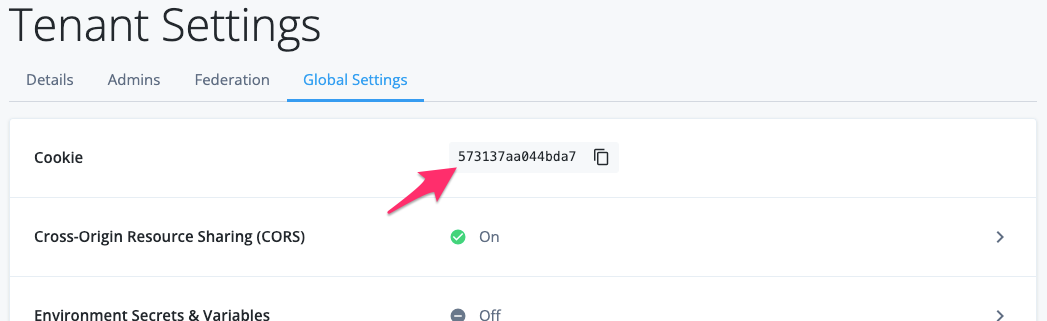
All variables should be obvious with the exception of cookieName. This is the cookie name of the sso token name in use in the specific tenant. (This uses a default value of iPlanetDirectoryPro in the software itself, but ID Cloud sets cookie name to a randomized number. You can find this value from tenant settings in ID Cloud:
Step 2: Create your admin user in your tenant
To use the Identity Cloud Postman collection, you must create a user identity in Identity Cloud that the collection requests can connect to.
Create a new user in the realm that you would like to use. Be sure the “postmanAdminUsername” variable is set to the name of the new user. (The default in the collection is “postmanAdminUser”.)
Set the admin user account’s password in the ID Clouds UI. Set the “postmanAdminPassword” to this value in the Postman collection.
In the ID Cloud UI, add openidm-admin and openidm-authorized
authorization roles to the user.
Step 3: Create your OAuth client definitions (“applications”)
First, verify that your environment is active be checking the environment drop down at the top right.
(1) Login as a tenant admin:
Expand the “Prerequisites” folder on the left.
Execute steps 1, 2a, and 2b. This is the equivalent of logging into the root into the root realm with a tenant admin. (Step 1 kicks off the authN process, step 2 submits the IDCloudAdminUsername user credentials, and step 3 selects “skip for now option.)
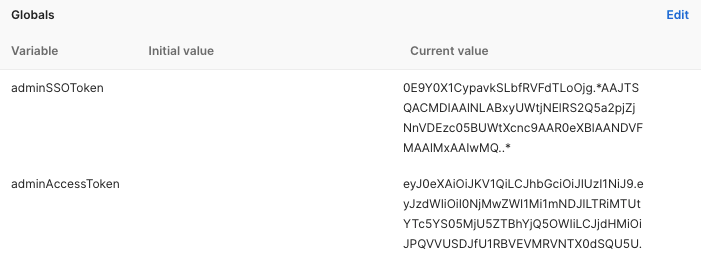
The important return value from step 2b is the “tokenId”, which is the sso token for the IDCloudAdminUsername user. This value will be stored in the adminSSOToken global variable

(2) Create OAuth Clients
Execute steps 3, 4, and 5. This will create the OAuth2 clients (“applications”) if all variables are set correctly. Validate by logging into your tenant and examine the applications:
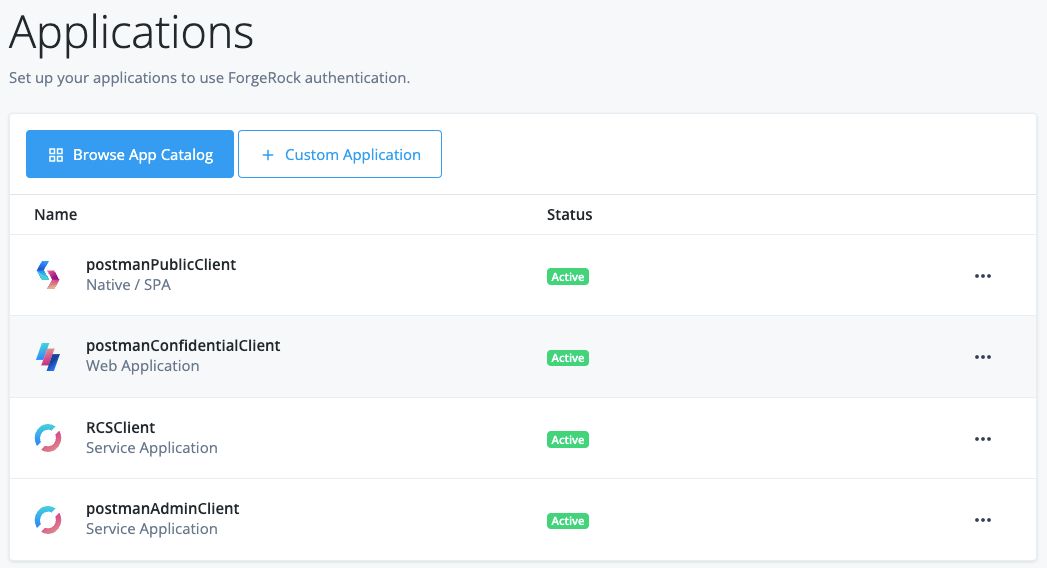
The OAuth Clients will be used for the OAuth flows.
(3) Get an access token as the postmanAdmin user and test access
Run steps 6 to authenticate as postmanAdminUser.
The access_token returned will be stored in the adminAccessToken
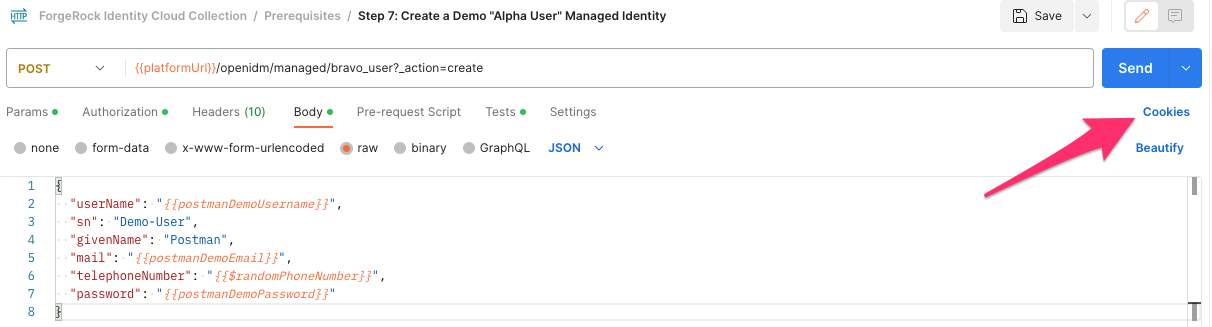
Run Step 7 to use that token to create postmanDemoUser.
The postmanDemoUser will be created and the JSON representation will be returned.
Step 4: Create a logging account
From your tenant admin UI, select “Log API Keys”

Click the “+ New Log Key” icon. Name your new key in the dialog.
Be sure to copy the api_key_id and the api_key_secret for later use. The secret cannot be displayed again.
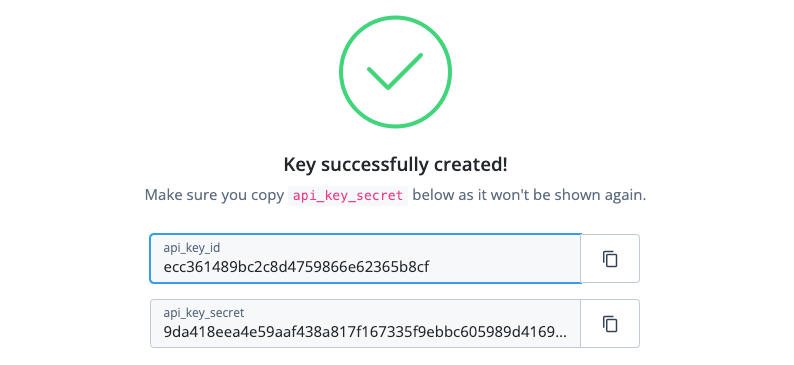
Set the logApiKey and logApiSecret environment variables using these values. I will go over their use in a later post.
Aside: Token storage in Postman and How to Reset
As mentioned previously, tokens are stored in the Postman collection as global variables. During testing, it may become necessary to delete your tokens manually if there is no other option. In all cases, it is a convenient method to remove your session from the client.
To clear your active sessions (“logout”) remove the tokens from your global variables.
In certain cases, tokens can be stored as cookies. To clear these, click on the cookies link in the console, then delete the desired cookie: