Zendesk and ForgeRock Identity Cloud SAML based SSO in 5 minutes
Author: |
Patryk Krolikowski |
Created at: |
Mar 2021 |
Updated at: |
Jul 2022 |
By Patryk Krolikowski
Originally posted on
https://medium.com/@scureq
If you need to integrate Zendesk with ForgeRock Identity Cloud acting as
an Identity Provider using SAML then this story is for you. If not, you
can still read it ;). This post is a joint effort of
Andre
Posner and myself.
ForgeRock Identity Cloud configuration
First let’s visit the Platform UI of our Identity Cloud instance. Then go to Access Management Native console:
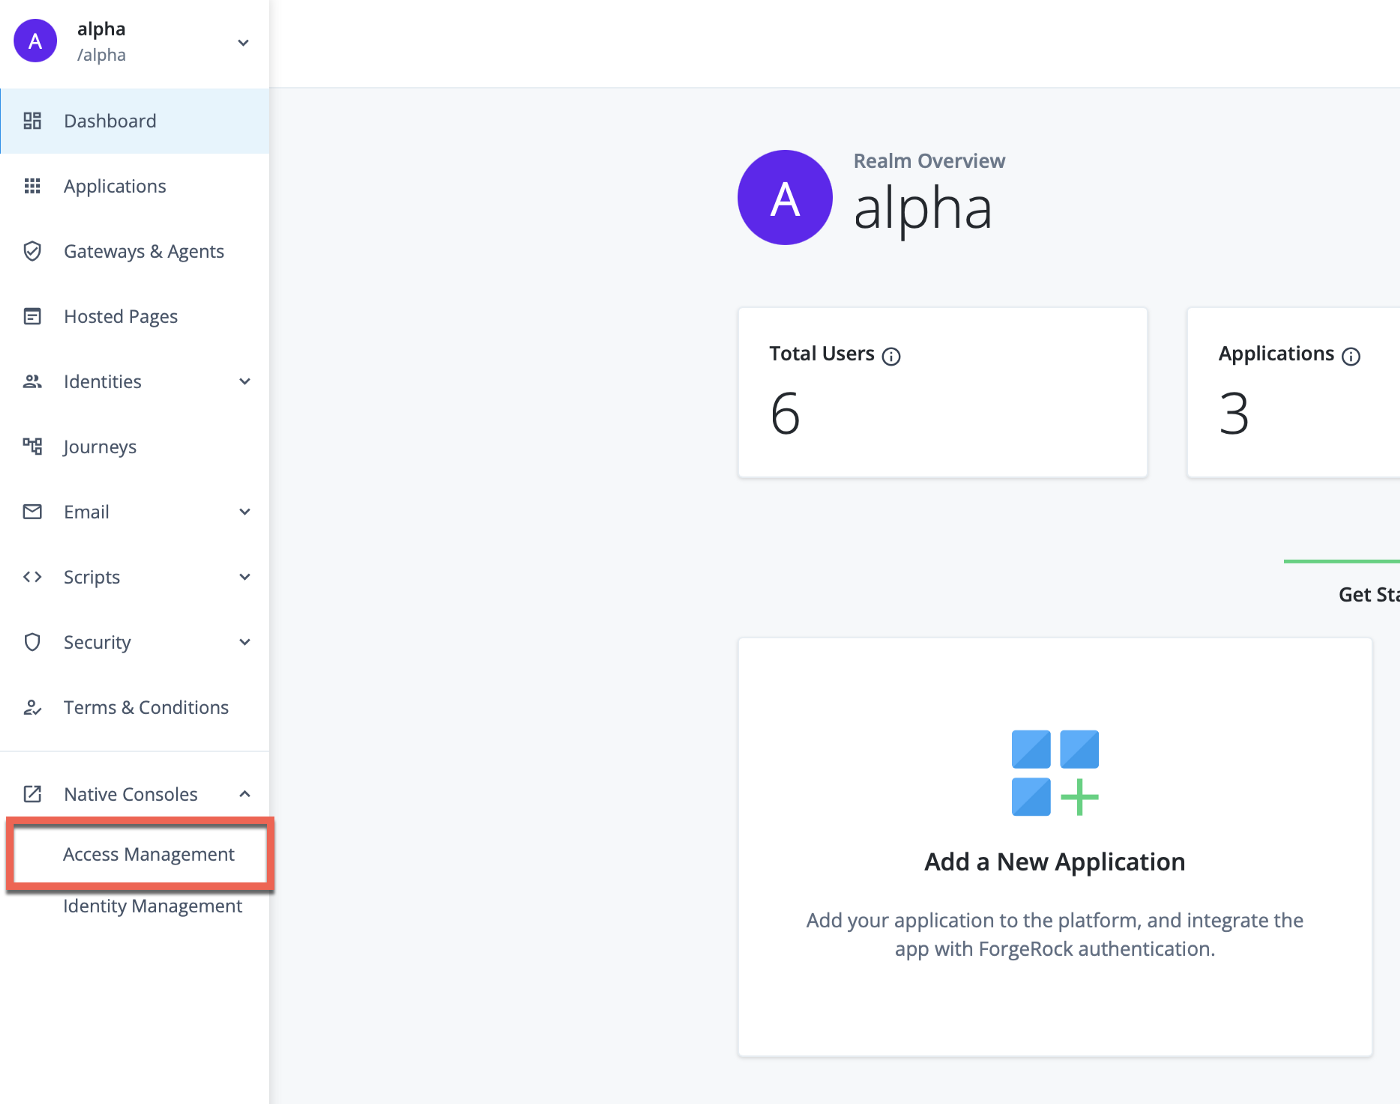
Forgerock Identity Cloud Platform console — going to Access Management native console
The next steps are configuring SAML2 Federation.
SAML2 Federation setup
Create a Circle of Trust
-
From “Applications”→”Federation”→”Circles of Trust” click Add Circle of Trust. You can name it however you want eg. “CoT”.
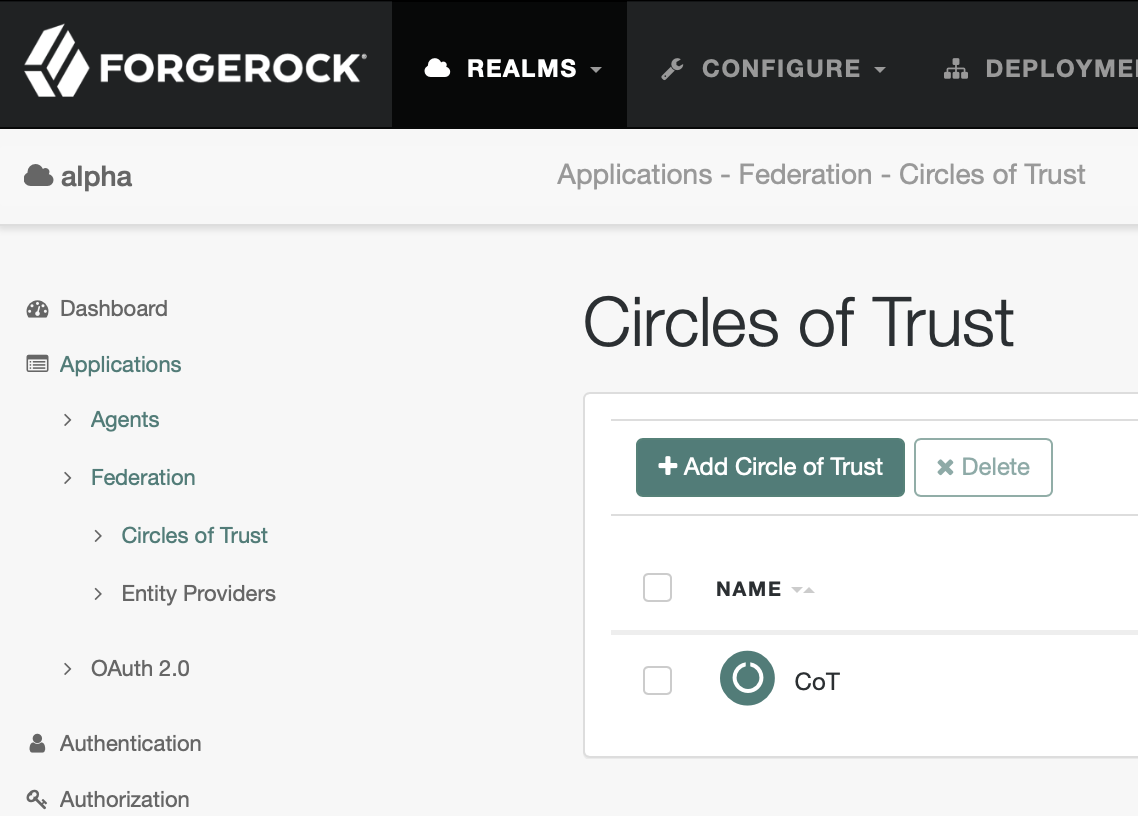
Create a Circle of Trust
Create a hosted IDP
-
From “Applications”→”Federation”→”Entity Providers” click create a Hosted Provider:
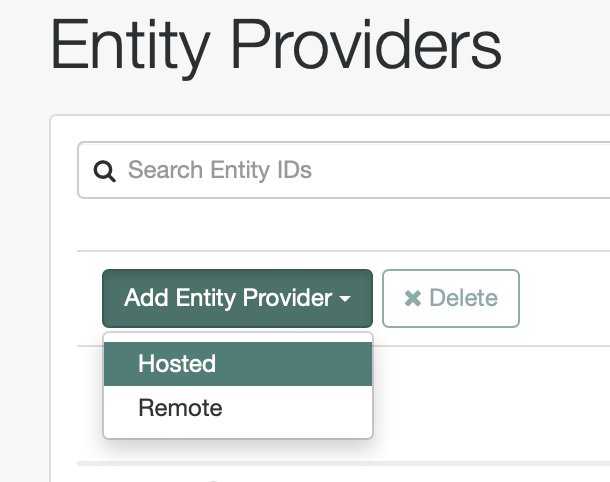
Create a Hosted IDP
-
Fill “Entity ID” — just copy Entity Provider Base URL and use it as Entity ID value. Then set Identity Provider Meta Alias to eg. “idp”.
-
From “Circles of Trust” dropdown select your Circle of Trust eg. “CoT”.
-
Click “Create”.
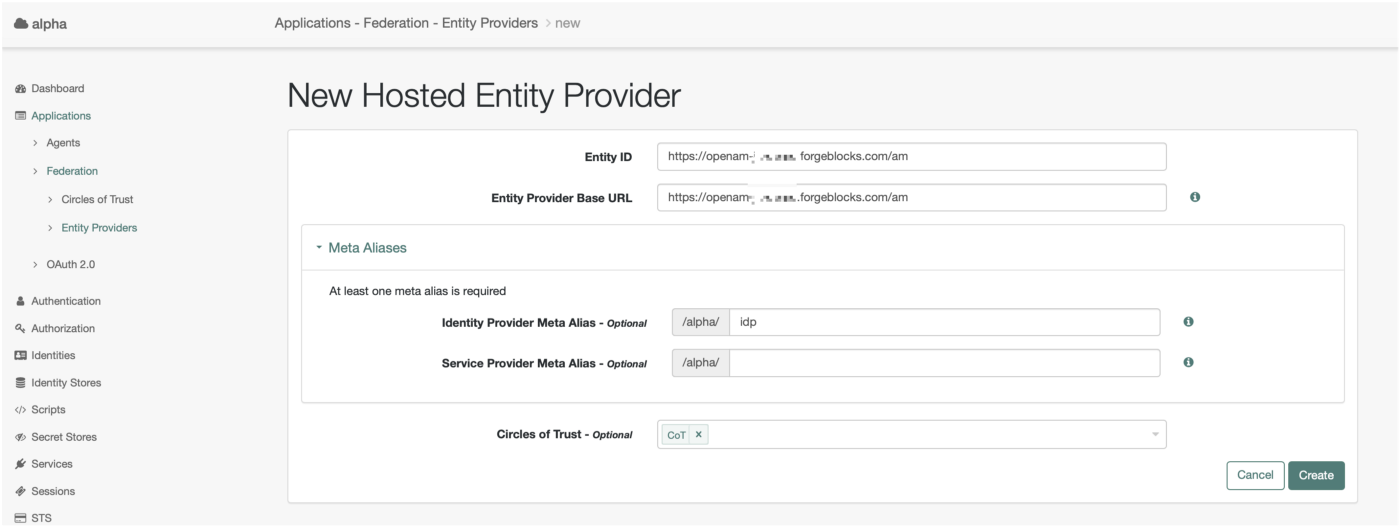
Create a Hosted IDP
Create a remote SP
Creating remote SP requires a bit of preps. You need to construct your SAML2 metadata file. It should look like this — replace [your_instance_name] with your Zendesk instance name:
Zendesk SAML2 Metadata
-
Save metadata.
-
From “Applications”→”Federation”→”Entity Providers” click create a Remote Provider:
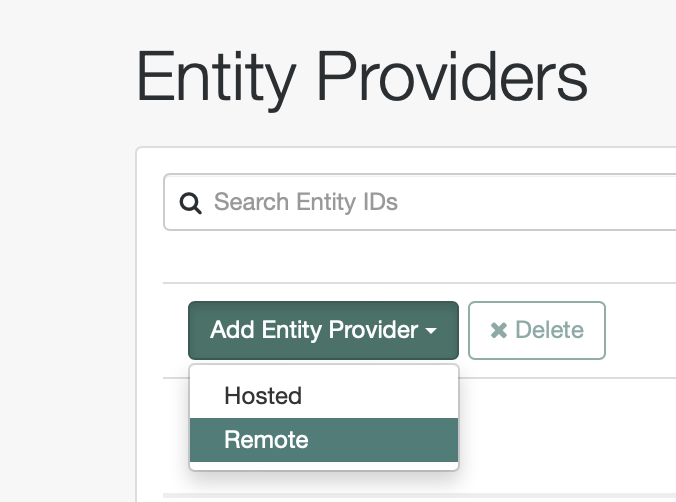
Create a Remote SP
-
Upload your metadata file:
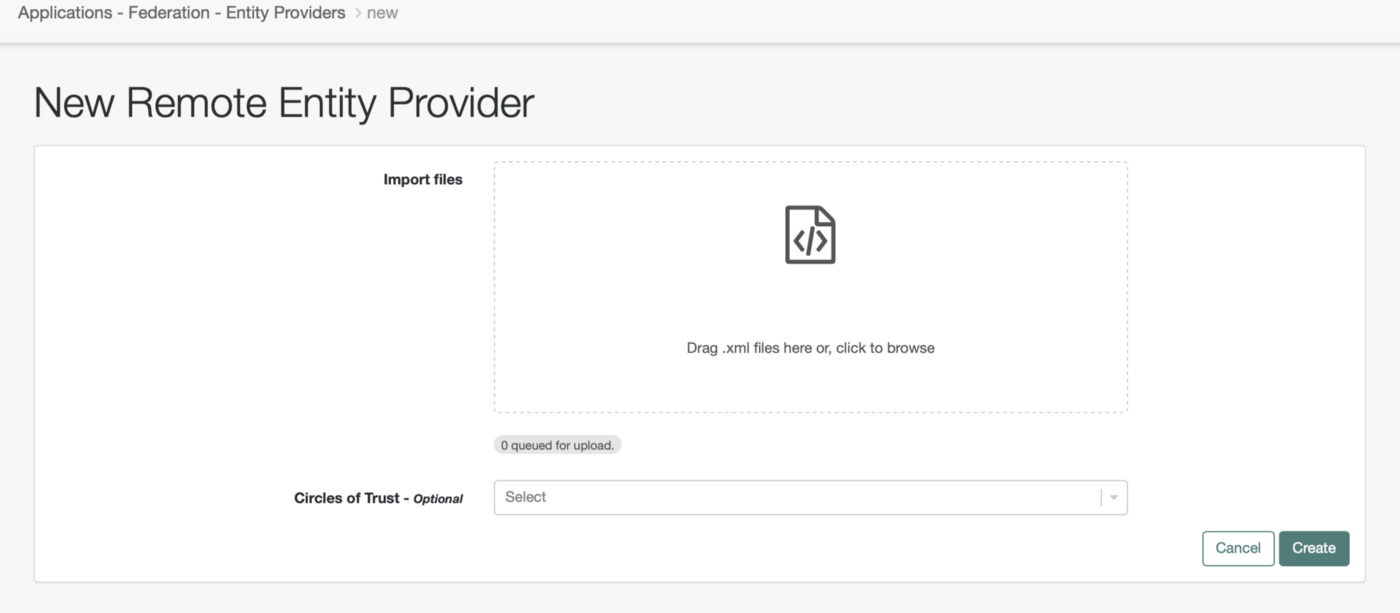
Create a Remote SP
-
As before remember to select a Circle of Trust.
As a result the list of Entity Providers should look like that:
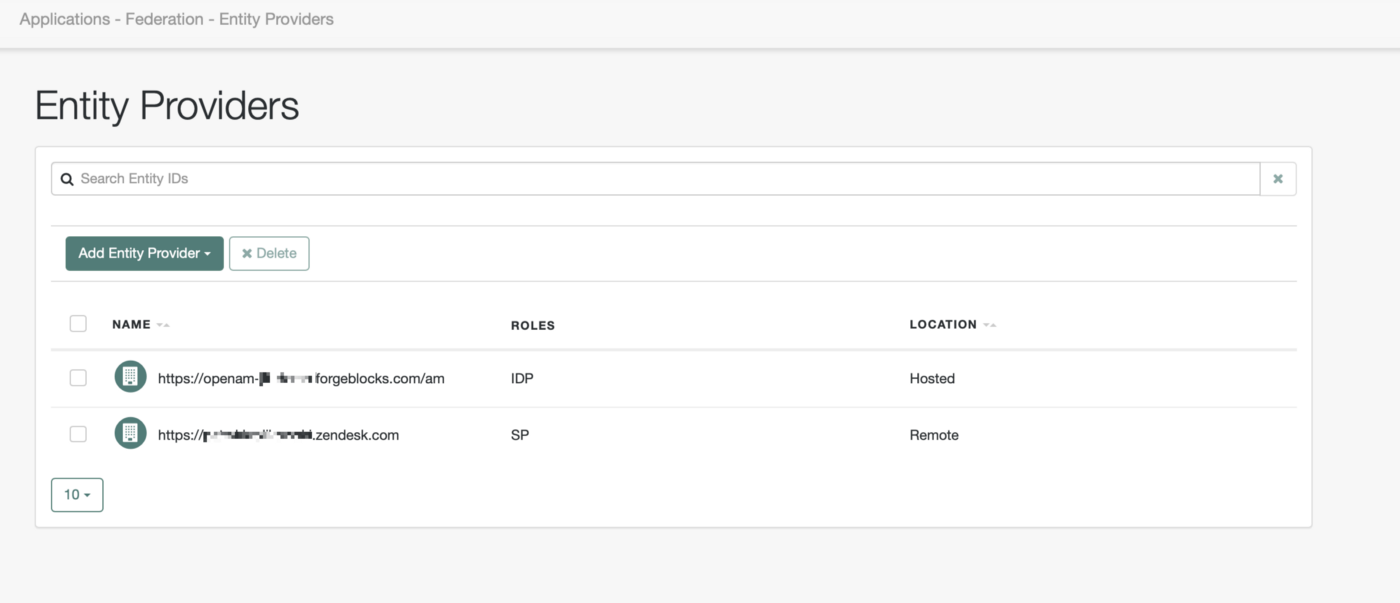
Providers list
Now it is time to add just a tiny bit of config to our IDP.
-
Select your hosted IDP and go to the “Assertion Processing” tab:
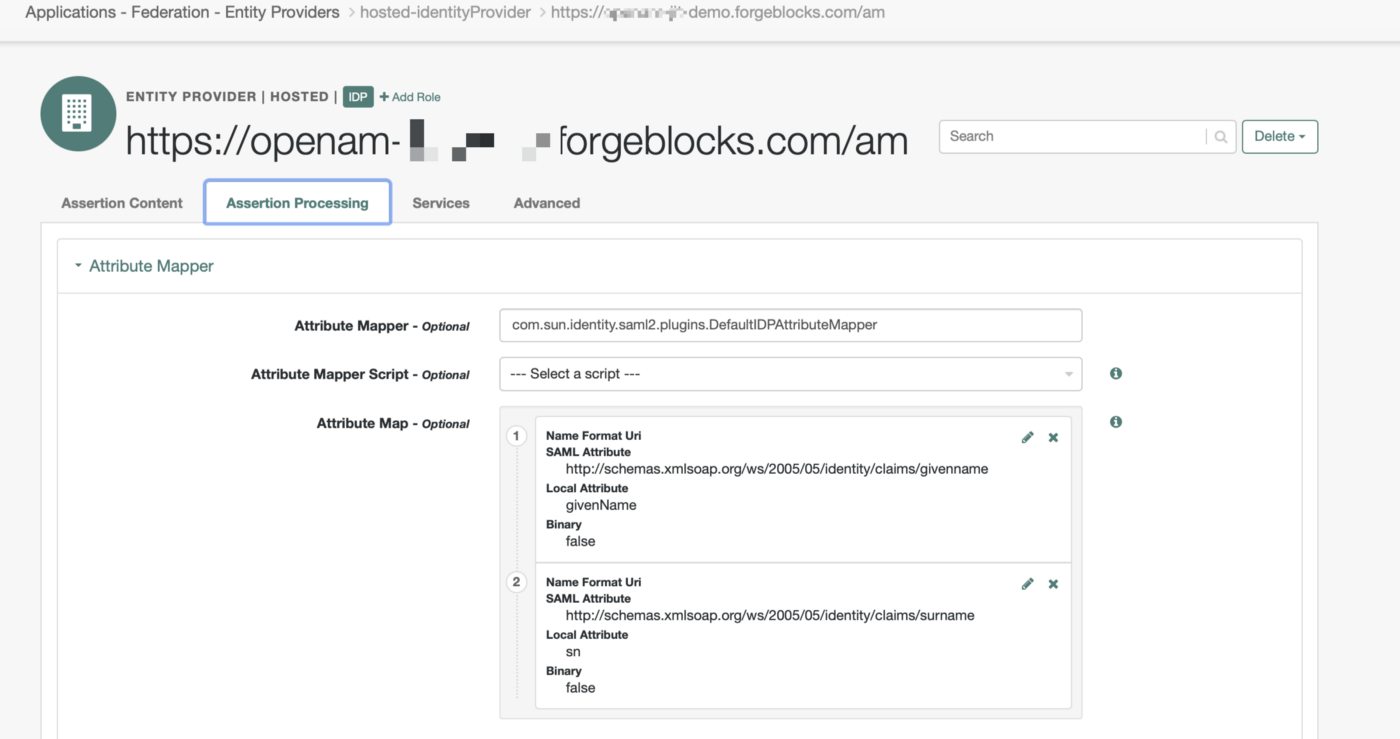
Assertion configuration
Fill the attribute map as above. To make it easier you can copy&paste SAML attributes values:
For Local Attribute use `givenName`and `sn`respectively. This will allow IdP to return first name and last name in the SAML2 Attribute Statement.
Create a user in ForgeRock Identity Platform
Last thing is creating a user in ForgeRock Identity Platform. We are not discussing data synchronization between Identity Cloud and Zendesk (that could be a topic for another post), so the assumption is that there should a corresponding user in Zendesk already — with a matching email address. This is because Zendesk uses “urn:oasis:names:tc:SAML:1.1:nameid-format:emailAddress” as SAML2 NameID to match users.
You can create users from Identity Cloud Platform UI — “Identities”→”Manage”→”Alpha Realm — Users” → “Add Alpha realm — user” eg.:

Sample User
The last thing is getting our IdP’s metadata. We only need three things here:
-
X.509 signing certificate
-
Single Sign On URL
-
Single Log Out URL
We can get all of these by going to the Identity Cloud exportmetadata endpoint:
your-instance.forgeblocks.com/am/saml2/jsp/exportmetadata.jsp?entityid=https://openam-[your-instance].forgeblocks.com/am&realm=/alpha
Let’s take the all the information:
-
Signing Certificate:
X.509 from metadata
-
Single Sign On URL:
Zendesk requires HTTP-POST so make sure you take the value from the right binding.
-
Single Logout URL:
That’s it. The rest is Zendesk configuration.
Zendesk configuration
SAML Configuration
You can configure SSO options at: https://[your_instance_name].zendesk.com/admin/account/security/sso
You need to be logged in as an admin. We also assume at this point that an enduser is already created. If not create one — remember email address must be matching the one we had configured in ForgeRock Identity Cloud.
Edit configuration for SAML:
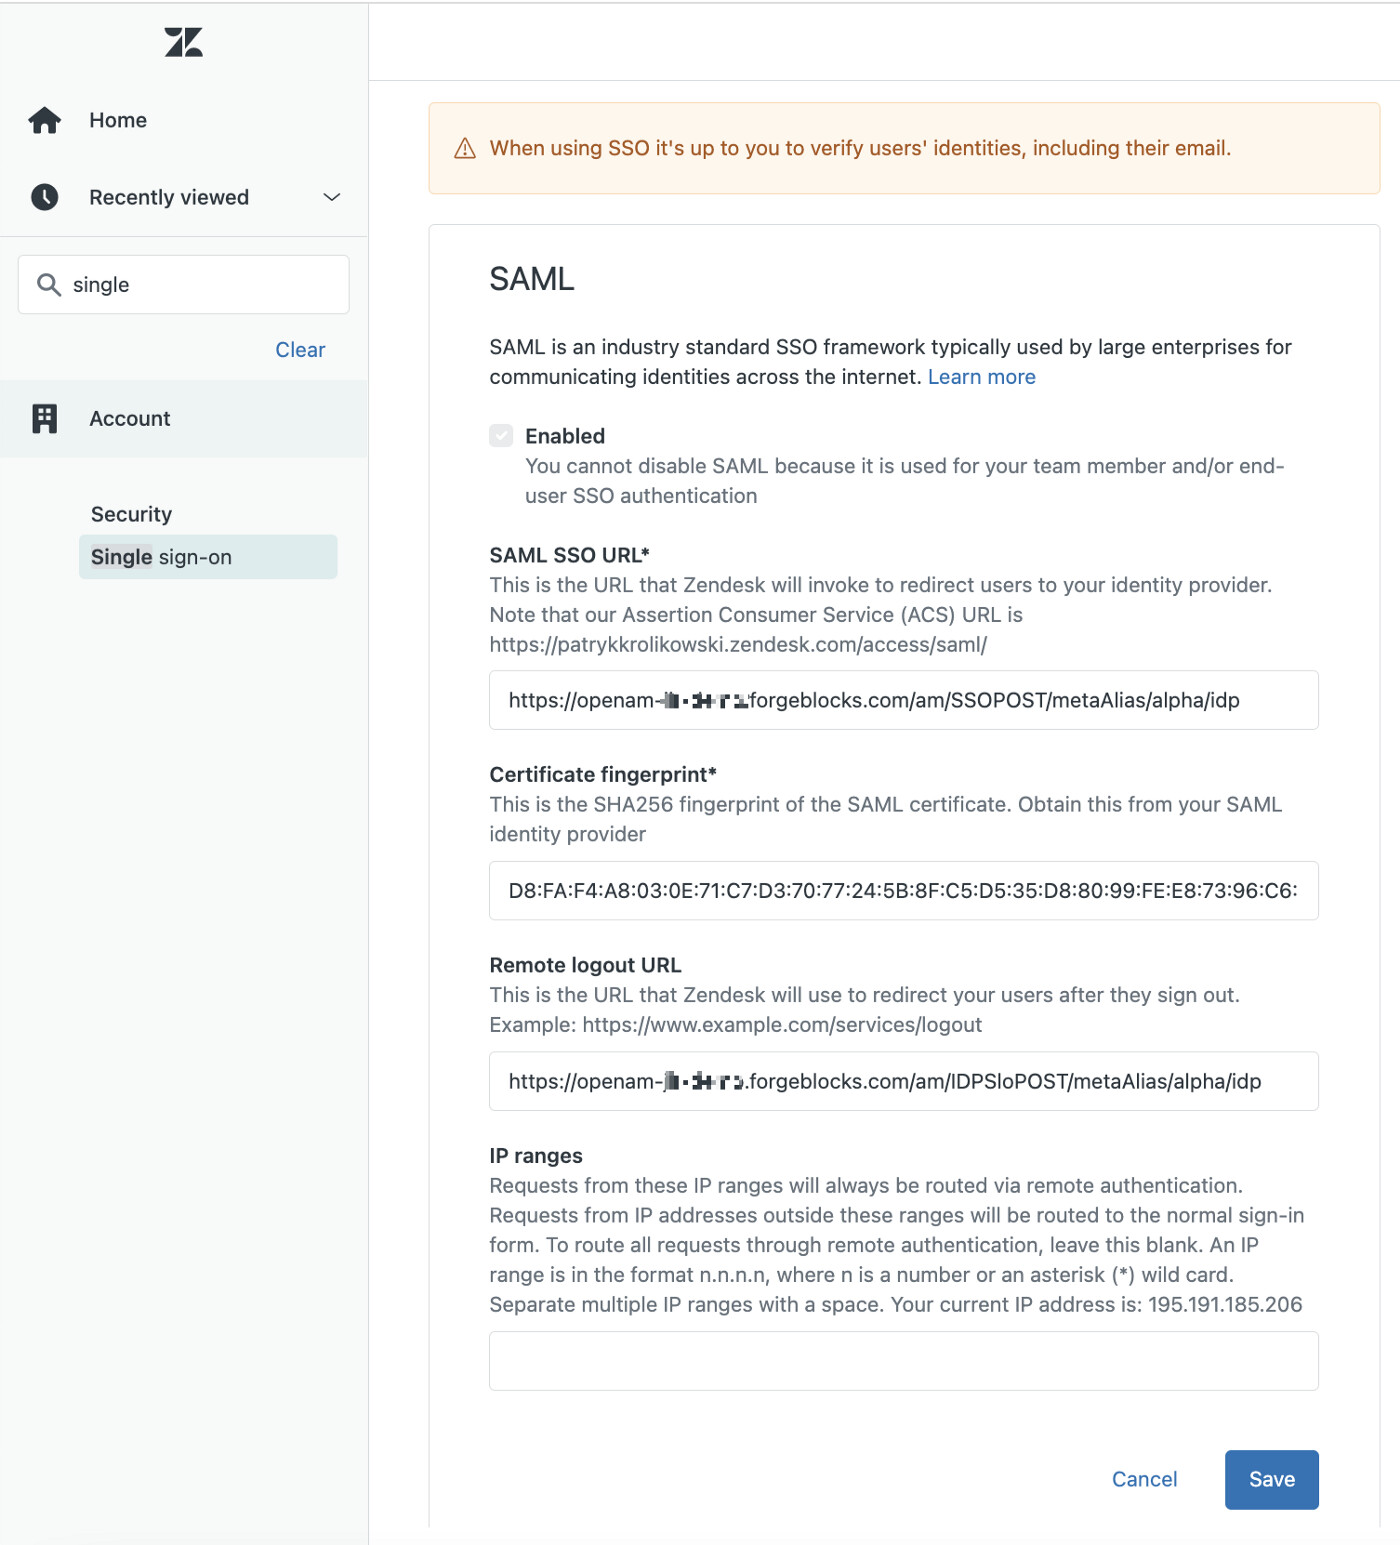
Zendesk SSO setup page
Fill SAML SSO URL and Remote Logout URL with corresponding values captured from Identity Cloud IDP metadata.
Last thing that we need to provide is a Certificate Fingerprint. In order to get it we need to take our X.509 cert from IDP’s metadata and make a formatted hash of it.
You can use a tool like X.509 Certificate Format Online Tool | SAMLTool.com to format the certificate — take “X.509 cert with header”. Then SAML X.509 Certificate Fingerprint - Online SHA1 Decoder | SAMLTool.com to get a “Formatted Fingerprint” — remember to select sha256 as a hashing algorithm.
Tehn hit Save.
Now there are two things left:
-
Enable SAML SSO for either enduser or staff (or both). Let just enable SSO for end users.
You can do it here [https://[your_instance_name].zendesk.com/admin/account/security/end_users]:
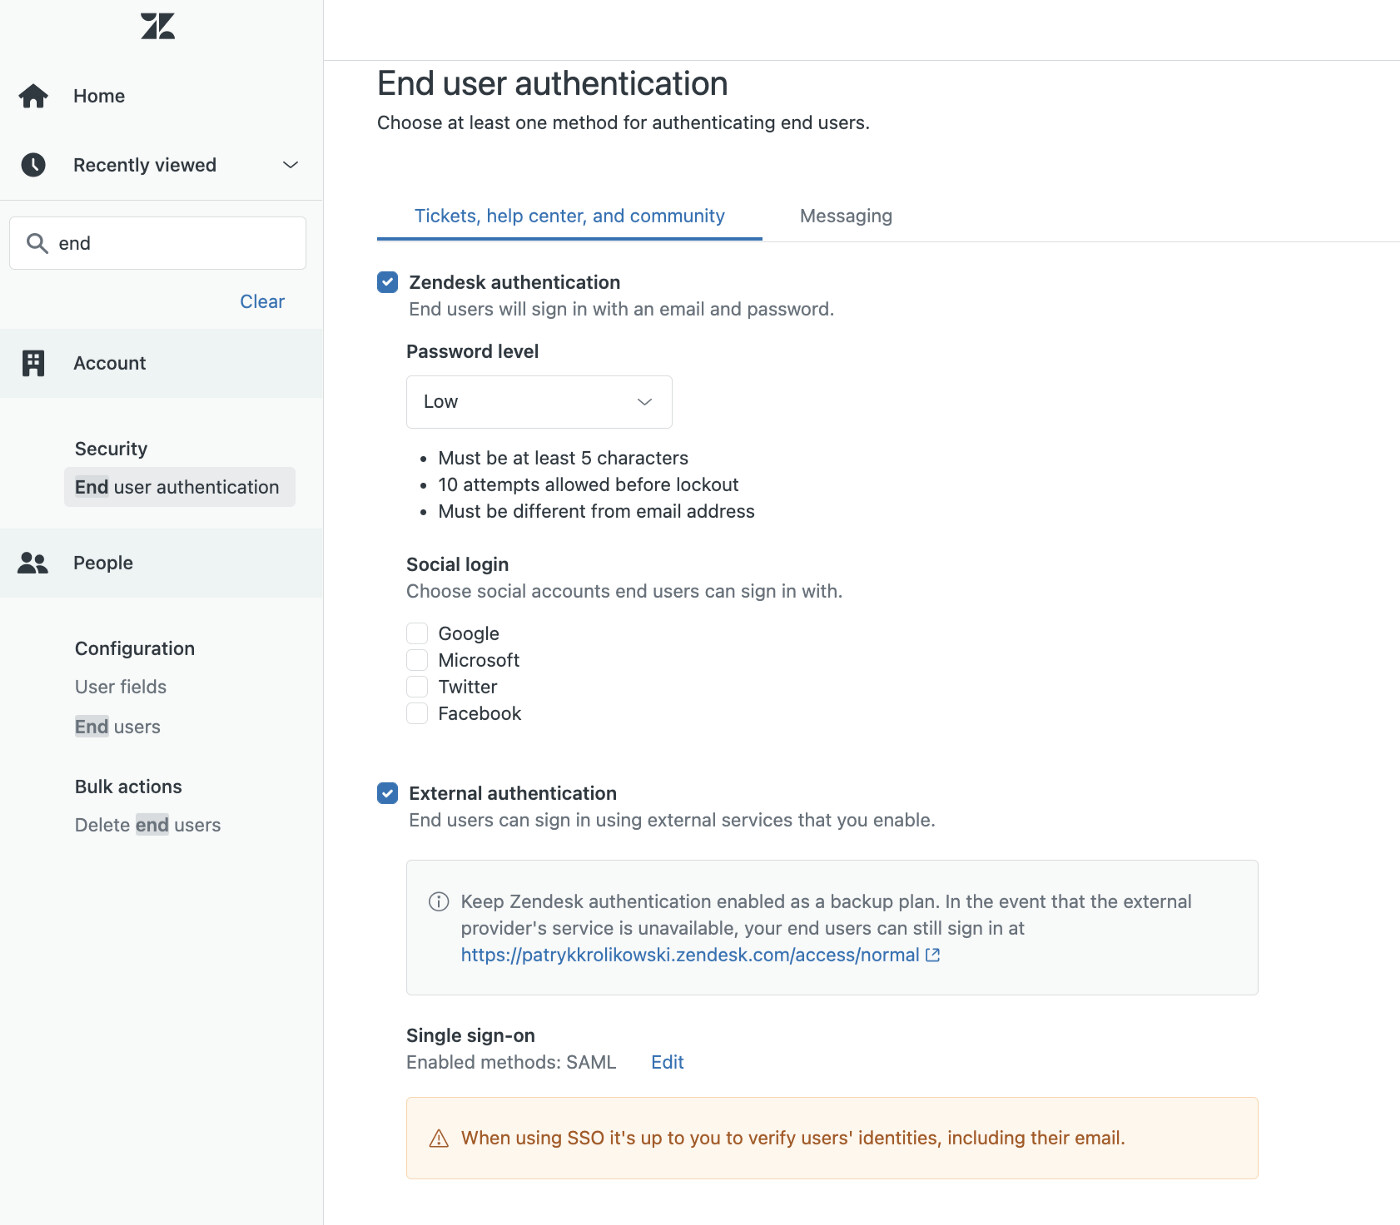
Enable SSO for Endusers
-
If that is a fresh instance of Zendesk you need to Enable Help Center for End users here:
Now visit your Zendesk instance: https://[you_instance_name].zendesk.com/access
If all goes well you should see something like that:
SSO Flow
Other Articles by This Author
![]() ForgeRock Identity Cloud
& Azure AD B2C
[.badge-category__name#Integrations#]
ForgeRock Identity Cloud
& Azure AD B2C
[.badge-category__name#Integrations#]
By Patryk Krolikowski Originally posted on https://medium.com/@scureq Did you ever wonder how to integrate ForgeRock Identity Cloud (this also applies to ForgeRock Access Management) and Microsoft Azure AD B2C? And maybe even how to do it using OpenID Connect? If so, read on! Why… First, you might be asking yourself — Azure AD B2C can be an Identity Provider itself, right? So, why would I even consider using a 3rd party provider? That’s a very valid question and I think there might be severa…