Getting started with ForgeRock Identity Cloud journeys: Part 4 -
Author: |
Rajesh Rajasekharan |
Created at: |
Jul 2023 |
Updated at: |
Mar 2024 |
This is Part 4 of 8 in the series Getting started with ForgeRock Identity Cloud journeys.
Self-registration journey ~15 minutes
In the Customer Identity and Access Management (CIAM) space, the best way to onboard millions of customers into an infrastructure is to give them the option to self-register.
The Registration sample journey in ForgeRock Identity Cloud is useful in creating a self-registration process for the users.
This guide takes you through the Registration journey and shows how it can be modified to include additional capabilities.
Examining the Registration journey
-
In a supported browser, log into your Identity Cloud Admin UI.
-
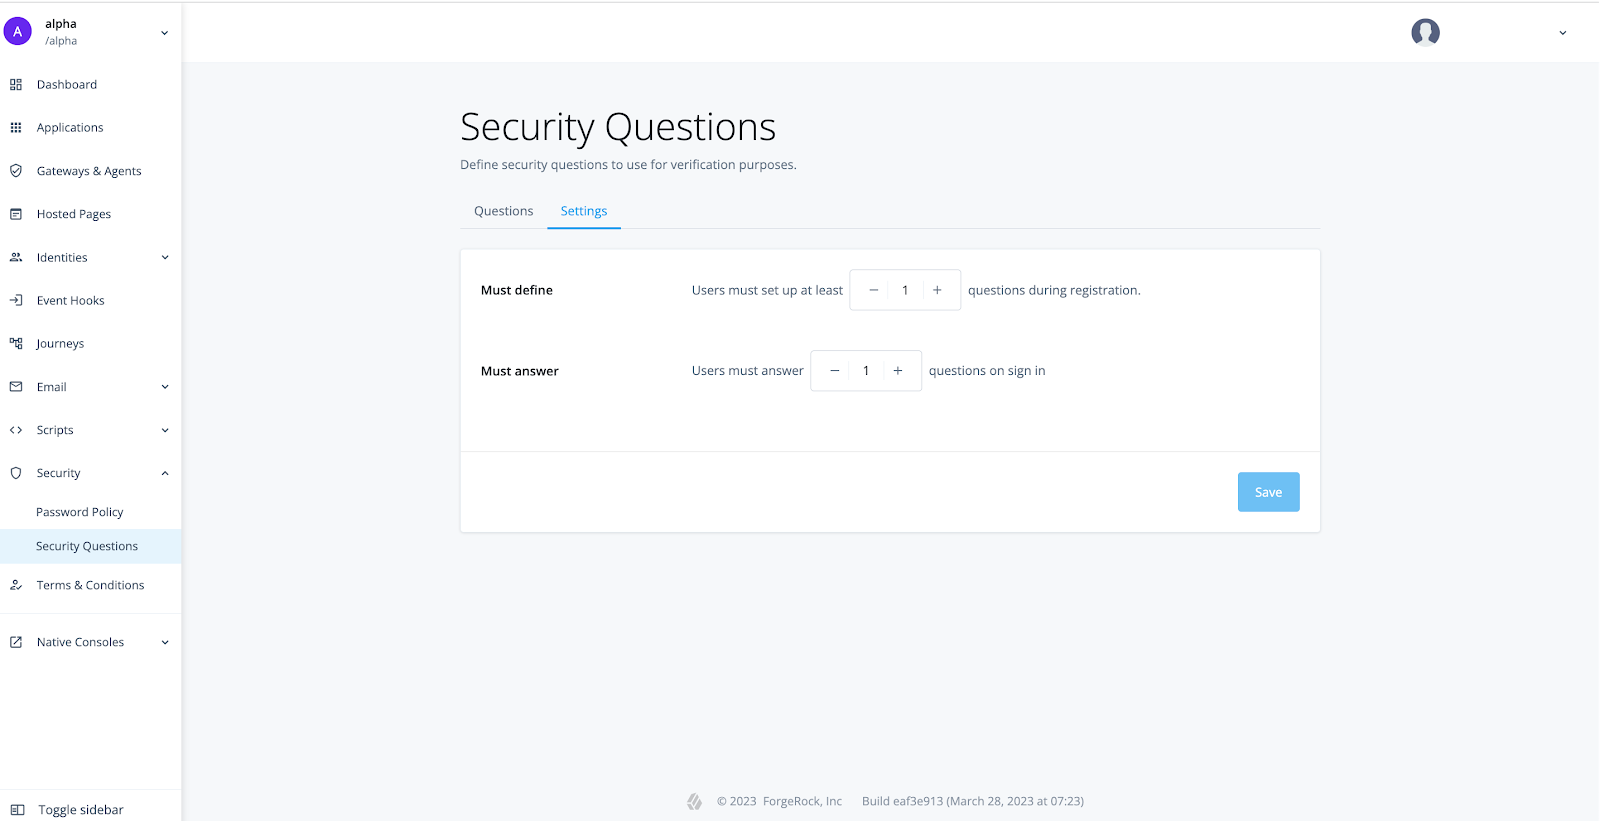
In the alpha realm, go to Security > Security Questions.
Note that in the Questions tab, there is one question configured by default.
-
Click the Settings tab to view the Security Questions policy.
-
On the left navigation pane, click Terms & Conditions.
-
Click on the default Terms & Conditions defined on the page.

-
Click ← Terms & Conditions to return to the Identity Cloud Admin UI landing page.
-
On the left navigation pane, click Journeys > Registration.
-
Edit the Registration journey by clicking on the preview image.
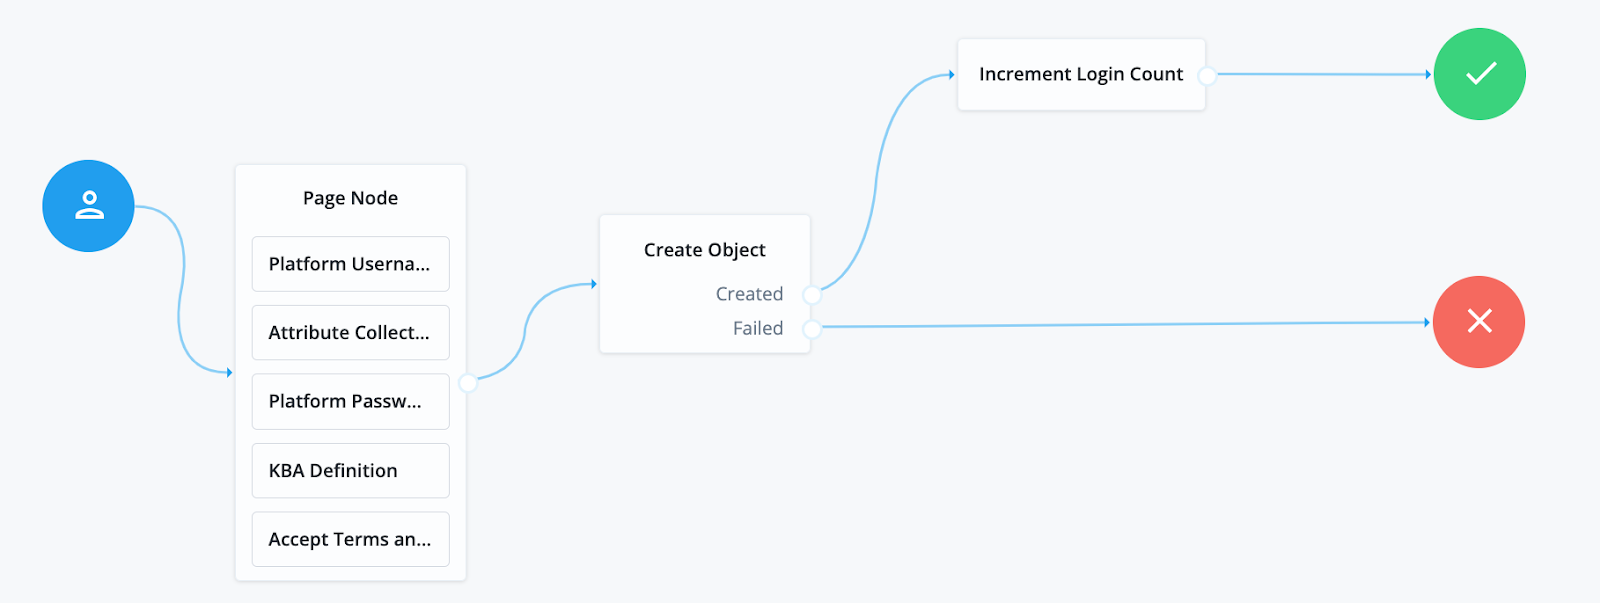
At the start of this journey, the nodes in the Page Node prompt end users to provide the information required to create their account such as username, password, profile attributes, the answers to security questions, and acceptance of the Terms and Conditions defined.
-
In the Page Node, click the Attribute Collector node. Notice the parameters under the Attributes to Collect property.

This property lists all the attributes a user is expected to provide an answer to during self-registration. Attributes added here are necessary to keep a user’s profile complete upon registration. A common practice is to keep the self-registration process simple with only minimum attributes and have users complete their profile using Progressive Profiling in their subsequent login journeys.
The journey then uses the Create Object node to create a user profile in the Identity Cloud.
The journey increments the login count attribute of the new user created and displays the end user dashboard.
Testing the Registration journey
-
In the alpha realm of your Identity Cloud tenant, go to Journeys > Registration.
-
Copy the preview URL of the journey.
-
In a browser different from the Identity Cloud administrator active session, paste and go to the journey preview URL.
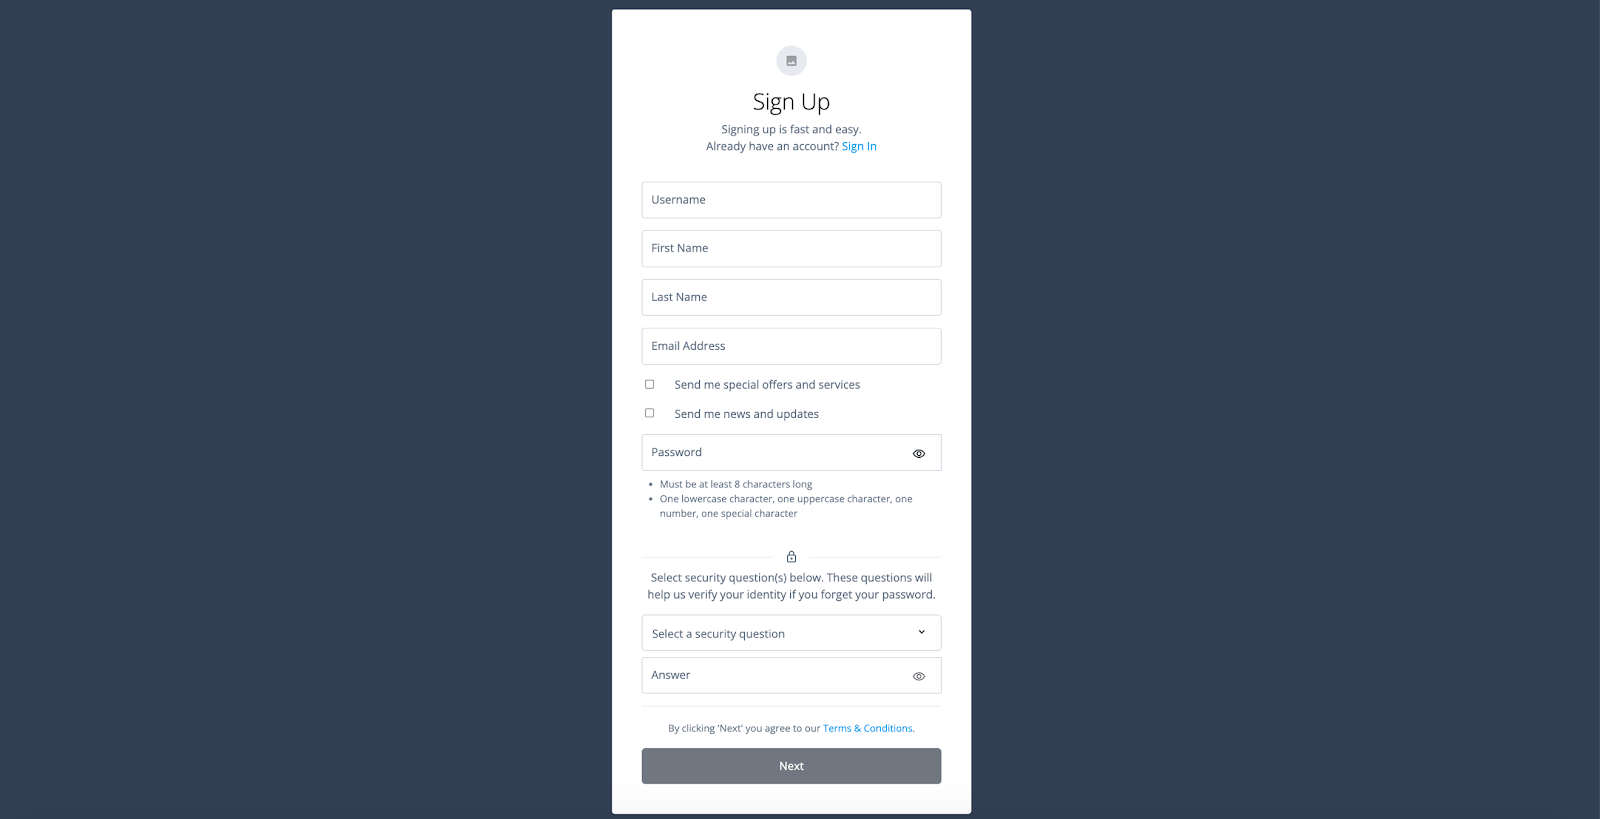
The Page Node with all the collector nodes appears as a registration form.
-
Complete the form with appropriate responses and click Next.
A new user created is created and logged into the Identity Cloud end user dashboard.
-
Sign out of the end user dashboard.
-
To view the newly created user account details, go to your Identity Cloud Admin UI > Identities > Manage.
Modifying the Registration journey to add additional capability
To prevent bots from signing up, you can modify the journey by adding an authentication node that prompts the users to pass a CAPTCHA test. This journey makes use of the Google reCAPTCHA service, so for it to work, use an active Google account to perform the following steps.
-
Go to https://google.com/recaptcha.
-
Click V3 Admin Console.
-
Sign in using a Google account, if prompted.
-
Click + at the top right corner of the admin console.
-
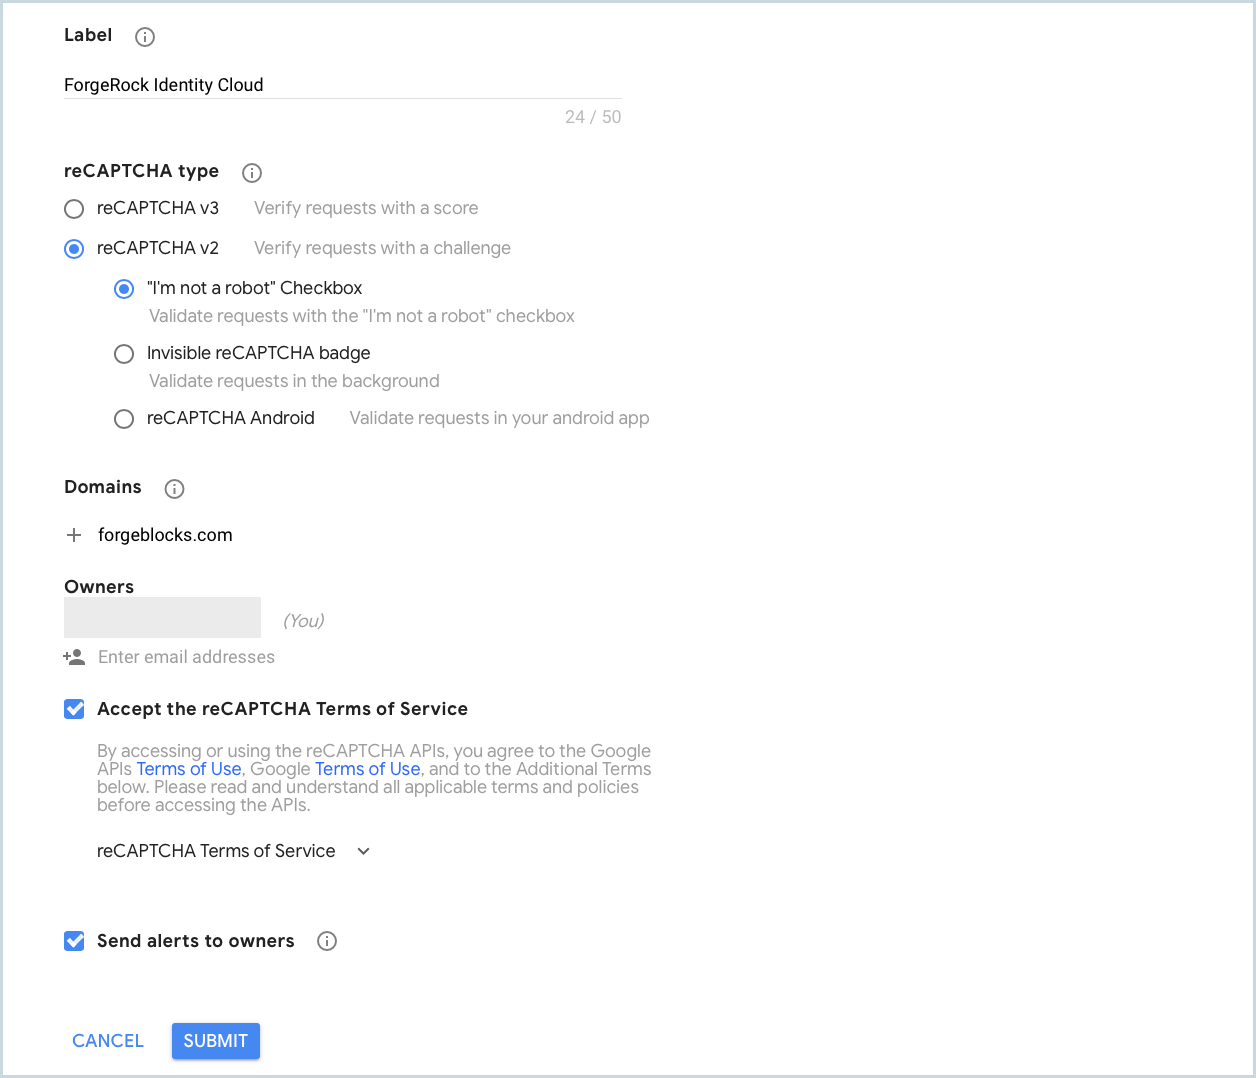
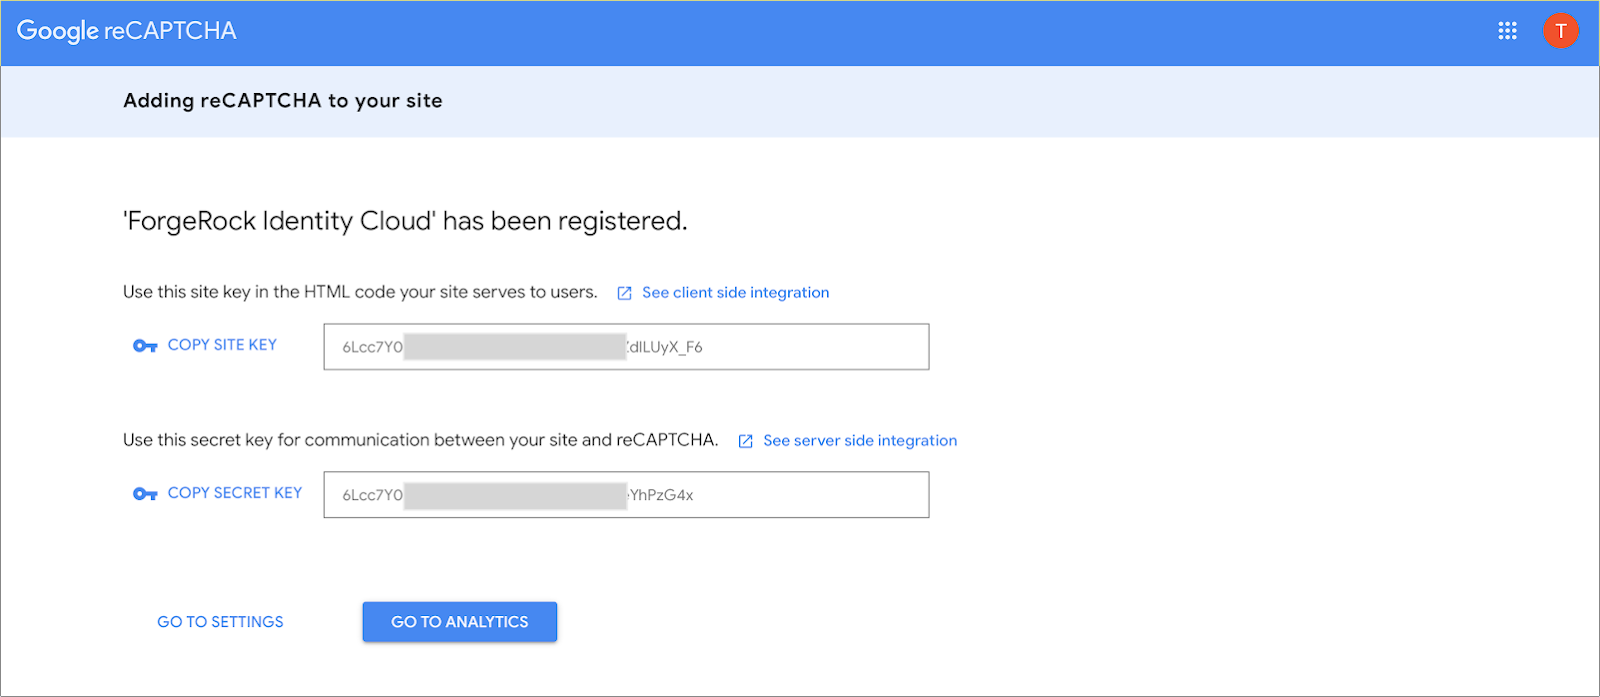
Using the following information as reference, register a new site.
-
Label: ForgeRock Identity Cloud
-
reCAPTCHA type: reCAPTCHA v2 (keep the default option beneath it checked)
-
Domains: forgeblocks.com
-
Check Accept the reCAPTCHA Terms of Service
-
Click SUBMIT
-
-
Copy and keep the Site Key and Secret Key handy.
-
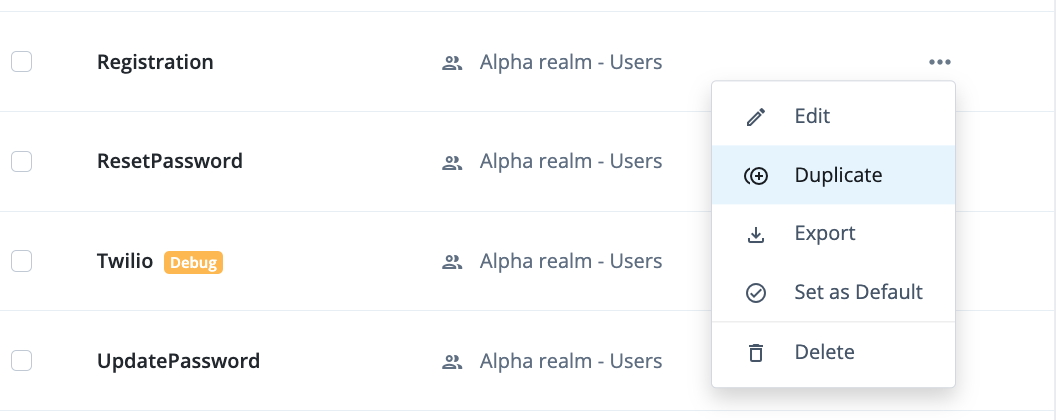
In the alpha realm of your Identity Cloud Admin UI, go to Journeys > Registration > … menu and select Duplicate.
-
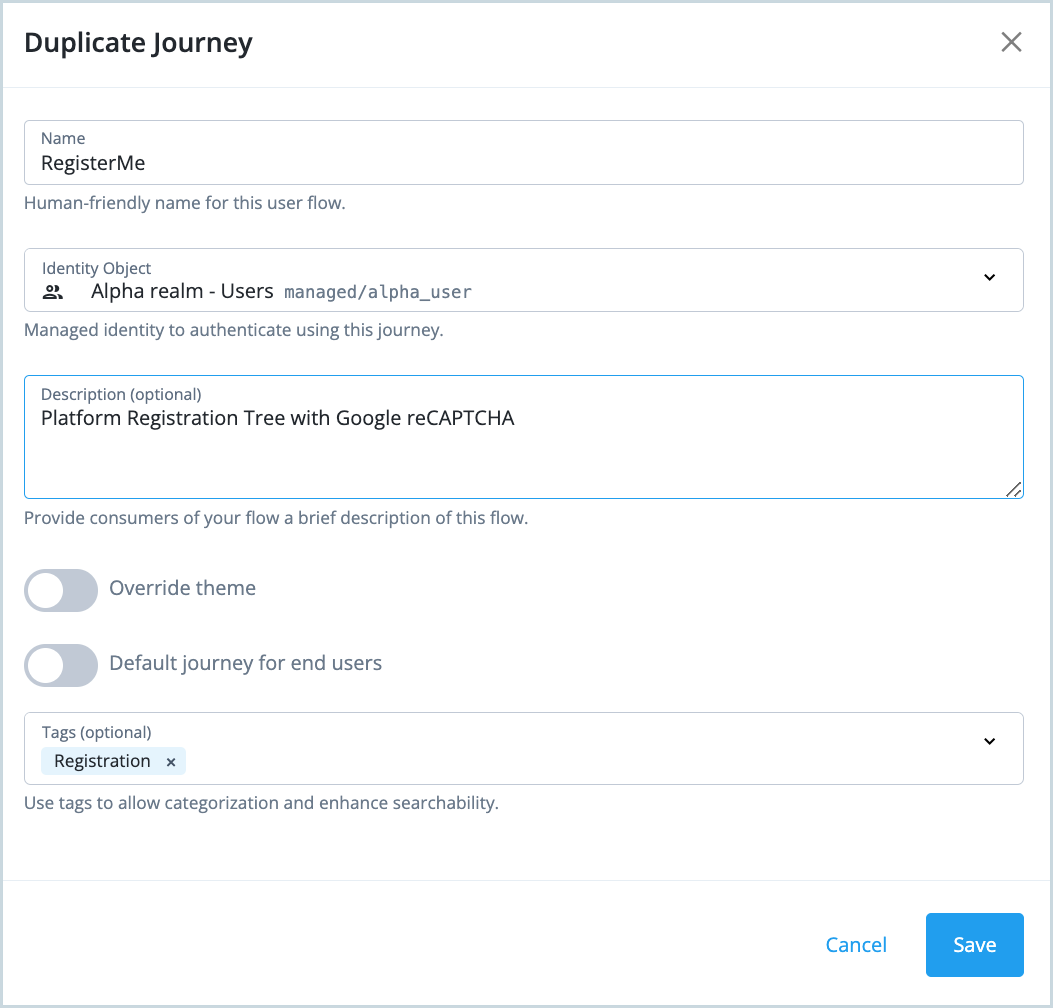
Replace the default name of the duplicate journey with the name ‘RegisterMe’ and set the description to “Platform Registration Tree with Google reCAPTCHA”.
-
Click Save.
-
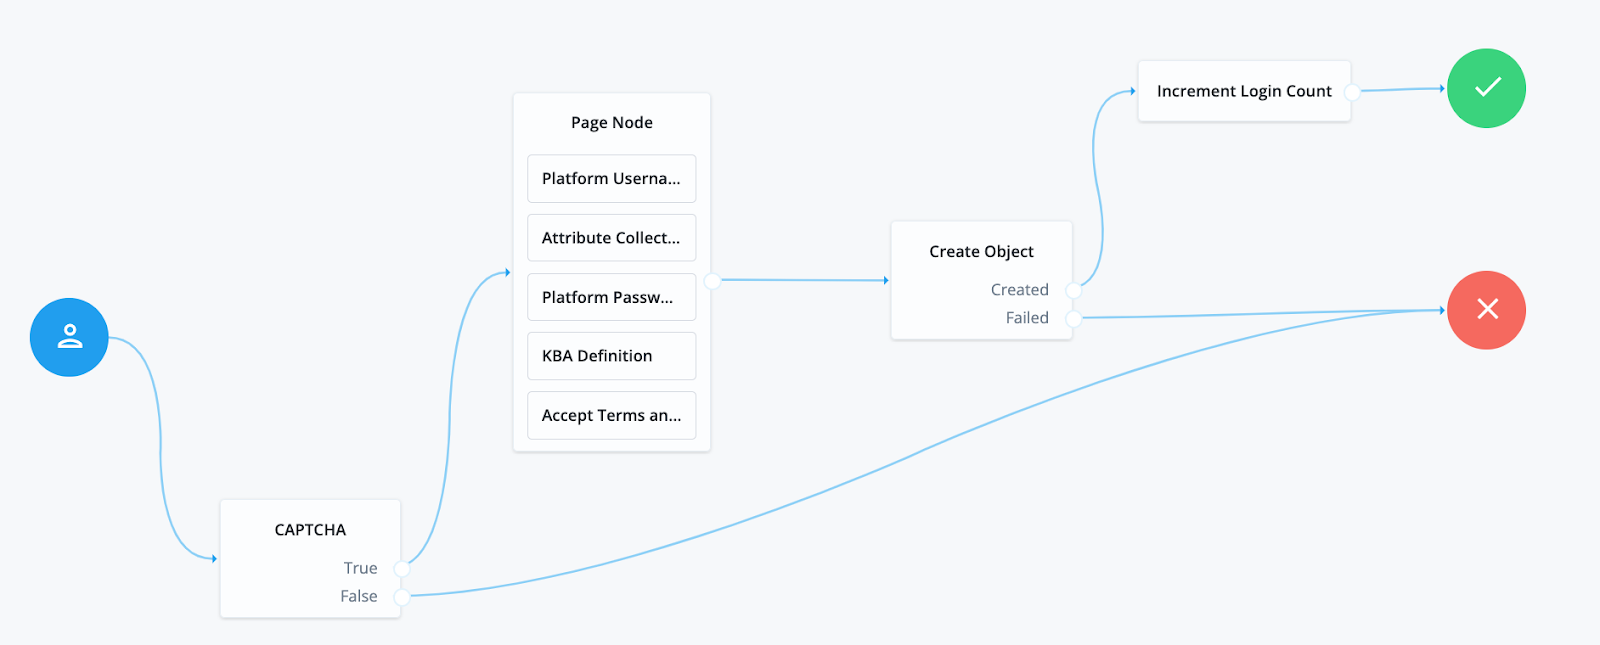
On the edit page of the newly created ‘RegisterMe’ journey, click and drag the CAPTCHA (Risk) authentication node.
-
Connect the nodes as follows:
-
Start node → CAPTCHA node.
-
CAPTCHA node True outcome → Page Node.
-
CAPTCHA node False outcome → Failure node.
-
-
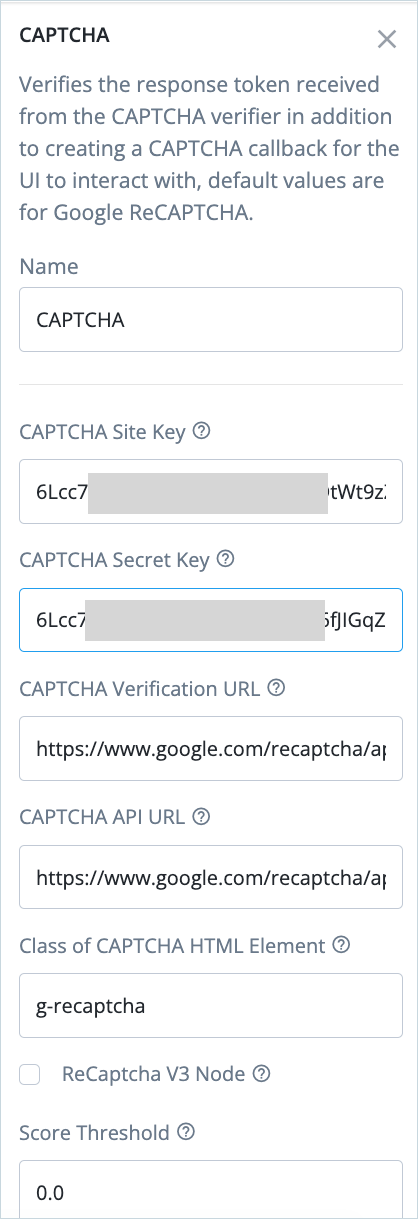
Click on the CAPTCHA node and complete the Site Key and Secret Key in the respective node properties.
-
Click Save to save the journey.
Testing the modified Registration journey
-
In a browser different from the Identity Cloud administrator active session, paste and go to the ‘RegisterMe’ journey preview URL.
The Google reCAPTCHA challenge page is displayed.

-
Verify the CAPTCHA and click Next.
The journey proceeds to show the registration page.
-
Complete the journey as appropriate.