Getting started with ForgeRock Identity Cloud journeys: Part 1 -
Author: |
Rajesh Rajasekharan |
Created at: |
Jul 2023 |
Updated at: |
Mar 2024 |
Introduction to building journeys in ForgeRock Identity Cloud
ForgeRock Identity Cloud is a ForgeRock managed Identity and Access Management solution hosted on Google Cloud Platform (GCP), with an unmatched security architecture built for Enterprise.
A journey collects necessary information from a user to allow them access to accounts by verifying their identity. A journey can be configured to collect basic information such as username and password, or additional information such as a one-time passcode (OTP) or an authenticator app.
About this guide
This is Part 1 of 8 in a series of Getting Started guides that provide an overview of navigating the Identity Cloud tenant and deep dives into building journeys for different authentication use cases.
Part 1 provides a step-by-step guide to:
Navigating the Identity Cloud tenant ~ 4 minutes
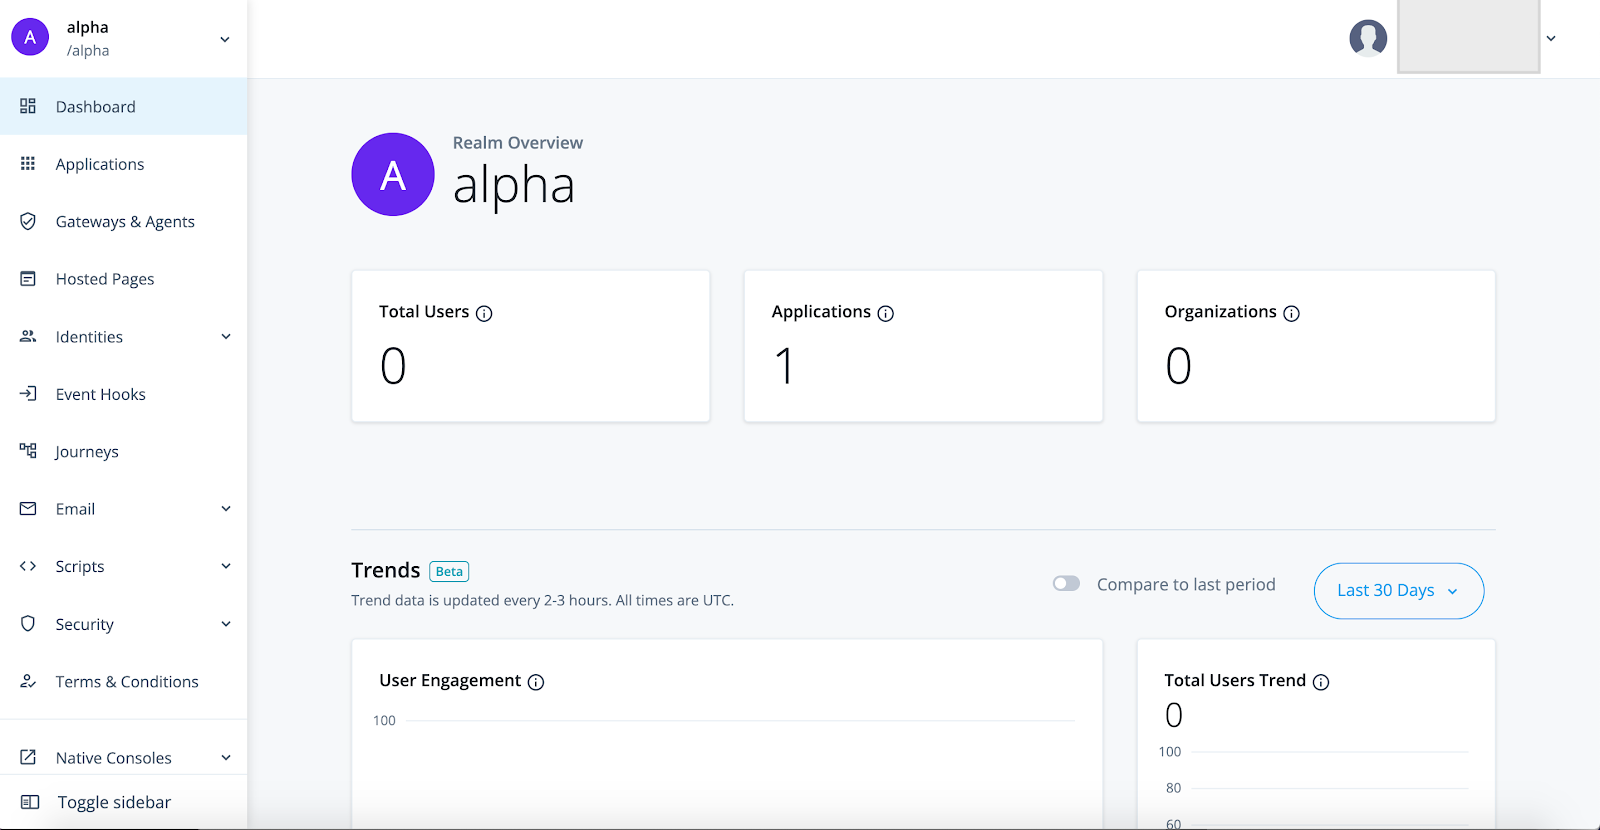
Log in to your Identity Cloud admin UI. You can skip setting up MFA for now.
Once logged in, the Identity Cloud Admin UI looks similar to the screenshot below.
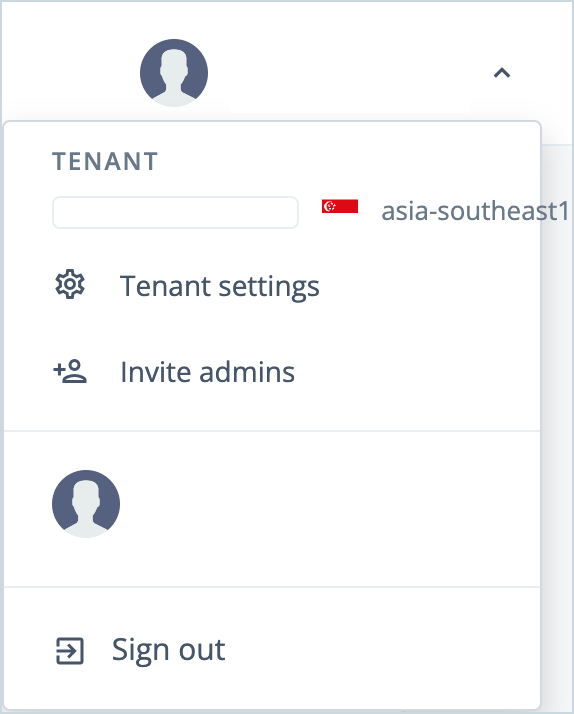
Inviting tenant admins
-
Click the user profile on the top right of the Identity Cloud Admin UI.
-
Click Invite admins.
-
Enter a comma-separated list of email addresses of the people you want to add as admins.
-
Click Send Invitations.
Identity Cloud sends an email invite with instructions to set up an administrator account.
Exploring journeys ~ 15 minutes
-
On the left sidebar, click Journeys.
Preconfigured journeys and any custom journeys that you have built for your use cases are displayed on the Journeys page.
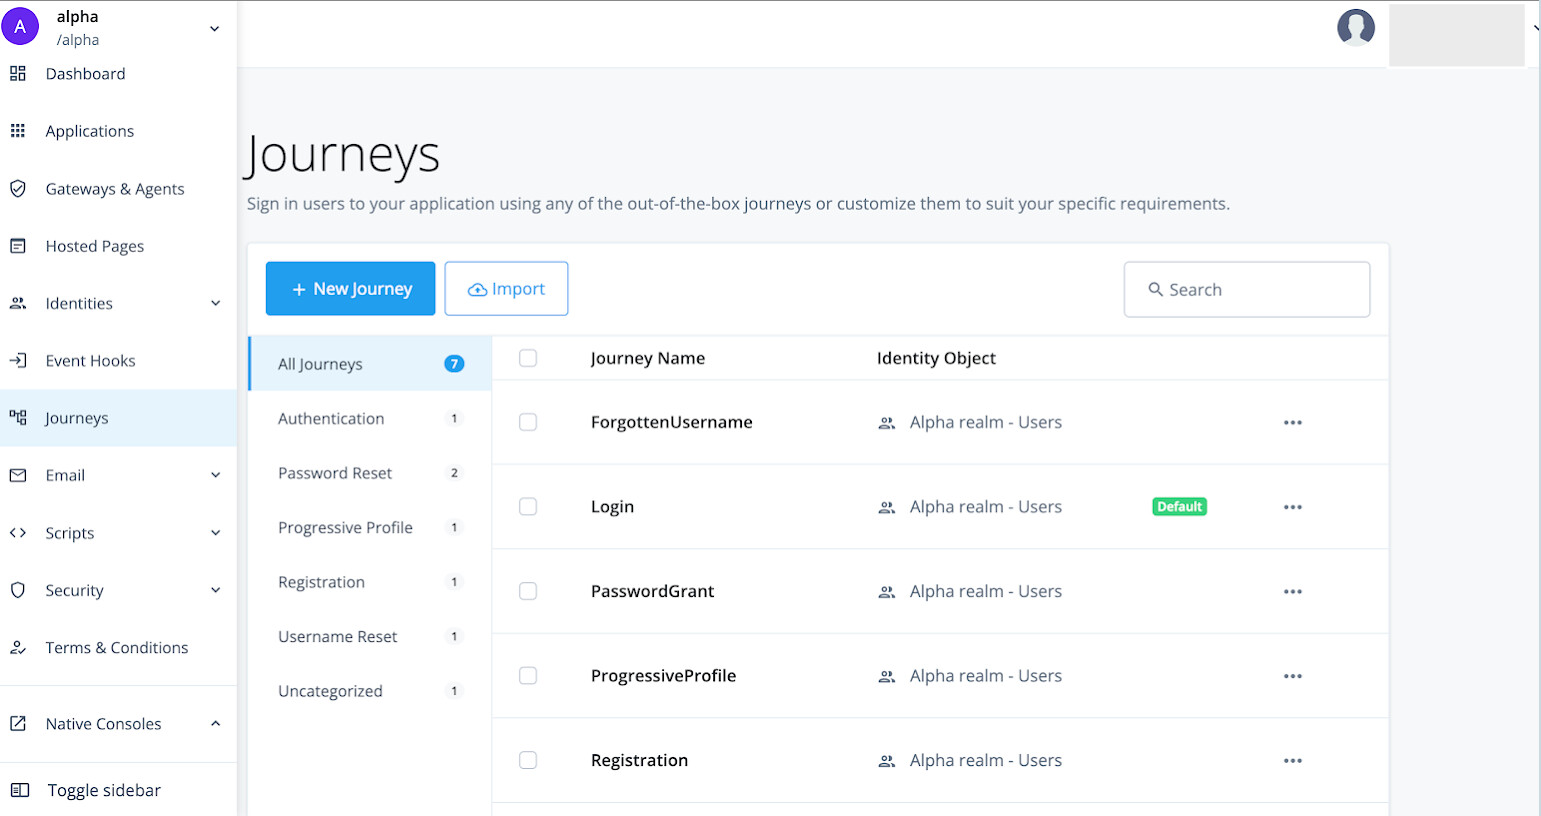
Setting a default journey
You can set a journey as default for the realm.
-
On the left sidebar, click Journeys.
-
Click … next to the journey and select Set as Default.
-
Click Save Default.
The journey you set as the default journey now has a green Default label.
Understanding a journey
-
Click on the Login journey to get additional information such as:
-
A preview image of the journey
-
A journey description
-
Preview URL – an endpoint to authenticate against the journey in focus
-
Tree ID – a unique ID for the journey, used in the authentication endpoints, etc.
-
-
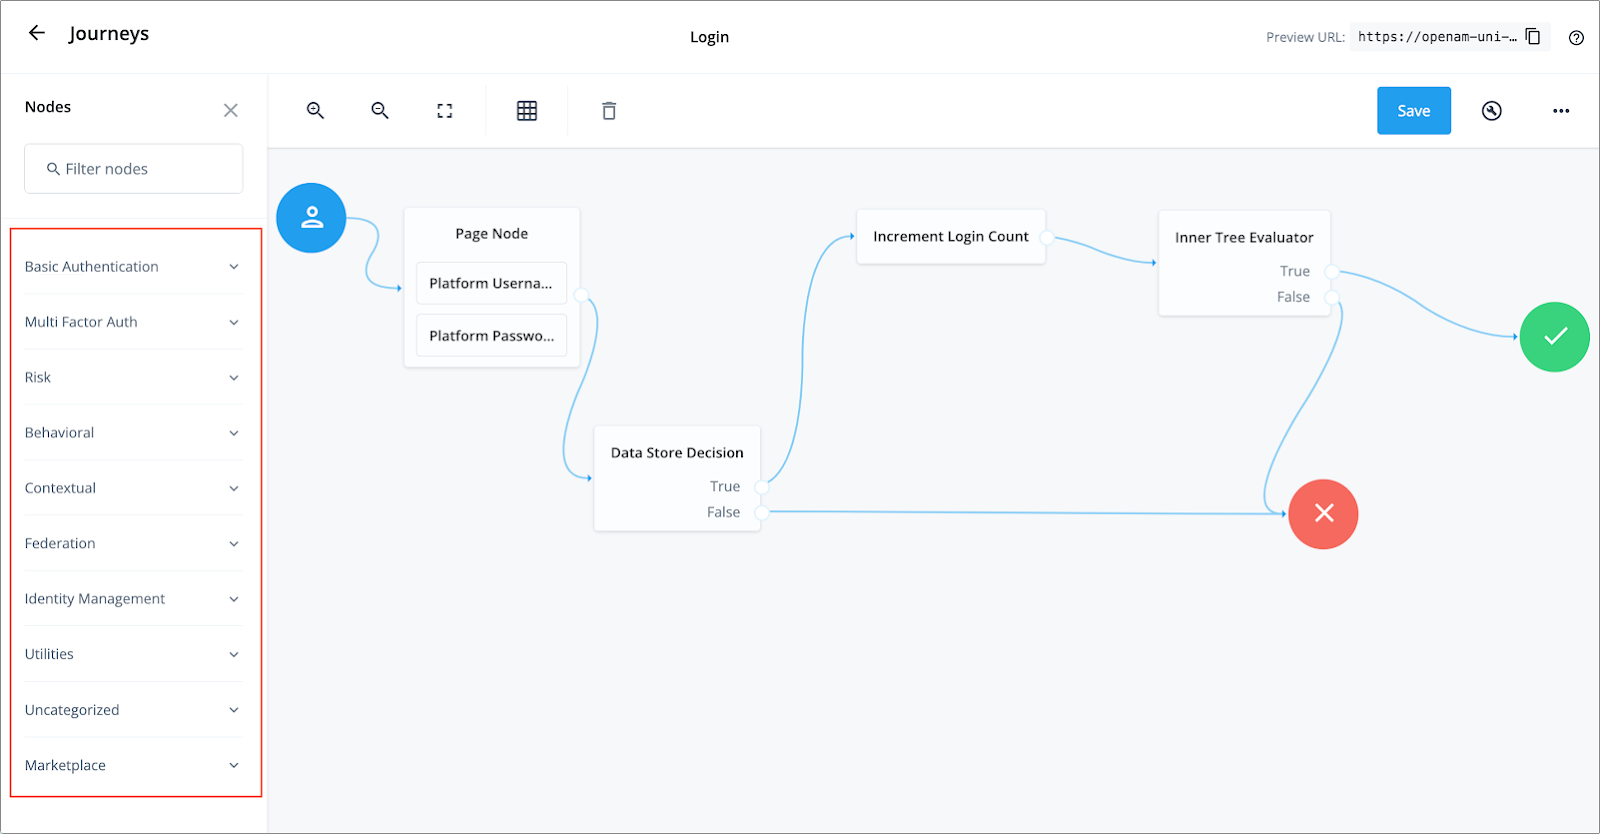
Click on the preview image of the journey to open the journey editor, as shown in the screenshot below.
A journey is composed of nodes. Each node in a journey has a specific function such as:
-
collecting certain information from the user
-
validating the collected information against a backend datastore
-
setting/resetting certain attribute values in the backend datastore, and much more
Some nodes have only one outcome while others have multiple outcomes. The information collected in one node is used by the subsequent nodes until an outcome is reached.
A Scripted Decision node is an example of a node where possible outcome paths are defined by setting one or more values of a string variable named “outcome”. Besides the Scripted Decision node, Identity Cloud has many other nodes to build journeys with varying criteria for authentication.
Authentication nodes are organized into various categories based on their characteristics. These categories are displayed on the left side of the journey editor. To display a short description about the node, hover the mouse over a node in the sidebar.
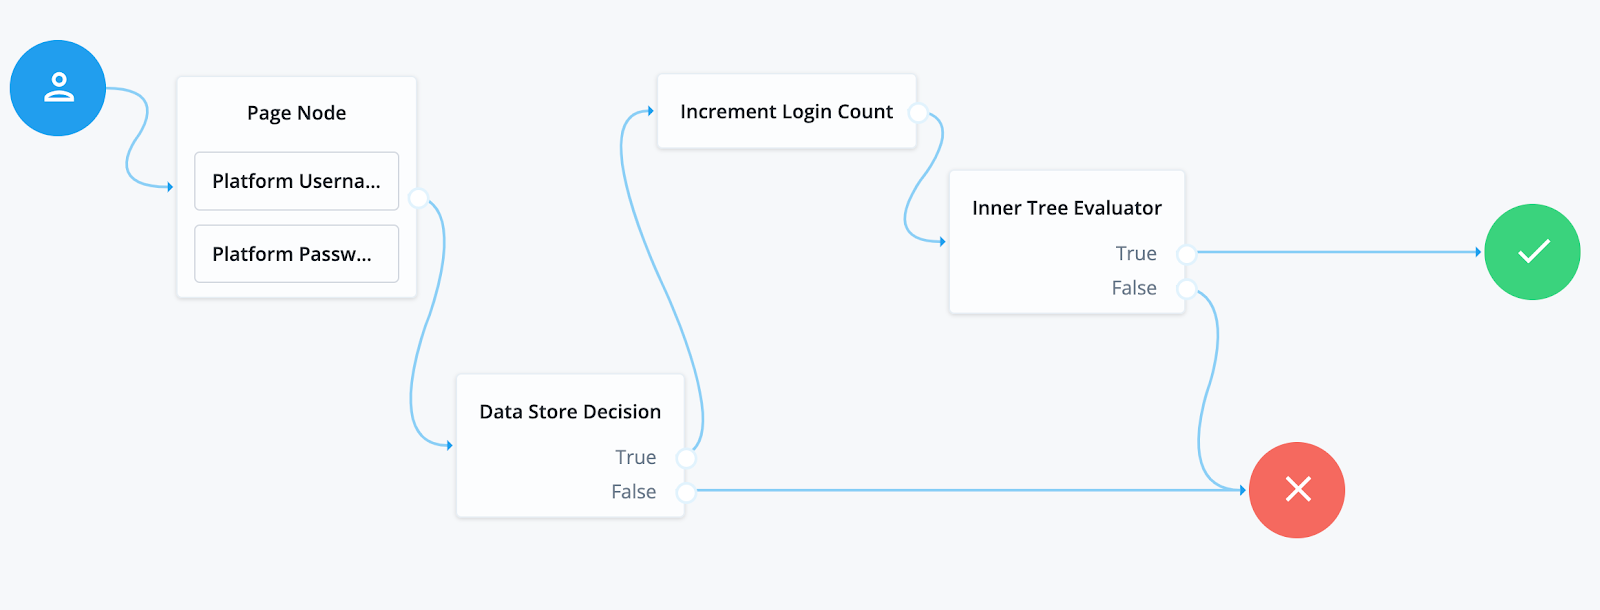
Components of the Login journey
The preconfigured Login journey is made up of the following nodes:
Node descriptions:
-
Page Node – a utility node to organize other nodes and HTML links on a single page.
-
Platform Username – a collector node to collect the username from a user.
-
Platform Password – a collector node to collect the password from a user.
-
Data Store Decision – a decision node used to validate the credentials collected from the user with a backend datastore. In Identity Cloud this backend data store is ForgeRock Directory Services.
-
Increment Login Count – a behavioral node that increments the value of a user profile property in the datastore upon successful validation of the user credentials.
-
Inner Tree Evaluator – a utility node used to invoke another journey in the realm. Click on the Inner Tree Evaluator node to see the journey configured in the /alpha realm, in this case ‘ProgressiveProfile’.
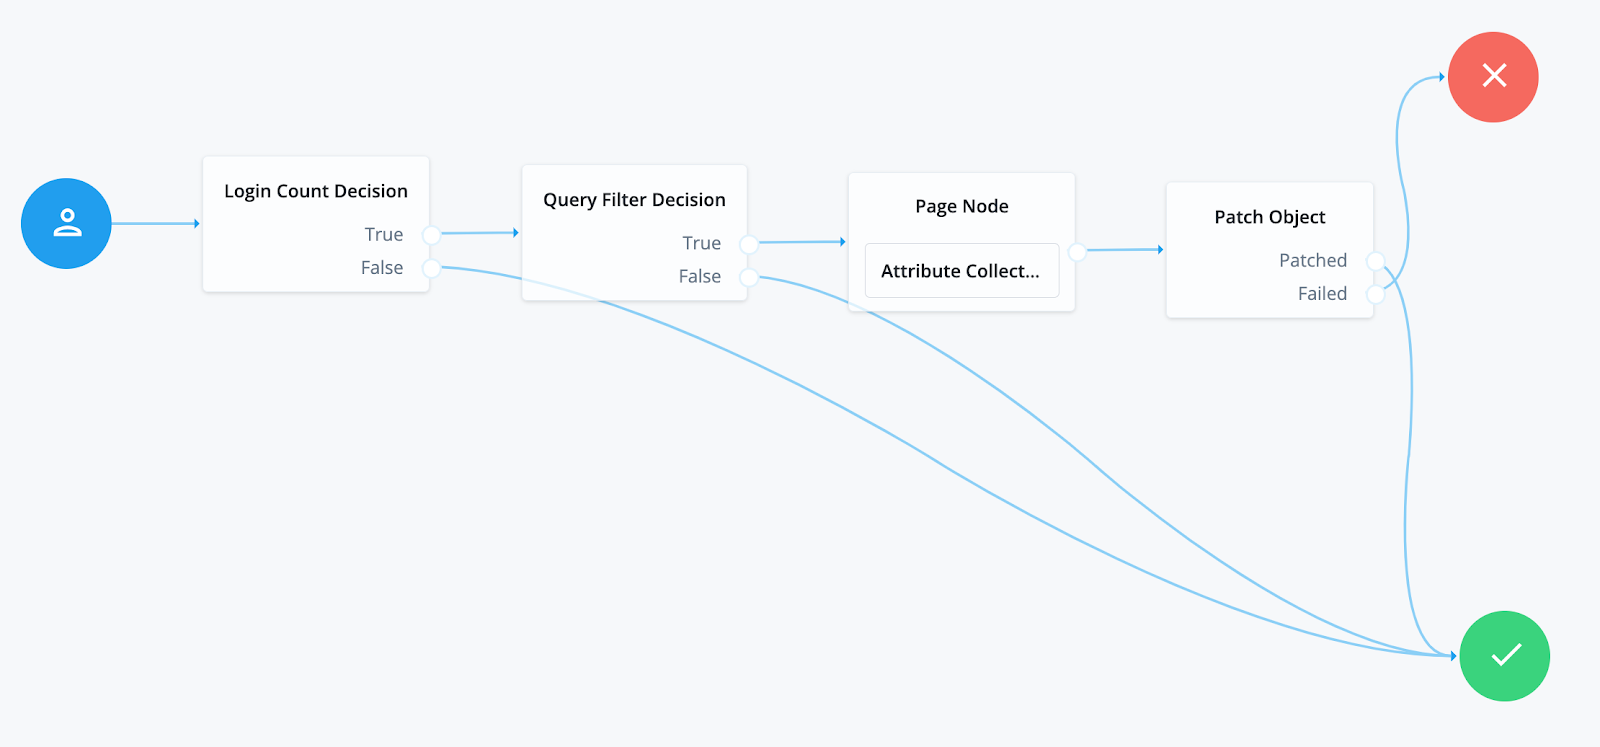
Components of the ProgressiveProfile journey
-
Click ← Journeys on top left of the journey editor to go back to the list of journeys in your tenant.
-
Click ProgressiveProfile.
-
Click on the preview image to open the journey editor, as shown in the screenshot below.
-
Click on each node in the journey to display the node properties.
Node descriptions: * Login Count Decision – checks for the third successful login attempt by the user. If true, the user is taken through the journey. If false, the user is allowed access with no further action. * Query Filter Decision – at the third successful user login, checks if an attribute
/preferenceis present in the user’s profile in the datastore or if the values set for the user profile attributes/preference/marketingand/preference/updatesare false. * Page Node – used to organize a message “Please select your preferences” and an Attribute Collector node in a single page. * Attribute Collector – contained within the Page Node, collects input from the user on/preference/marketingand/preference/updatesattributes. * Patch Object – updates the attributes in the User object based on data collected by the Attribute Collector node.
Login journey in action
Click on the Login journey in the list of journeys in the alpha realm, and then copy the Preview URL and paste it to a text editor for a quick review.
The preview URL for the Login journey looks like this:
https://<tenant_name>.forgeblocks.com/am/XUI/?realm=alpha&authIndexType=service&authIndexValue=Login
The URI parameters in the above URL are:
-
realm– the realm Identity Cloud authenticated against, “alpha” realm in this instance. -
authIndexType– used in conjunction with the parameterauthIndexValue, a value of “service” for this parameter meansauthIndexValuepoints to a journey. -
authIndexValue– with theauthIndexTypeparameter set to “service”, the value ofauthIndexValuein the above URL refers to a journey name, “Login” in this instance.
Note the default value for authIndexType is “service”, so if the
authentication is against the default journey set for a realm, both
authIndexType and authIndexValue parameters can be omitted. The
following URL will perform authentication against the default journey
set for the alpha realm:
To try out the journey:
-
In a supported browser, different from the one that has the Identity Cloud admin UI’s active session, open the Login journey preview URL. You can do this in the incognito mode of your browser.

The first page in the Login journey comes from the Page Node. This node has three links for self-service actions * Create an account * Forgot username? * Forgot password? * and two nodes to collect user credentials
-
Click Create an account to self-register a user. Do not perform this step in the same browser that has the Identity Cloud administrator’s active session.
Username |
fruser1 |
First Name |
ForgeRock |
Last Name |
User1 |
Email Address |
|
Keep the check boxes on marketing/update preferences unchecked |
|
Password |
Rock5tar10$ |
Security question |
What’s your favorite color? |
Answer |
Pink |
-
Complete and submit the user registration form using the following information as a reference:
If the self-registration process presents a “Login failed” error, confirm the browser does not have an active session for Identity Cloud administrator.
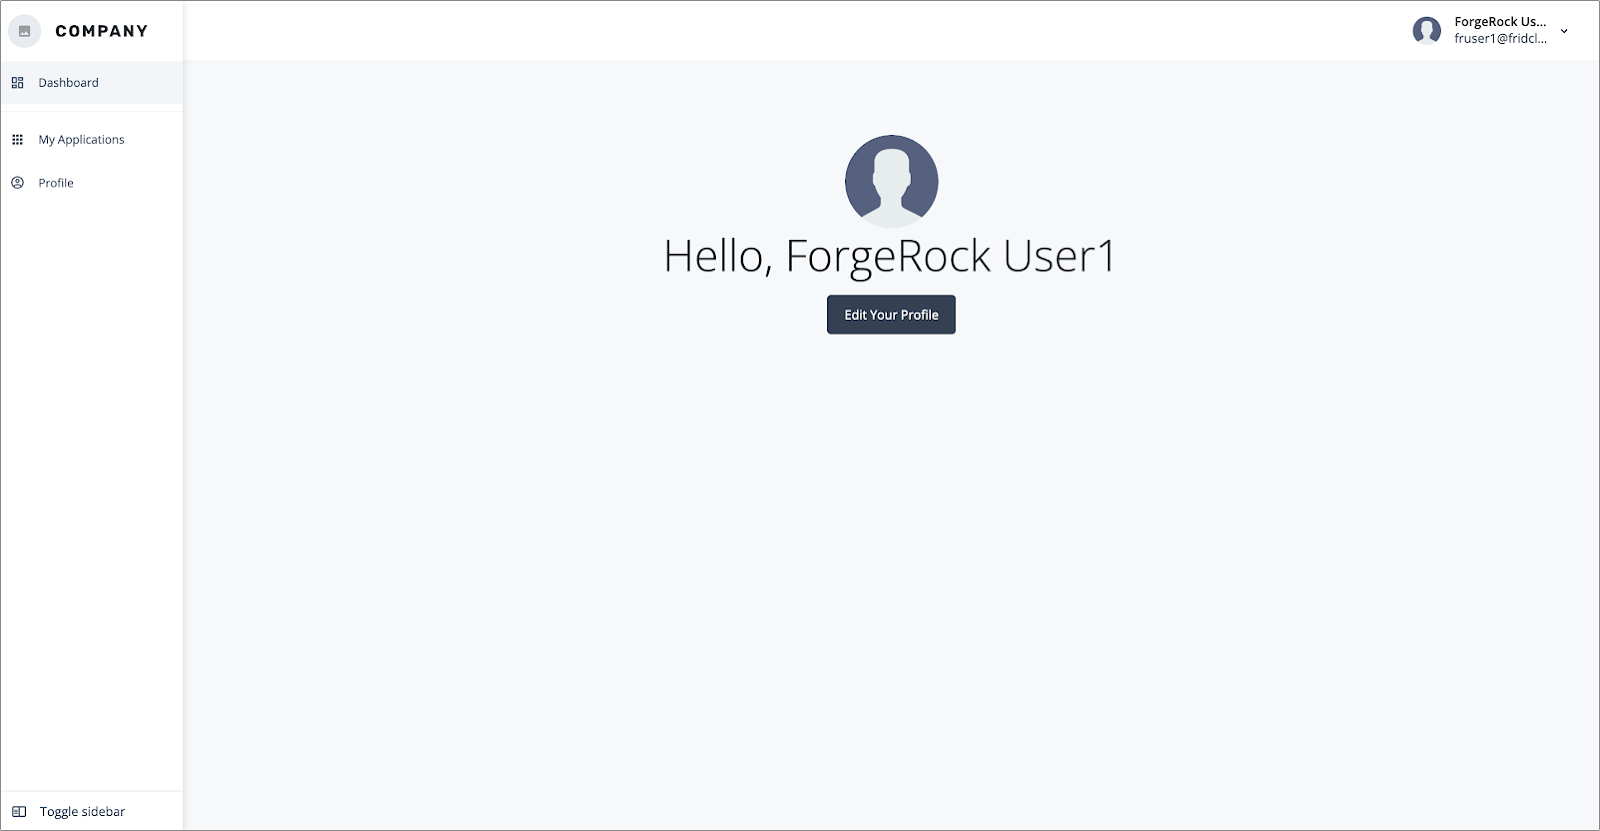
On successful self-registration, the end user dashboard of the Identity Cloud tenant is displayed.
-
Click on the logged-in user’s information on the top right and select Sign Out.
The browser redirects to the login page. This is because the Login journey is set as the default in the alpha realm.
-
On the login page, provide credentials created for “fruser1” and click Next.
The credentials are validated against the datastore. If correct, the login count attribute is incremented for the user. The ProgressiveProfile journey in the Inner Tree node of Login journey then checks if the login count attribute value for the user is exactly three, and if not, lets the user land on the end user dashboard.
-
Sign out of the dashboard and repeat the authentication process one more time, which will be the third successful login of a user.
Now the ProgressiveProfile journey in the Inner Tree Evaluator node of the Login journey is initiated and the user is prompted to opt in for marketing or updates preferences.

-
Select both checkboxes.
The input that the user provides on this page is used to patch the user’s profile in Identity Cloud.
-
Click Next to display the Identity Cloud end user dashboard.
-
Sign out of the end user dashboard.
-
Go back to the browser with your Identity Cloud administrator tenant.
-
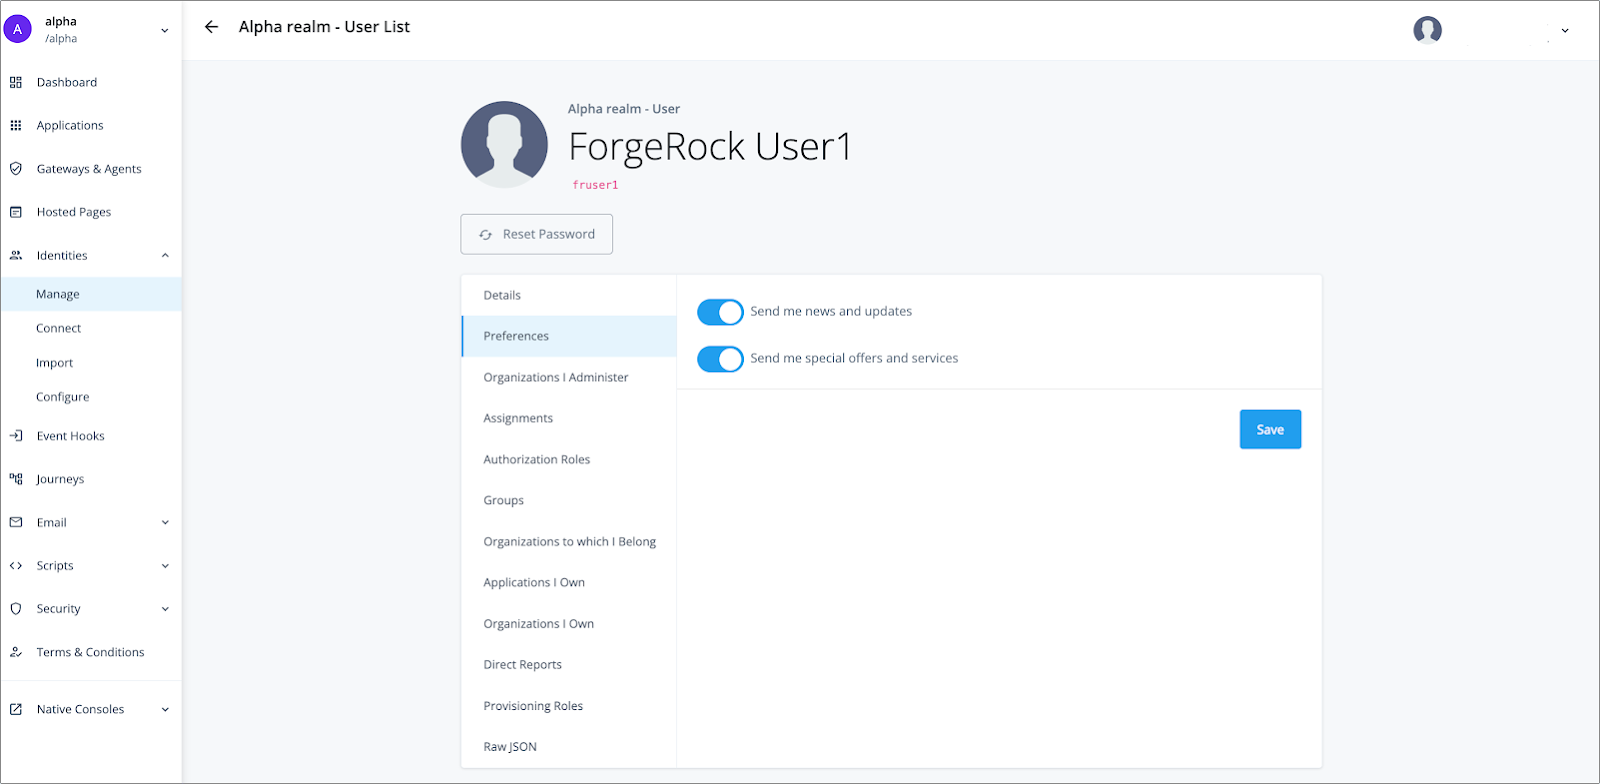
On the sidebar, go to Identities > Manage > Alpha realm – Users and click on the
fruser1identity created in the previous step.Review the Preferences section of the user profile to confirm that the preferences opted in by the user during the third successful login are captured in the user profile. The Patch Object node in the ProgressiveProfile journey is responsible for adding this information to the user profile.
Recap
-
ForgeRock Identity Cloud is a ForgeRock managed Identity and Access Management Platform hosted in GCP.
-
To perform administrative tasks in Identity Cloud, log in using the administrator credentials to the Identity Cloud tenant URL.
-
Additional tenant administrators can be created in the Identity Cloud tenant.
-
An Identity Cloud tenant has two realms, alpha and bravo. Each realm is a unit of administration with its own identities, journeys, password policies, etc.
-
Identity Cloud uses journeys to help users authenticate their identity.
-
An journey is composed of nodes, with each node responsible for certain functions.
-
While authenticating to a specific realm of Identity Cloud, use the URI parameters
authIndexTypeset to a value “service” andauthIndexValuepointing to the name of the journey in the realm. In the absence of these parameters in the authentication URI, the default journey set for the realm is used.