Custom OIDC claims in ForgeRock Identity Cloud
Author: |
Mark Nienaber |
Created at: |
May 2023 |
Updated at: |
May 2023 |
Custom OIDC claims in ForgeRock Identity Cloud
A guide to adding additional OIDC claims from the identity schema in ForgeRock Identity Cloud
Clients or Relying Parties consuming OpenID Connect (OIDC) tokens may require additional attributes inside the OIDC Token (id_token).
We are going to address two common use cases where we retrieve values of different attributes from the authenticated user to include in the token.
The ForgeRock identity cloud user schema provides :
-
Standard user attributes like first name, last name etc
-
General purpose extension attributes, some indexed, some not, these are baked into the schema and have set names like Generic Indexed String 1 or Generic Unindexed Multivalue 3.
-
Custom unindexed attributes which can be added to the schema, with names like custom_myAttribute.
More information about the Identity Schema can be found here. Also each of the attribute is referenced differently in IDM vs AM, the reference table for this is found here.
Referencing standard and general purpose extension attributes relatively simple as they are explicitly defined in the schema. Custom attributes are a little more complex as they are stored in a single JSON blob. The two use cases below will address each of these.
Use Case 1 — Requirements
The ID Token must include a claim called “status” and the value must be the value of the general purpose extension attribute — Generic Indexed String 1.
Use Case 2 — Requirements
The ID Token must include a claim called “preferredMail” and the value must be the value of a custom attribute called custom_preferredMail.
OIDC Claims Script
ForgeRock provides a mechanism to customise the ID Token by use of an OIDC Claims Script. The OIDC claims script is run when the ID Token is minted by the OpenID Provider (OP), a role filled by ForgeRock Access Management.
OpenID Provider
The script used by the provider can be viewed or changed by looking at the OAuth2 Provider service in the AM. To do this browse to the Access Manager Native Console, then go to Services, OAuth2 Provider, then the Plugins tab. The OIDC Claims script will be listed there, and the OIDC Claims Plugin type says to use this Script as it’s noted as SCRIPTED.
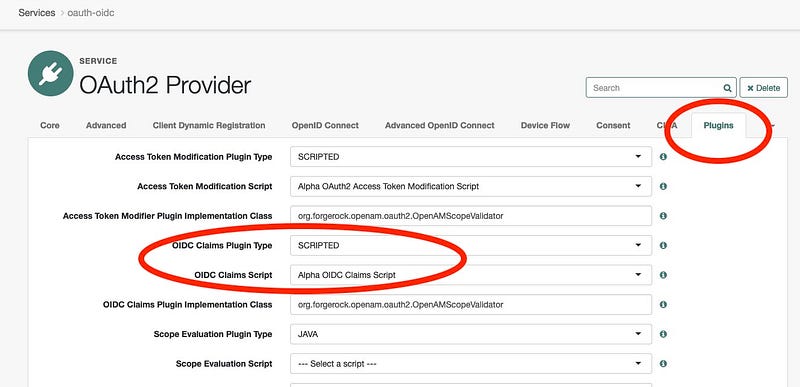
It’s possible to create your own script and set it at the provider level, this will be it’s called any time the provider is called to mint an id_token.
Important: customisations made to the Provider level affects ALL clients.
OIDC Client
The OIDC Claims script can be overridden at the client level, for example Application 1 requires certain additional claims, while Application 2 needs the basic OOTB claims.
For both our use cases we are setting at the client level so let’s setup a new client and custom claims script.
Create Application
Browse to Applications and + Custom Application.
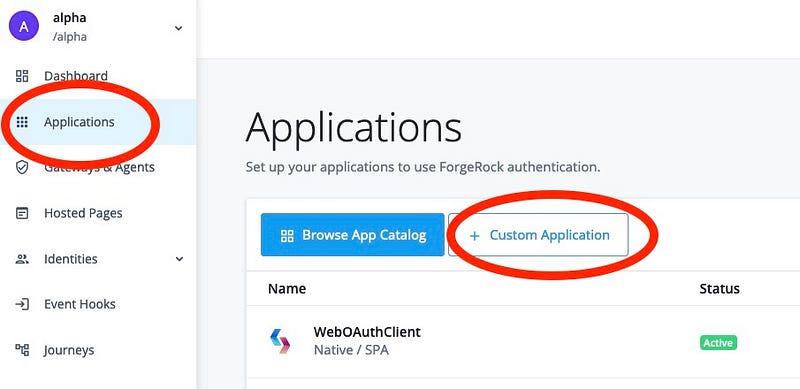
Create an application of type OIDC.

Select Web application type.

We will call our client NewClient, you’ll also be required to set an owner then press Next.

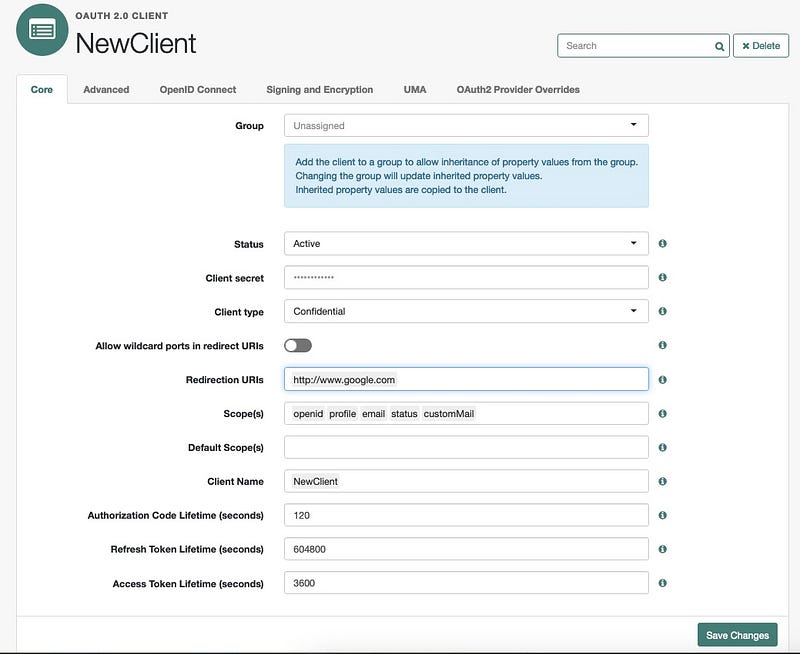
Once Created, browse to the AM Native Console then go to Applications, OAuth 2.0, Clients and click on the NewClient

Modify the new client and add in :
-
Redirection URI: http://www.google.com
-
Scopes: status customMail
Press Save
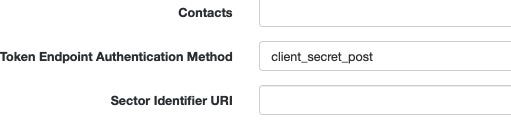
On the Advanced tab, set the Token Endpoint Authentication Method to client_secret_post
To make sure this is working lets get an id_token with a standard set of scopes i.e. openid, profile and email.
Expectation:
-
openid scope will request an id_token
-
profile scope will return a set of claims representing basic profile attributes i.e. name, family_name, given_name etc
-
email is a separate claim mapped to the mail attribute
Make a REST call to the authorize endpoint:
curl - location ‘https://openam-fidc.forgeblocks.com/am/oauth2/realms/alpha/authorize?client_id=NewClient&redirect_uri=http%3A%2F%2Fwww.google.com&state=abc123&response_type=code&scope=email%20profile%20openid’ \
-
header ‘Content-Type: application/x-www-form-urlencoded’ \
-
header ‘Cookie: <session_cookie>=’
The response includes the code in the 302 redirect which we swap for the token
curl - location ‘https://openam-fidc.forgeblocks.com/am/oauth2/realms/alpha/access_token’ \
-
header ‘Content-Type: application/x-www-form-urlencoded’ \
-
data-urlencode ‘grant_type=authorization_code’ \
-
data-urlencode ‘code=SAQockGPRFrD5XhF1v_1jAi4qe4’ \
-
data-urlencode ‘client_id=NewClient’ \
-
data-urlencode ‘client_secret=password’ \
-
data-urlencode ‘redirect_uri=http://www.google.com’
We have our tokens in the response including the id_token, when decoded:
\{
“iss”: “https://openam-fidc.forgeblocks.com:443/am/oauth2/alpha”,
“tokenName”: “id_token”,
“given_name”: “Mark”,
“azp”: “NewClient”,
“name”: “Mark Nienaber”,
“family_name”: “Nienaber”,
“email”: “mailattribute@email.com”,
… additional standard token claims
}
Let’s customise the OIDC claims script to provide some additional information.
Create Custom OID Script
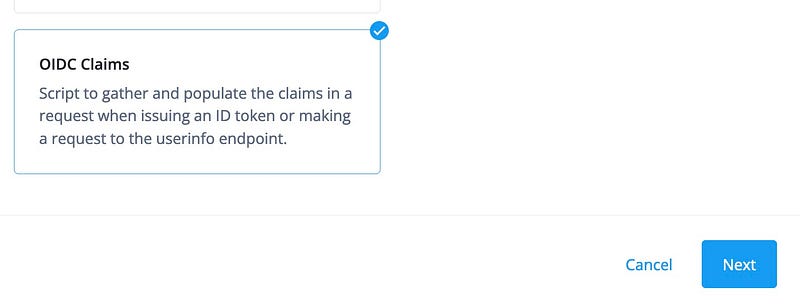
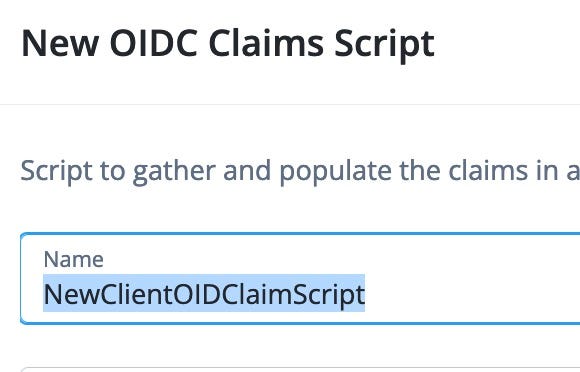
Browse to Scripts, Auth Scripts, New Script then of type OIDC Claims
Let’s call this NewClientOIDClaimScript
Set Client Overrides
In the OAuth Client we will override the provider settings and set the client specific OID Claims script we created above.
In the AM Native Console, browse to Applications, OAuth 2.0, Clients, and select the new client — NewClient.
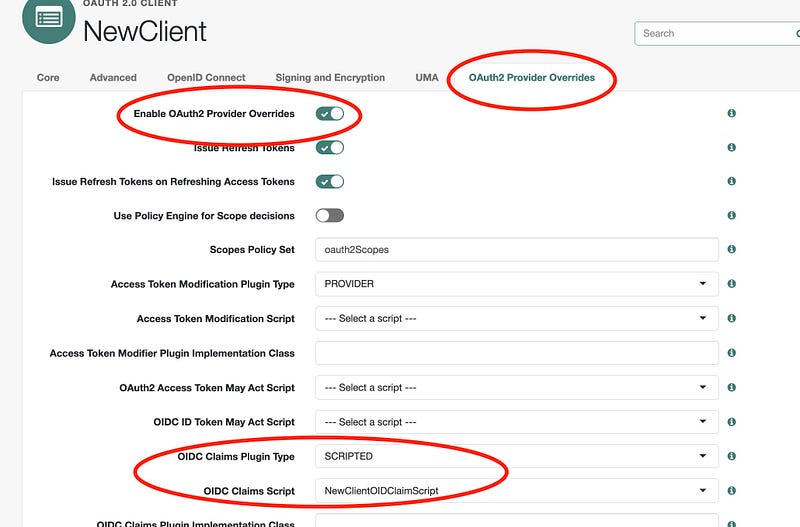
Browse to the OAuth2 Provider Overrides tab.
Check the Enable OAuth2 Provider Overrides checkbox to enable overrides, now the client will use the settings on this page.
Important: Ensure all the relevant options for this client are selected on this page i.e. Allow Clients to Skip Consent, Use Client-Side Access & Refresh Tokens etc
Set OIDC Claims Plugin Type is set to SCRIPTED, set the OIDC Claims Script to be the new script, NewClientOIDClaimScript then press Save.
We have now set up our client, so let’s look at the use cases and customise the script.
To see the sample script, browse here.
Use Case 1 — include status
Modify setScopeClaimsMap
Modify the NewClientOIDClaimScript and add in a status claim to the setScopeClaimsMap.
This says there is a claim called status, and the value will come from the ‘status’ resolver.
utils.setScopeClaimsMap(\{
profile: [
‘name’,
‘family_name’,
‘given_name’,
‘zoneinfo’,
‘locale’
],
email: [‘email’],
address: [‘address’],
phone: [‘phone_number’],
status:[‘status’] // ← new claim
});
Add Claim Resolver
Add the claim resolver for ‘status’ and use the already existing
getUserProfileClaimResolver to get the available attribute
fr-attr-istr1.
utils.setClaimResolvers(\{
name: utils.getUserProfileClaimResolver(‘cn’),
family_name: utils.getUserProfileClaimResolver(‘sn’),
given_name: utils.getUserProfileClaimResolver(‘givenname’),
zoneinfo: utils.getUserProfileClaimResolver(‘preferredtimezone’),
locale: utils.getUserProfileClaimResolver(‘preferredlocale’),
status: utils.getUserProfileClaimResolver(‘fr-attr-istr1’), // ← new
claimResolver
email: utils.getUserProfileClaimResolver(‘mail’),
Test
If we look at a test user in Identity Cloud we can see the the value for
frIndexedString1 = Enabled. Remember that frIndexedString1 is the
IDM attribute for fr-addr-istr1.
\{
“custom_initials”: “mn”,
“custom_otherGivenNames”: “smithy”,
“country”: null,
“frUnindexedString1”: null,
“frIndexedString1”: “Enabled”, // <— we want this value in the token
“givenName”: “Mark”,
“accountStatus”: “Active”,
“sn”: “Nienaber”
}
Request token with additional status scope
curl --location
‘https://openam-fidc.forgeblocks.com/am/oauth2/realms/alpha/authorize?response_type=code&client_id=NewClient&redirect_uri=http%3A%2F%2Fwww.google.com&state=abc123&scope=email%20profile%20openid%20status’
–header ‘Content-Type: application/x-www-form-urlencoded’
–header ‘Cookie: =’
After swapping the code for a token, we get the id_token, which when decoded contains a new claim named status and the value is Enabled as expected.
\{
“tokenName”: “id_token”,
“given_name”: “Mark”,
“aud”: “NewClient”,
“acr”: “0”,
“name”: “Mark Nienaber”,
“realm”: “/alpha”,
“tokenType”: “JWTToken”,
“family_name”: “Nienaber”,
“email”: “mailattribute@email.com”,
“status”: “Enabled”, // <— new value included
… additional claims
}
Use Case 2 — include custom attribute
This use case is a little more involved because custom attributes like
custom_preferredMail are stored in a JSON blob named
fr-idm-custom-attrs. We will create a custom claim resolver to get
this value.
Modify setScopeClaimsMap
Modify the NewClientOIDClaimScript and add in a customMail claim to
the setScopeClaimsMap.
utils.setScopeClaimsMap(\{
profile: [
‘name’,
‘family_name’,
‘given_name’,
‘zoneinfo’,
‘locale’
],
email: [‘email’],
address: [‘address’],
phone: [‘phone_number’],
status:[‘status’],
customMail:[‘customMail’] // <— new claim
});
Modify claimResolvers
Update setClaimResolvers to include customMail, and for that
resolver to use getCustomClaimResolver which we will create below.
utils.setClaimResolvers(\{
name: utils.getUserProfileClaimResolver(‘cn’),
family_name: utils.getUserProfileClaimResolver(‘sn’),
given_name: utils.getUserProfileClaimResolver(‘givenname’),
zoneinfo: utils.getUserProfileClaimResolver(‘preferredtimezone’),
locale: utils.getUserProfileClaimResolver(‘preferredlocale’),
status: utils.getUserProfileClaimResolver(‘fr-attr-istr1’),
email: utils.getUserProfileClaimResolver(‘mail’),
customMail: utils.getCustomClaimResolver( // <— new resolver
/**
-
Pass in the full JSON blob of all custom attributes
*/
utils.getUserProfileClaimResolver(‘fr-idm-custom-attrs’)
),
Create custom claim resolver
We will create a new custom claim resolver named
getCustomClaimResolver. This will take the full
`fr-idm-custom-attrs `JSON string and parse the value to return a
specific value. The value in this case is a string, but this could be
any supported type.
function getCustomClaimResolver(resolveClaim) \{
function resolveCustomClaim(claim) \{
var claimValue = resolveClaim(claim);
var customClaim;
var customEmailAttr = “custom_preferredMail”;
if (isClaimValueValid(claimValue)) \{
customClaim = JSON.parse(claimValue);
return customClaim[customEmailAttr];
}
}
return resolveCustomClaim;
}
Make method public
Add the new claim resolver to the list of public methods so it can be called above.
return \{
setScopeClaimsMap: setScopeClaimsMap,
setClaimResolvers: setClaimResolvers,
getUserProfileClaimResolver: getUserProfileClaimResolver,
getAddressClaimResolver: getAddressClaimResolver,
getEssentialClaimResolver: getEssentialClaimResolver,
getUserInfoClaims: getUserInfoClaims,
getCustomClaimResolver: getCustomClaimResolver // ← custom resolver
};
Test
Looking at the the JSON of the user in question, we note the value for
custom_preferredMail.
\{
“custom_initials”: “mn”,
“custom_otherGivenNames”: “smithy”,
“country”: null,
“frUnindexedString1”: null,
“frIndexedString1”: “Enabled”,
“givenName”: “Mark”,
“accountStatus”: “Active”,
“sn”: “Nienaber”,
“custom_preferredMail”: “mypreferredMail@mail.com”,
}
Lets request a token and include the customMail scope.
curl --location
‘https://openam-fidc.forgeblocks.com/am/oauth2/realms/alpha/authorize?response_type=code&client_id=NewClient&redirect_uri=http%3A%2F%2Fwww.google.com&state=abc123&scope=email%20profile%20openid%20status%20customMail’
–header ‘Content-Type: application/x-www-form-urlencoded’
–header ‘Cookie: =’
After swapping the code for a token, we receive the id_token with the correct value.
\{
“tokenName”: “id_token”,
“email”: “mailattribute@email.com”,
“subname”: “174a4f9c-b6b1-4d18-a1c4-c5597e987979”,
“given_name”: “Mark”,
“aud”: “NewClient”,
“name”: “Mark Nienaber”,
“realm”: “/alpha”,
“tokenType”: “JWTToken”,
“family_name”: “Nienaber”,
“customMail”: “mypreferredMail@mail.com”, <—New Claim added
“status”: “Enabled”
}
The sample script used in this article can be found here.
And that’s it folks.
By Mark Nienaber on May 19, 2023.
Exported from Medium on May 22, 2023.