Using ForgeRock Identity Cloud as an Identity Provider for Okta
Author: |
Brad Tarisznyas |
Created at: |
Dec 2021 |
Updated at: |
Sep 2022 |
In this article, we’ll configure ForgeRock Identity Cloud as an OpenID Connect Authorization server for Okta. This lets users log in to Okta via a ForgeRock Identity Cloud tenant, and optionally, dynamically provision the user on Okta.
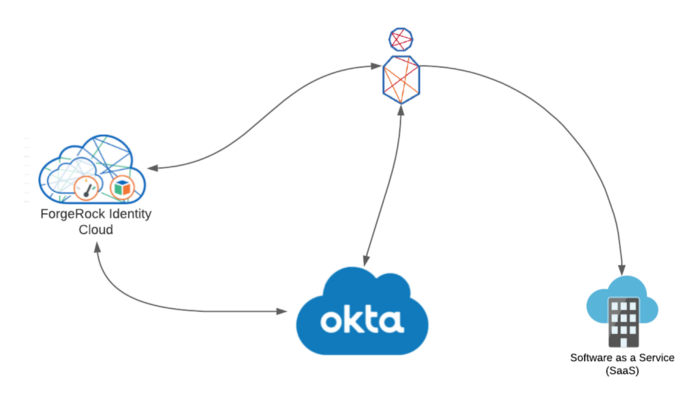
There are may reasons that you may want to configure this. Some organizations have multiple IAM platforms and need to integrate them—this was the case for a customer recently. Or, you may need to add more complex authentication journeys to your Okta deployment while still leveraging your existing Okta integrated SAAS applications. Whatever the reason, the integration can be configured solely through configuration, as ForgeRock Identity Cloud is fully standards-compliant.
We’ll be using a development Okta tenant attained by signing up for an Okta developer account (Okta Developer). Note that although we are using ForgeRock Identity Cloud; this also works with a standalone ForgeRock Access Management deployment. Firstly, we’ll configure ForgeRock Identity Cloud with an OAuth2 client for Okta
-
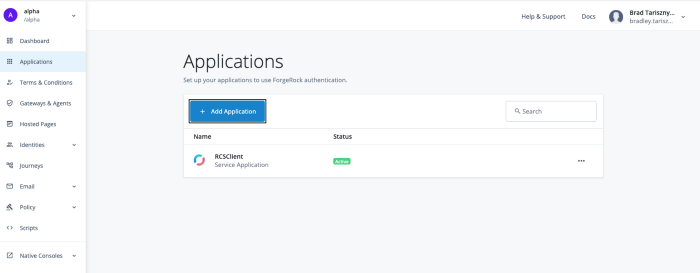
Access your ForgeRock Identity Cloud tenant and login as an administrator.
-
In the Alpha realm, access Applications, and click Add Application.
-
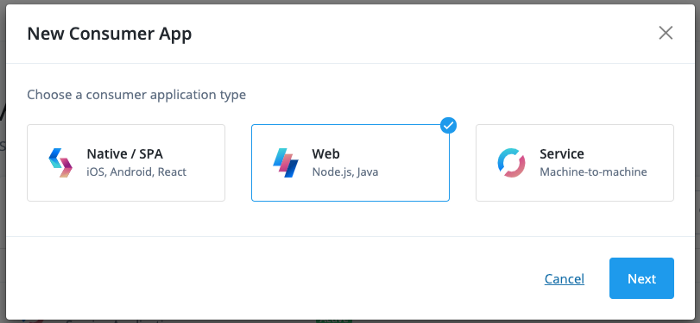
Select Web, and Next.
-
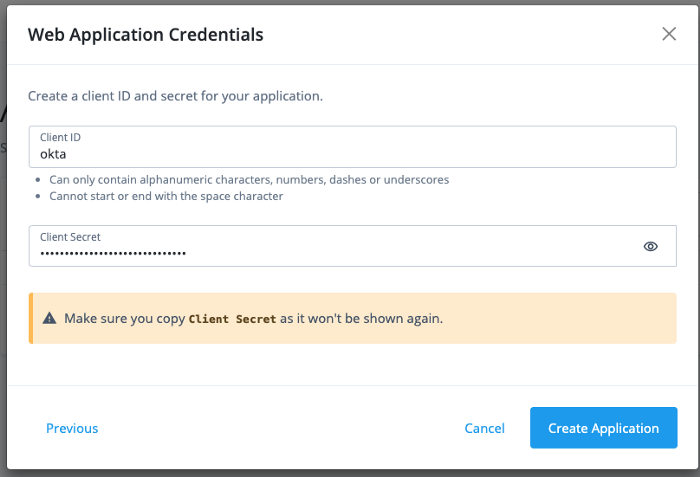
Enter a client ID and secret, choose a secure value for the secret and store it securely:
-
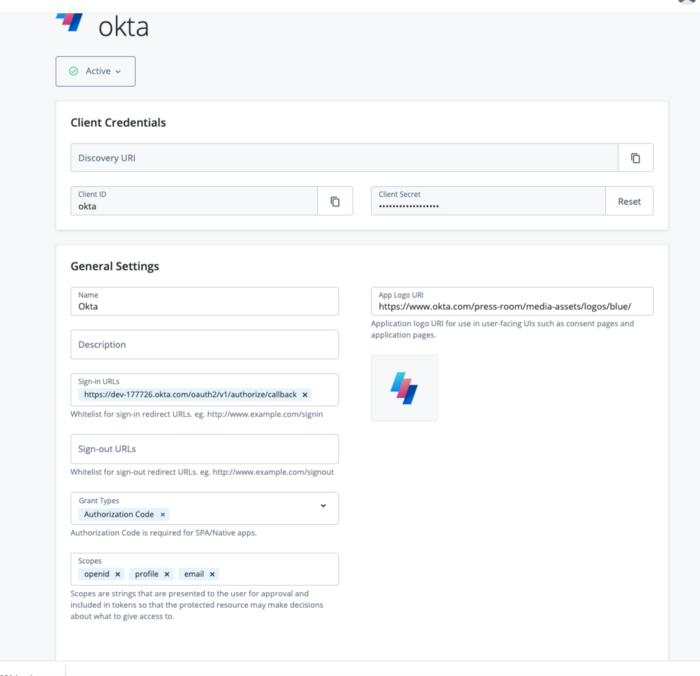
Configure the Okta client. You’ll need your Okta tenant ID, as it forms part of the URL for the redirect URI.
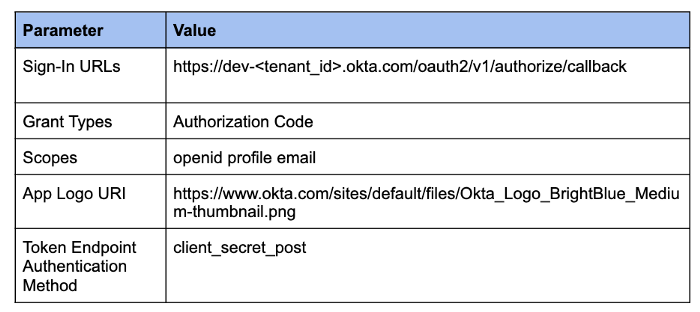
It should look something like this.
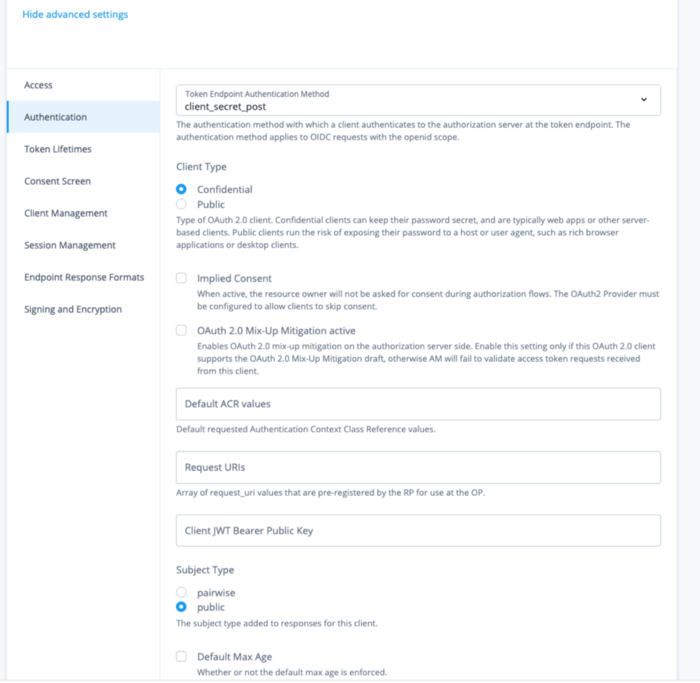
Under Advanced settings, ensure you change the Token Endpoint Authentication method from client_secret_basic to client_secret_post; otherwise, Okta won’t be able to authenticate correctly to the token endpoint, and you will receive a 400 Bad Request from Okta.

Advanced settings, correctly set.
Once that is complete, let’s move on to the Okta configuration.
-
In the Okta configuration, admin interface (https://dev-<tenant_id>-admin.okta.com/) select Security >Identity Providers and click Add Identity Provider.
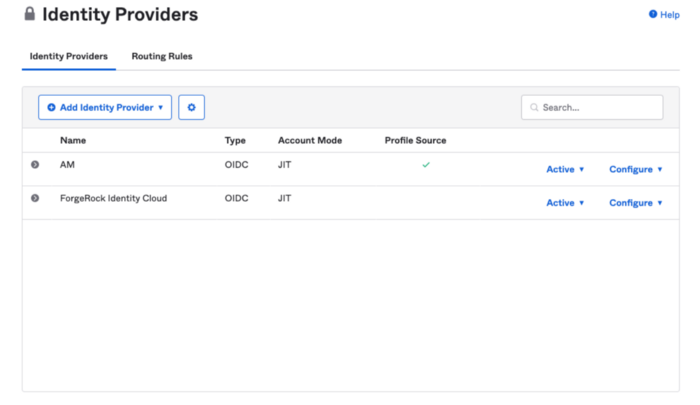 2.
Create the Identity Provider using the following as a guide.
2.
Create the Identity Provider using the following as a guide.
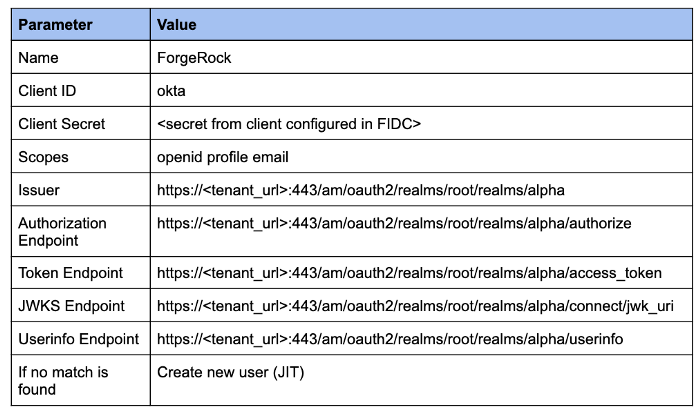
Note that including the port number in the endpoints is critical, and
omitting these will fail validation for the issuer.

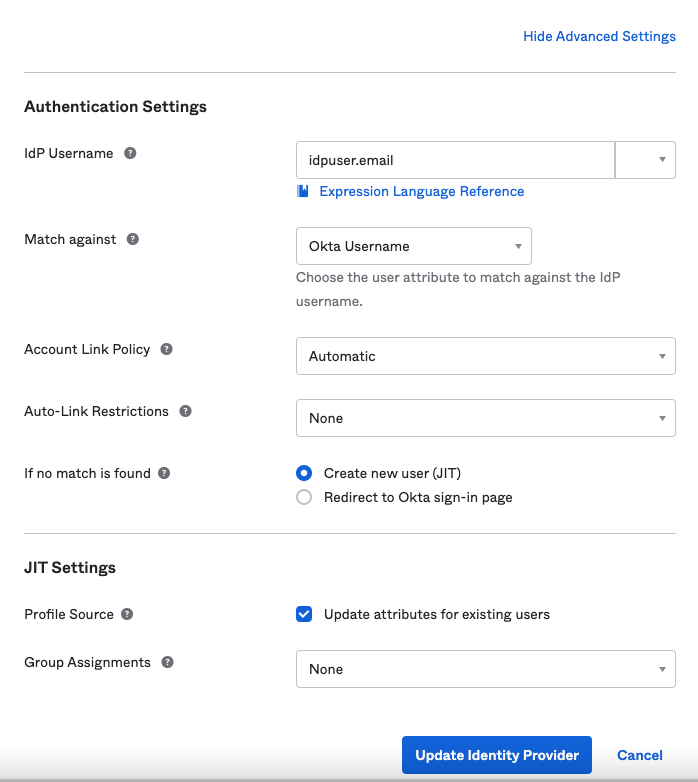
To have Okta create the user Just In Time (JIT) if they don’t exist in
Okta, under the Show Advanced Settings set If no match found to ‘create
new user (JIT). To have Okta update the user’s profile attributes during
a login if they have changed in ForgeRock Identity Cloud, set Profile
Source > Update attributes for existing users.
In the below configuration, the email is used as the Okta username.
To change the mapping of attributes from ForgeRock Identity Cloud to Okta, under Directory > Profile Editor’ select ForgeRock Identity Cloud User > Mappings. Here you will be able to update how Okta maps profile attributes.
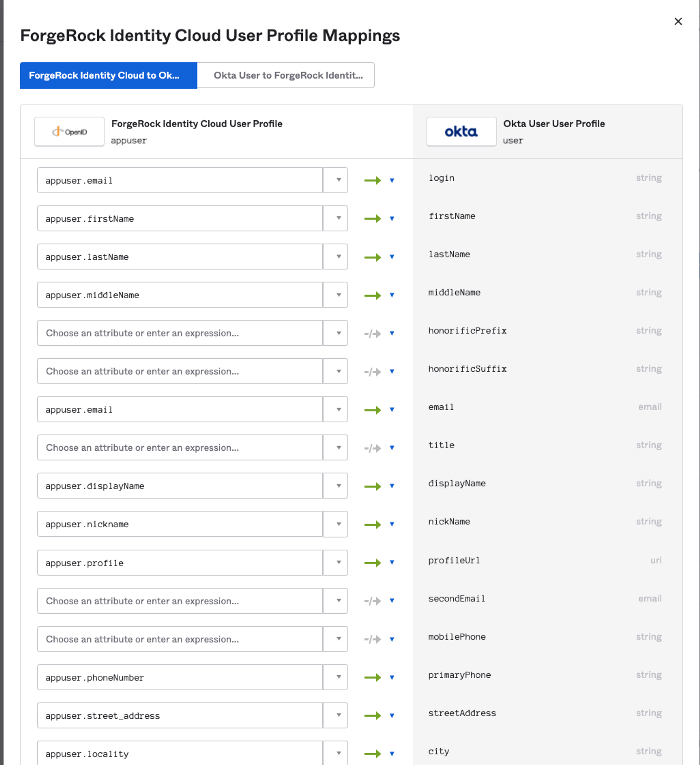
I’m just using the defaults for this example, but it’s likely in a real world scenario that you’ll need to update these settings.
-
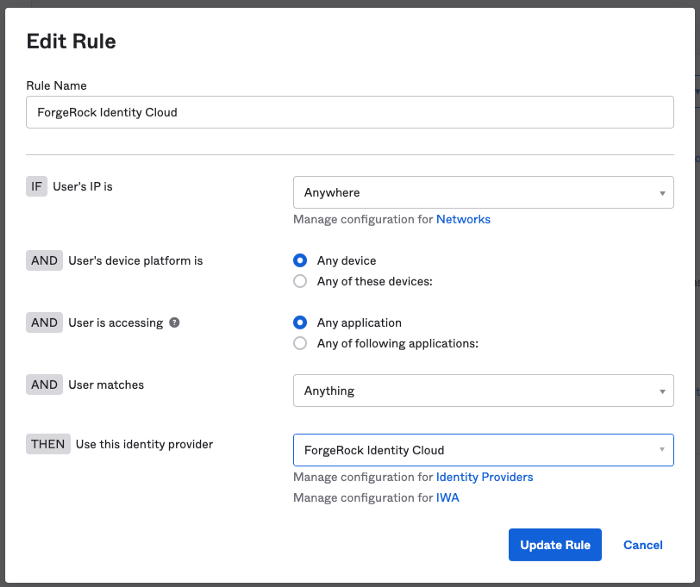
To enable the identity provider, you can enable it for the whole tenant, or for a subset of users based on specific route logic (such as a regex on the login). In the example below, all users are redirected to ForgeRock Identity Cloud for authentication. More on Okta routing rules here.
If enabled for the whole tenant, admins will also be redirected to ForgeRock Identity Cloud for authentication, so you should have an account representing your Okta admin user in ForgeRock Identity Cloud using the same email.
That completes the configuration…we’re ready to test!
-
Access you Okta dev tenant at https://dev-<tenant_id>.okta.com
-
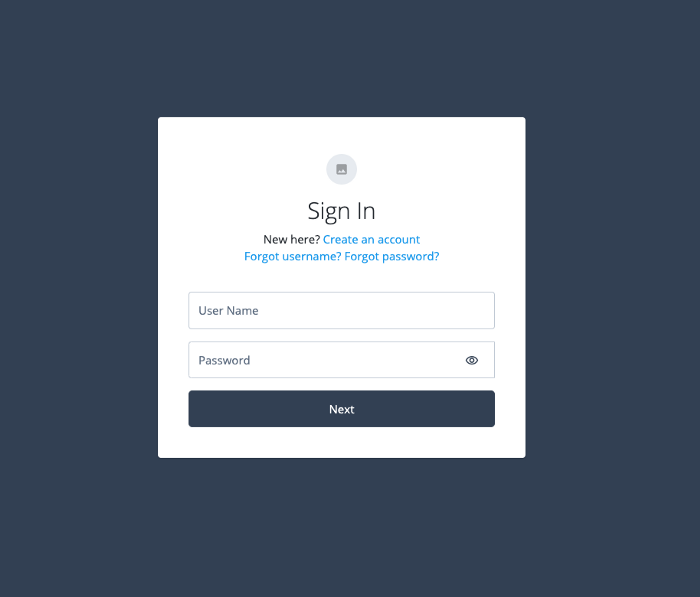
You’ll be redirected to ForgeRock Identity Cloud for authentication
-
Login with a user that exists in ForgeRock Identity Cloud (in my case I’m using user.10 with an email of user.10@example.com). Note if your test user doesn’t exist in Okta it will be dynamically provisioned based on the response from the userinfo endpoint.
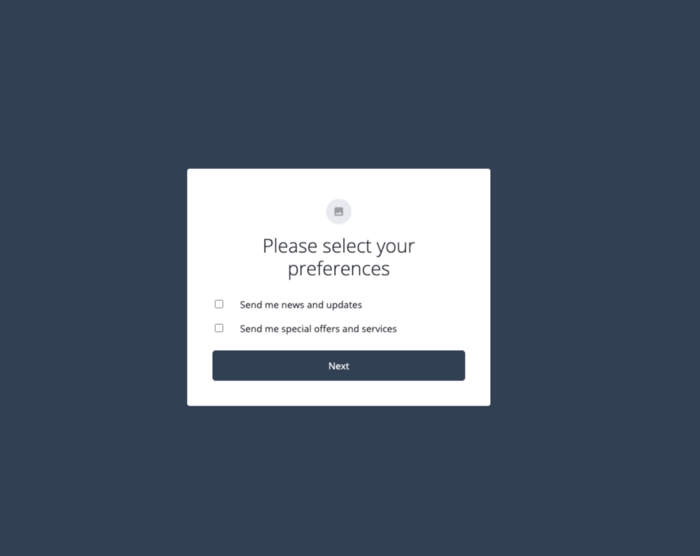
You may be prompted to set your preferences, click ‘Next’:
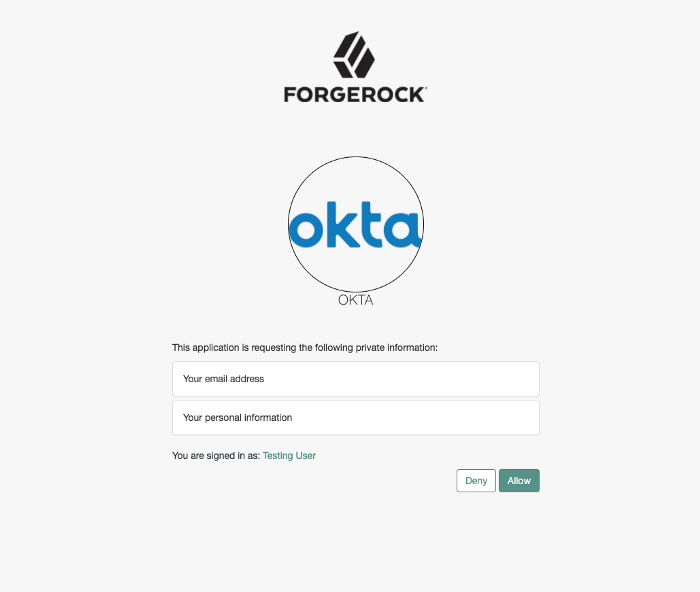
Once authenticated, you’ll be prompted for consent, click Allow.
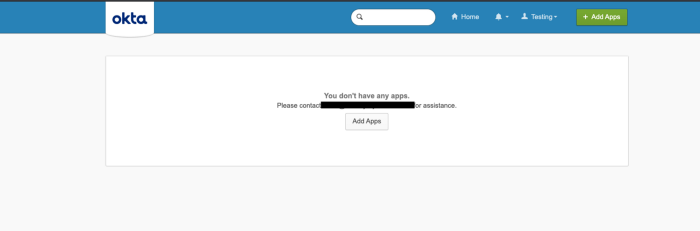
Once consent is granted, you’ll see you are logged into the Okta UI,
signifying a successful integration! If you used an admin account,
you’ll see the Okta admin interface.
From here, you can add the additional step for signing into Okta integrated SAAS applications. For this, you’ll need to use the Authorize URL listed under your ForgeRock Identity Cloud IDP in the Okta admin console.
Happy integrating!