ForgeRock Identity Cloud & Azure AD B2C
Author: |
Patryk Krolikowski |
Created at: |
Jun 2022 |
Updated at: |
Jun 2022 |
By Patryk Krolikowski
Originally posted on
https://medium.com/@scureq
Did you ever wonder how to integrate ForgeRock Identity Cloud (this also applies to ForgeRock Access Management) and Microsoft Azure AD B2C? And maybe even how to do it using OpenID Connect? If so, read on!
Why…
First, you might be asking yourself — Azure AD B2C can be an Identity Provider itself, right? So, why would I even consider using a 3rd party provider?
That’s a very valid question and I think there might be several reasons why.
Some may argue that Azure AD B2C is not the most capable and flexible IAM system on the market. It’s a curated experience targeted at a very specific use case and which is tightly integrated with Microsoft ecosystem. As such it might be too limiting. For example for those who use applications of various types, integrate using modern federation standards, seek ultra flexibility and end user experience. There might be other reasons too. One example could be having an IAM solution already in place. In such scenario you don’t want to manage your identity data all over the place — you want to keep it with you IAM solution. Another scenario is having a multi cloud strategy. Azure AD B2C is Azure Cloud specific. So, if you’re diversifying your cloud vendors then you might not want to be limited to Azure only. Last but not the least reason might be simply avoiding a vendor lock-in.
What…
What is it that we want to achieve then?
There are a few goals here:
-
we want to keep our identity where it currently belongs- in our case ForgeRock Identity Cloud and control user registration and authentication flow — eg. when it comes to MFA, progressive profiling, consent management.
-
we already use applications tightly integrated into Microsoft ecosystem — eg. Microsoft Dynamics
-
we want to use standards for authentication and federation everywhere — by standards I mean mainly SAML2, OAuth2, OpenID Connect.
In such case what are the most typical integration examples we can think of? Let’s discuss the two that are most frequently asked about:
-
ForgeRock Identity Cloud playing a role of an OpenID Provider (Identity Provider) and Azure AD B2C being a Relying Party (Service Provider).
and reverse i.e:
-
ForgeRock Identity Cloud playing a role of a Relying Party and Azure AD B2C being an OpenID Provider.
In this article we’ll cover the first use case.
Before we jump straight into the techie bit lets see what that would look like from an enduser perspective

And here’s the architecture diagram:
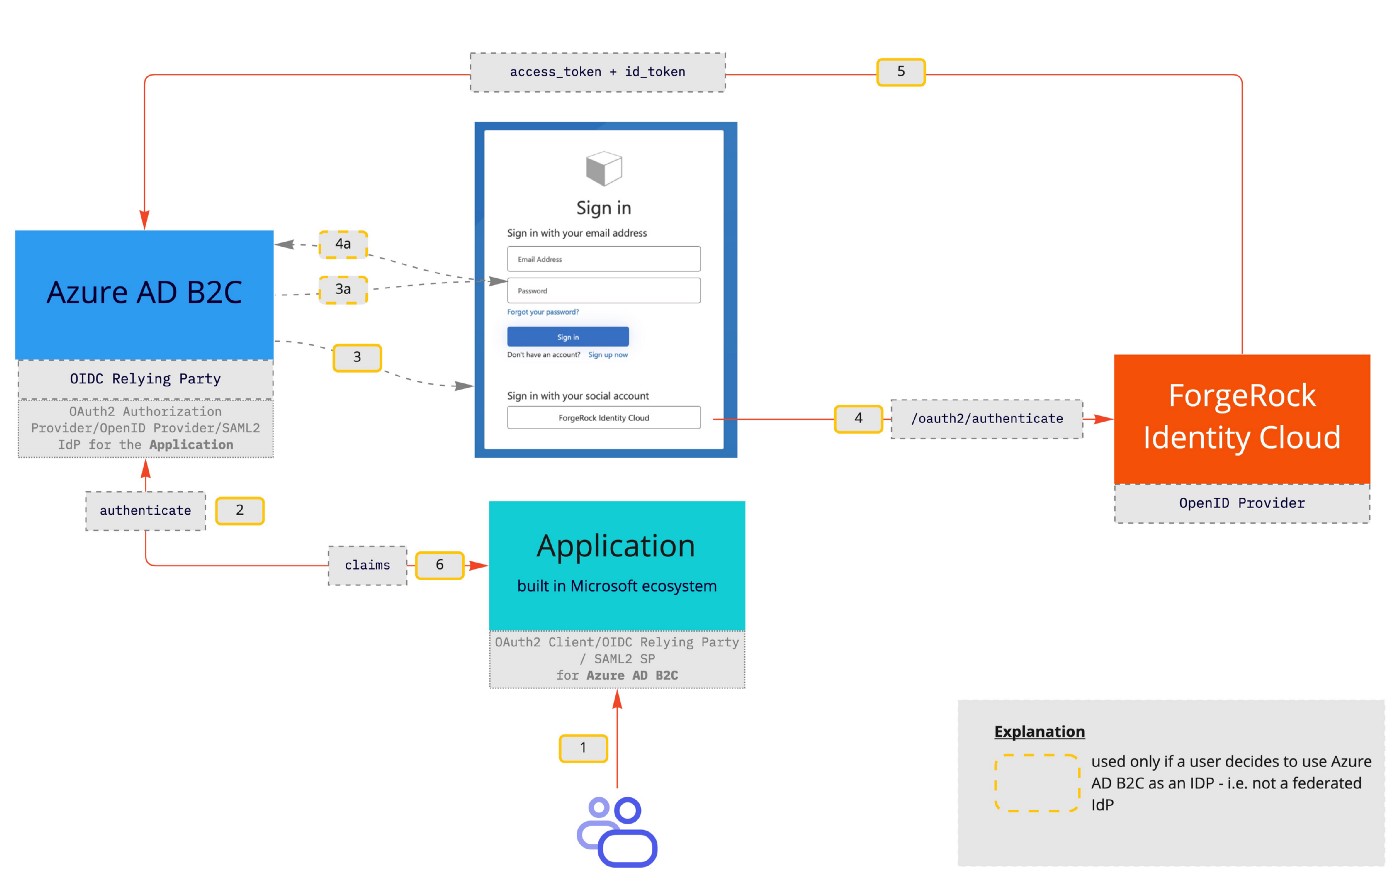
Architecture diagram
How…
First things first. Let’s create an Azure AD B2C instance. It should be a pretty straightforward task — it is well described here. One of the issues that you may have is an error message like that:
“The subscription is not registered to use namespace ‘Microsoft.AzureActiveDirectory’. See Troubleshoot common Azure deployment errors - Azure Resource Manager | Microsoft Learn for how to register subscriptions*.*”
And then the tenant creation fails. I found a great article by Adam Storr describing how to overcome that issue.
Once you’re done we should have a summary message similar to this:
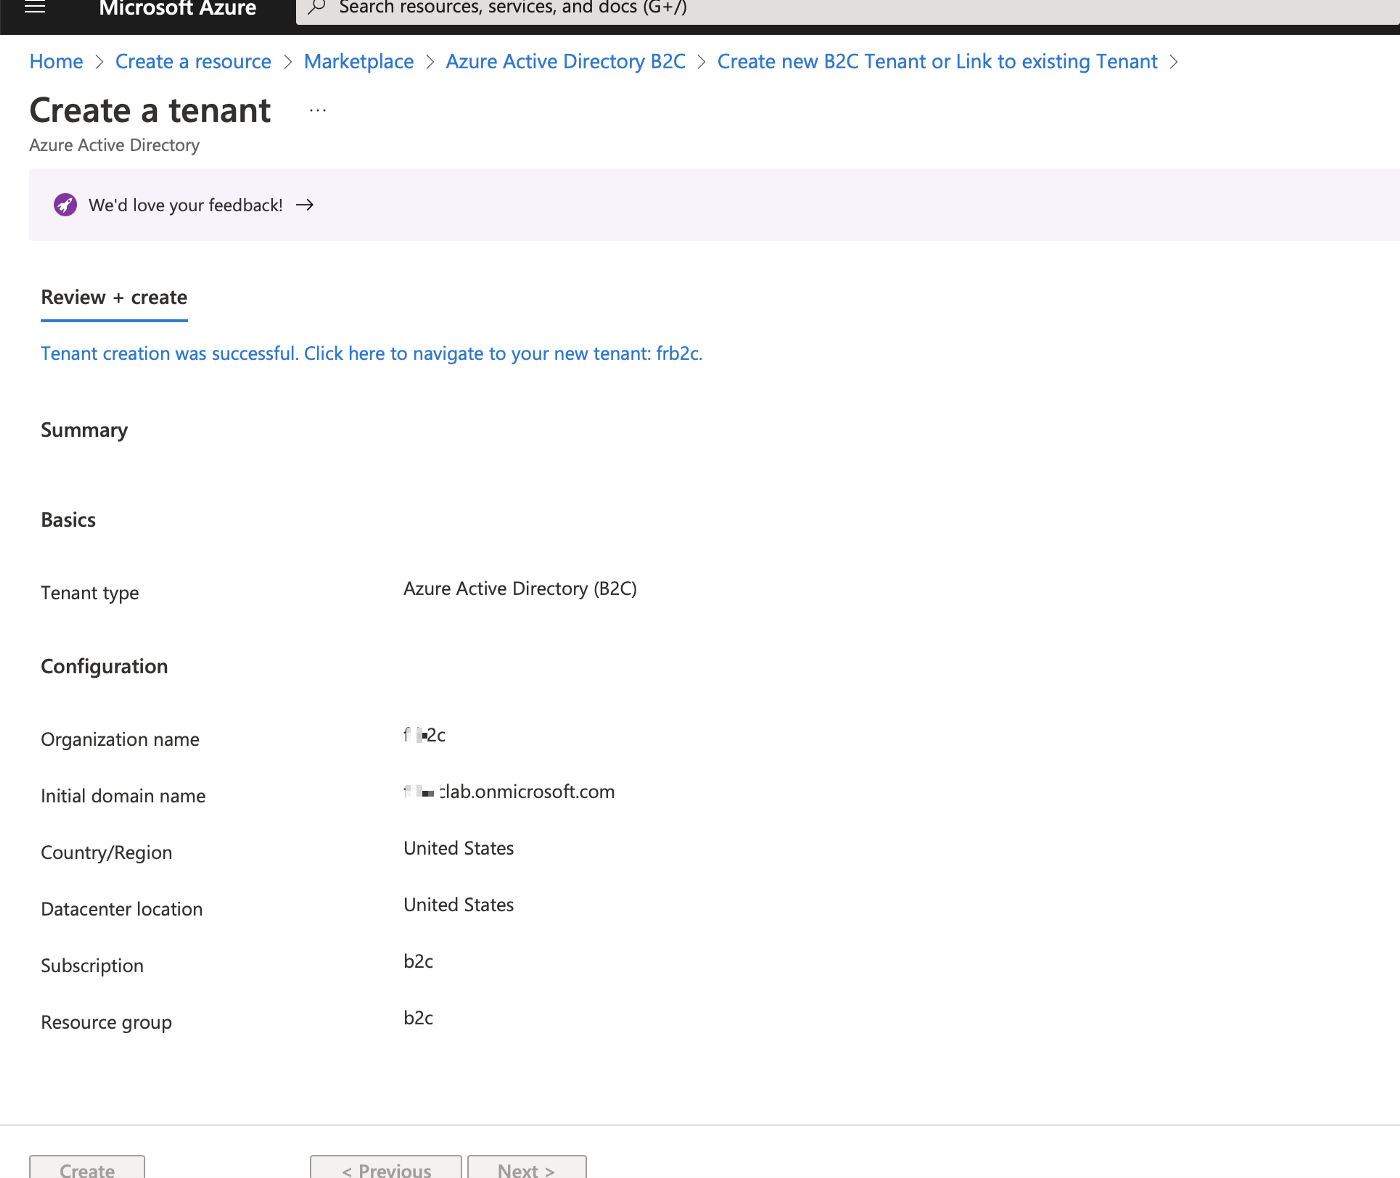
Azure AD B2C Tenant Creation
We are not creating any users locally on Azure AD B2C side — at least not yet.
Once have Azure AD B2C tenant created we can move to the configuration steps.
ForgeRock Identity Cloud as an OP
Now it is time to set our first use case up. Here’s the outline of what we need to do (I’ll cover the details in subsequent paragraphs):
ForgeRock Identity Cloud
-
Register Azure AD B2C as a Relying Party
-
Create or use an existing Journey
-
Create a test user
Azure AD B2C
-
Register a web application used for testing
-
Create an Identity Provider
-
Create a User Flow
Let’s configure ForgeRock Identity Cloud first as an OpenID Provider, then we’ll move on to setting up Azure AD B2C.
ForgeRock Identity Cloud
Register Azure AD B2C as a Relying Party
ForgeRock Identity Cloud is ready to be an OpenID Provider out of the box. The only thing that needs to be configured is registration of a Relying Party — Azure AD B2C in our case.
First let’s visit the Platform UI and go to the Applications section (which is responsible for creating Relying Parties) and hit “Add Application”:
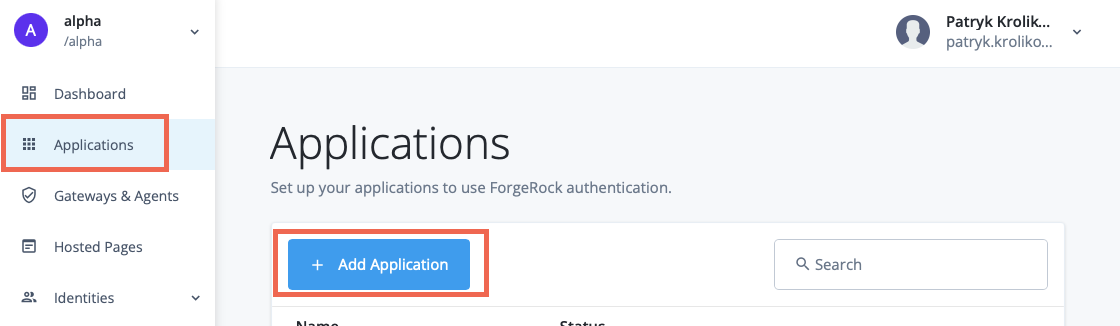
OAuth2 Client Configuration — initial screen
Next, choose the App type eg. Web:
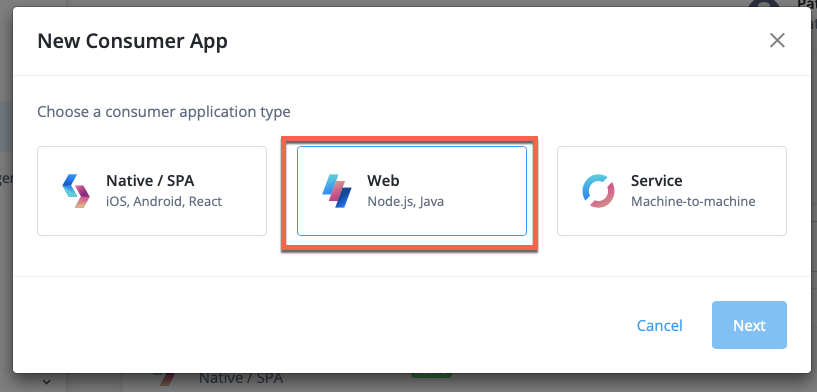
OAuth2 Client Configuration — selecting an application type
then fill the credentials i.e client_id and client_secret :
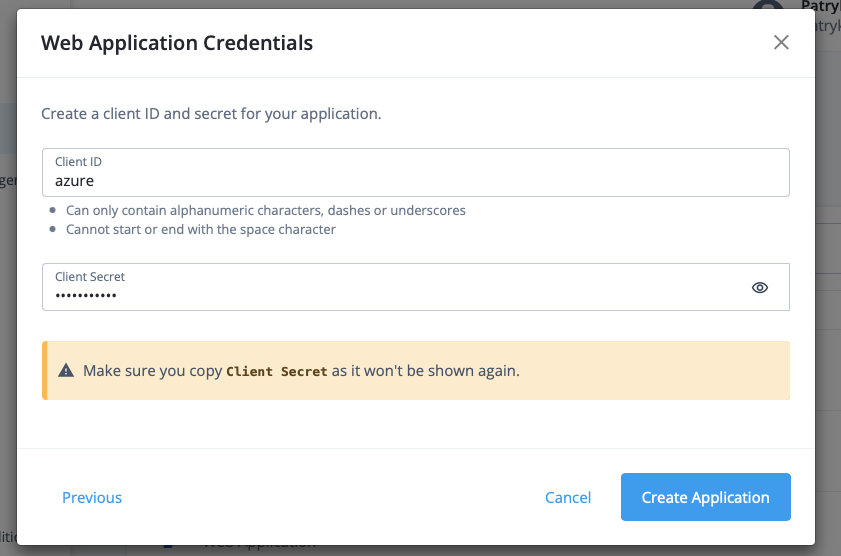
OAuth2 Client Configuration — seeting client_id and client_secret
Then configure the rest of the properties:
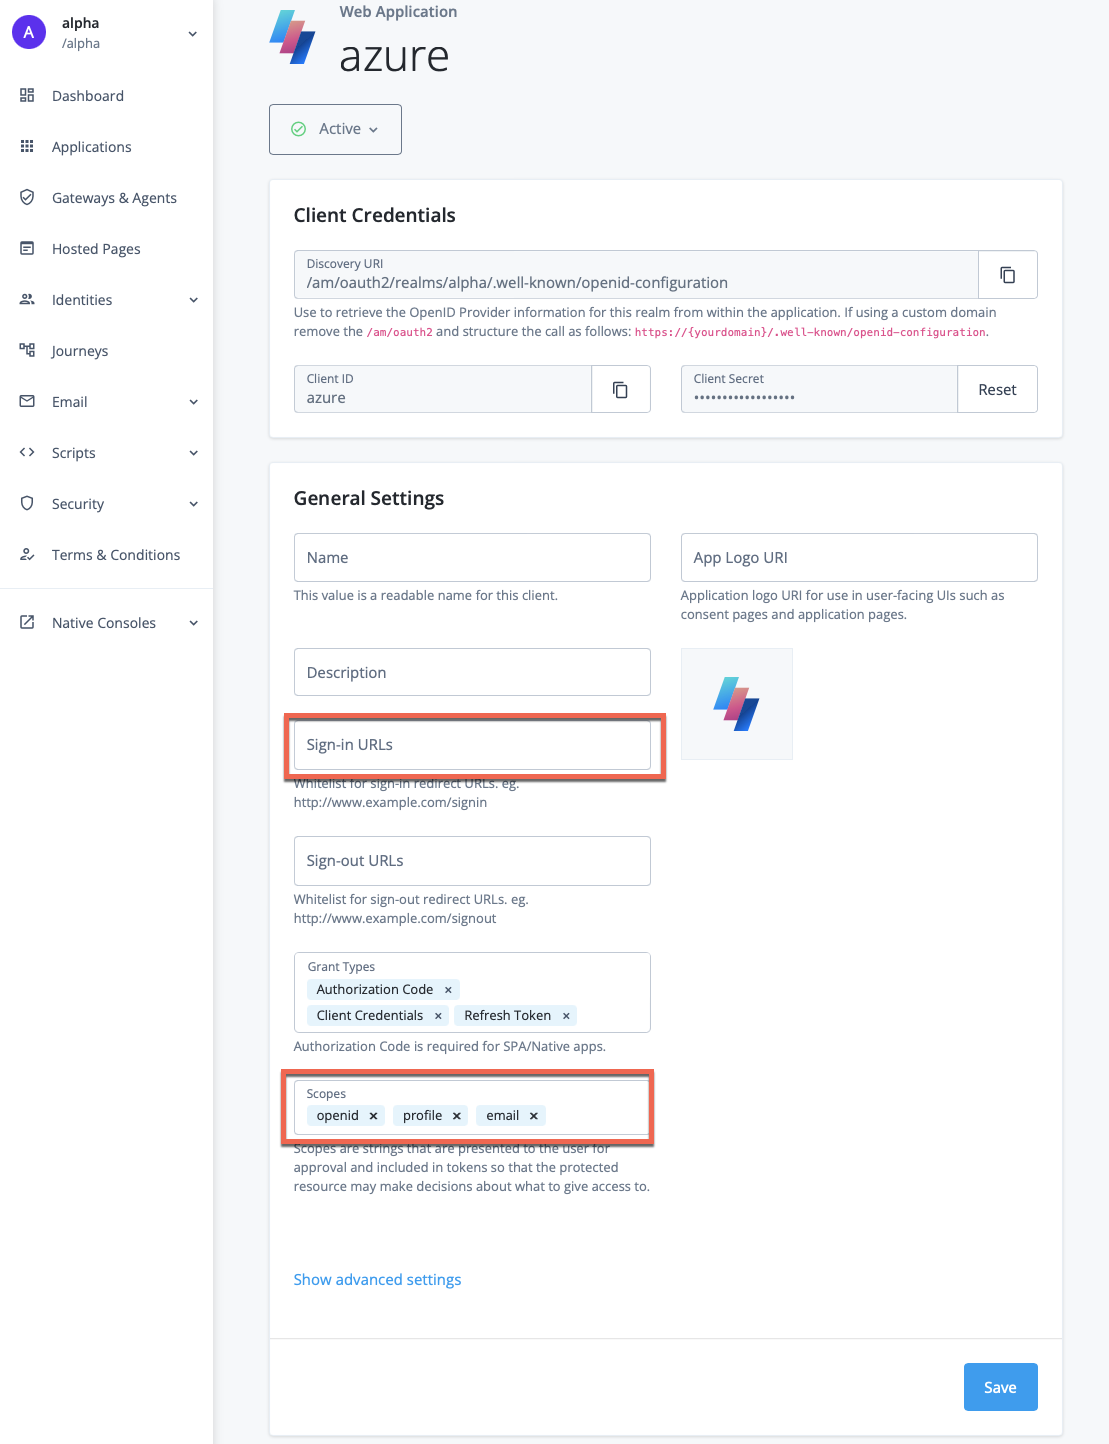
OAuth2 Client Configuration — basic configuration
For the sign-in URLs we’ll need to provide a redirect_uri for the
Azure AD B2C.
The “Sign-in URL” in our case should have syntax similar to this one:
https://[XXX].b2clogin.com/[XXX].onmicrosoft.com/oauth2/authresp
where [XXX] is the prefix of the “Initial domain name” you received as
the result of Azure AD B2C tenant creation. For instance if you have
myb2cinstance.onmicrosoft.com then the [XXX] would be
myb2cinstance .
For the Scope section — remember to add profile and email scopes;
openid should already be there.
Then go to the “Show Advanced Settings” section and change the
“Authentication” tab and change “Token Endpoint Authentication Method”
to client_secret_post :

OAuth2 Client Configuration — Token Endpoint Authentication Method
Save changes and continue.
Create or use an existing Journey
Now, let’s a have a look at the Journeys — a super flexible way to create user flows (eg. registration, authentication) and experience in a form similar to the decision trees.To get to them let’s visit the “Journeys” section of the Platform UI:
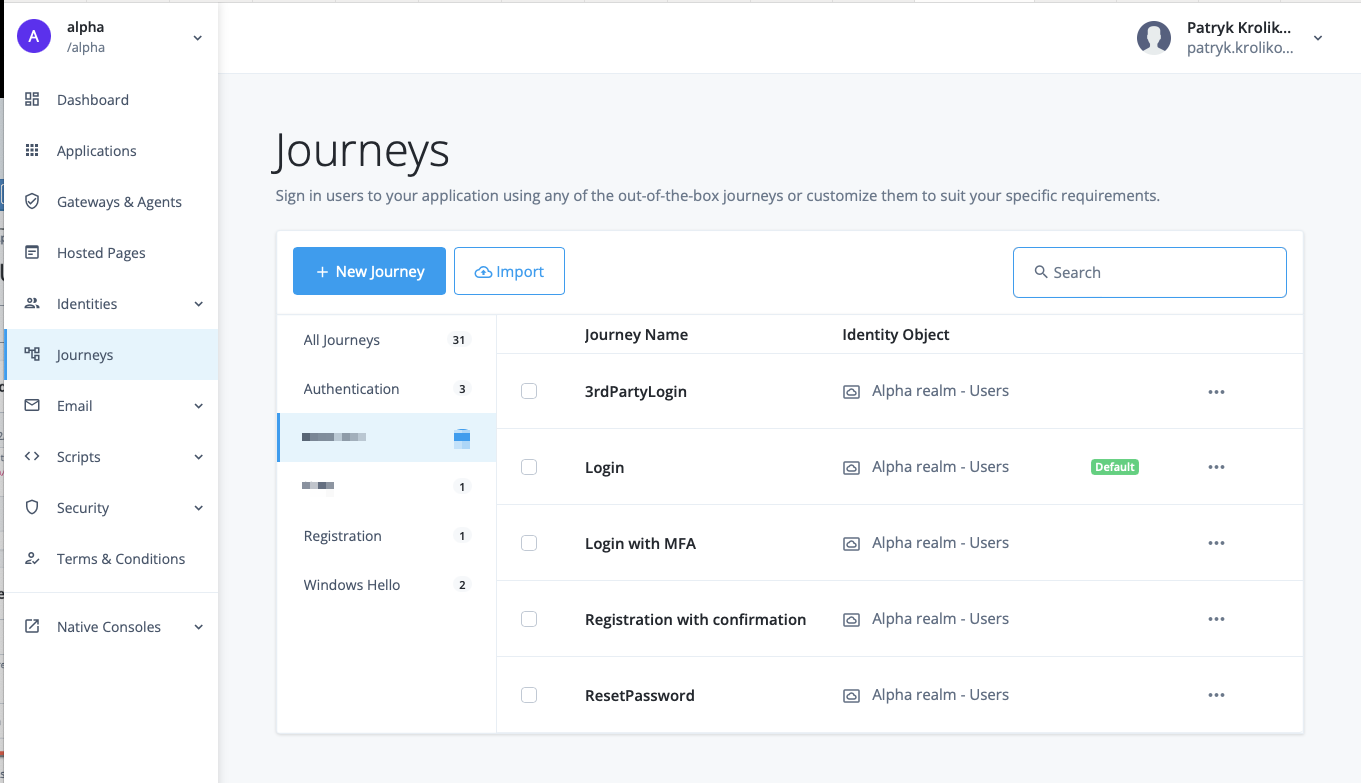
ForgeRock Identity Cloud — Journeys
As you can see there are quite a few Journey in my ForgeRock Identity Cloud instance. Lots of them come out of the box and can be used for our testing. For instance a Login journey which looks like that:

ForgeRock Identity Cloud — Login journey
That is a super simple flow. We just use user’s username and password and verify these credentials with the Data Store. If they are valid we increase the Login Count and check whether another Journey (called “Progressive Profile”) should be invoked.
If yes then we go through that journey and once finished we return with the the result back to our main journey. If the result is “True” we end the Journey with “Success”, we return “Failure” otherwise.
Side note: Progressive Profile refers to the ability to ask users to provide additional profile information over time, or to update existing information when needed. The sample Progressive Profile tree used above checks the number of logins, and prompts the user to fill out their marketing preferences if they haven’t already.
Create a test user
The last thing to do is creating a test user. In order to do so we need to go back to the main Platform UI and go to “Identities”→ “Manage” section:
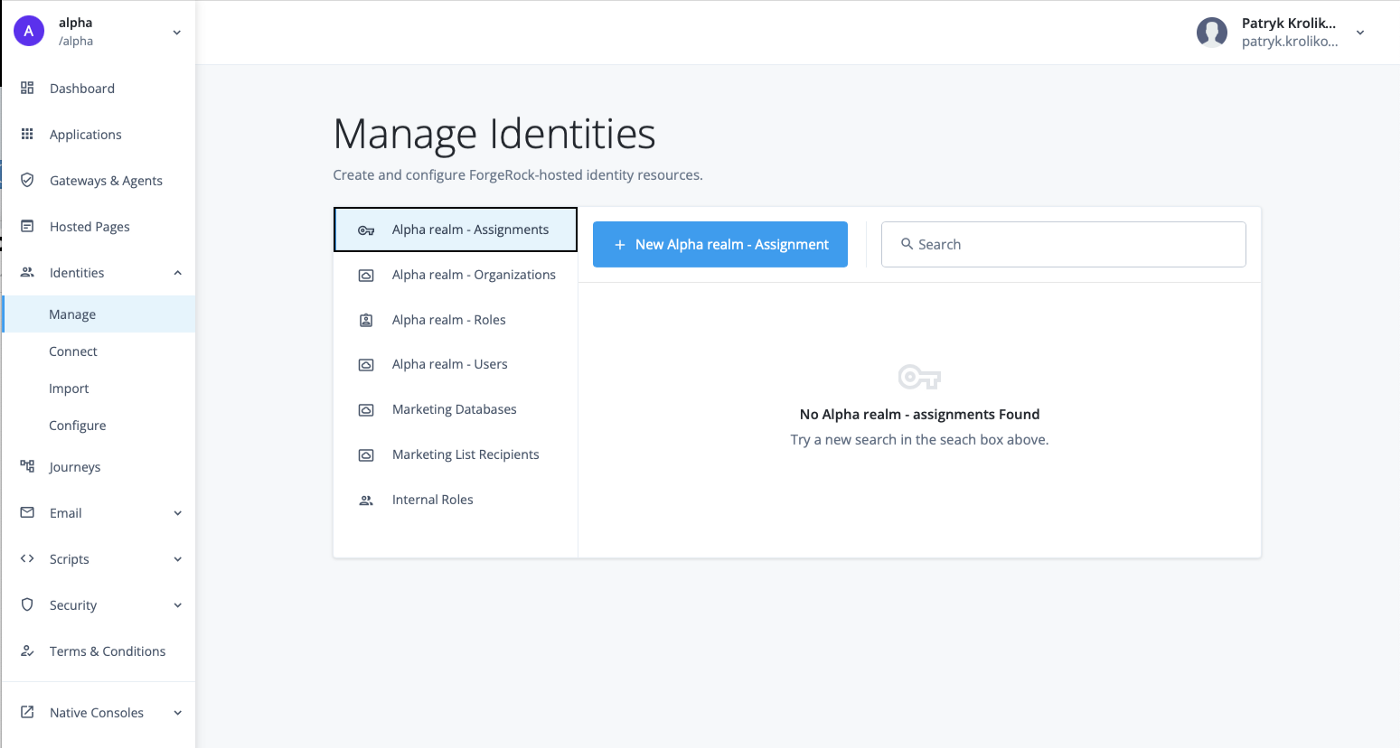
ForgeRock Identity Cloud — Managed Identities
Then we go to “Alpha realm — Users”, hit “New Alpha Realm User”
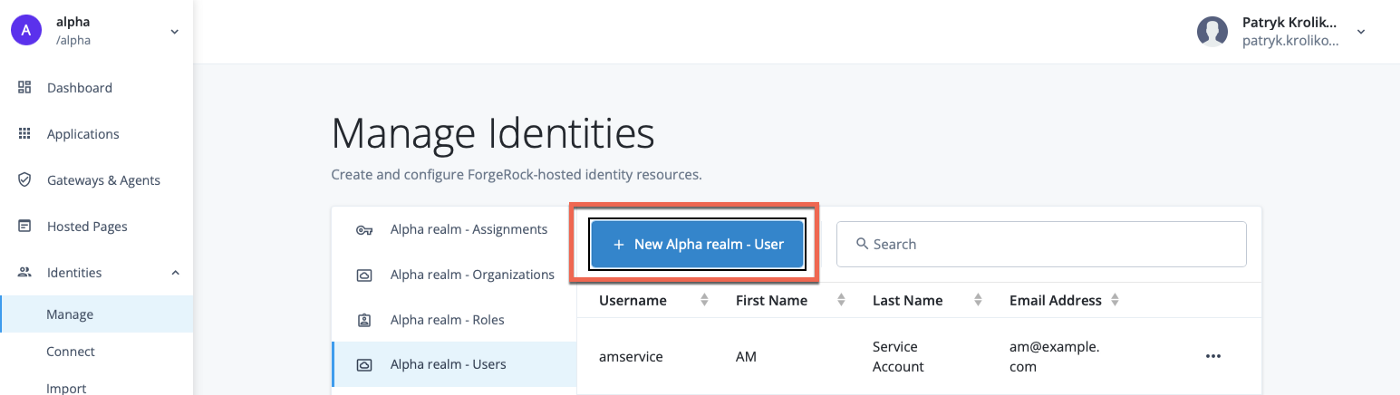
ForgeRock Identity Cloud — test user creation
and fill the details.
Note: Please use a “real” email address as Azure AD B2C will want to send a confirmation email to that address during the initial Azure AD B2C User Flow.
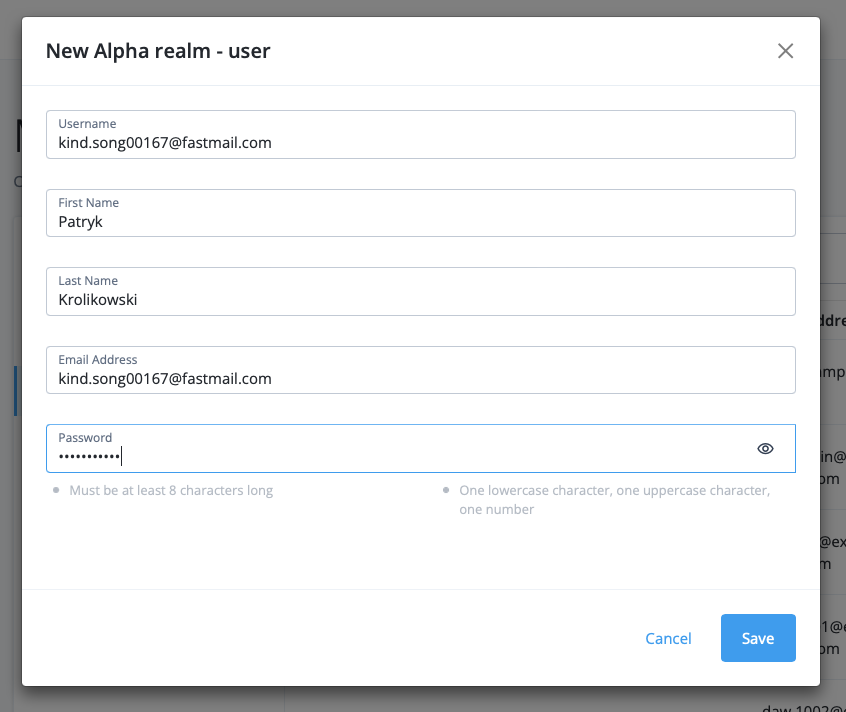
ForgeRock Identity Cloud — user creation form
With that, we are ready to move on.
Azure AD B2C
Register our web application
We can either use an existing application or build our own. For simplicity we can use one of the sample, published on-line applications Microsoft offers — https://jwt.ms. This application allows us to inspect token details once the integration has been completed.
Regardless of the application we chose we need to register it.
In order to do so, in Azure AD B2C portal go to App Registrations → New Registration
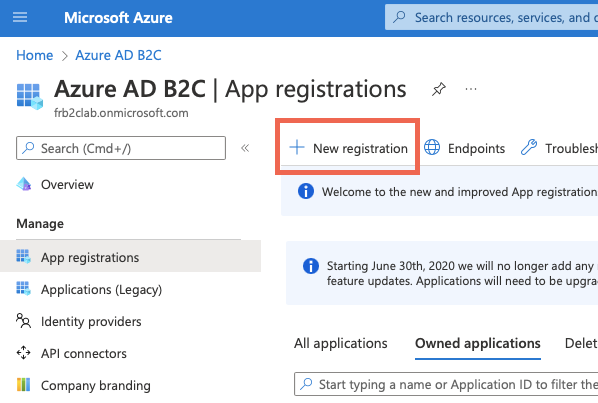
App Registration — step 1
Then fill the details for the jwt.ms application
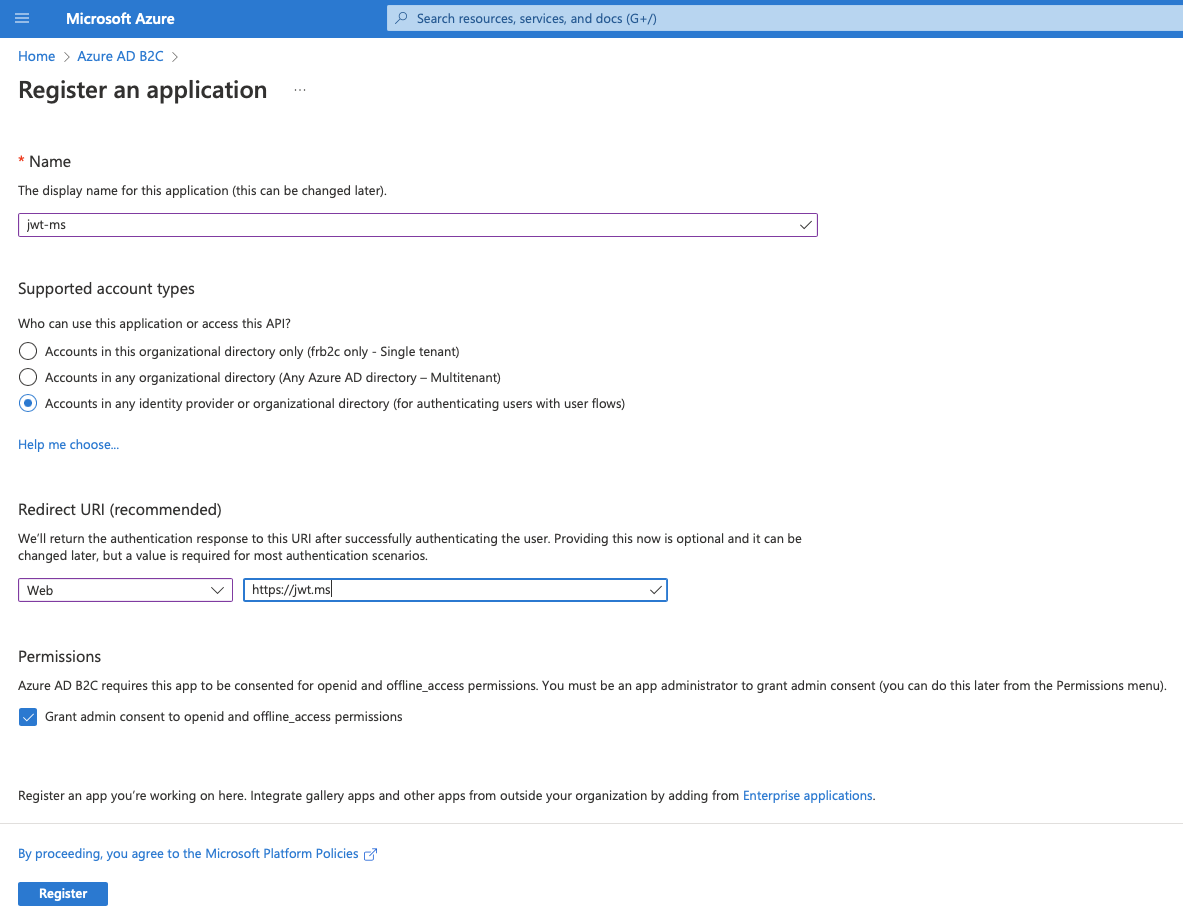
App Registration — step 2
Go to the details of the newly registered app and make a note of
“Application (client) ID” — that’s a client_id
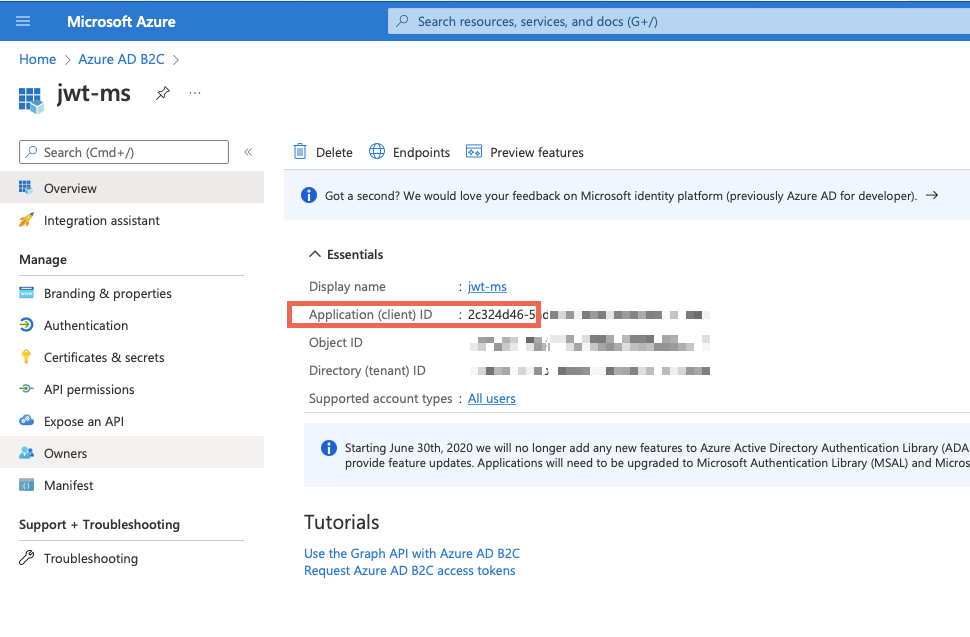
App configuration — copy Application (client) ID
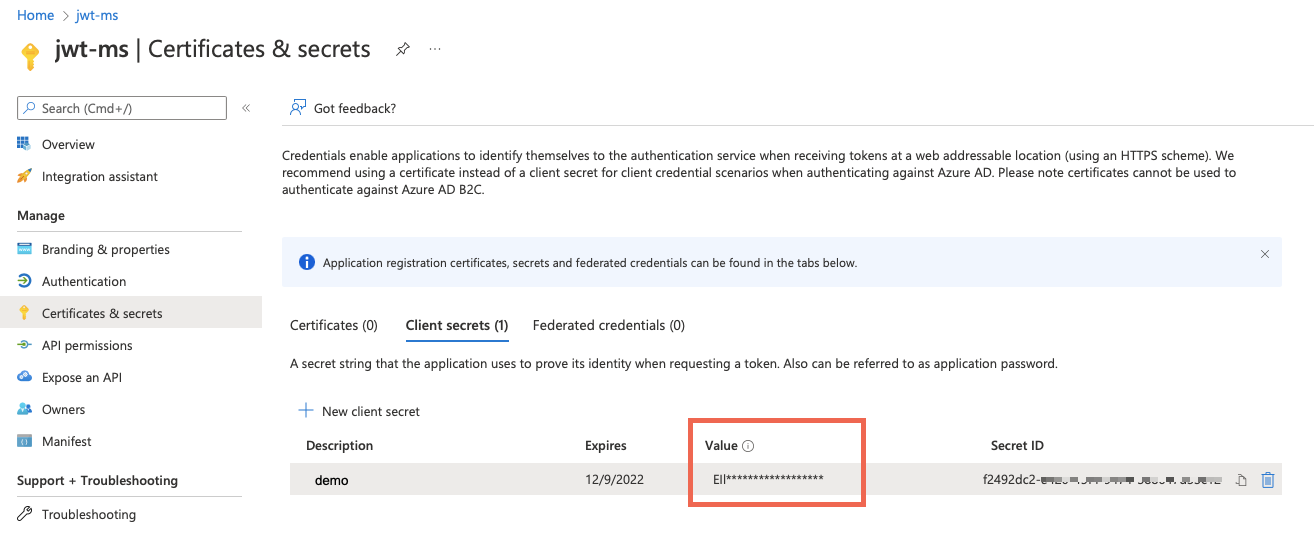
Then go to “Certificates & secrets” section and create a secret.Give it a description and set expiration time to your liking.
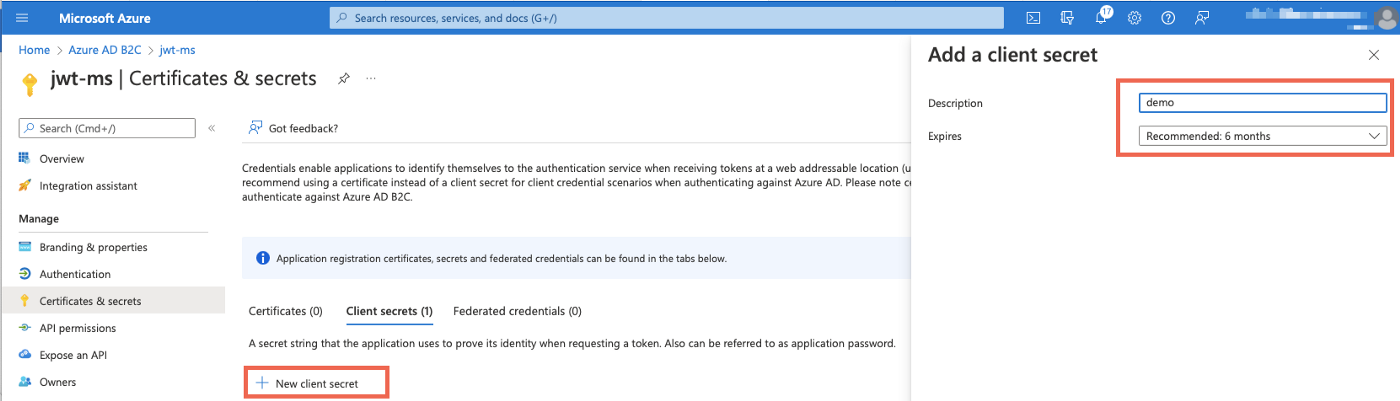
Next, copy the generated secret (“Value” and not the “Secret ID”) — this
will become your client_secret . Make sure you do it right after
creating it. The value will be not available later on.
Create an Identity Provider
Now go back to the main Azure AD B2C configuration page and choose “Identity Providers”. Then hit “New OpenID Connect provider”
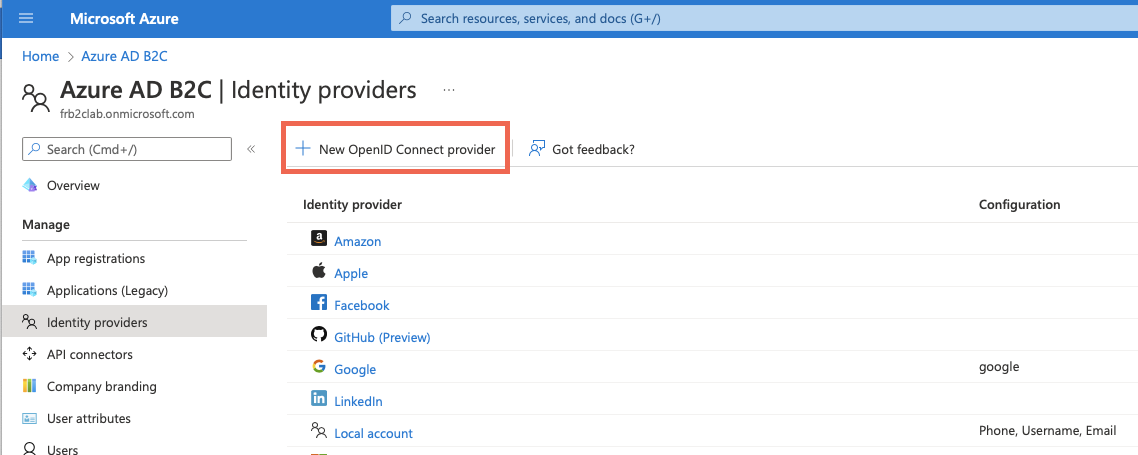
Create OpenID provider.
Then we need to fill some details out:

ForgeRock Identity Cloud as an OP
Makes sure to put the right `.well-known`endpoint in the Metadata Url field. For the ForgeRock Identity Cloud in most cases it will be:
https://[your_fidc_instance]/am/oauth2/realms/root/realms/alpha/.well-known
…where alpha is the name of the realm. If it is different in your case
change it accordingly.
Use the same “Client ID” and “Client secret” that we set up in ForgeRock Identity Cloud during OpenID Connect `azure`application creation. Also make sure you have the right scopes in place as well as “Identity Provider Claims Mapping” section is filled out.
Create a User Flow
Now we need to configure a user flow that will bring the web application and our Identity Provider together.
Go to the main page of Azure AD B2C config. Under “Policies” click “User flows” → “New user flow”:
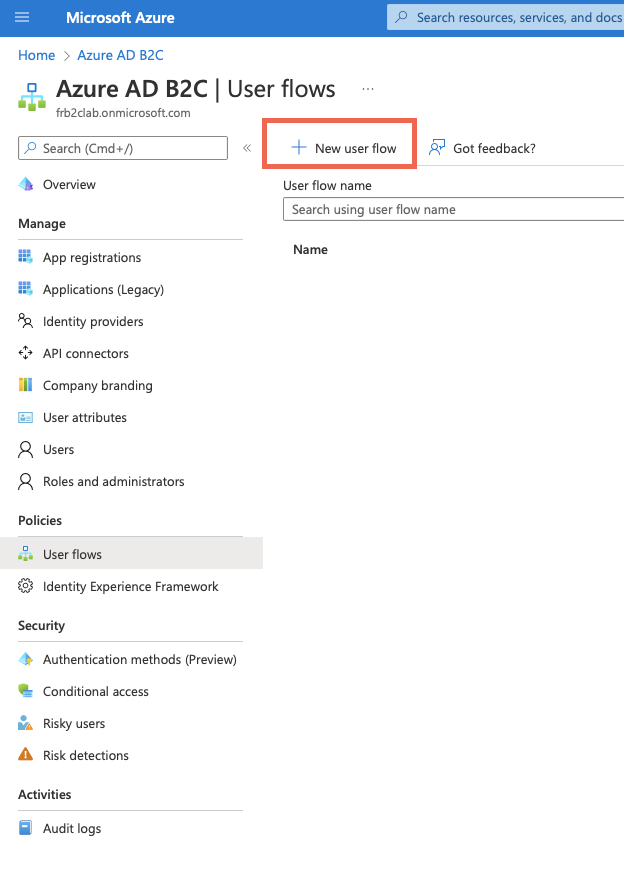
Create a new User Flow
Then from the list of flow types select “Sign up and sign in” plus a “recommended” version of the flow. The reason why we select this particular flow type is we want to register a user with Azure AD B2C if one does not exist when coming back from ForgeRock Identity Cloud.
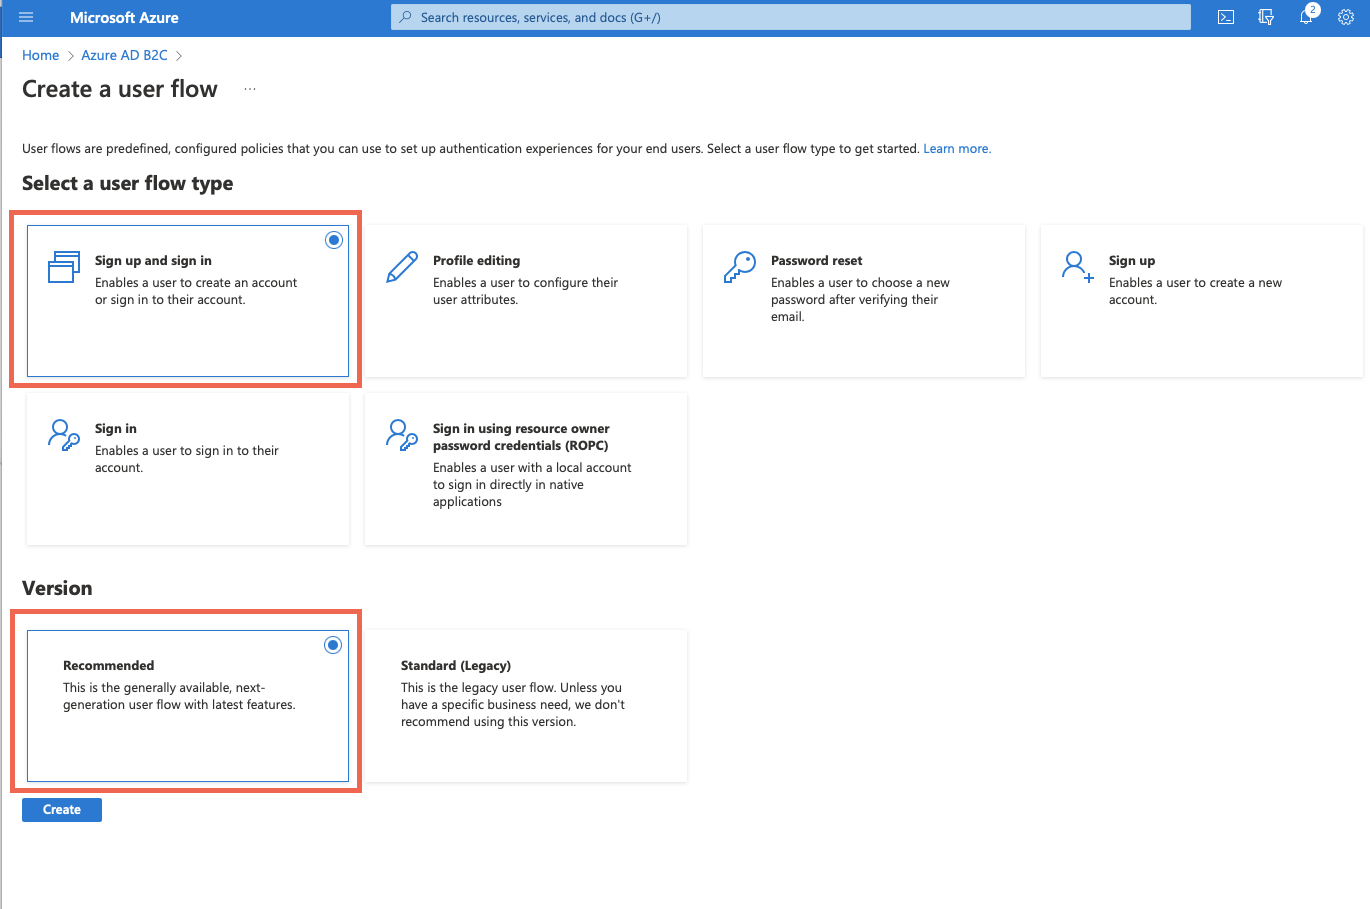
User flow type — Sign-up and Sign-in and Version
Then, give the flow a name and configure Identity Providers. These can be local (handled by Azure AD B2C) or “social” — like Google, or “custom” — like ForgeRock Identity Cloud. Let’s pick “Email signup” for a local account and ForgeRock Identity Cloud as a custom provider. We can skip MFA config as well as Conditional access leaving the defaults:
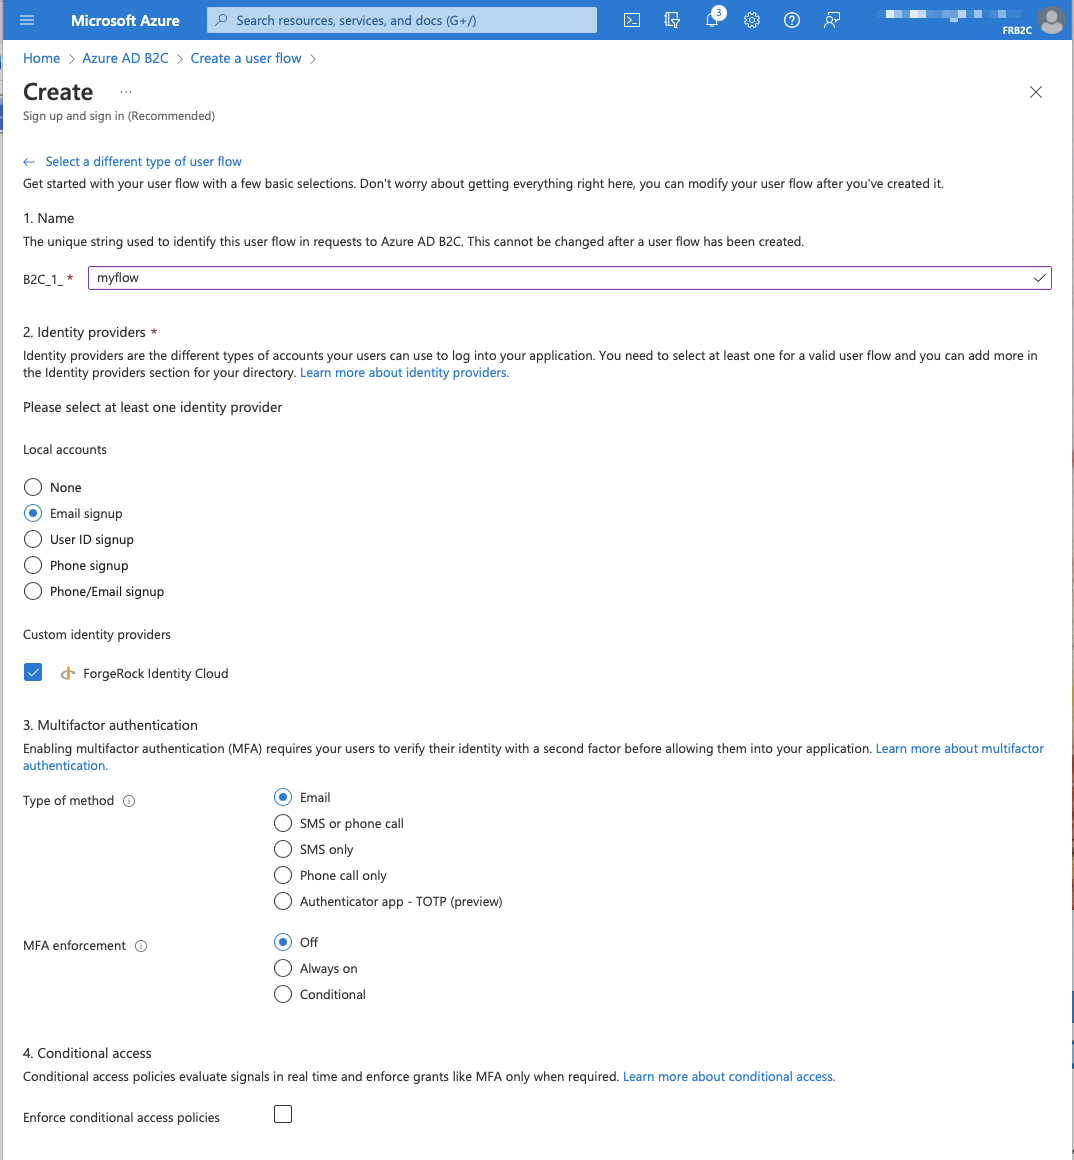
User Flow — Select Identity Providers
The next section is interesting — User attributes and token claims. It allows for collecting attributes from the user during sign-up and select which claims will be returned in the token:

User Flow — Attributes and Claims — part 1
To get more attributes/claims pairs let’s go ahead and click Show more… Then we can choose whatever we need eg.:

User Flow — Attributes and Claims — part 2
Then, hit the “Create” button to create the flow.
But, there’s one last thing to check before we test the user flow. Let’s make sure we don’t have a user in Azure AD B2C that would correspond to the one we had created in ForgeRock Identity Cloud. It should be creating during the first encounter.
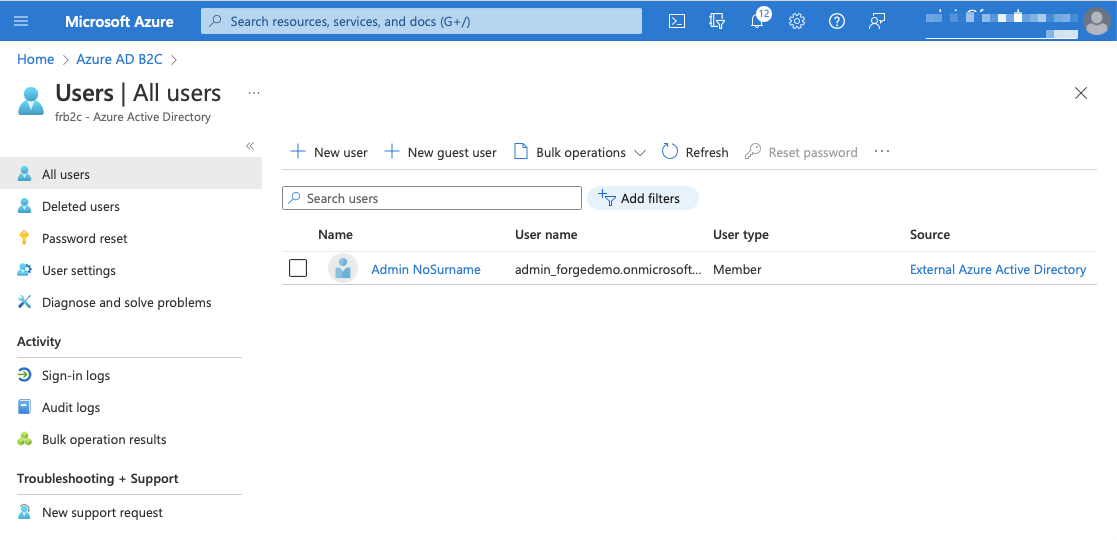
Users view — before testing user flow
Now, when we run the flow the sequence should be as follows:
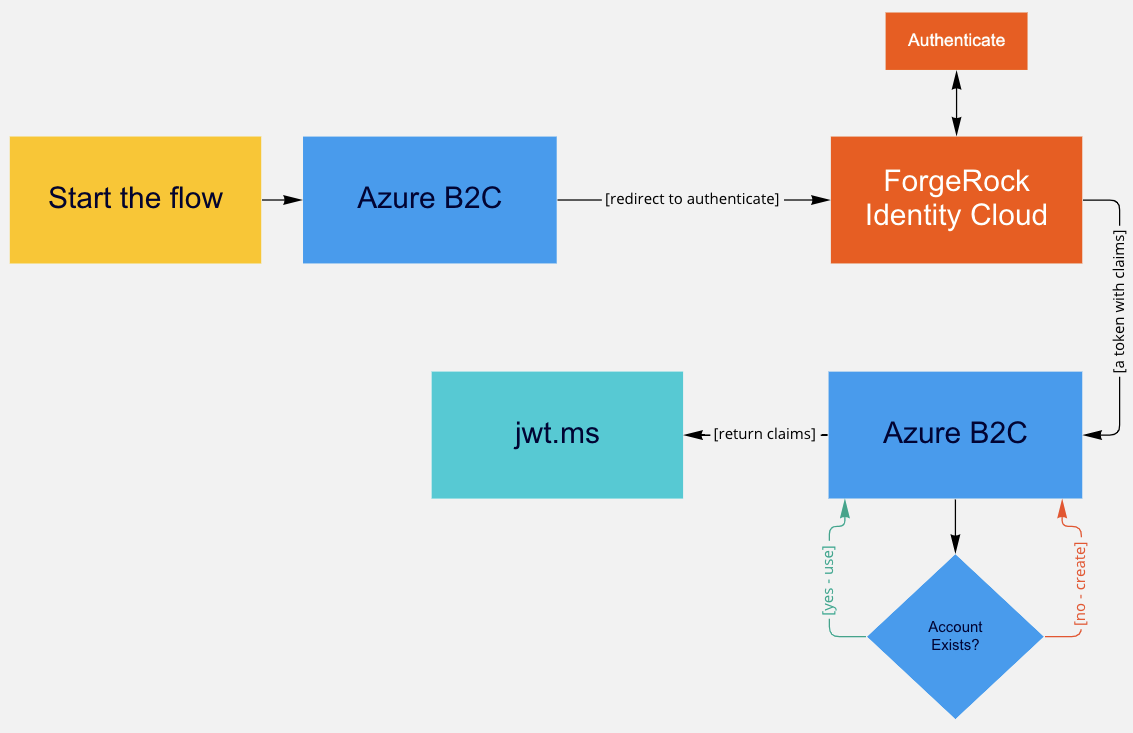
User journey — flow diagram
Now we are ready to test it. Select “B2C_1_myflow” (or whatever flow you created) from the User Flows section of Azure AD B2C main config screen:
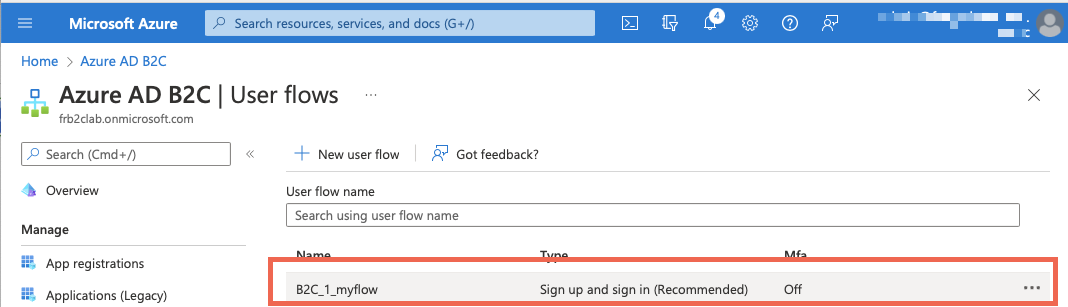
Testing the flow
That should give you a view similar to that one:

Testing the flow — “Run user flow” — step 1
Hit “Run user flow”. Now we have to pick an application which will be tested against the flow — we use jwt.ms that we had created:
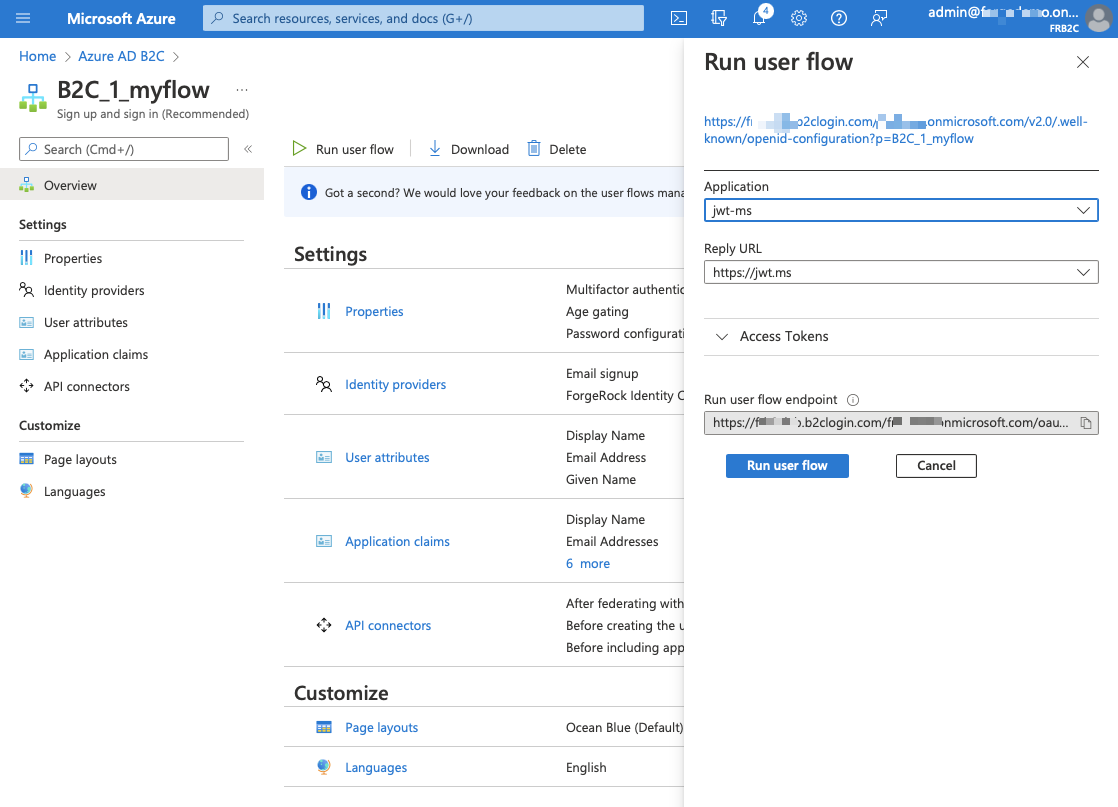
Testing the flow- “Run user flow” — step 2
As the last step we can check whether the user has been successfully created in Azure AD B2C:
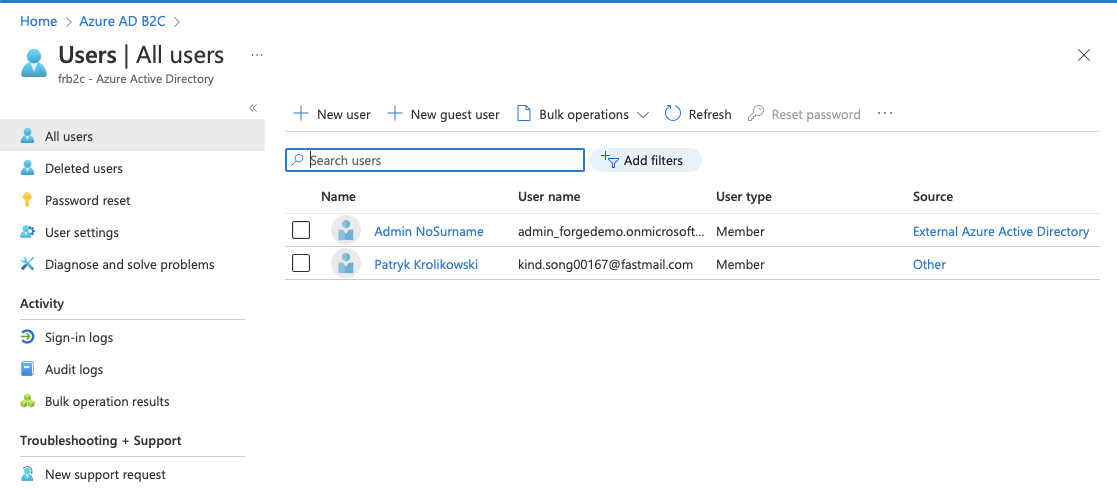
Users view — after testing user flow
The user is there now. Have a look at the “Source” column.
So far I’ve shown how to integrate Azure AD B2C with ForgeRock Identity Platform using OpenID Connect where the first one is a Relying Party and the latter an OpenID Provider.
Thanks Steffo Weber, Stéphane Orluc and Andre Posner for invaluable feedback!
Other Articles by This Author
![]() Zendesk
and ForgeRock Identity Cloud SAML based SSO in 5 minutes
[.badge-category__name#Integrations#]
Zendesk
and ForgeRock Identity Cloud SAML based SSO in 5 minutes
[.badge-category__name#Integrations#]
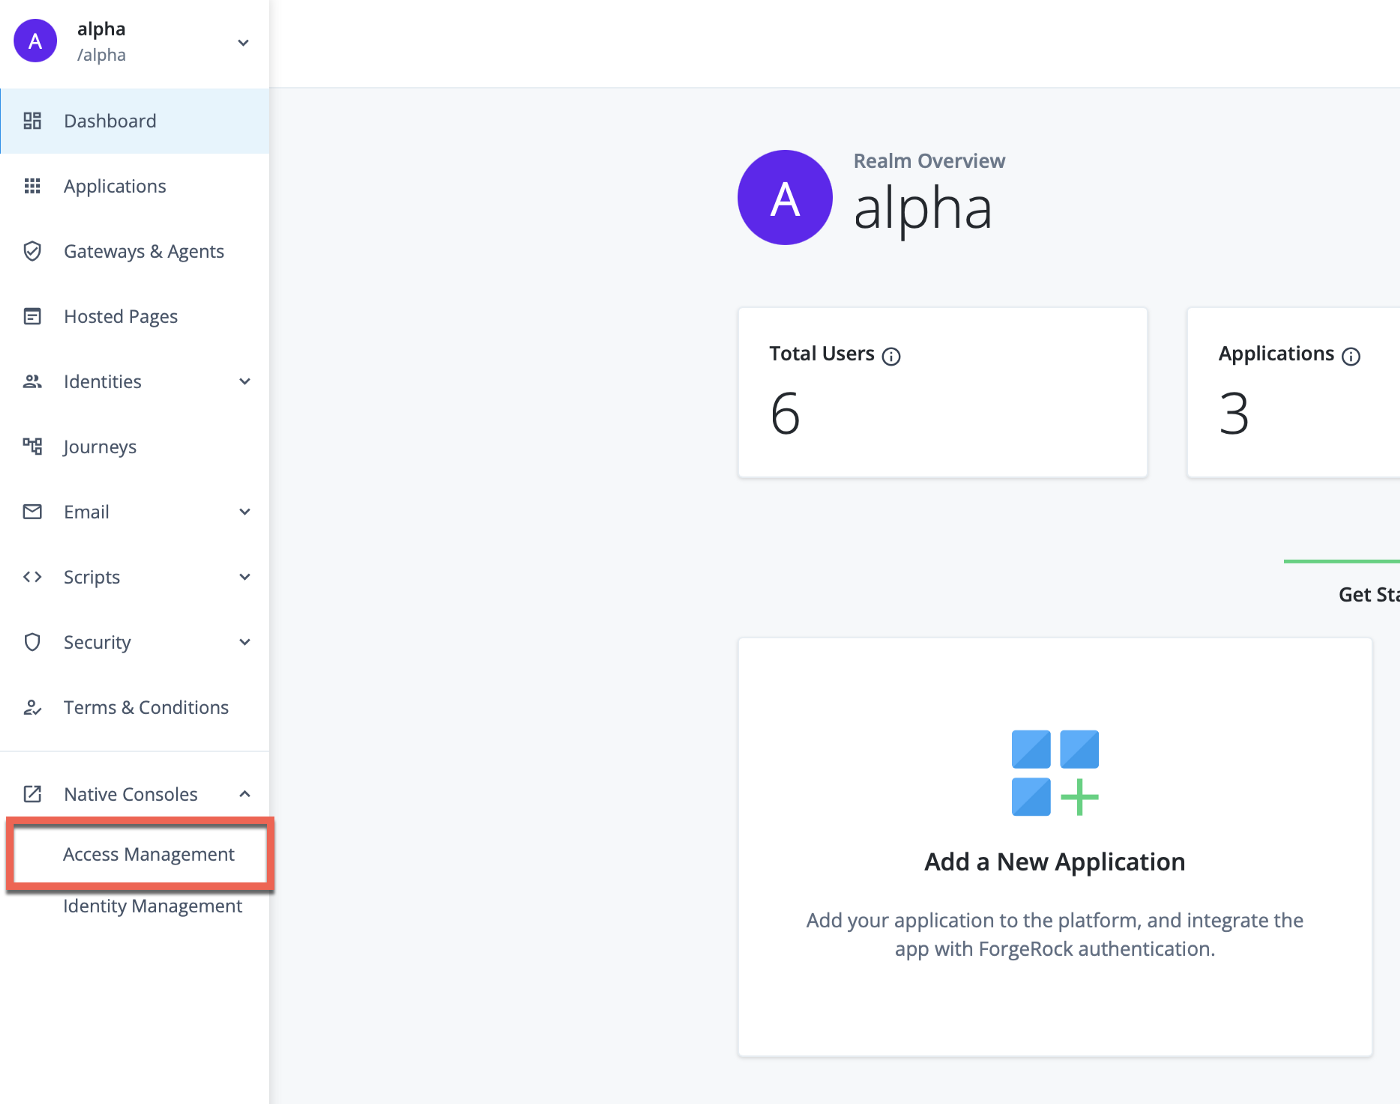
By Patryk Krolikowski Originally posted on https://medium.com/@scureq If you need to integrate Zendesk with ForgeRock Identity Cloud acting as an Identity Provider using SAML then this story is for you. If not, you can still read it ;). This post is a joint effort of Andre Posner and myself. ForgeRock Identity Cloud configuration First let’s visit the Platform UI of our Identity Cloud instance. Then go to Access Management Native console: [image] Forgerock Identity Cloud Platform console…