Using Apigee to Integrate ForgeRock AM With Your API Gateway
Author: |
Wayne Blacklock |
Created at: |
Dec 2018 |
Updated at: |
Sep 2024 |
Summary
Instructions for using Apigee to Integrate ForgeRock AM With Your API Gateway
We are often asked how ForgeRock® Access Management (AM) can be integrated with a customer’s existing API gateway. This is a common security pattern, especially with OAuth 2.0-based approaches. In this article, we will show you how to do this with Apigee Edge (Apigee), following their instructions for integrating with a third-party authorization server:
Prerequisites
-
A ForgeRock Access Management (AM/Open AM) instance hosted somewhere that is accessible to Apigee
-
An Apigee account (sign up for a free account)
-
An HTTP-based API to protect
-
Postman/cURL
Proxying the API with Apigee
First, we need to create an API proxy in Apigee. It will flow any requests through to our API, applying the behavior we configured in the gateway.
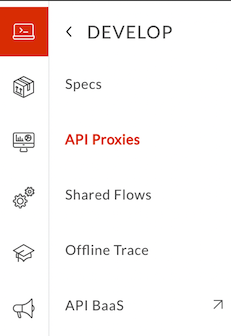
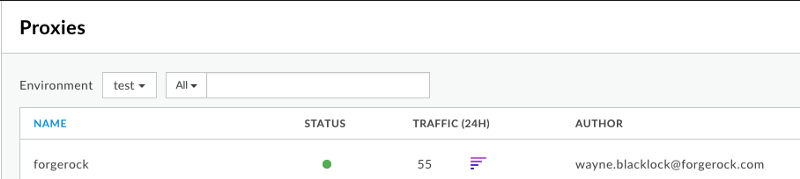
Select API Proxies, then +Proxy:
Select Reverse Proxy and select Next:
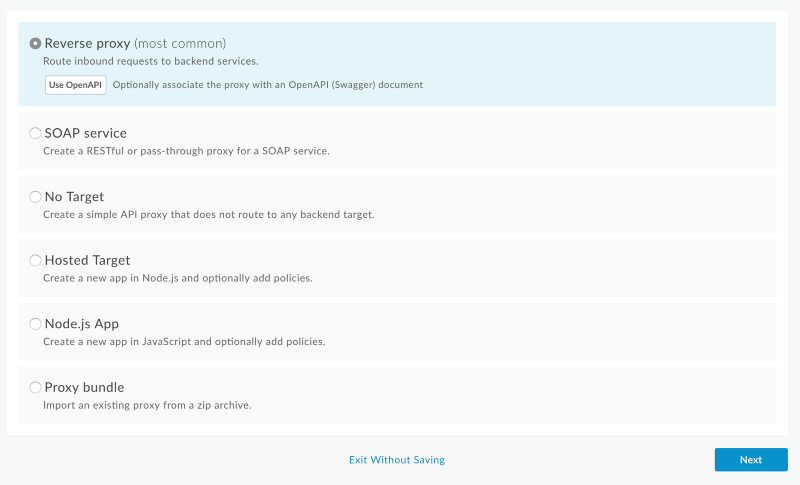
Note: You can use an OpenAPI definition if you have previously set up or imported one. It will save you time when you perform the next steps. Setting up or importing an OpenAPI definition is outside of the scope of this article.
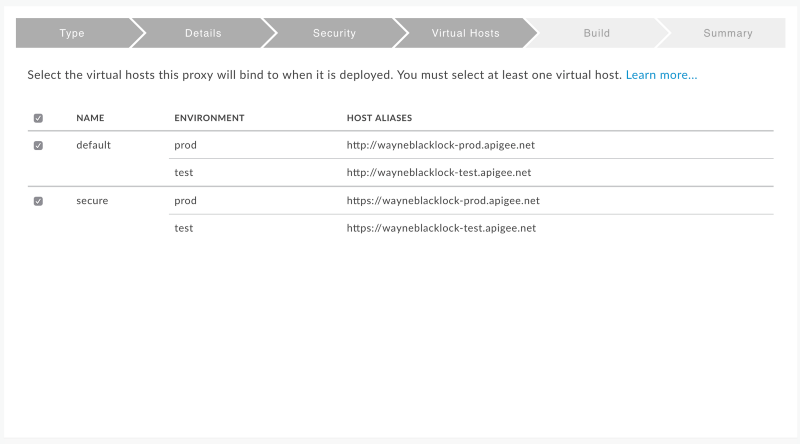
Enter your proxy details and define a proxy base path in their respective text areas. Apigee will create this path to direct requests to your API after you tell it where the existing API is located. Enter a valid URL in the Existing API text area:

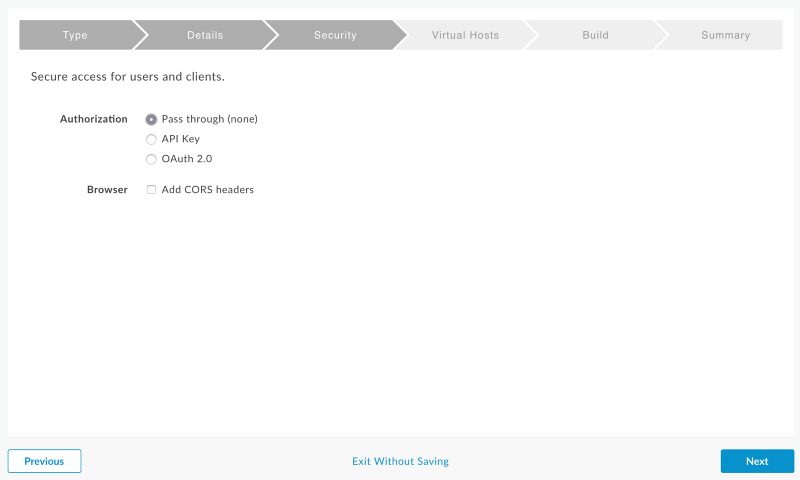
Select Pass through (none), then select Next. Authorization occurs, and the request flows through the API directly. This lets us validate some basic connectivity before we start working with our AM configuration:


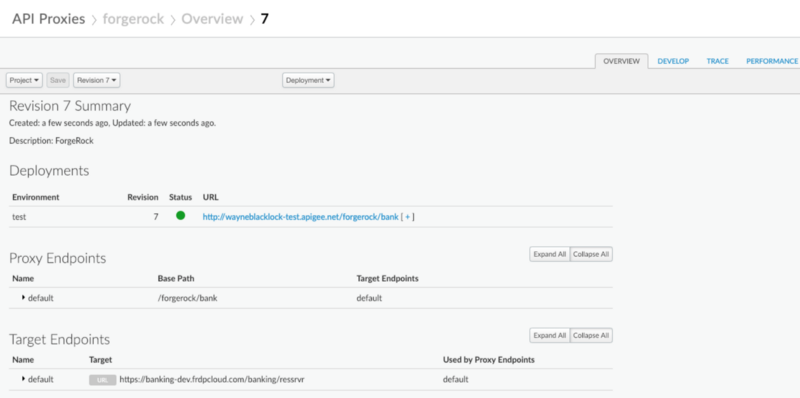
Select forgerock to view the forgerock proxy in the editor. The API Proxies dialog box displays:
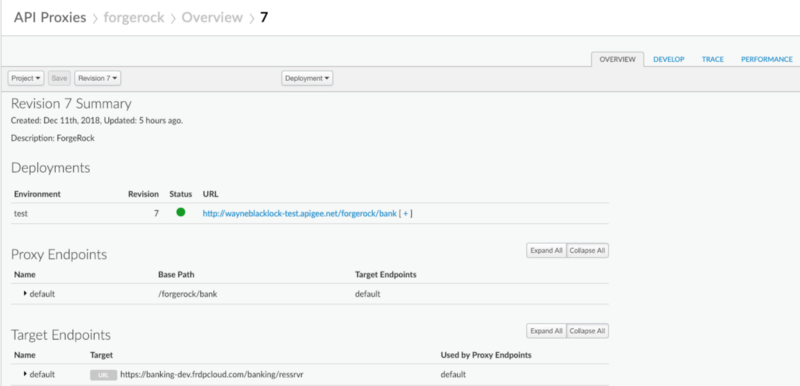
Before we move on to the next step, we need to ensure that Apigee is proxying correctly to our API. To do this, select the Proxy Endpoint. You should see exactly the same result as if you hit your API directly:
curl -X GET http://wayneblacklock-test.apigee.net/forgerock/bank/api/wblacklock

{"_id":"wblacklock","_rev":"5","frdpmfapref":"push","resourceSet"…
Now that we know Apigee is proxying correctly, we can start doing something interesting with it.
Retrieving an OAuth 2.0 Access Token>
Follow these steps.
Set up an OAuth 2.0 Provider Service
Log in to AM as administrator, navigate to the Top Level Realm, or the realm you wish to use:
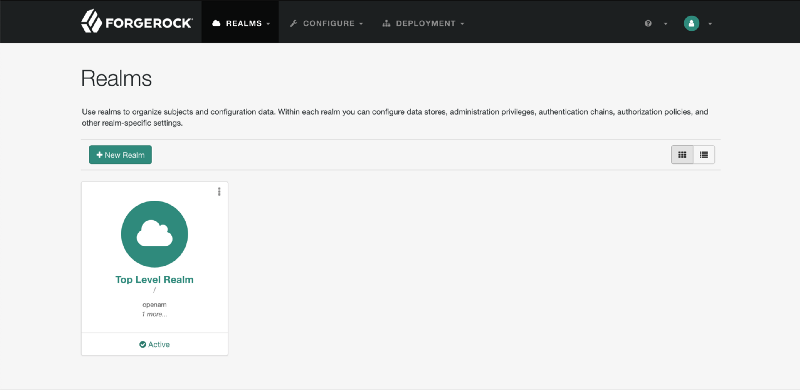
The Services page displays. Select + Add a service:

The New Service dialog box displays. Select OAuth 2 Provider from the Choose a service type drop-down menu, enter the desired scopes in the Supported Scopes text area, and select Create:
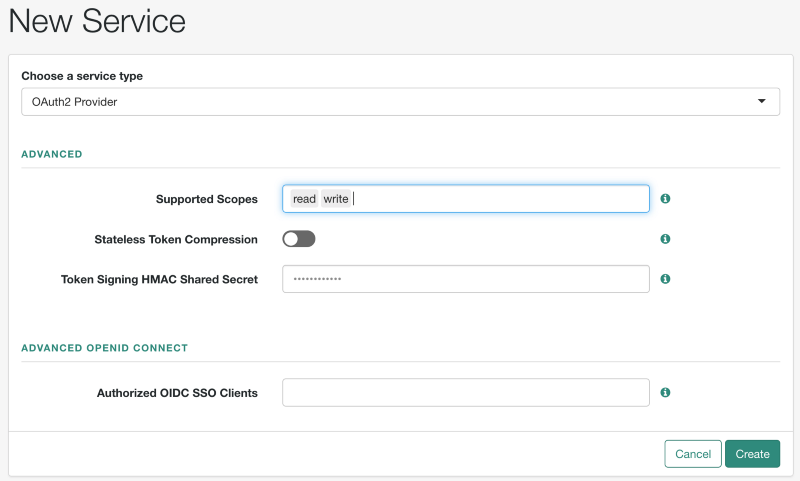
A new OAuth2 provider is created, and the Service dialog box displays.
Activate the Use Stateless Access & Refresh Tokens on/off switch and
select Save Changes:

Create the OAuth 2.0 Client Application
Before we can request an access token, we need to create an OAuth 2.0 client application.
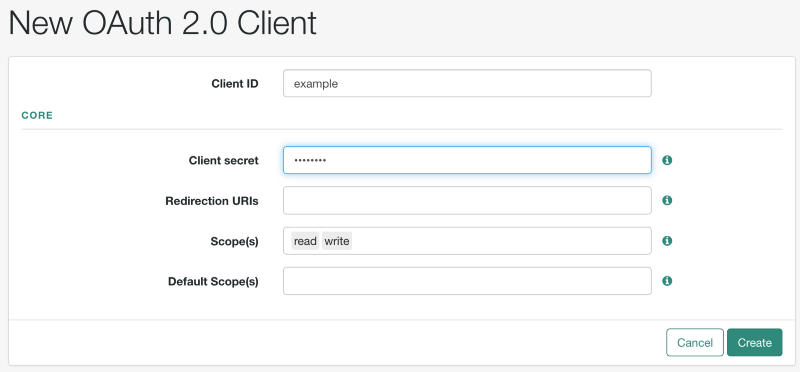
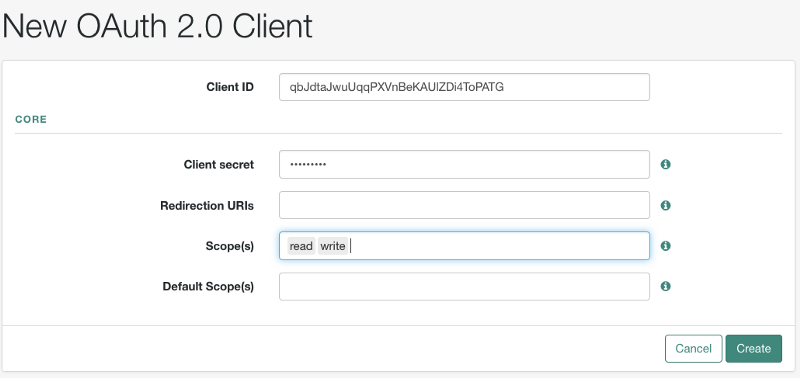
In the Top Level Realm, navigate to Applications > OAuth 2.0. Select Add Client. The New OAuth 2.0 Client dialog box displays:
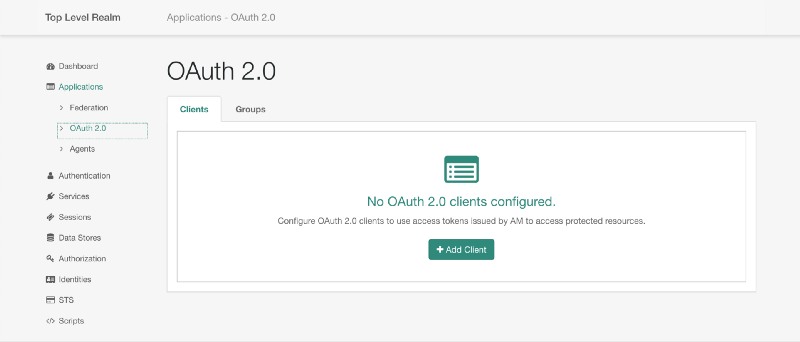
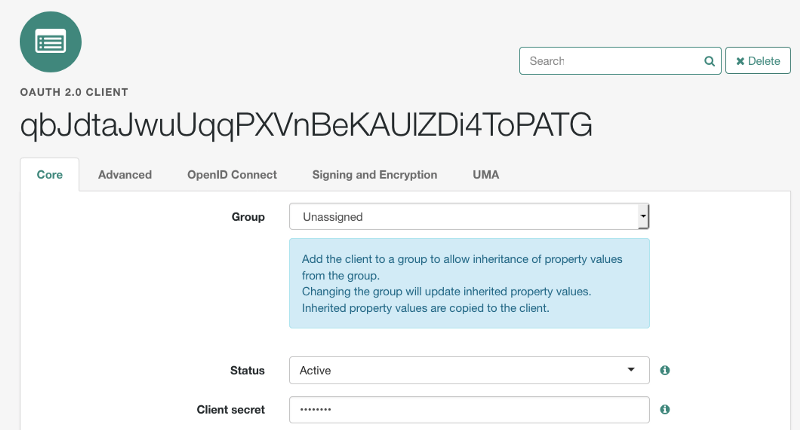
Enter a Client ID and Client secret of your choosing, and the scopes you defined earlier. Select Create. A new OAuth 2.0 client is created:
We are now ready to request an access token. Although AM supports all OAuth grant types, we’ll use the simple password grant type for our request:
curl -X POST \

  http://authtree.openrock.org:8080/openam/oauth2/realms/root/access_token \
  -H 'Content-Type: application/x-www-form-urlencoded' \
  -d 'grant_type=password&username=demo&password=changeit&scope=read&client_id=example&client_secret=password'

{"access_token":"eyJ0eXAiOiJKV1QiLCJ6aXAiOiJOT05FIiwiYWxnIjoiSFMyNTYifQ.eyJzdWIiOiJkZW1vIiwiY3RzIjoiT0FVVEgyX1NUQVRFTEVTU19HUkFOVCIsImF1dGhfbGV2ZWwiOjAsImF1ZGl0VHJhY2tpbmdJZCI6IjY0ZjcxMmFjLWUxZjQtNDJmZi04NTY3LTFlYzg0NGY0YTg5MC0yNDM3NSIsImlzcyI6Imh0dHA6Ly9hdXRodHJlZS5vcGVucm9jay5vcmc6ODA4MC9vcGVuYW0vb2F1dGgyIiwidG9rZW5OYW1lIjoiYWNjZXNzX3Rva2VuIiwidG9rZW5fdHlwZSI6IkJlYXJlciIsImF1dGhHcmFudElkIjoiaktScUd4SkU0ZWFfS21fZkZ0WVREcFhyZDdrIiwiYXVkIjoiZXhhbXBsZSIsIm5iZiI6MTU0NDg5MTU3NywiZ3JhbnRfdHlwZSI6InBhc3N3b3JkIiwic2NvcGUiOlsicmVhZCJdLCJhdXRoX3RpbWUiOjE1NDQ4OTE1NzcsInJlYWxtIjoiLyIsImV4cCI6MTU0NDg5NTE3NywiaWF0IjoxNTQ0ODkxNTc3LCJleHBpcmVzX2luIjozNjAwLCJqdGkiOiI0amxmX25ma01lSFROSFJNUUZuM04yRlY4SEEifQ.8eWcfQ-RGN1X0gNsuMZjf7jkJ7qynbOIrz7QYn34QkY","refresh_token":"...
An access token is created. Next, we will protect our APIs.
Retrieve an Access Token From AM in Apigee
For this next section, follow the instructions in the Apigee documentation: https://docs.apigee.com/api-platform/security/oauth/use-third-party-oauth-system; specifically, the “External Validation of Client Credentials” section.
Apigee calls out to AM to issue an OAuth token, and will use the token it stored as part of the verification process later.
Instead of requesting the access token from ForgeRock directly, you request it using Apigee, which in turn passes the token request on to AM. When AM returns a token, Apigee stores it and presents it back to the calling application.
In Apigee we need to:
-
Make a service callout to verify client credentials and acquire an access token from AM
-
Extract variables to extract the access token
-
Use Assign Message to set a well-known variable called oath_external_authorization_status
-
Use the OAuth 2.0 policy with
GenerateAccessTokenand `ExternalAuthorization `set to true
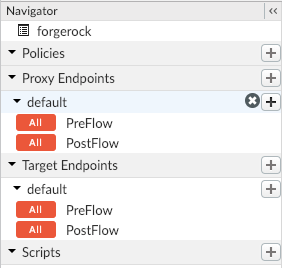
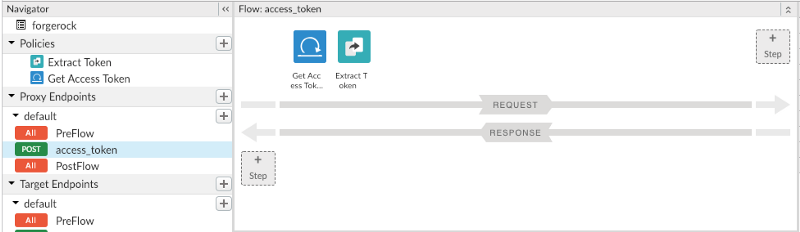
Navigate to the API proxy we created earlier:
Navigate to the DEVELOP tab:
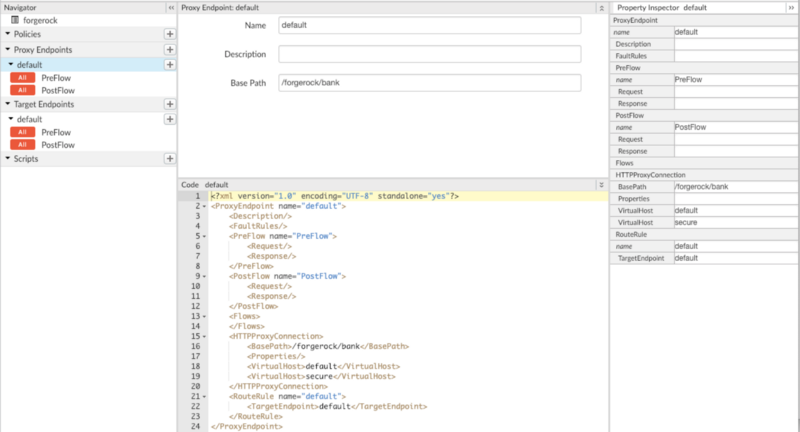
Create a new conditional flow by selecting + on the default pull-down menu:
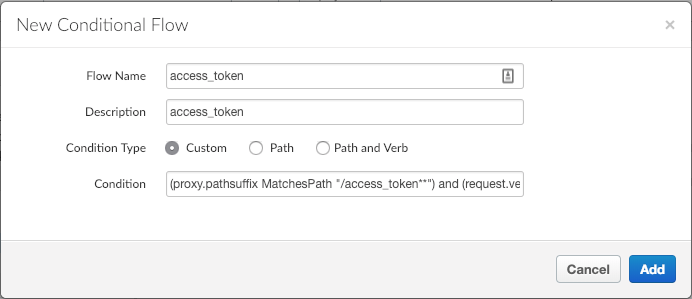
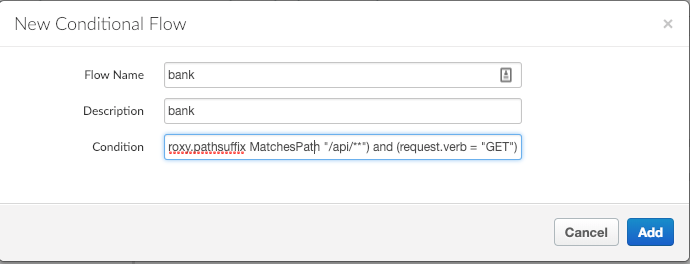
Use the following condition:
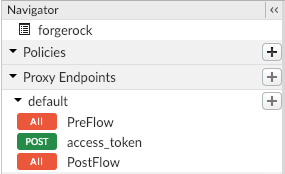
(proxy.pathsuffix MatchesPath “/access_token**”) and (request.verb = “POST”)Select the new `access_token `flow. It should be empty, as shown below:

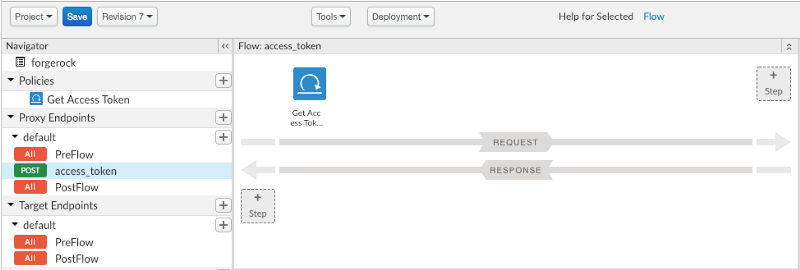
We will now populate this flow by creating policies in Apigee. From the Policies menu, select +:
Add a Service Callout policy and select Add:

Drag and drop the new policy to the access_token flow:
Copy and paste the following policy configuration and select Save:
<?xml version="1.0" encoding="UTF-8" standalone="yes"?>
<ServiceCallout async="false" continueOnError="false" enabled="true" name="Get-Access-Token">
    <DisplayName>Get Access Token</DisplayName>
    <Properties/>
    <Request clearPayload="false" variable="myRequest">
        <Set>
            <Verb>POST</Verb>
            <Headers>
                <Header name="Content-Type">application/x-www-form-urlencoded</Header>
            </Headers>
            <FormParams>
                <FormParam name="grant_type">password</FormParam>
                <FormParam name="username">{request.formparam.username}</FormParam>
                <FormParam name="password">{request.formparam.password}</FormParam>
                <FormParam name="client_id">{request.formparam.client_id}</FormParam>
                <FormParam name="client_secret">{request.formparam.client_secret}</FormParam>
                <FormParam name="scope">{request.formparam.scope}</FormParam>
            </FormParams>
        </Set>
        <IgnoreUnresolvedVariables>false</IgnoreUnresolvedVariables>
    </Request>
    <Response>calloutResponse</Response>
    <HTTPTargetConnection>
        <Properties/>
        <URL>http://authtree.openrock.org:8080/openam/oauth2/realms/root/access_token</URL>
    </HTTPTargetConnection>
</ServiceCallout>
This policy creates a new HTTP POST payload using the form params sent
in the request to the Apigee endpoint. The policy sends the HTTP POST
payload to our HTTPTargetConnection, which in this case, is the AM
access_token endpoint.
Create a new Extract Variables policy using the same process as when you created a new conditional flow and select Add:
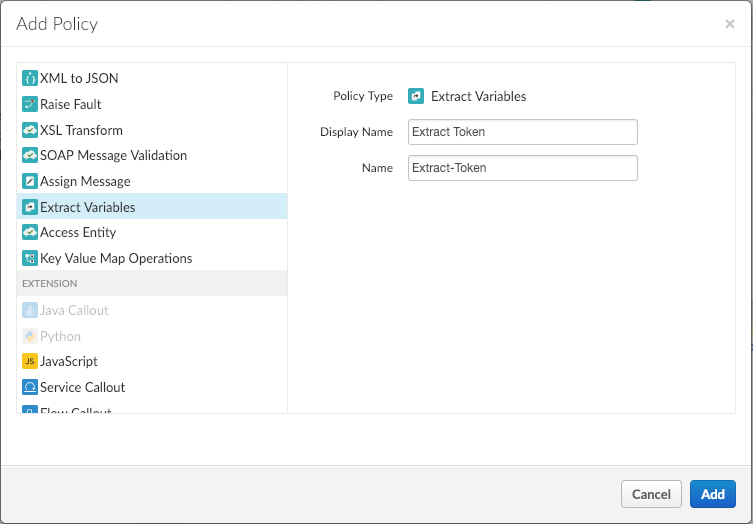
Drag it to the access_token flow:
Copy and paste the following configuration, and save it:
<?xml version="1.0" encoding="UTF-8" standalone="yes"?>
<ExtractVariables async="false" continueOnError="false" enabled="true" name="Extract-Token">
    <DisplayName>Extract Token</DisplayName>
    <IgnoreUnresolvedVariables>true</IgnoreUnresolvedVariables>
    <JSONPayload>
        <Variable name="forgerock_access_token">
            <JSONPath>$.access_token</JSONPath>
        </Variable>
    </JSONPayload>
    <Source clearPayload="false">calloutResponse</Source>
</ExtractVariables>
This policy configuration takes the JSON returned from the call to AM
access_token endpoint and sets it into a variable called
forgerock_access_token .
Create a new Assign Message policy and select Add:
Drag it to the access_token flow:
Copy and paste the following configuration, then save it:
<?xml version="1.0" encoding="UTF-8" standalone="yes"?>
<AssignMessage async="false" continueOnError="false" enabled="true" name="Assign-Message-Set-Variables">
    <DisplayName>Set Ext Authz Status</DisplayName>
    <FaultRules/>
    <Properties/>
    <AssignVariable>
        <Name>oauth_external_authorization_status</Name>
        <Value>true</Value>
    </AssignVariable>
    <IgnoreUnresolvedVariables>true</IgnoreUnresolvedVariables>
    <AssignTo createNew="false" transport="http" type="request"/>
</AssignMessage>
This policy configuration determines whether Apigee will try to validate the client credentials. AM has already performed this validation in our flow, so we can set it to true.
Create an OAuth v2.0 policy and select Add:

Drag it to the access_token flow:
Copy and paste the following configuration, then save it:
<?xml version="1.0" encoding="UTF-8" standalone="yes"?>
<OAuthV2 name="OAuth-v20-Store-External-Token">
    <DisplayName>Store Access Token</DisplayName>
    <Attributes/>
   <ExternalAccessToken>forgerock_access_token</ExternalAccessToken>
    <ExternalAuthorization>true</ExternalAuthorization>
    <Operation>GenerateAccessToken</Operation>
    <GenerateResponse enabled="true">
        <Format>FORM_PARAM</Format>
    </GenerateResponse>
    <ReuseRefreshToken>false</ReuseRefreshToken>
    <StoreToken>true</StoreToken>
    <SupportedGrantTypes>
        <GrantType>password</GrantType>
    </SupportedGrantTypes>
    <Tokens/>
</OAuthV2>
This policy configuration tells Apigee the name of the variable holding the access token; in this case, `forgerock_access_token`. It also sets the supported grant types. More importantly, tells Apigee to store the access token for later validation.
We’re nearly ready to request an access_token. However, before we do
so, we must create a new application in Apigee and ensure AM has a
matching client application.
Ensure all of your changes are saved, then go to Publish:
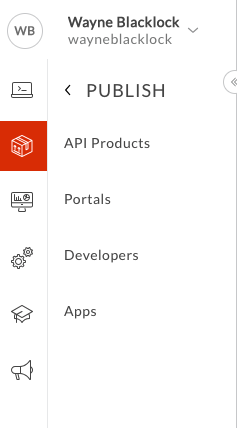
From API Products, select + API Product:
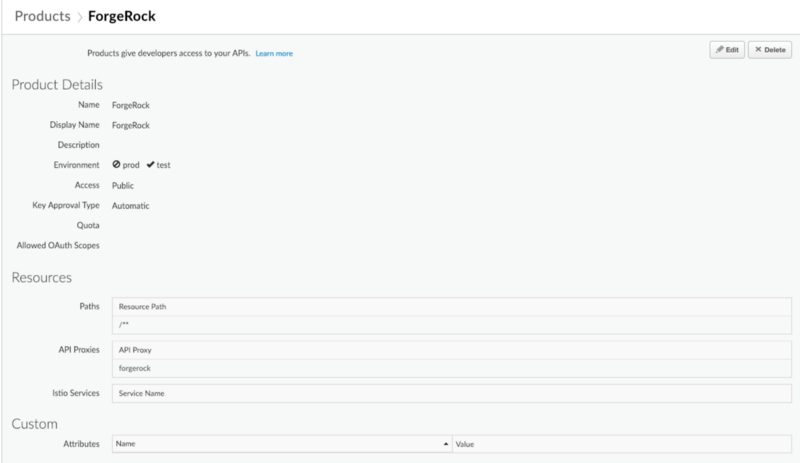
![]()
Give the product a Name, and select the API Proxy created earlier:
Go to Apps:
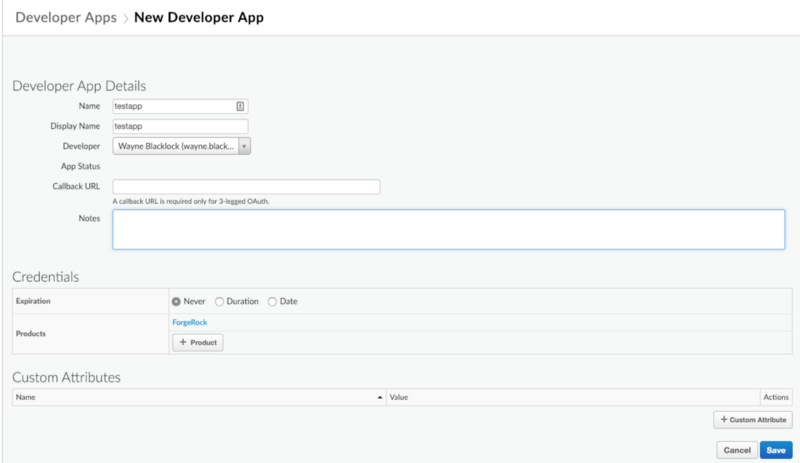
From Apps, select +App:
![]()
Enter a name and add a developer in their respective text areas. In the Products section, select + Product and add the product you created earlier. Select Save. A new developer app is created:
Next, we need a client ID. This is the Consumer Key in Apigee:
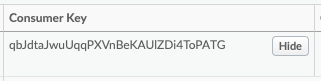
The final step is to access AM again as the administrator, and create a new OAuth 2.0 client application with an ID that matches the Consumer Key:
We should now be able to make a call to our access_token flow in Apigee, which will call AM to retrieve a token:
curl -X POST \
  http://wayneblacklock-test.apigee.net/forgerock/bank/access_token \
  -H 'Content-Type: application/x-www-form-urlencoded' \
  -d 'grant_type=password&username=demo&password=changeit&client_id=qbJdtaJwuUqqPXVnBeKAUlZDi4ToPATG&client_secret=password&scope=read'
{
  "refresh_token_expires_in" : "0",
  "refresh_token_status" : "approved",
  "api_product_list" : "[ForgeRock]",
  "api_product_list_json" : [ "ForgeRock" ],
  "organization_name" : "wayneblacklock",
  "developer.email" : "wayne.blacklock@forgerock.com",
  "token_type" : "BearerToken",
  "issued_at" : "1544966209580",
  "client_id" : "qbJdtaJwuUqqPXVnBeKAUlZDi4ToPATG",
  "access_token" : "eyJ0eXAiOiJKV1QiLCJ6aXAiOiJOT05FIiwiYWxnIjoiSFMyNTYifQ.eyJzdWIiOiJkZW1vIiwiY3RzIjoiT0FVVEgyX1NUQVRFTEVTU19HUkFOVCIsImF1dGhfbGV2ZWwiOjAsImF1ZGl0VHJhY2tpbmdJZCI6IjY0ZjcxMmFjLWUxZjQtNDJmZi04NTY3LTFlYzg0NGY0YTg5MC00MDA1NjAiLCJpc3MiOiJodHRwOi8vYXV0aHRyZWUub3BlbnJvY2sub3JnOjgwODAvb3BlbmFtL29hdXRoMiIsInRva2VuTmFtZSI6ImFjY2Vzc190b2tlbiIsInRva2VuX3R5cGUiOiJCZWFyZXIiLCJhdXRoR3JhbnRJZCI6IlREZHpfV25zNWpkUkQzckdKZDJUcm9fenBVWSIsImF1ZCI6InFiSmR0YUp3dVVxcVBYVm5CZUtBVWxaRGk0VG9QQVRHIiwibmJmIjoxNTQ0OTY2MjA5LCJncmFudF90eXBlIjoicGFzc3dvcmQiLCJzY29wZSI6WyJyZWFkIl0sImF1dGhfdGltZSI6MTU0NDk2NjIwOSwicmVhbG0iOiIvIiwiZXhwIjoxNTQ0OTY5ODA5LCJpYXQiOjE1NDQ5NjYyMDksImV4cGlyZXNfaW4iOjM2MDAsImp0aSI6Ik5VOC03c1JZZWNRSm5kNVRZTWg0bHo5cHJlZyJ9.EGc3lPowM8lEq9CfedaJRaoh8nb5Oyvkcad8R7hdAGo",
  "refresh_token" : "ReG59I7kfQNp9YOGqGQriL0GmAswKbew",
  "application_name" : "d8e53f28-db9c-47f9-81b4-018e863b4d56",
  "scope" : "",
  "refresh_token_issued_at" : "1544966209580",
  "expires_in" : "1799",
  "refresh_count" : "0",
  "status" : "approved"
}“
If we decode the access_token, we can confirm it was issued by AM:
{
  "sub": "demo",
  "cts": "OAUTH2_STATELESS_GRANT",
  "auth_level": 0,
  "auditTrackingId": "64f712ac-e1f4-42ff-8567-1ec844f4a890-400560",
  "iss": "http://authtree.openrock.org:8080/openam/oauth2",
  "tokenName": "access_token",
  "token_type": "Bearer",
  "authGrantId": "TDdz_Wns5jdRD3rGJd2Tro_zpUY",
  "aud": "qbJdtaJwuUqqPXVnBeKAUlZDi4ToPATG",
  "nbf": 1544966209,
  "grant_type": "password",
  "scope": [
    "read"
  ],
  "auth_time": 1544966209,
  "realm": "/",
  "exp": 1544969809,
  "iat": 1544966209,
  "expires_in": 3600,
  "jti": "NU8-7sRYecQJnd5TYMh4lz9preg"
}
We can also use the AM introspect endpoints directly to confirm the validity of the token:
curl -X GET \

  'http://authtree.openrock.org:8080/openam/oauth2/realms/root/tokeninfo?access_token=eyJ0eXAiOiJKV1QiLCJ6aXAiOiJOT05FIiwiYWxnIjoiSFMyNTYifQ.eyJzdWIiOiJkZW1vIiwiY3RzIjoiT0FVVEgyX1NUQVRFTEVTU19HUkFOVCIsImF1dGhfbGV2ZWwiOjAsImF1ZGl0VHJhY2tpbmdJZCI6IjY0ZjcxMmFjLWUxZjQtNDJmZi04NTY3LTFlYzg0NGY0YTg5MC00MDA1NjAiLCJpc3MiOiJodHRwOi8vYXV0aHRyZWUub3BlbnJvY2sub3JnOjgwODAvb3BlbmFtL29hdXRoMiIsInRva2VuTmFtZSI6ImFjY2Vzc190b2tlbiIsInRva2VuX3R5cGUiOiJCZWFyZXIiLCJhdXRoR3JhbnRJZCI6IlREZHpfV25zNWpkUkQzckdKZDJUcm9fenBVWSIsImF1ZCI6InFiSmR0YUp3dVVxcVBYVm5CZUtBVWxaRGk0VG9QQVRHIiwibmJmIjoxNTQ0OTY2MjA5LCJncmFudF90eXBlIjoicGFzc3dvcmQiLCJzY29wZSI6WyJyZWFkIl0sImF1dGhfdGltZSI6MTU0NDk2NjIwOSwicmVhbG0iOiIvIiwiZXhwIjoxNTQ0OTY5ODA5LCJpYXQiOjE1NDQ5NjYyMDksImV4cGlyZXNfaW4iOjM2MDAsImp0aSI6Ik5VOC03c1JZZWNRSm5kNVRZTWg0bHo5cHJlZyJ9.EGc3lPowM8lEq9CfedaJRaoh8nb5Oyvkcad8R7hdAGo' \
  -H 'Content-Type: application/x-www-form-urlencoded' \
  -H 'cache-control: no-cache'
{"sub":"demo","cts":"OAUTH2_STATELESS_GRANT","read":"","auth_level":0,"auditTrackingId":"64f712ac-e1f4-42ff-8567-1ec844f4a890-400560","iss":"http://authtree.openrock.org:8080/openam/oauth2","tokenName":"access_token","token_type":"Bearer","authGrantId":"TDdz_Wns5jdRD3rGJd2Tro_zpUY","access_token":"eyJ0eXAiOiJKV1QiLCJ6aXAiOiJOT05FIiwiYWxnIjoiSFMyNTYifQ.eyJzdWIiOiJkZW1vIiwiY3RzIjoiT0FVVEgyX1NUQVRFTEVTU19HUkFOVCIsImF1dGhfbGV2ZWwiOjAsImF1ZGl0VHJhY2tpbmdJZCI6IjY0ZjcxMmFjLWUxZjQtNDJmZi04NTY3LTFlYzg0NGY0YTg5MC00MDA1NjAiLCJpc3MiOiJodHRwOi8vYXV0aHRyZWUub3BlbnJvY2sub3JnOjgwODAvb3BlbmFtL29hdXRoMiIsInRva2VuTmFtZSI6ImFjY2Vzc190b2tlbiIsInRva2VuX3R5cGUiOiJCZWFyZXIiLCJhdXRoR3JhbnRJZCI6IlREZHpfV25zNWpkUkQzckdKZDJUcm9fenBVWSIsImF1ZCI6InFiSmR0YUp3dVVxcVBYVm5CZUtBVWxaRGk0VG9QQVRHIiwibmJmIjoxNTQ0OTY2MjA5LCJncmFudF90eXBlIjoicGFzc3dvcmQiLCJzY29wZSI6WyJyZWFkIl0sImF1dGhfdGltZSI6MTU0NDk2NjIwOSwicmVhbG0iOiIvIiwiZXhwIjoxNTQ0OTY5ODA5LCJpYXQiOjE1NDQ5NjYyMDksImV4cGlyZXNfaW4iOjM2MDAsImp0aSI6Ik5VOC03c1JZZWNRSm5kNVRZTWg0bHo5cHJlZyJ9.EGc3lPowM8lEq9CfedaJRaoh8nb5Oyvkcad8R7hdAGo","aud":"qbJdtaJwuUqqPXVnBeKAUlZDi4ToPATG","nbf":1544966209,"grant_type":"password","scope":["read"],"auth_time":1544966209,"realm":"/","exp":1544969809,"iat":1544966209,"expires_in":3600,"jti":"NU8-7sRYecQJnd5TYMh4lz9preg"}“
Protecting the API with OAuth 2.0
We can now retrieve an access token—we just need a protected API to access it with. Let’s use OAuth 2.0 to enable the API mentioned earlier in this article.
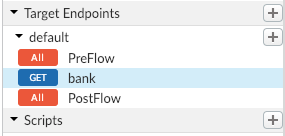
Create a new conditional flow on the default Target Endpoint and select Add:
Create a new OAuth v2.0 policy and select Add:
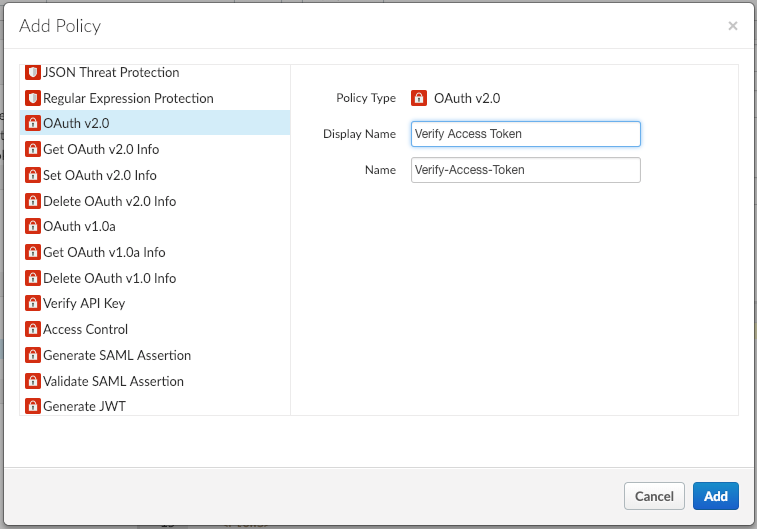
Configure the policy as follows:
<?xml version="1.0" encoding="UTF-8" standalone="yes"?>
<OAuthV2 async="false" continueOnError="false" enabled="true" name="Verify-Access-Token">
    <DisplayName>Verify Access Token</DisplayName>
    <Properties/>
    <Attributes/>
    <ExternalAuthorization>true</ExternalAuthorization>
    <Operation>VerifyAccessToken</Operation>
    <SupportedGrantTypes/>
    <GenerateResponse enabled="false"/>
    <Tokens/>
</OAuthV2>
Drag it over to the flow:

Try accessing the API. You should see an error from Apigee indicating that our access token is invalid:
curl -X GET \
  http://wayneblacklock-test.apigee.net/forgerock/bank/api/wblacklock
{"fault":{"faultstring":"Invalid access token","detail":{"errorcode":"oauth.v2.InvalidAccessToken"}}}“
The access token has probably expired, so repeat the call to the access_token flow to generate a new access token. When the access token is generated, try calling the API using it for authorization:
curl -X GET \
  http://wayneblacklock-test.apigee.net/forgerock/bank/api/wblacklock \
  -H 'Authorization: Bearer eyJ0eXAiOiJKV1QiLCJ6aXAiOiJOT05FIiwiYWxnIjoiSFMyNTYifQ.eyJzdWIiOiJkZW1vIiwiY3RzIjoiT0FVVEgyX1NUQVRFTEVTU19HUkFOVCIsImF1dGhfbGV2ZWwiOjAsImF1ZGl0VHJhY2tpbmdJZCI6IjY0ZjcxMmFjLWUxZjQtNDJmZi04NTY3LTFlYzg0NGY0YTg5MC00MTQ4NDEiLCJpc3MiOiJodHRwOi8vYXV0aHRyZWUub3BlbnJvY2sub3JnOjgwODAvb3BlbmFtL29hdXRoMiIsInRva2VuTmFtZSI6ImFjY2Vzc190b2tlbiIsInRva2VuX3R5cGUiOiJCZWFyZXIiLCJhdXRoR3JhbnRJZCI6IkJMMjFkNXlPU0pfeldkYkRmSjIxX05aVWhHMCIsImF1ZCI6InFiSmR0YUp3dVVxcVBYVm5CZUtBVWxaRGk0VG9QQVRHIiwibmJmIjoxNTQ0OTY5MDQ4LCJncmFudF90eXBlIjoicGFzc3dvcmQiLCJzY29wZSI6WyJyZWFkIl0sImF1dGhfdGltZSI6MTU0NDk2OTA0OCwicmVhbG0iOiIvIiwiZXhwIjoxNTQ0OTcyNjQ4LCJpYXQiOjE1NDQ5NjkwNDgsImV4cGlyZXNfaW4iOjM2MDAsImp0aSI6ImRMSXBVcXVNTEprUURHckwzMEphVVc4NEc0MCJ9.qcO5cbguA-Y2A4ogHpX8eAiZqxxc1twSya-b7JxyiYQ'
{"_id":"wblacklock","_rev":"5","frdpmfapref":"push","resourceSet...}
That’s it. We are now accessing the same API as we were at the beginning of this article, but now with the access token needed to access the API, generated by AM.
While we could do more, we’ve kept it simple to get you up and running, and show you that integration is possible.