Use case: View the riskiest users and locations based on past activity
Author: |
Lucy Billington |
Created at: |
Feb 2023 |
Updated at: |
Feb 2023 |
Use case overview
The ability to view which users and locations are risky based on past activity is a common use case that can be easily achieved using the Autonomous Access service in ForgeRock Identity Cloud.
For this use case, we’ll demonstrate how you can use the Autonomous Access Risk dashboard to get a view of anomalous and risky access attempts by users and get context on threats.
NOTE: You’ll need an Identity Cloud tenant with the Autonomous Access add-on service.
Autonomous Access Risk dashboard
For a comprehensive overview of the Risk dashboard, see A tour of the Risk dashboard.
To access the Risk dashboard and view event details:
-
Sign in to the Identity Cloud admin UI using your admin tenant URL, in the format
https://<tenant-name>/am/XUI/?realm=/#/. -
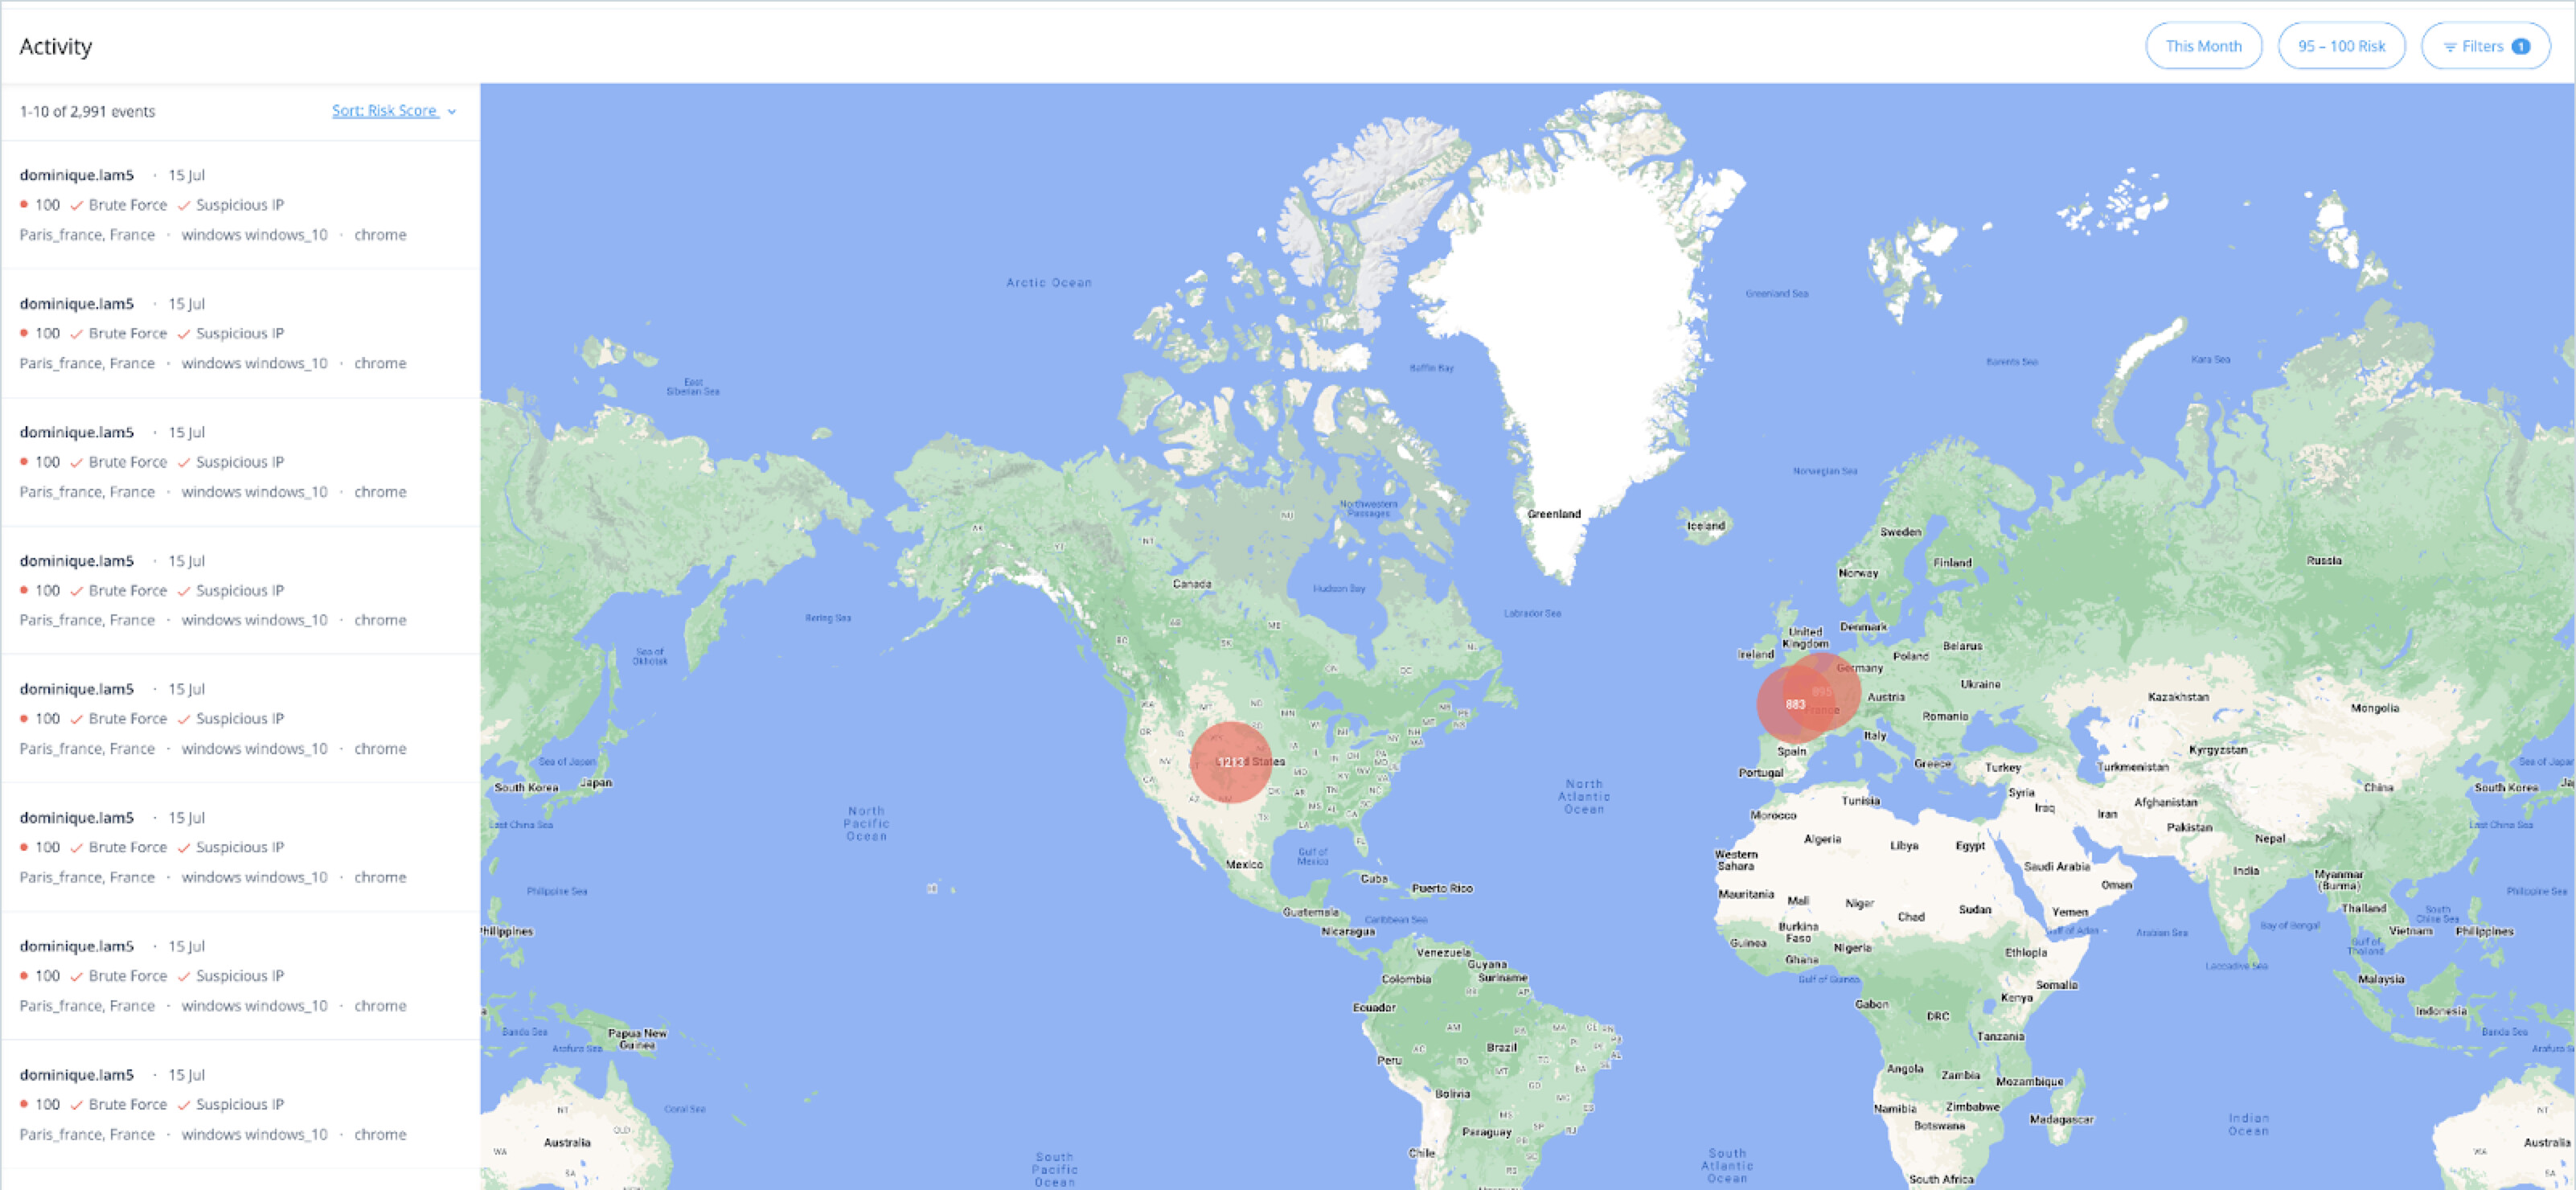
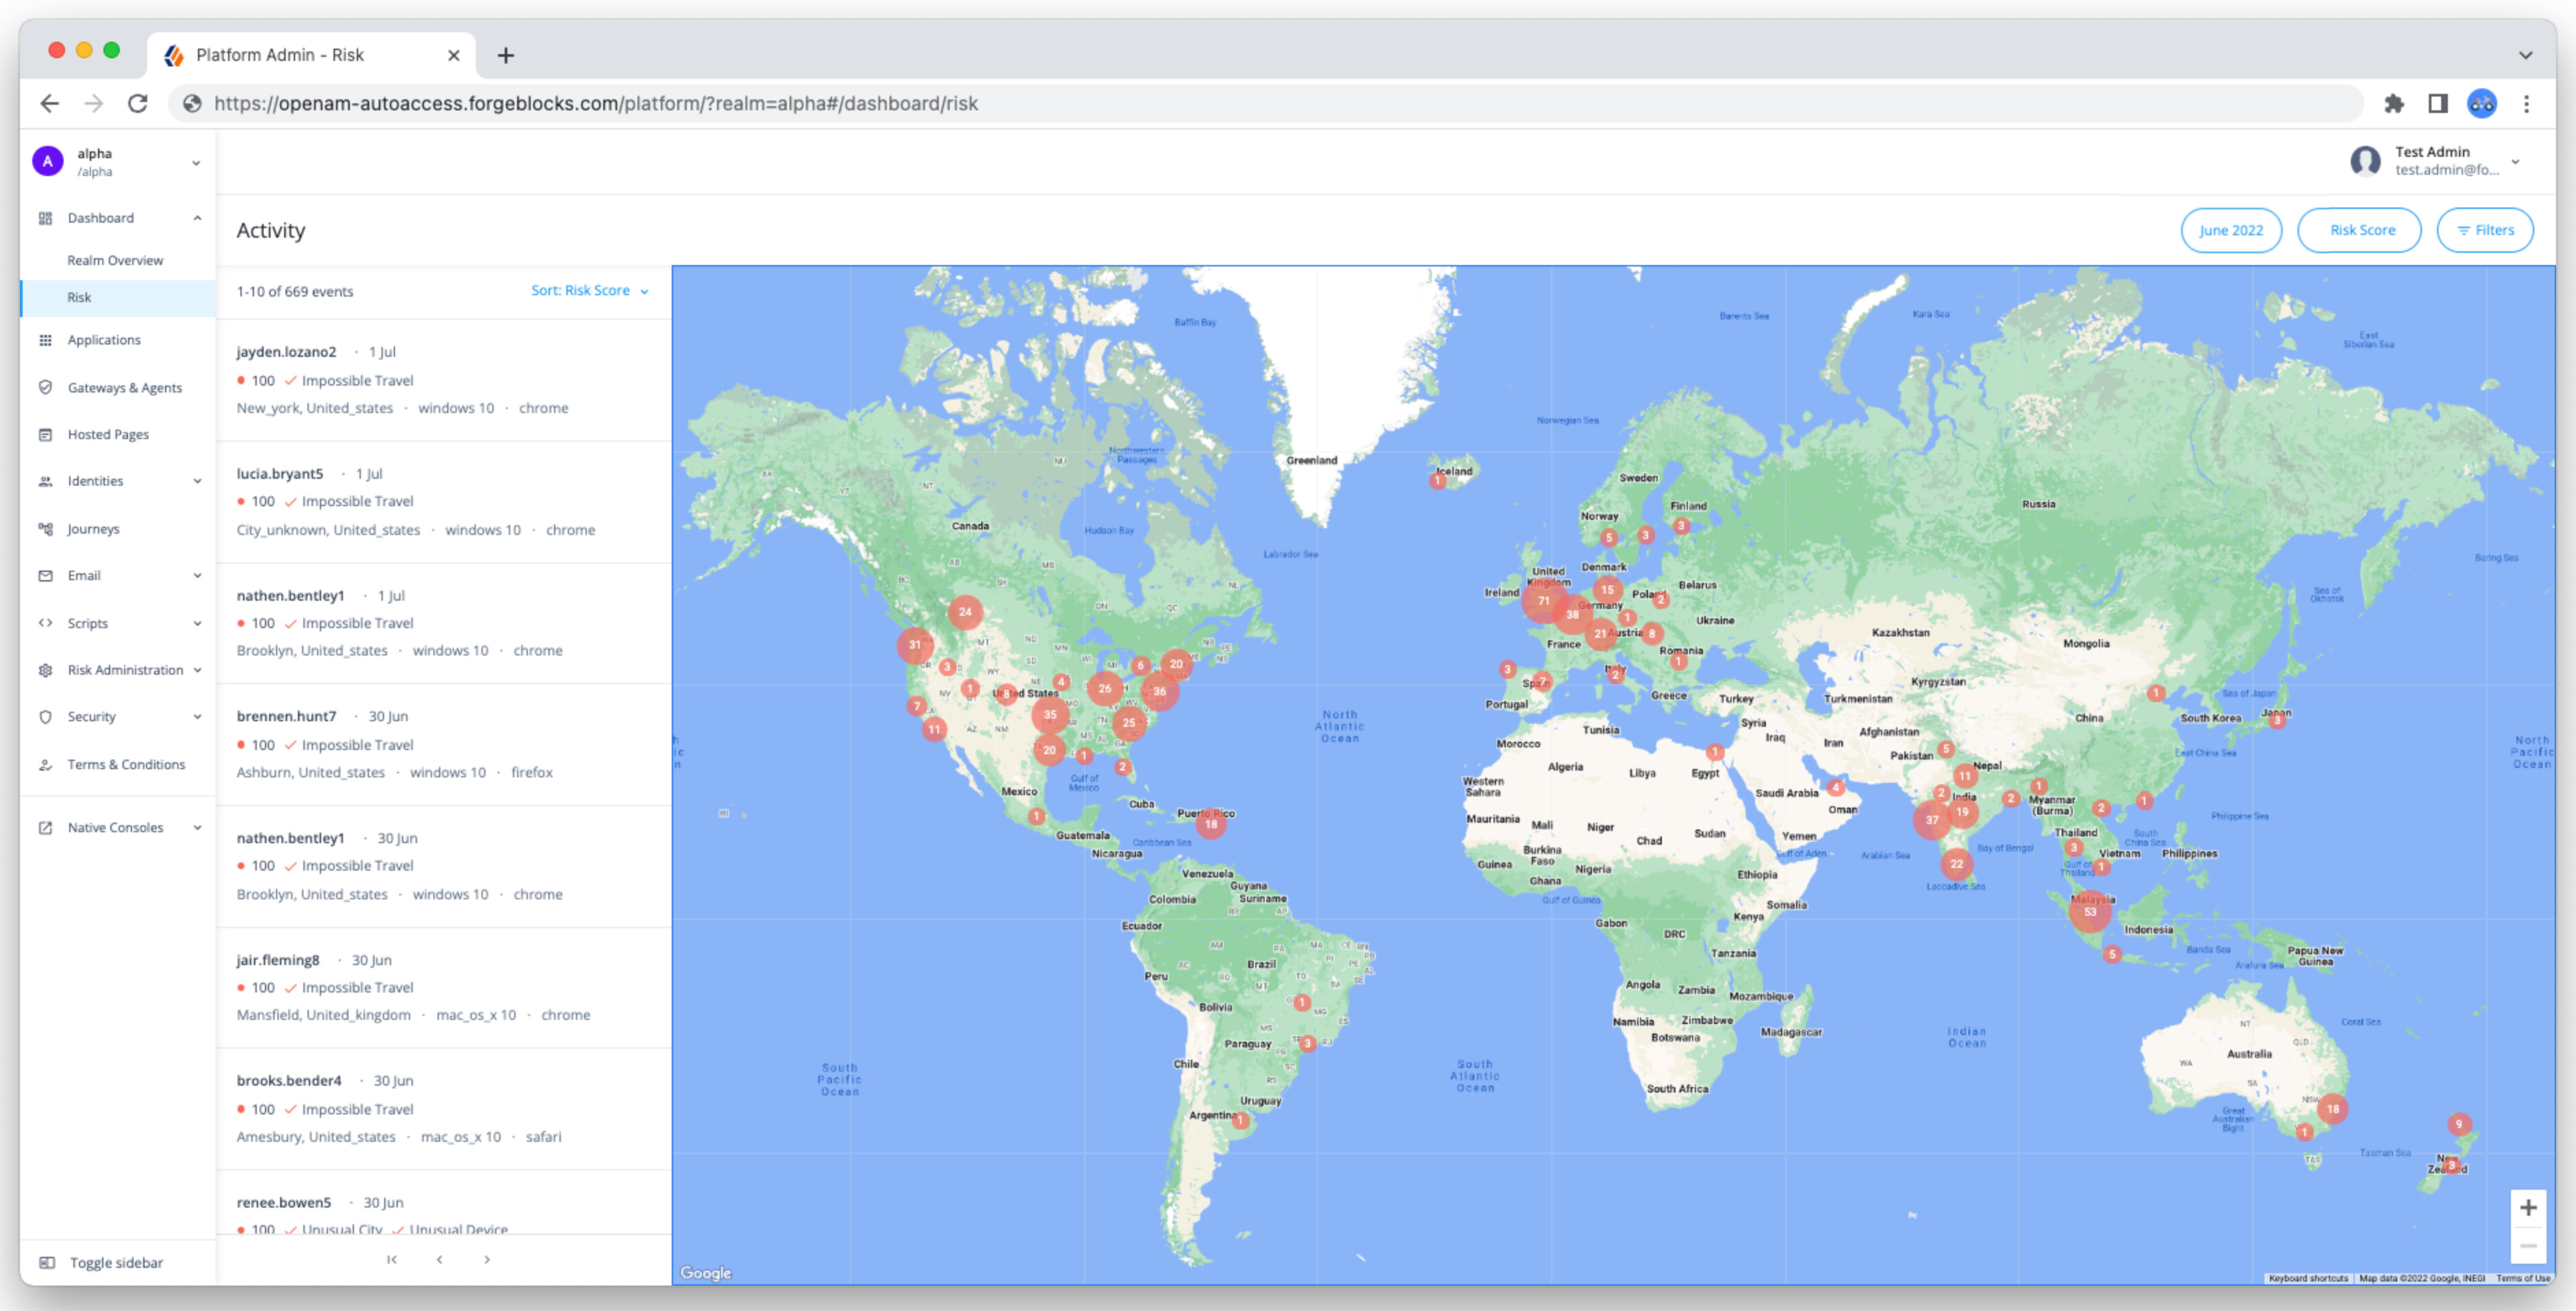
Go to Dashboard > Risk.
The dashboard shows the geographic locations of high-risk access events.
-
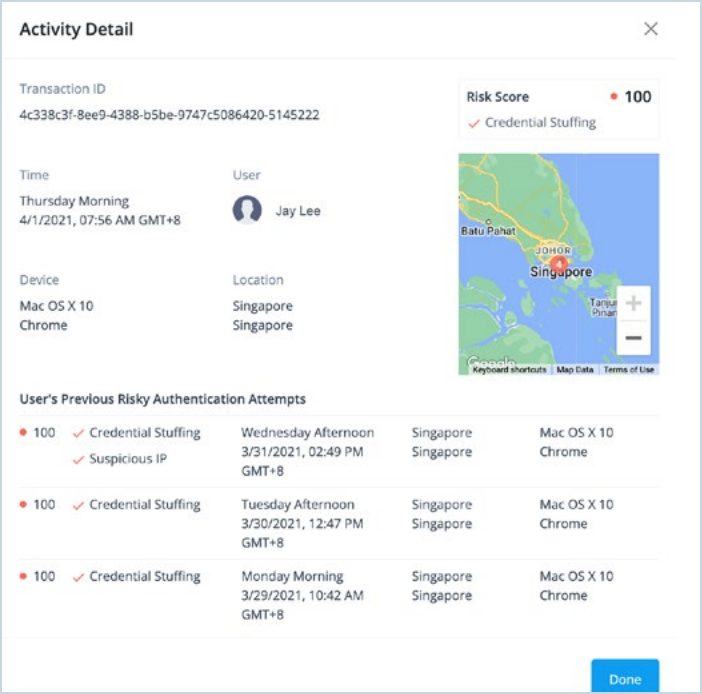
Click on an event to get a detailed view of the activity, including:
-
Date and time of the occurrence
-
Risk score
-
Type of risk threat
-
Geolocation
-
Device and browser type
-
User’s previous risky authentication attempts
For example:
-
Filtering the data
You can filter the results shown on the Risk dashboard by date range, risk score, attributes and risk reason.
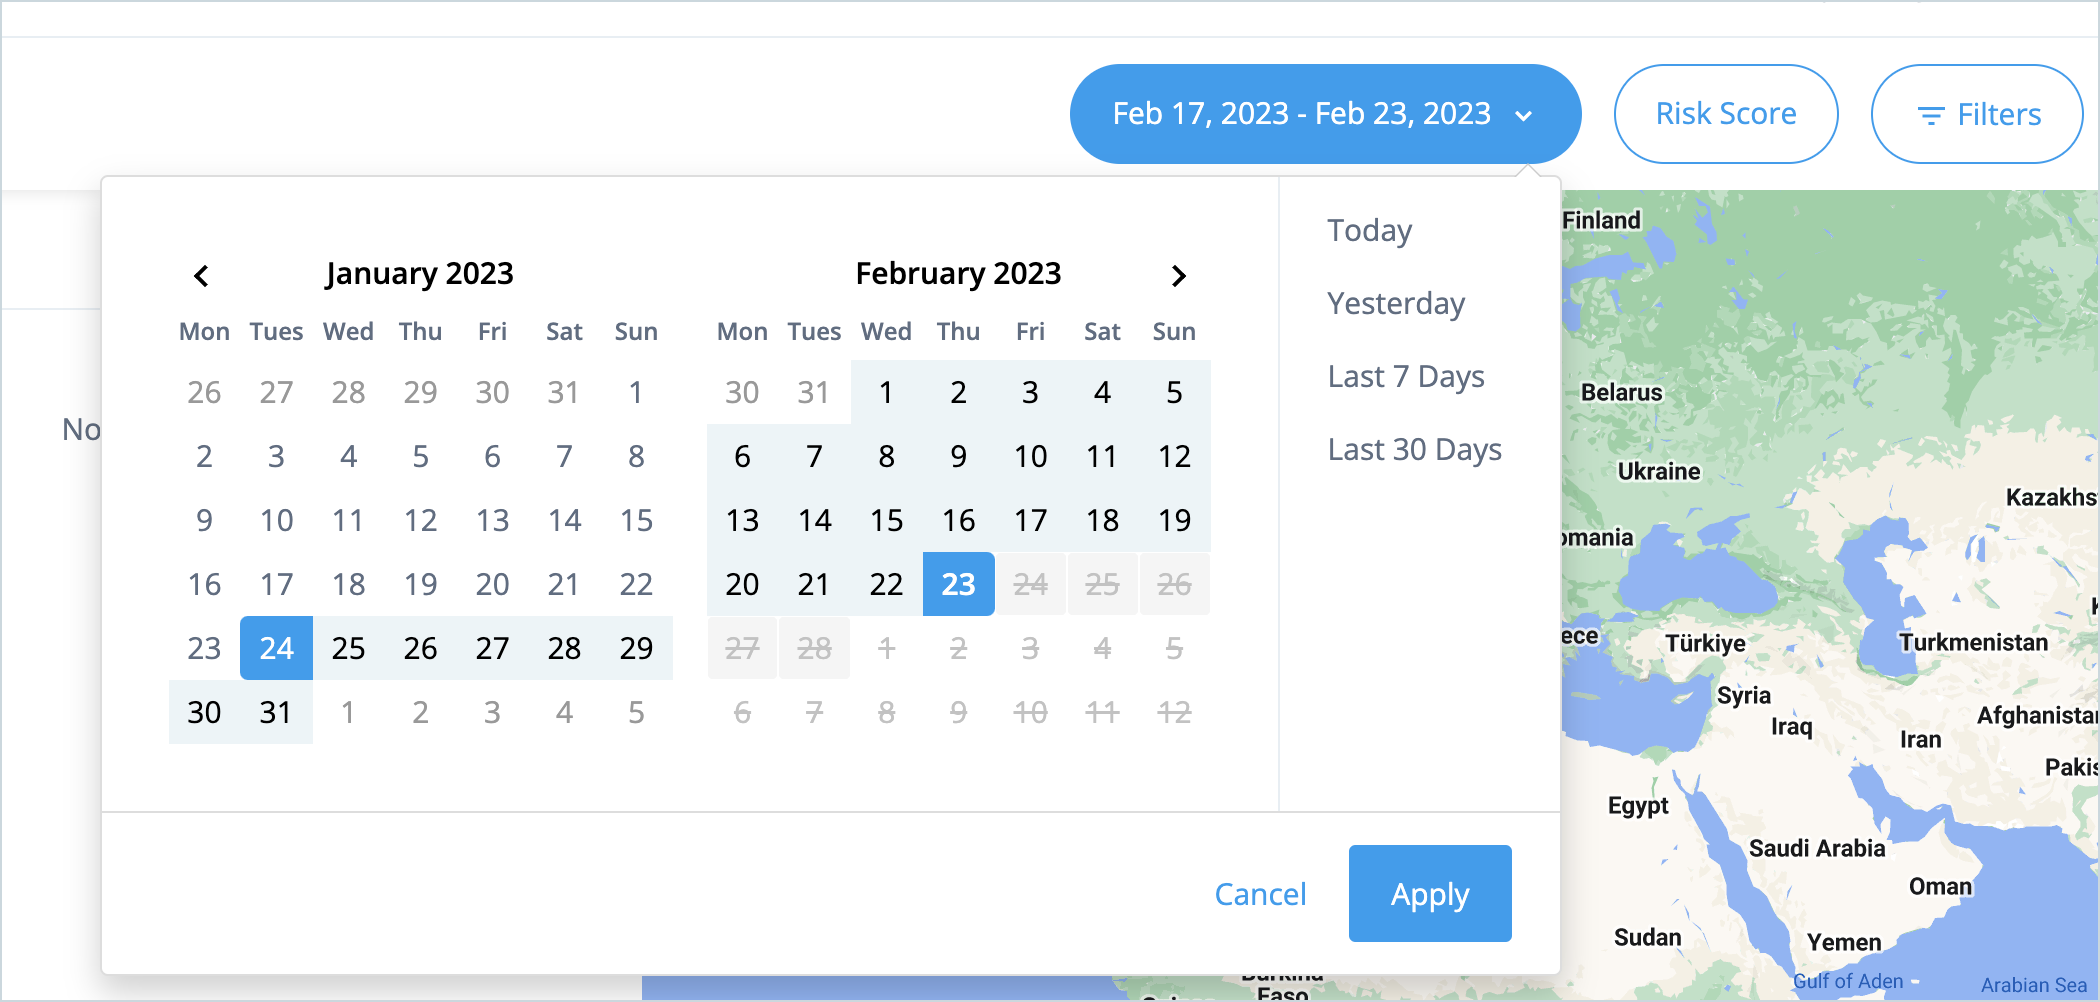
To filter on a date range:
-
Click the Date filter, select the required date range, and click Apply.
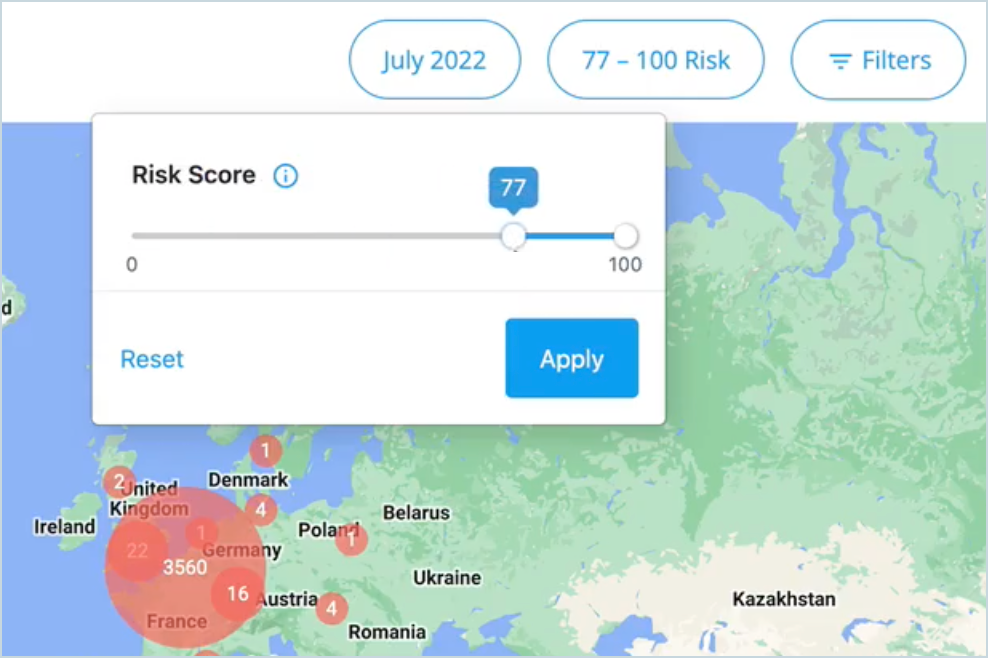
To filter on risk score:
-
Click the Risk filter, drag the marker to the required risk score range, and click Apply.
To filter on attributes and risk reason:
-
Click the Filters filter.
-
Select the feature to filter on (city, country, device, device type, OS, OS version, time of day, user agent, user ID) and select a value.

-
Select the risk reason(s) to filter on. You can select multiple risk reasons.
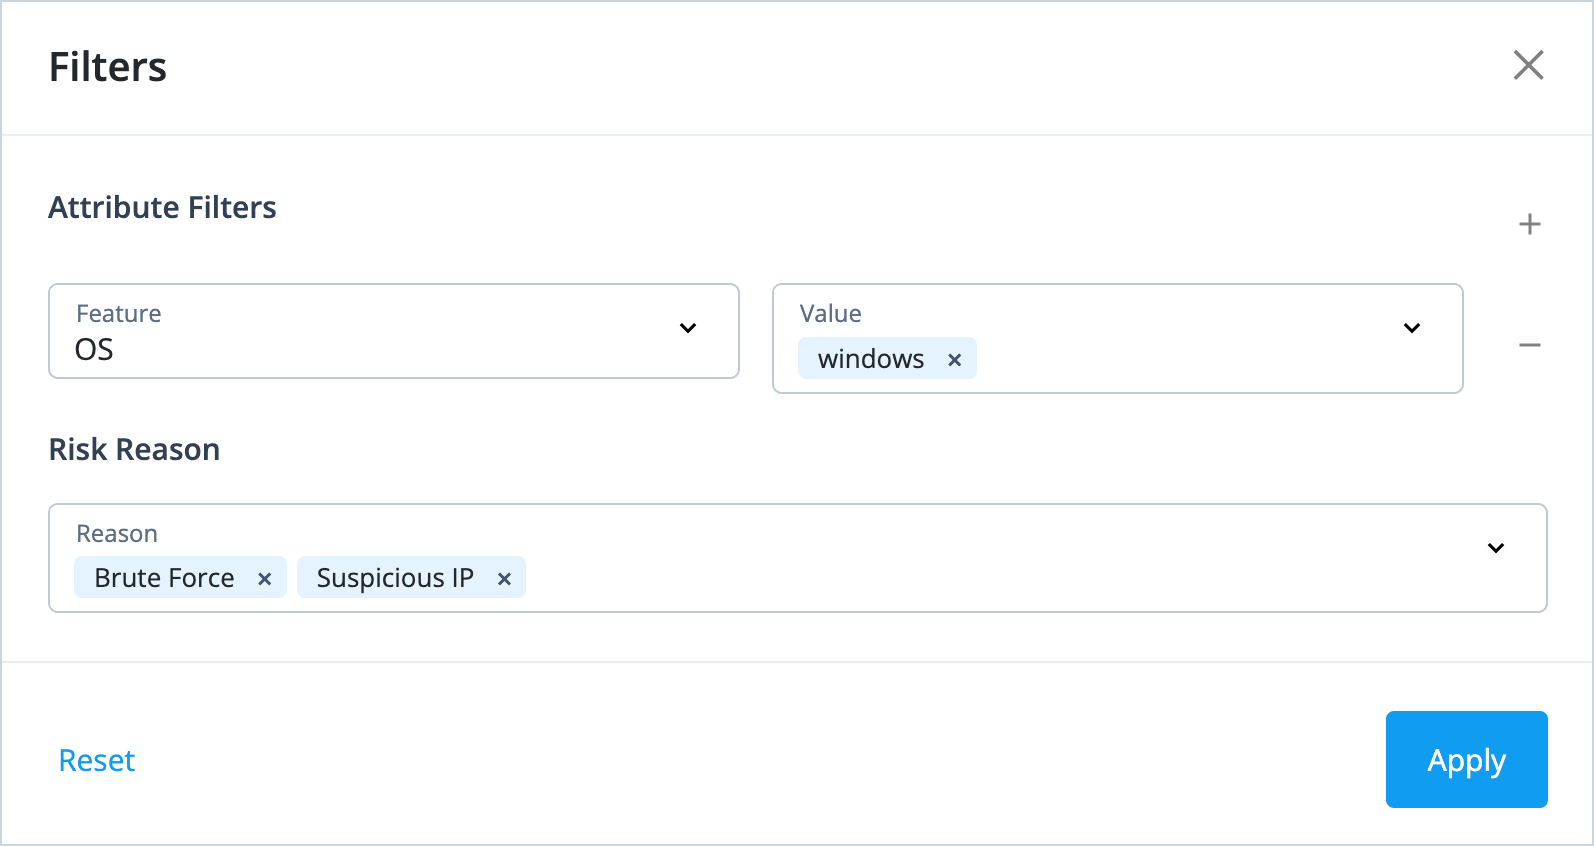
-
Click Apply.
The filtered results are displayed on the dashboard.