Getting started with the ForgeRock Identity Cloud REST API: Part 4 -
Author: |
Rajesh Rajasekharan |
Created at: |
Jul 2023 |
Updated at: |
Mar 2024 |
This is Part 4 of 8 in the series Getting started with the ForgeRock Identity Cloud REST API.
Before you begin
This guide assumes that you have already prepared the ForgeRock Identity Cloud Postman Collection environment and run the collection prerequisites. See Part 1 - Introduction and Part 2 - Prerequisite requests for further information.
User self-service ~ 5 min
-
In Postman, select the ForgeRock Identity Cloud Postman Collection, and expand the User Self-Service section.
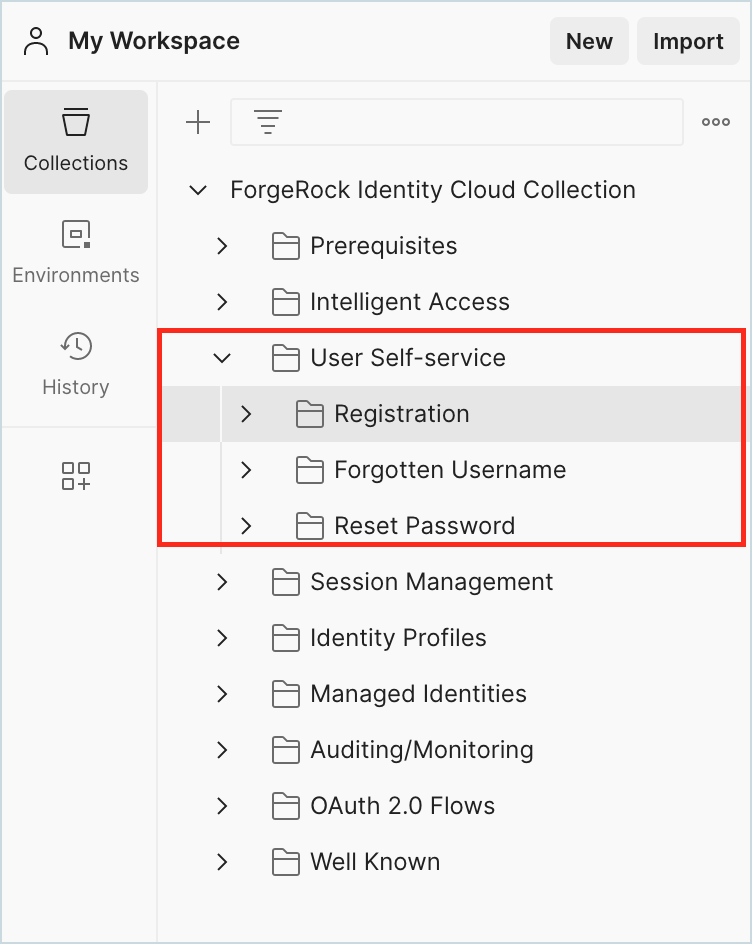
Identity Cloud offers options for users to self-register themselves into the system. It also has other self-service capabilities to help users retrieve their forgotten username or reset their forgotten password. The examples in the User Self-Service section of Identity Cloud Postman Collection use the “json/authenticate” endpoint of Identity Cloud, pointing to some default authentication journeys available.
-
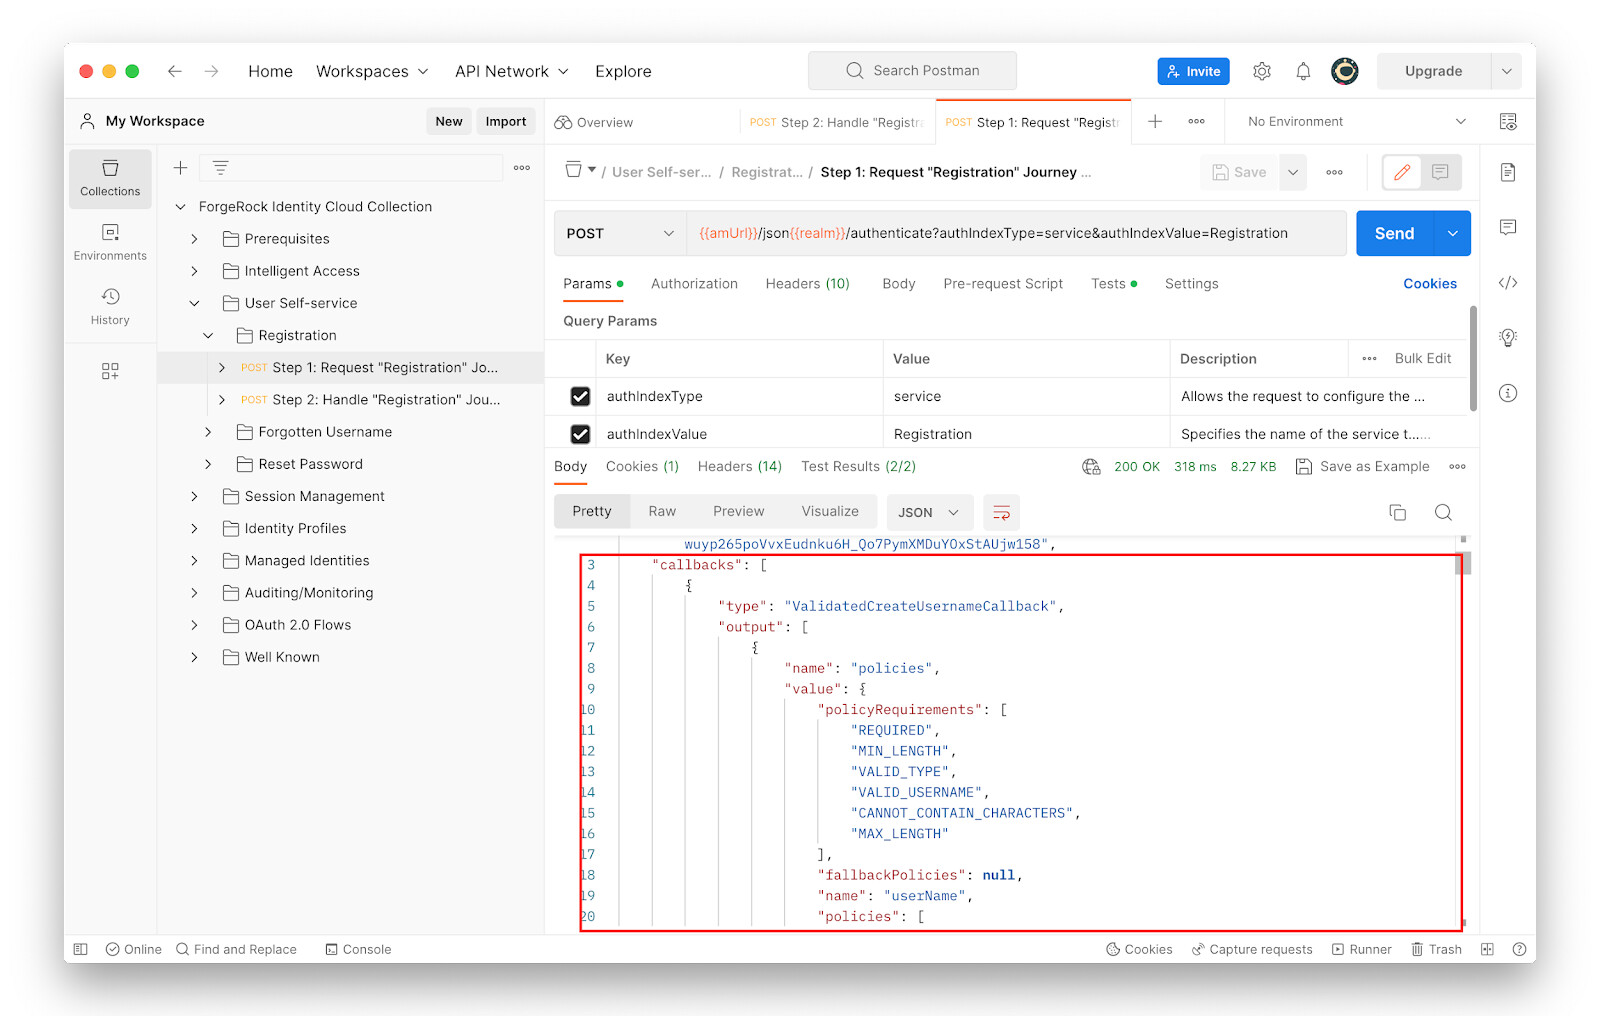
Go to User Self-Service > Registration > Step 1 and study the following:
-
The request type: POST
-
The request URL:
{{amUrl}}/json{{realm}}/authenticate?authIndexType=service&authIndexValue=Registration -
The Headers section
Note that the
authIndexValueparameter in the above HTTP endpoint points to an authentication journey named “Registration” in Identity Cloud.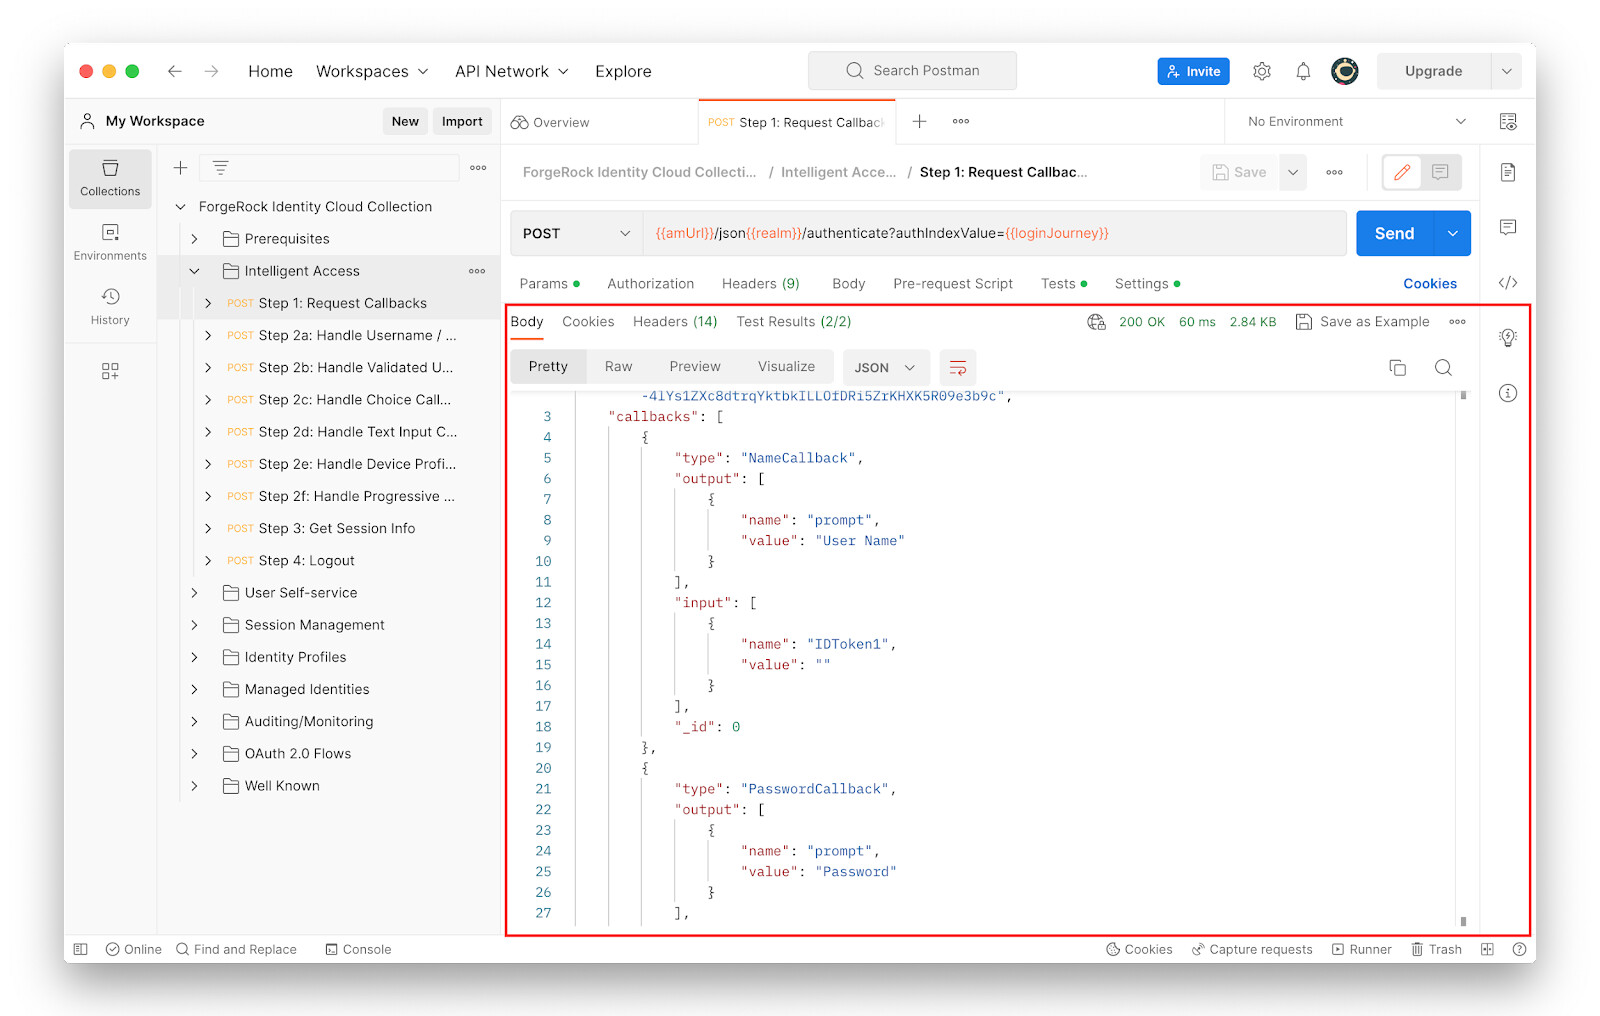
-
-
To explore the Registration journey used in this section, log into the Identity Cloud Admin UI and, in the alpha realm, go to Journeys > Registration. Click on the journey to view it.

-
The Page Node of the Registration journey expects certain inputs from the user like a username, the first name, the last name, a password and answers to security questions. A user who accesses the Registration journey to create an Identity Cloud account will see the following page.
Use the preview URL of the journey to get to this page.
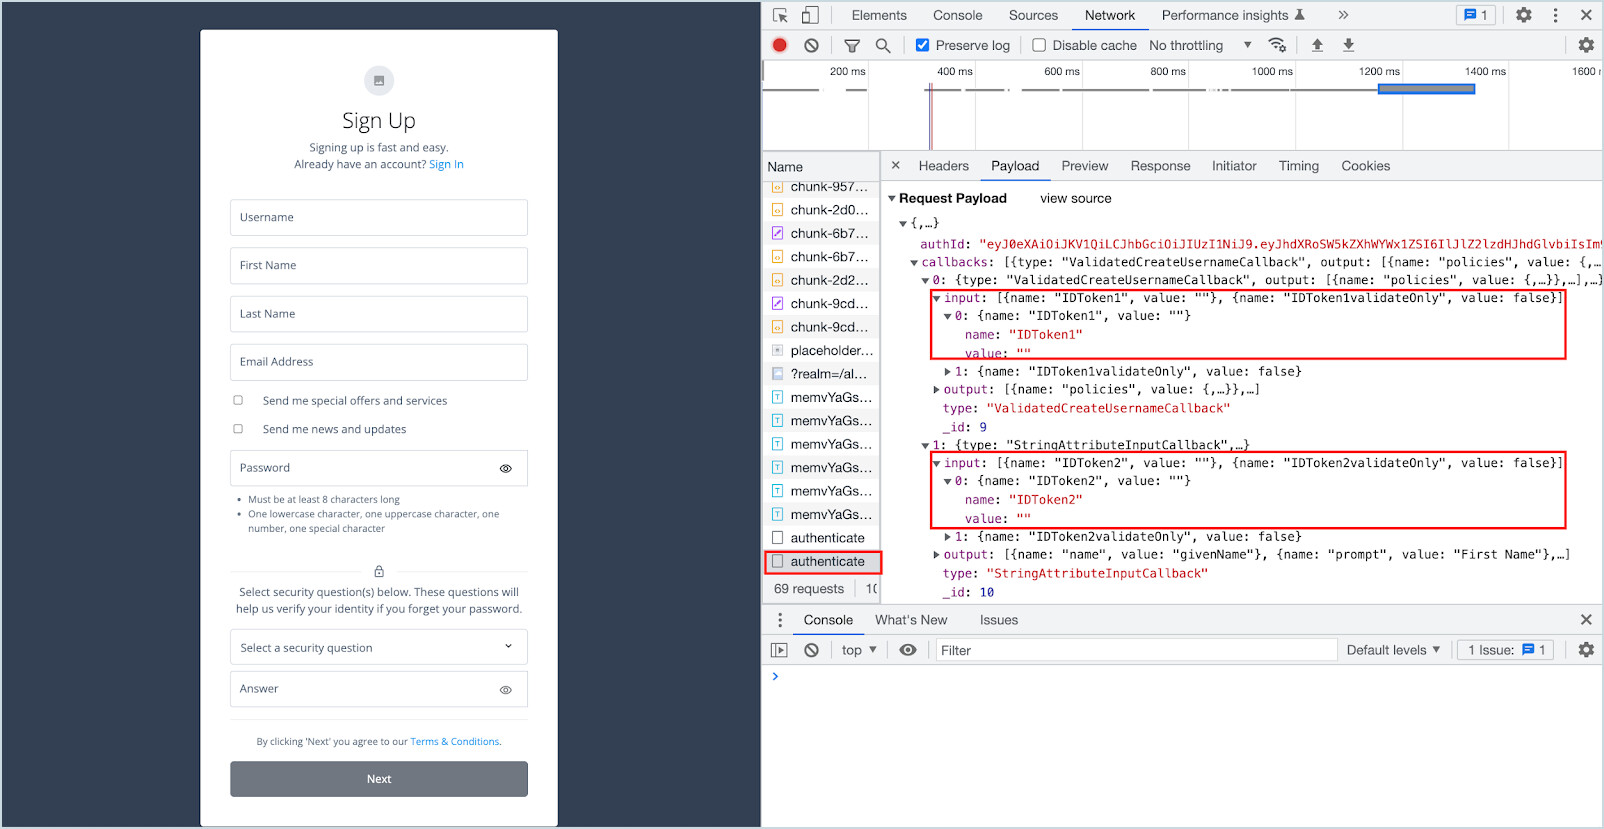
As shown in the browser developer tool in the image above, a request to the “/json/authenticate” endpoint of Identity Cloud, specifically to the Registration journey, returns a set of callbacks (authentication requirements). Each callback corresponds to an input expected from the user. In this example, the “Username” text field is “ValidatedCreateUsernameCallback” and is mapped to the input “IDToken1”. The “First Name” text field is “StringAttributeInputCallback” and is mapped to the input “IDToken2”.
-
A REST request to the “/json/authenticate” endpoint, pointing to the Registration journey, returns a set of callbacks. The user then has to send another request to the “/json/authenticate” endpoint, pointing to the Registration journey supplying values for the callbacks (username, first name, last name, etc).
-
In Postman, go to User Self-Service > Registration > Step 1 and click Send.
The response returns a set of callbacks.
-
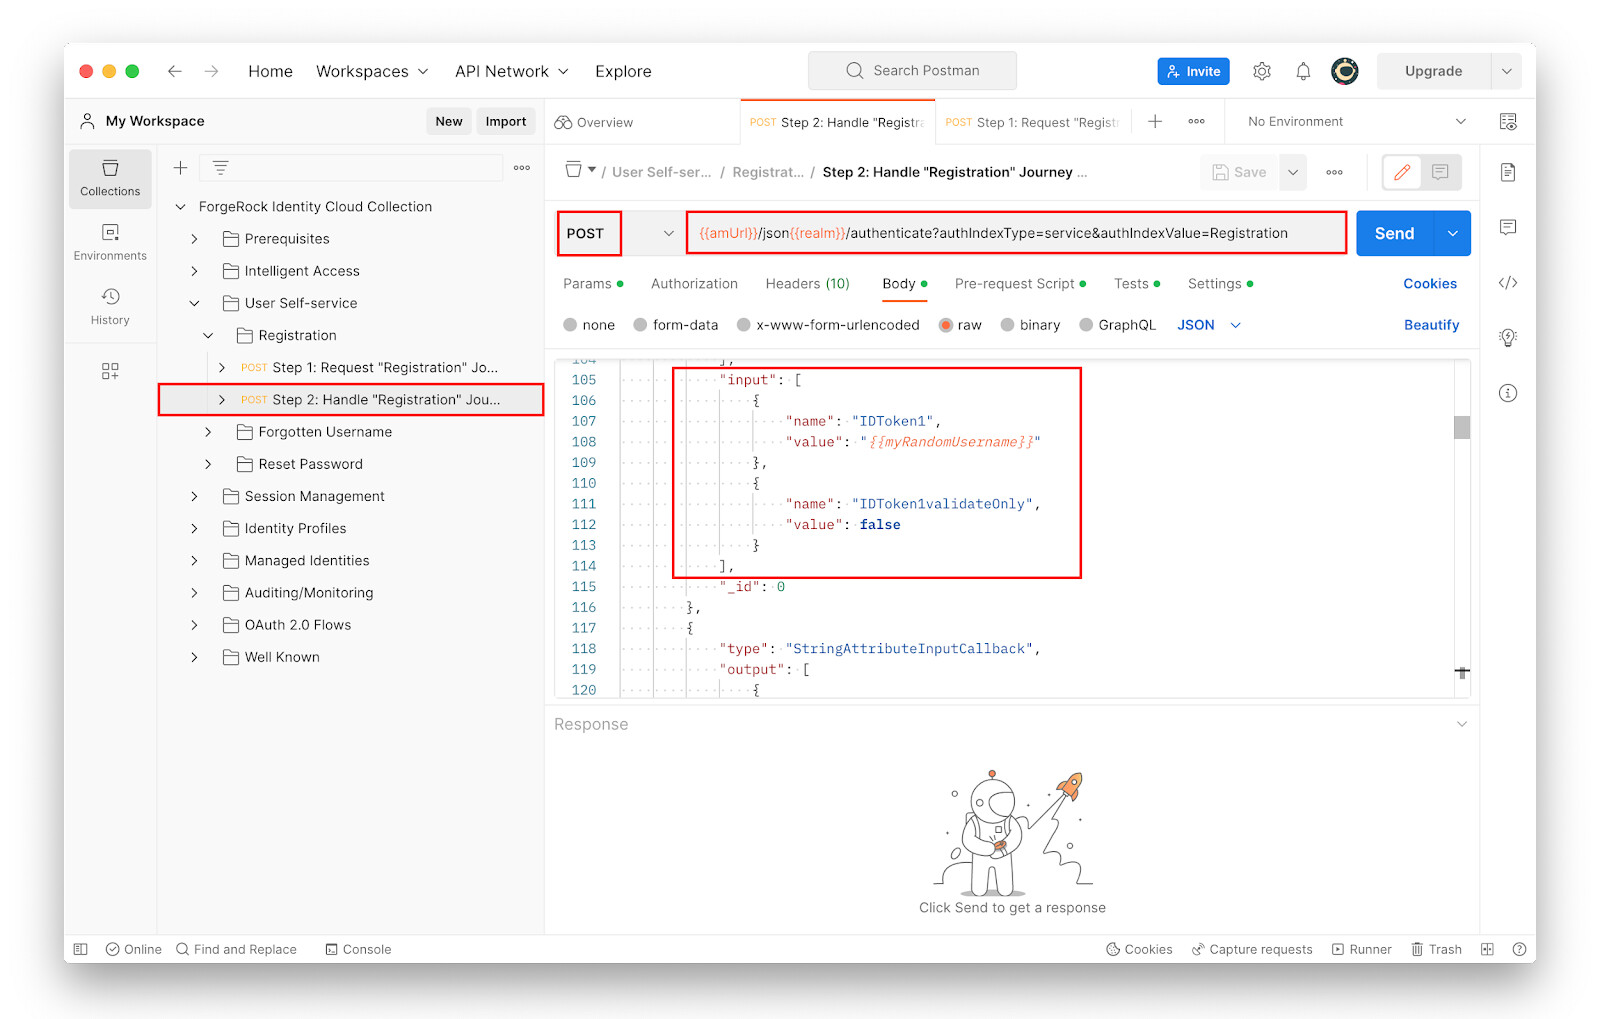
Go to User Self-Service > Registration > Step 2 and study the following:
-
The request type: POST
-
The request URL:
{{amUrl}}/json{{realm}}/authenticate?authIndexType=service&authIndexValue=Registration -
The request body, the input section for
IDToken1through toIDToken8corresponds to various profile attributes of the self-registering user.Note, some attribute values are randomly generated.
-
-
In the request body, add the following block just below the “predefinedQuestions” section within the “kbaCreateCallback” section. Don’t forget to add a “,” after the closing curly bracket below the “predefinedQuestions”. Use the screenshot below as a reference.
   {
          "name":"allowUserDefinedQuestions",
          "value":true
    }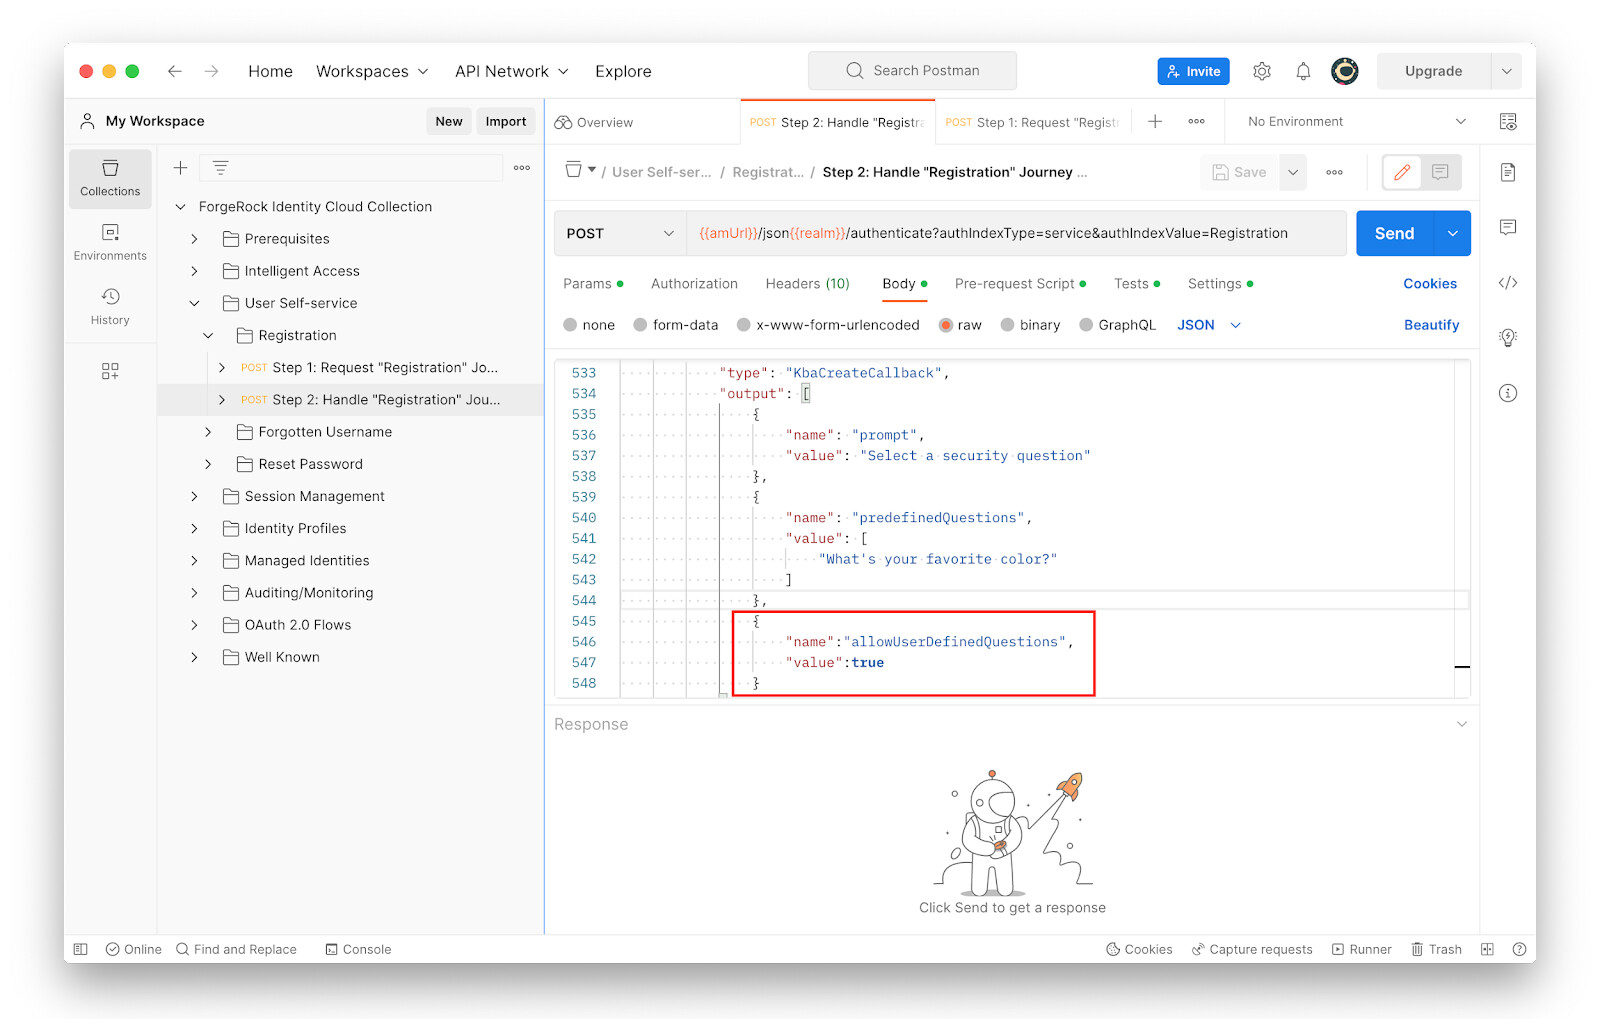
-
Save the changes
-
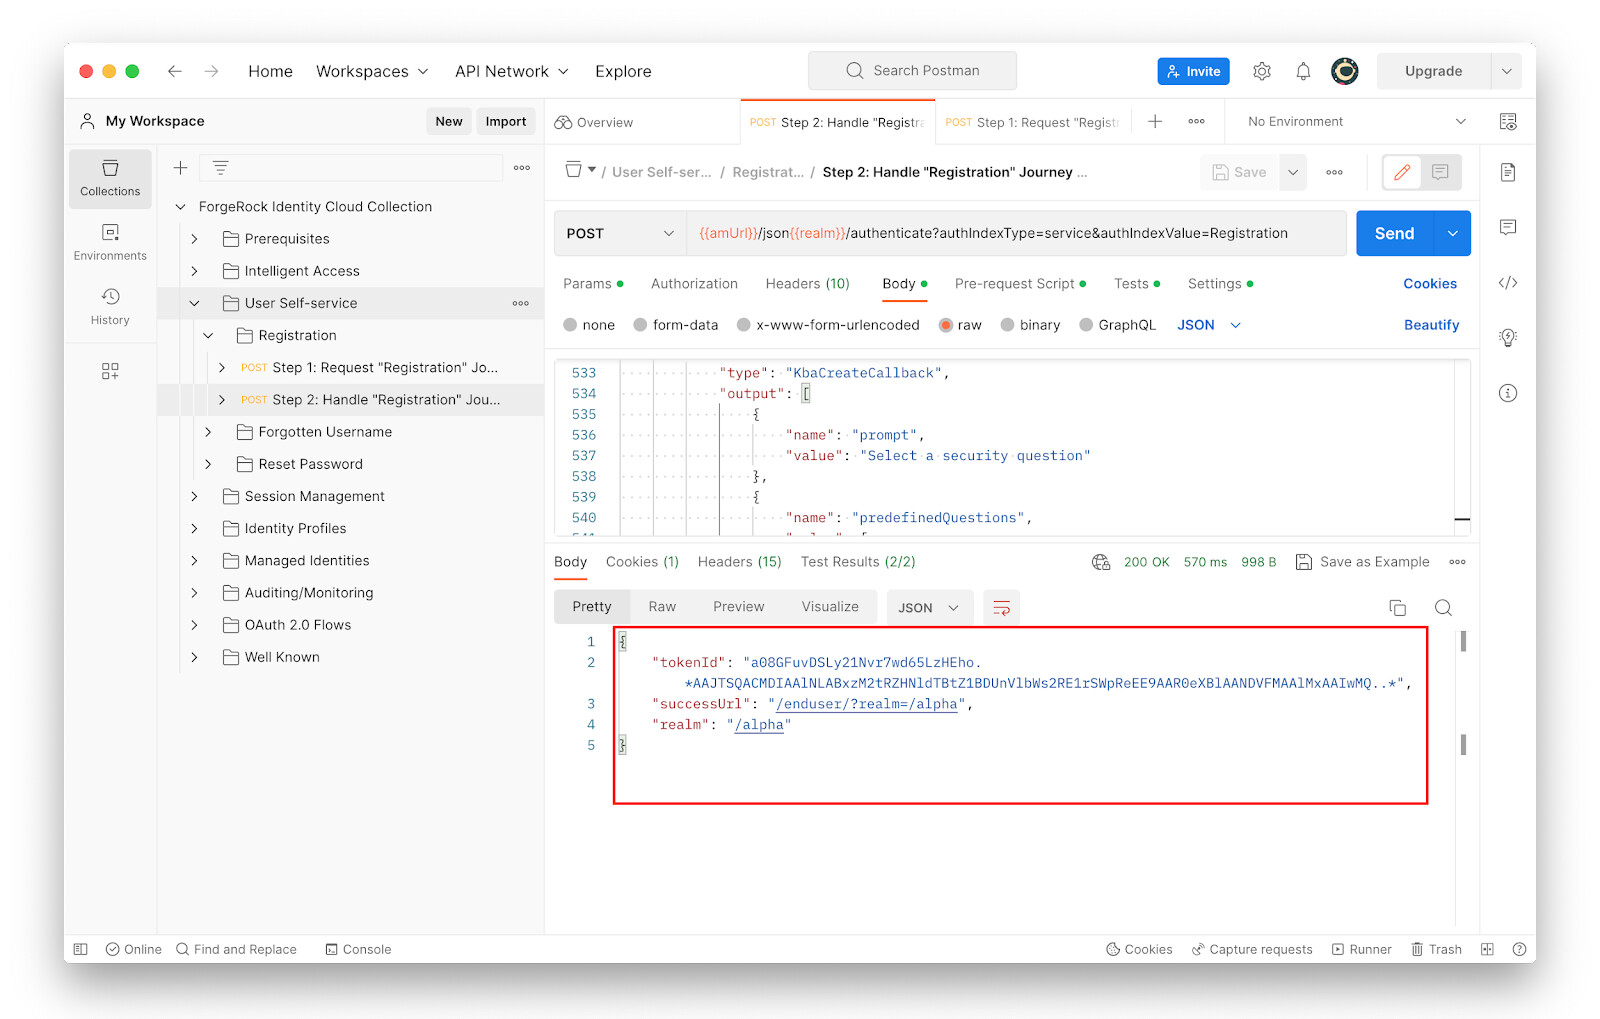
With Step 2 selected, click Send. If the request returns a “401 Unauthorized” message, send the Step 1 request under the Registration section again and then proceed to Step 2.
The newly self-registered user’s session token is returned in the JSON response. The Registration journey creates a user and logs the user in, resulting in a valid session token for the user.
-
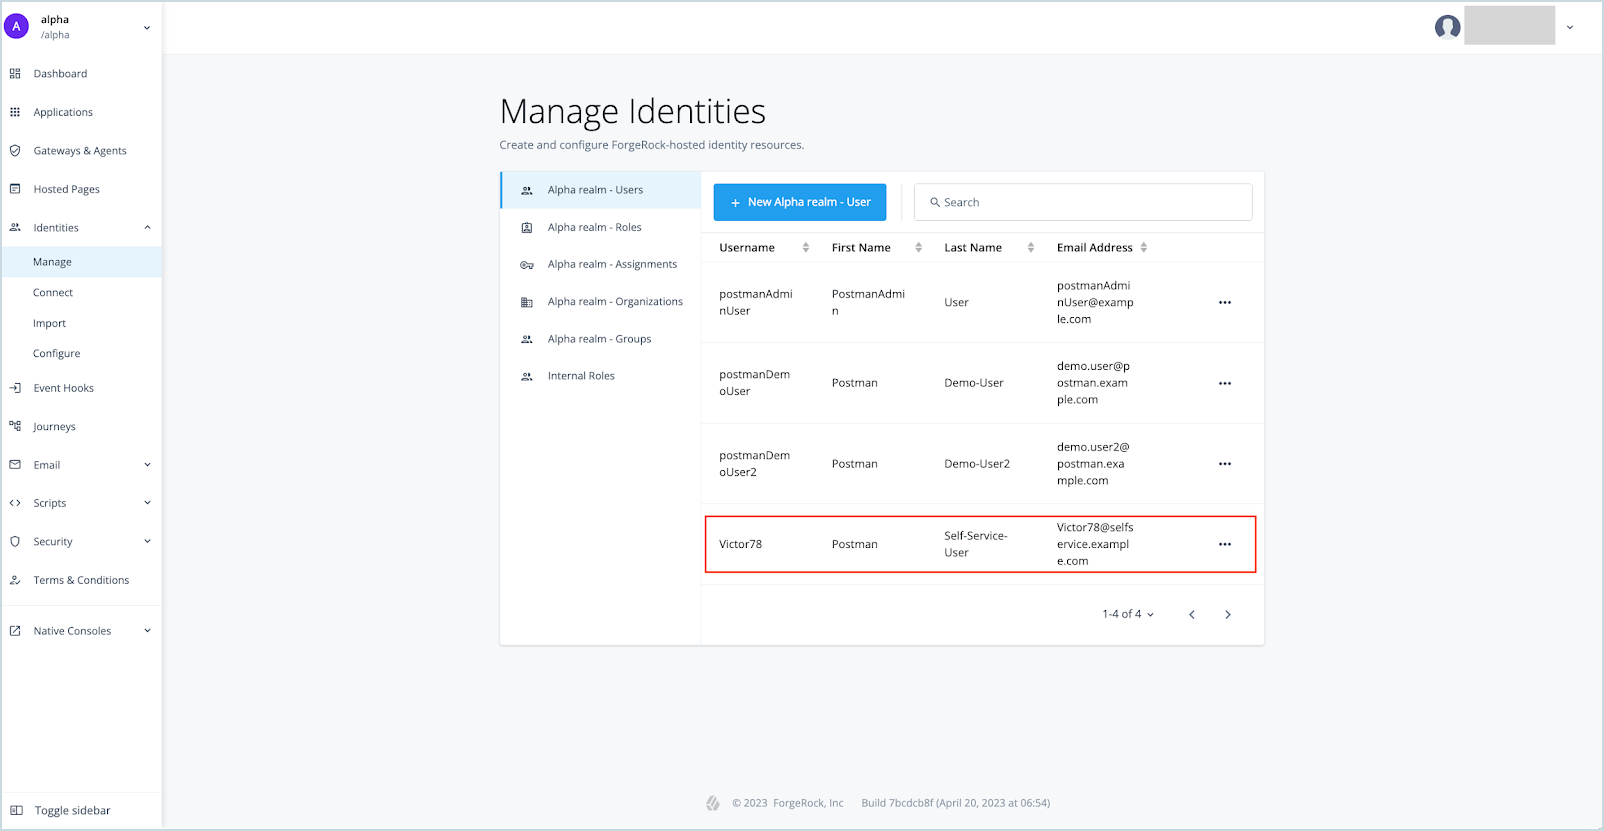
To confirm that the new user was created in the Identity Cloud alpha realm, log into your Identity Cloud Admin UI, and go to Identities > Manage. The newly created user is listed. Note that the user’s details are randomly generated.